Photo match AI
 Updated 6 months ago
by
Faisal Durrani
Updated 6 months ago
by
Faisal Durrani
Using InEvent's facial recognition tool, Photo match AI, your attendees can easily find event photos in which they are featured. It is as easy as uploading event photos to your event, and your attendees can browse through photos they are in from the My Photos tab.
This article will guide you to enable and use the Photo match AI feature at InEvent.
Enabling Photo match AI tool
In order to use the Photo match AI tool, you must first enable it at the Company level and Event level.
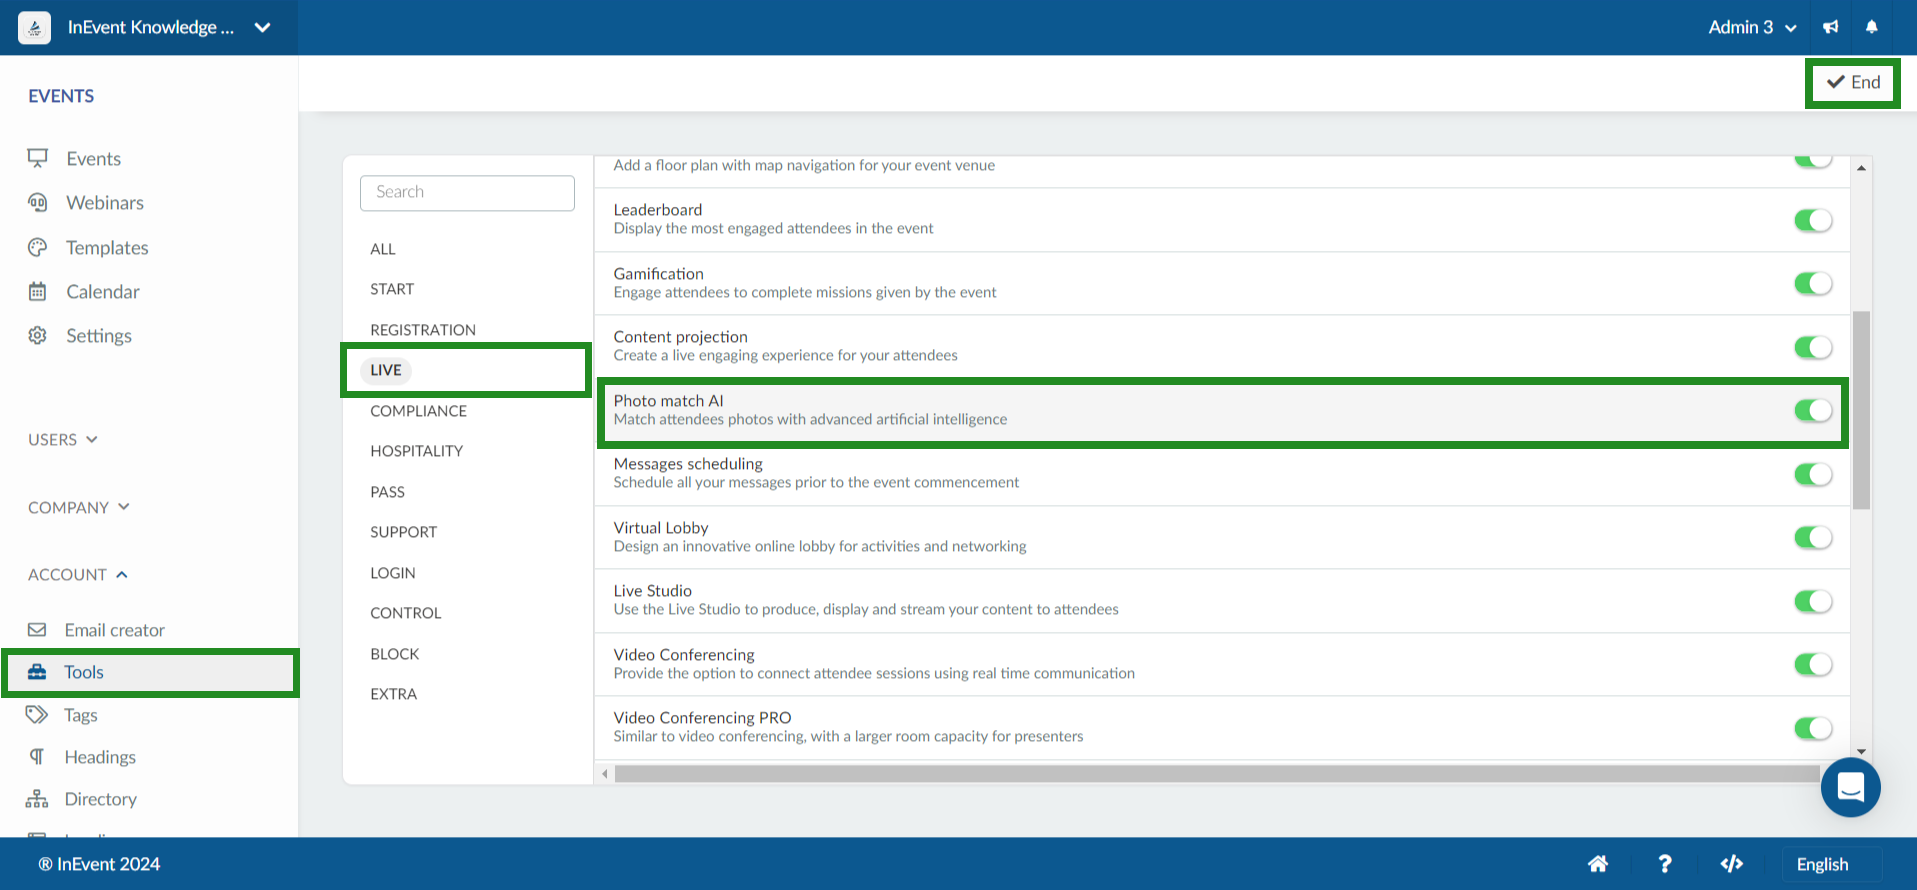
Company level
To enable the Photo match AI tool at the Company level, follow the steps below.
- Navigate to Account > Tools at the Company level.
- Locate the Photo match AI tool under the Live section.
- Click on Edit on the top right corner.
- Click on the toggle that corresponds to the Photo match AI tool until green to enable.
- Click End to finalize.
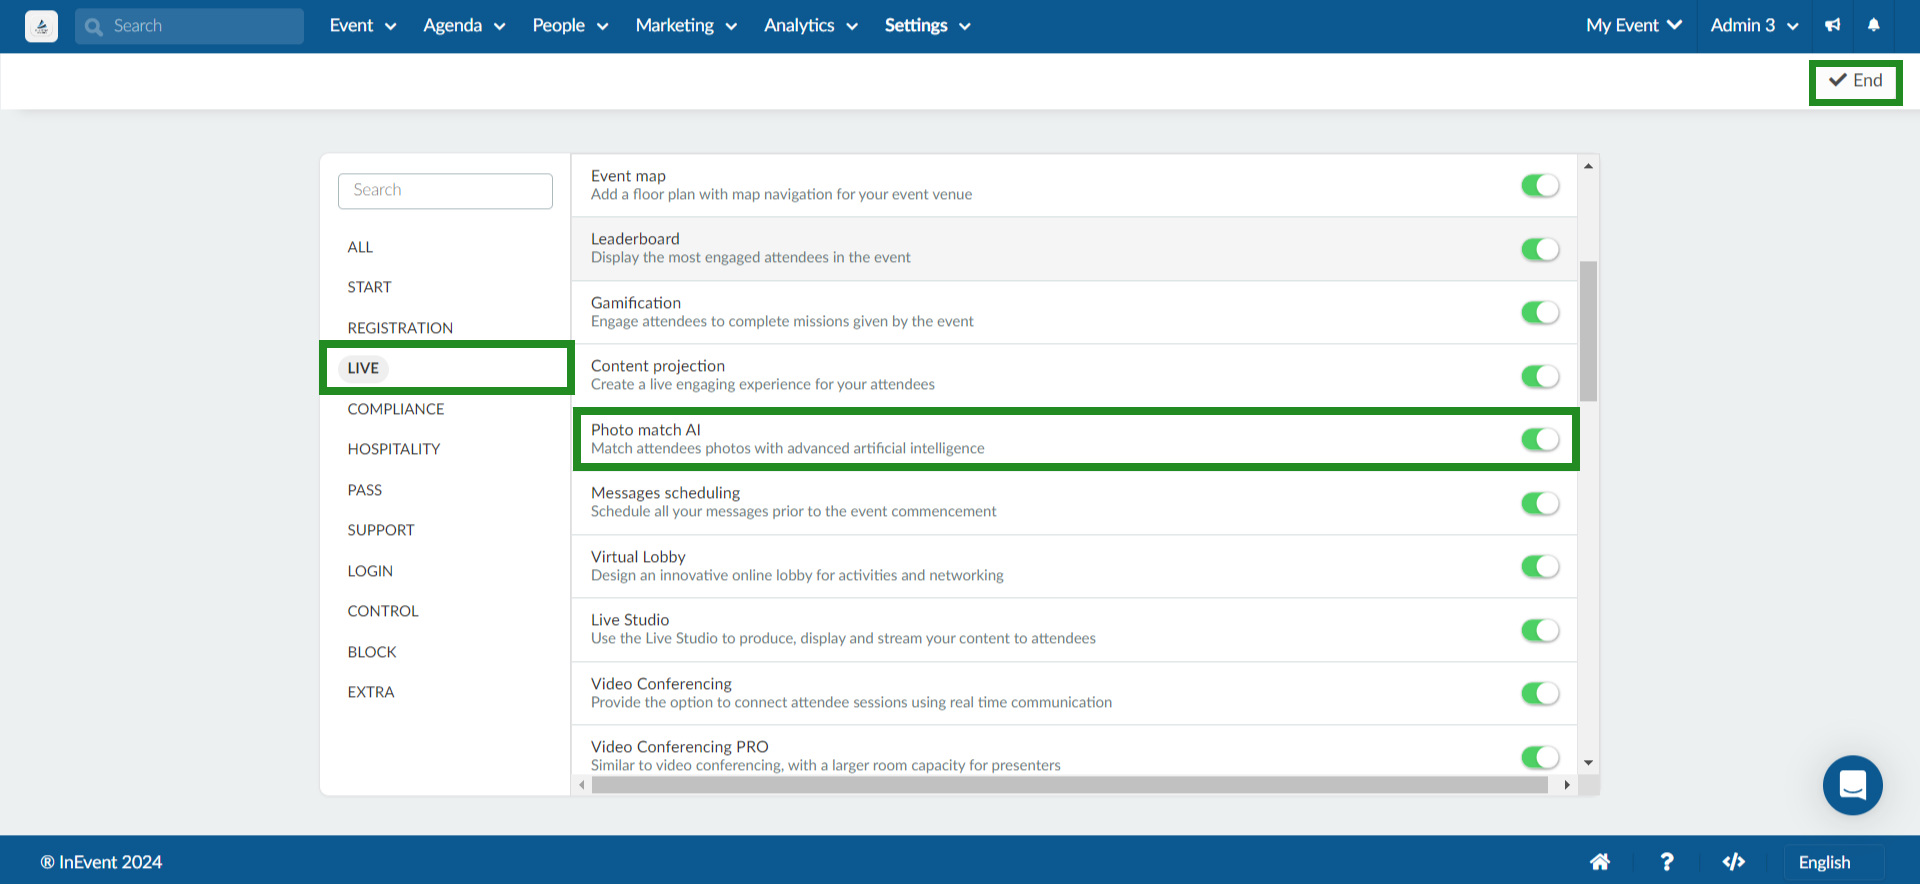
Event level
To enable the Photo match AI tool at the Event level, follow the steps below.
- Navigate to Settings > Tools at the Event level.
- Locate the Photo match AI tool under the Live section.
- Click on Edit on the top right corner.
- Click on the toggle that corresponds to the Photo match AI tool until green to enable.
- Click on End to finalize.
Enabling My Photos Web App tab
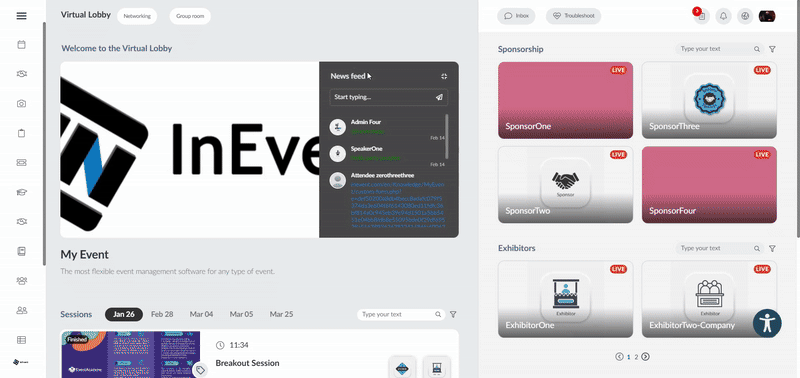
Your attendees can easily browse through photos in which they are featured in the My Photos Virtual Lobby tab.
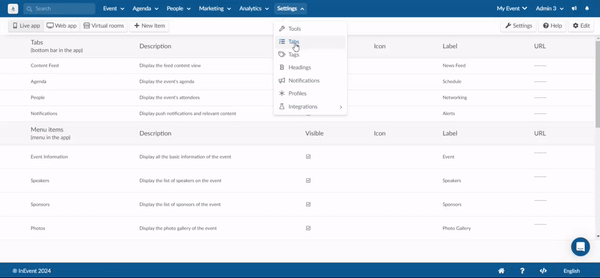
To enable My Photos tab in the Web App, follow the steps below.
- Navigate to Settings > Tabs at the Event level.
- Click on the Web app button on the top left corner.
- Locate My Photos tab on the list of tabs.
- Click on Edit on the top right corner.
- Check the box that corresponds to My Photos tab under the Visible column.
- Click on End to finalize.
After completing the steps above, My Photos tab will be displayed in the Virtual Lobby. Additionally, if the Event photos Virtual Lobby tab is made visible, attendees will also be able to access My Photos from Event photos tab.
Uploading event photos
InEvent's Photo match AI matches photos uploaded to your event's Photo Gallery with your attendees profile photos. For complete instructions on uploading event photos, refer to our Photo Gallery article.
Identifying attendees in event photos
When attendees appear in event photos, a green square will be displayed around their face. This visual indicator helps them quickly locate themselves in group photos and ensures they can easily identify where they are in the image. The green square appears automatically on all matched photos.
How can attendees use the Photo match AI in the Web app.
In order to use the Photo match AI functionality on the Virtual Lobby, attendees will have to upload a profile photo with their face visible so that InEvent can recognize their facial features and match them with the available event photos.
Follow these steps to make use of Photo Match AI:
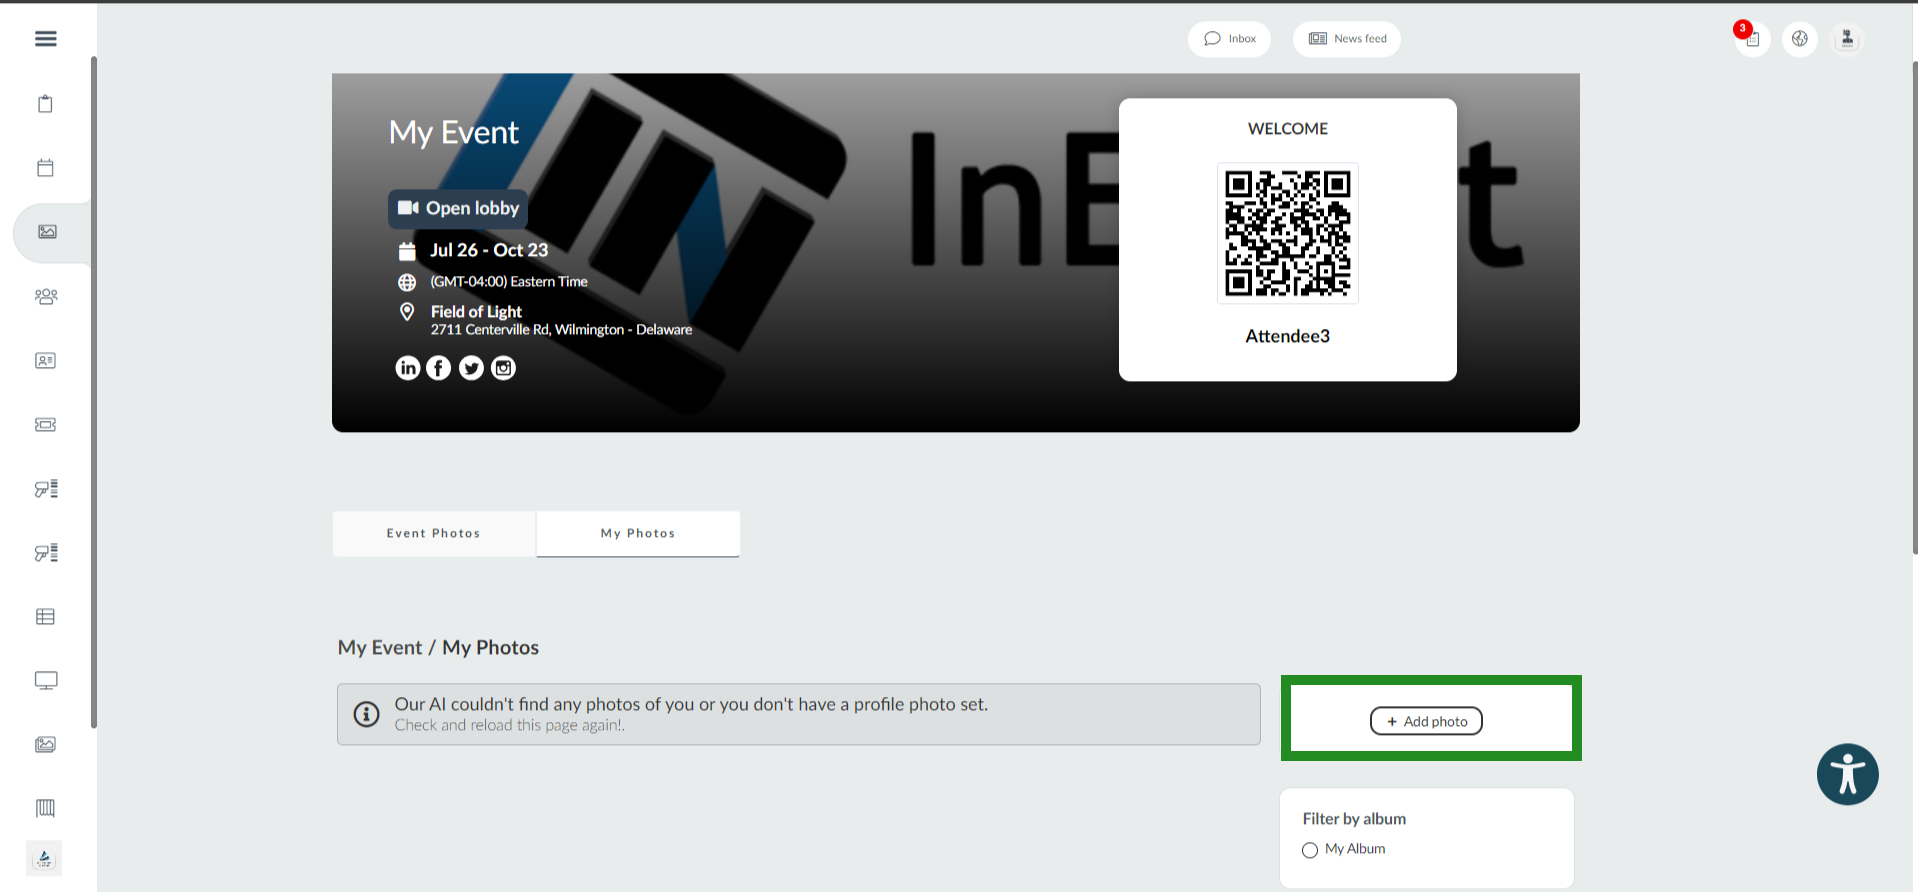
- Navigate to My photos tab in attendee center. If attendees have a profile photo, InEvent will automatically match facial features in their profile photo with those in the event photos and display the matching ones. Attendees will be able to view them in the my photos tab in the attendee center.
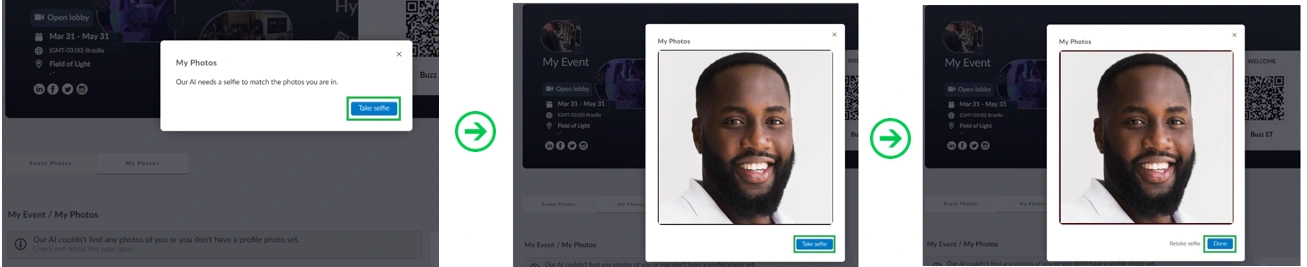
- If you have no profile picture uploaded, you'll see a prompt to take a selfie. Click the Take selfie button, grant your browser access to your camera, and capture the image. If you want to retake the picture, click Retake selfie. Once satisfied, click Done. The AI will then automatically search the event gallery for pictures in which you appear, matching them to your profile picture.
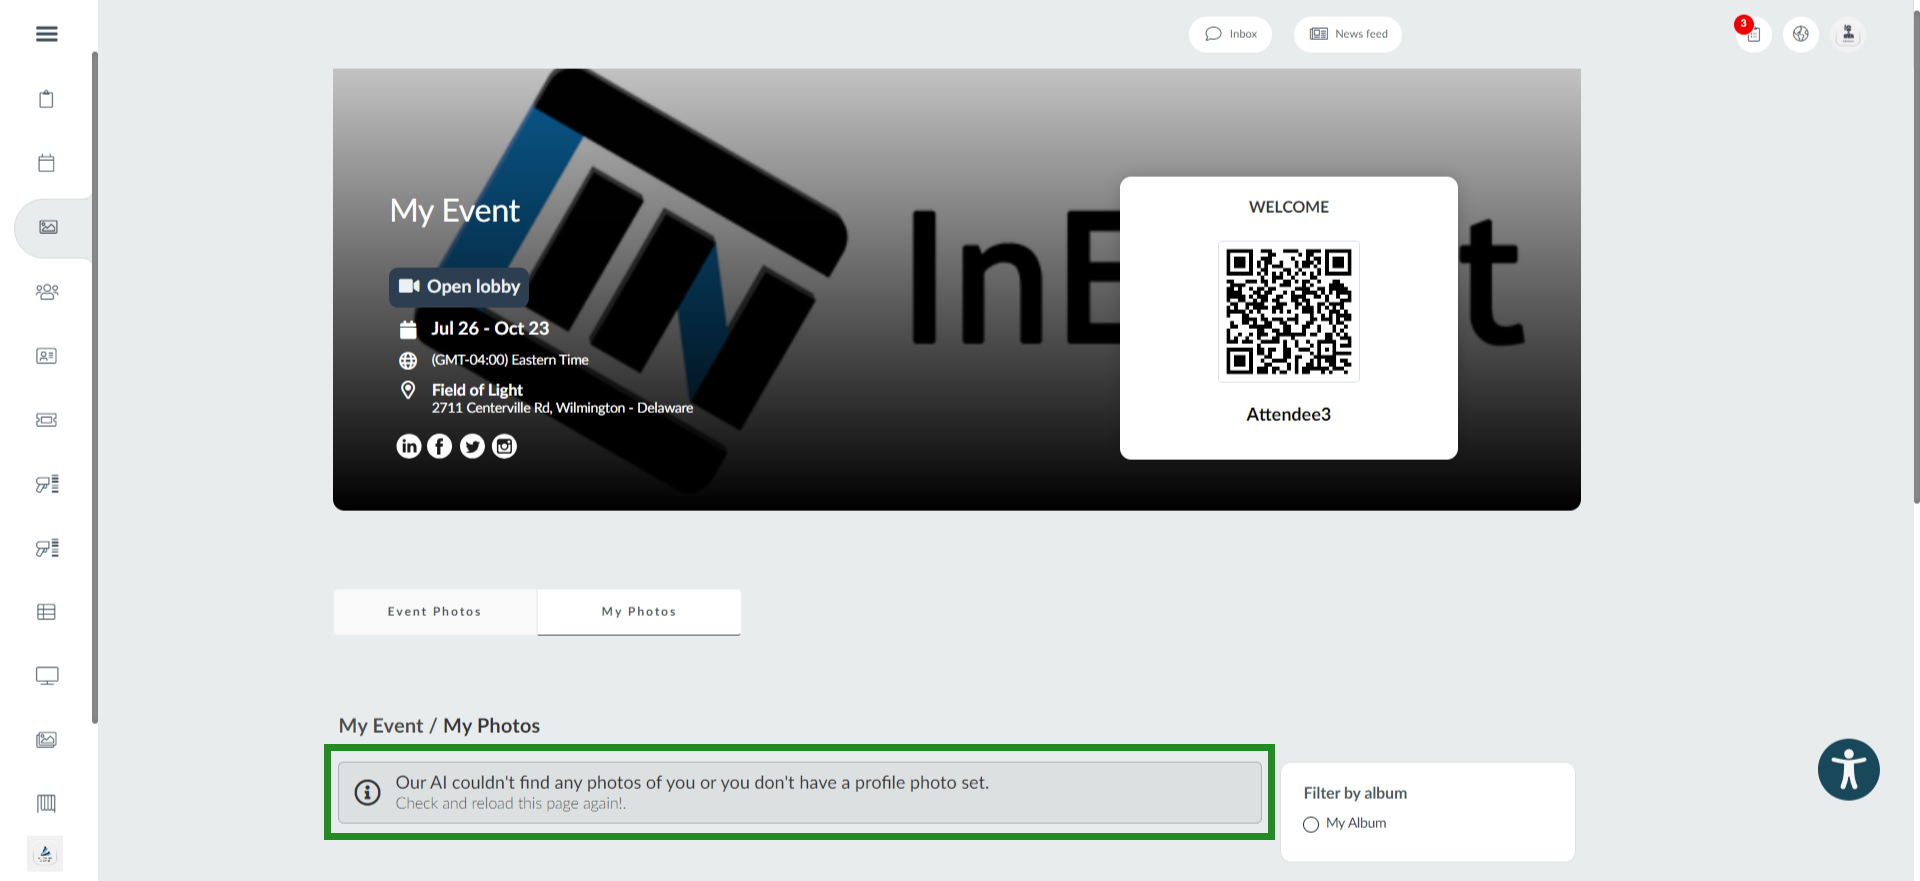
If your profile picture doesn't match any of the available event photos, you will see the message below:
Can attendees upload photos directly from the Web app?
Yes, attendees can upload photos to the event's photo gallery through the Event Photos or My Photos tab in the web app if they have the Photographer, staff or admin permission, or if the event organizer has enabled the Any user can upload photos tool. In either case, the Add Photo button will be visible in these tabs, as shown below.
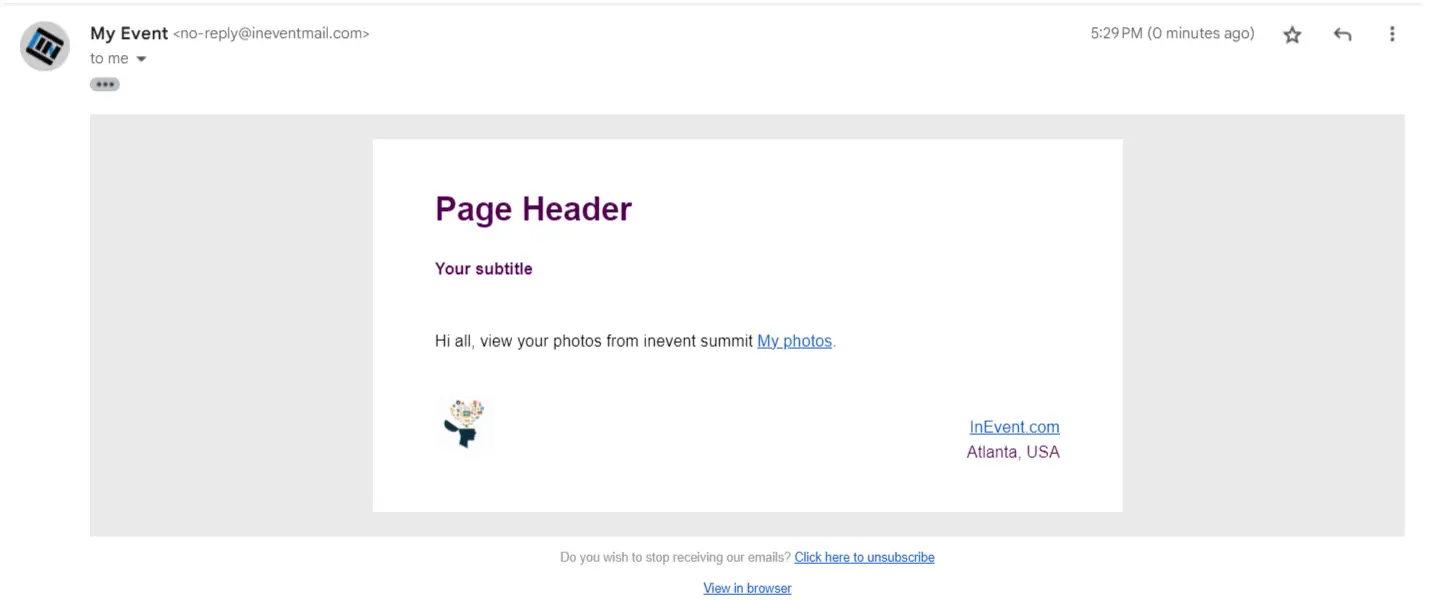
Sharing the My Photos feature with attendees via dynamic link
To send dynamic link to attendees, follow the steps below:
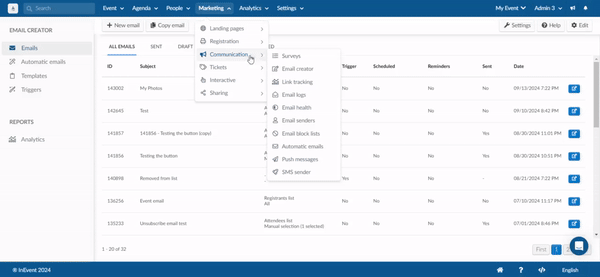
- Navigate to Marketing > Communication > Email creator and create an email.My Photos dynamic link can also be added to Automatic emails.
- Click on Dynamic links and select My Photos.
- Select your target attendees.
- Review and send.
Your attendees will receive an email containing a link, which will redirect them to the My Photos tab in the Virtual Lobby when clicked on.