Creating manual certificates of attendance
 Updated 2 years ago
by
Chioma Okenwa
Updated 2 years ago
by
Chioma Okenwa
Event attendees are often looking forward to receiving a certificate once the event is over so they are able to add it to their CV, and set themselves apart in a competitive industry.
This article proposes a workaround for those who purchased a plan that doesn't include the option to create automated Certificates of attendance. This feature allows you to automate this process and better customize the certificates. In case you would like a plan upgrade, please contact your account executive.
How can I track attendance?
We offer you two options when it comes to tracking attendance:
- Attendance tracking tool: With the attendance tracking tool, event organizers will be able to track and report Continuing Education Units (CEU), Continuing Professional Education (CPE), or any other custom credit units.
- Virtual Lobby reports: You will be able to see how many of your sessions were viewed, who viewed them, and for how long.
How do I create an attendance certificate?
Accessing the email editor
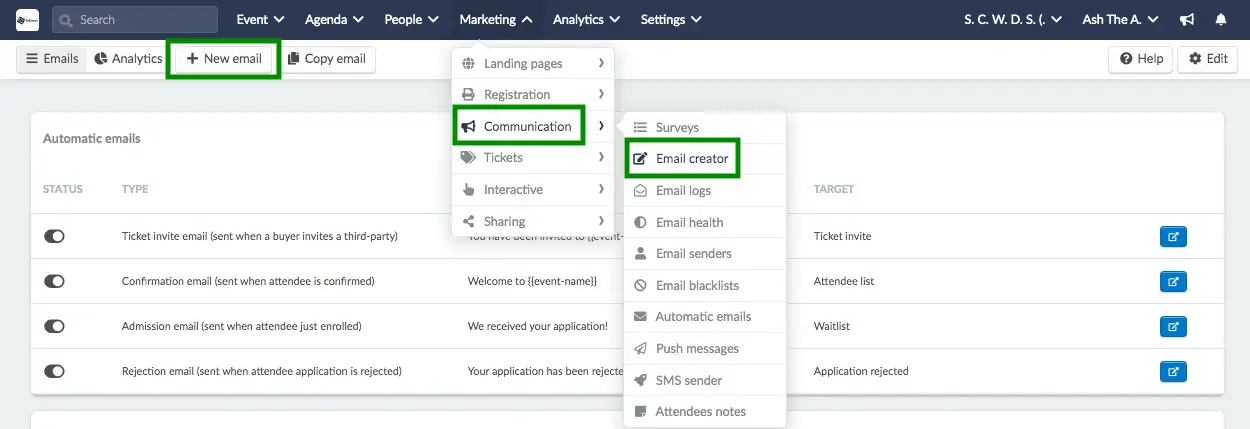
To access our email creator, go to Marketing > Communication > Email Creator.
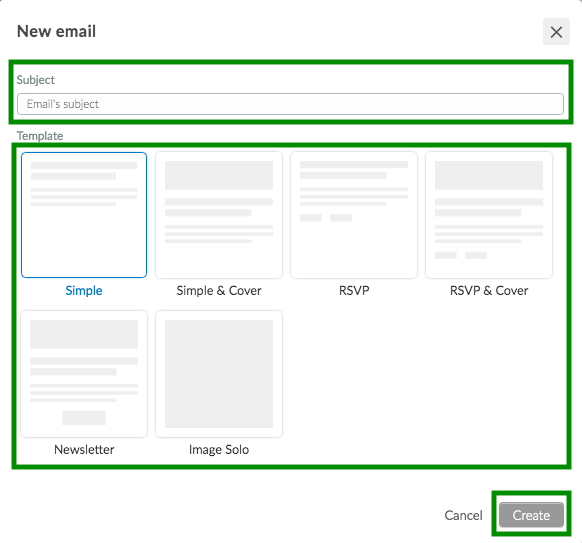
To create a new email, click on the + New Email button, type the message's subject, select one template and press Create.
Creating the text
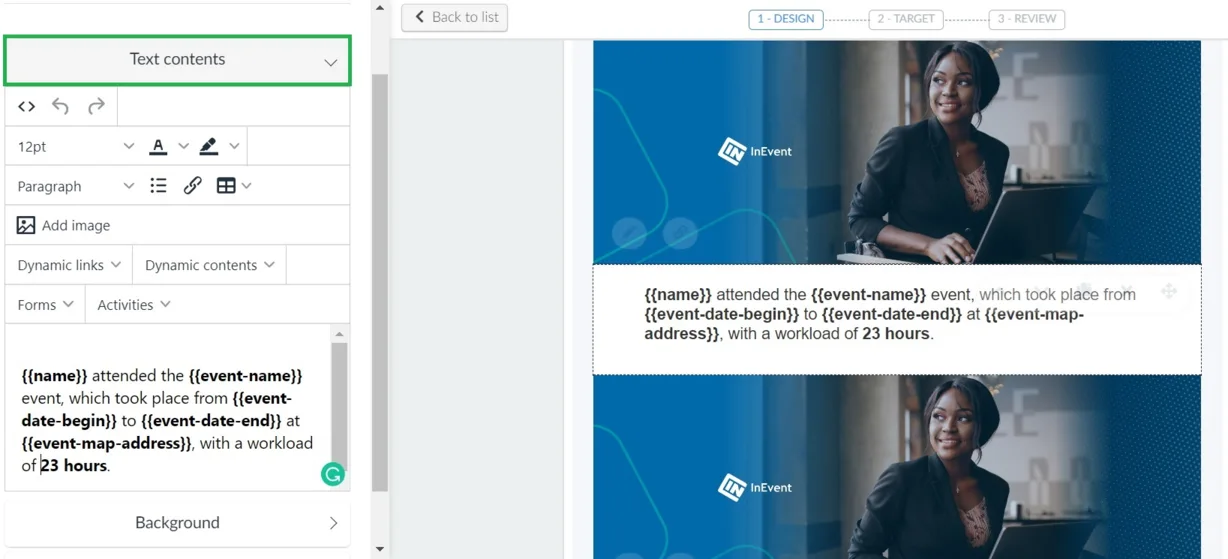
Now it's time for you to create the certificate text. You should pay attention to its titles and wording to properly recognize the attendees' achievements.
We suggest using the dynamic content fields to correctly reference the participants' names, event days, and location.
Here is an example of a text with dynamic content fields from the InEvent platform:
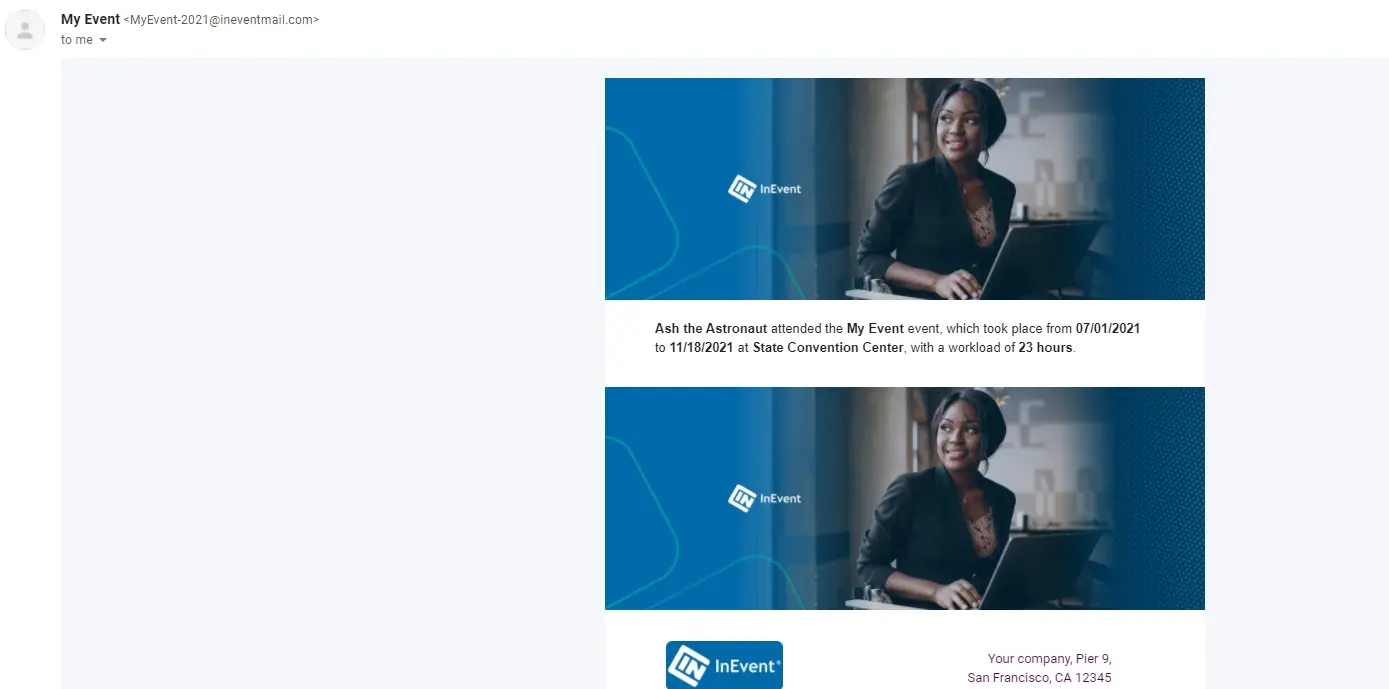
{{name}} attended the {{event-name}} event, which took place from {{event-date-begin}} to {{event-date-end}} at {{event-map-address}}, with a workload of (report) hours.
Click here to learn more about how to change your email's text content and design.
Inserting images
To create a certificate with a personalized visual identity, we suggest inserting two images at the email top and bottom edges body. The desired sizes for the images are 600x200 px.
To insert images into the email, you must drag the chosen options from the Media section in the left into the email on the right, as shown below:

Defining the recipients of the email
Will you send it to all participants who attended the event or will you create specific lists? Regardless of your choice, you must define your audience in step 2, Target.

Click here for further information on how to define the recipients of your email.
Sending the certificates
Now it's time for you to review and send the certificates! You will do it in step 3, Review.

You can send the certificate right away or schedule the e-mail for a date and time you prefer. Click here for further information on how to review and send emails.
Your participants will receive the certificate in the body of the email, as shown in the image below.