In-store app approval on the Google Store
 Updated 11 months ago
by
Chioma Okenwa
Updated 11 months ago
by
Chioma Okenwa
After setting up the Android version of your app, you may need to give access to Google to test it. To make this possible, you will generally need to create a public event, add an attendee, and provide Google with the login details of that attendee. The following sections explain the sequence of steps to make this possible.
Creating a public event for approval
For an app to be approved on the Google Store, there must be an event created on the platform.
This event needs to have minimal amount of content so Google can confirm this is a real working app.
With this purpose, a demo event should be created. There should be information such as location, dates, an event cover etc. The word test should not appear anywhere on the event.
You need to create a published event and ensure that you add information to the following sections of your demo event:
Minimum requirements for your demo event
Below are some suggested minimum requirements for your demo event:
- Event Details: It is advised to enter the following information in the Event details page:
- Event address.
- Event cover.
- General description of your event.
- Set the status of your event to Published.
- Set to Visible to world.
- Contact information.
- Set a Reply-to email.
- Activities: The minimum number of activities you can add is 2.
- Speakers: The minimum number of speakers you can add is 2.
- Tags: The minimum number of tags you can add is 2.
- Live app tabs: It is recommended to keep the following live app tabs:
- Event information.
- Agenda.
- Speakers.
- Photos - add at least 5 photos from your past events.
- Content Feed - post at least 2 messages.
- Check-in.
- Access control.
- Custom “Terminate account” tab.
- Voucher.
- Custom Website: We advise your custom website contains the following sections:
- Event description.
- Speakers.
- Agenda.
- Registration form.
- Map.
- Photo Gallery (at least 5 photos from past events).
Creating credentials for approval
For the app to be approved, it is necessary to create a participant login and password within your event and insert it on your Google Play Console.
To create the participant, click on People > Attendee > Add person.
Example:
Name: Google tester
Email: youremail@google.com
Password: xxxxxxx
Google Play console configuration
To start configuring your Google Play Console, you need to follow these steps:
- Sign in to your Google Play Console.
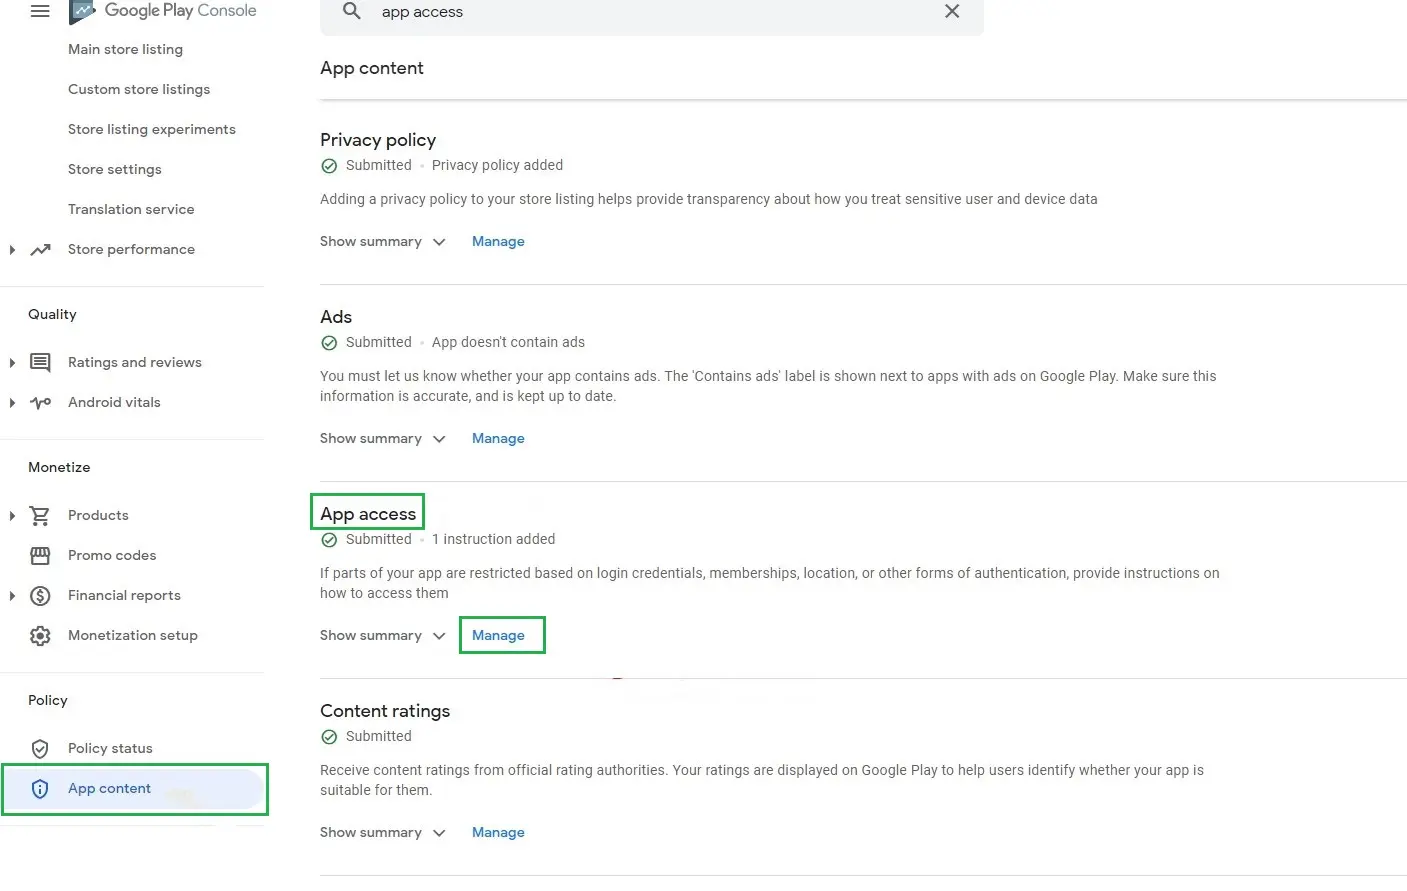
- Locate the Policy section and select App Content.
- Go to App access questionnaire and click on Manage to start editing.
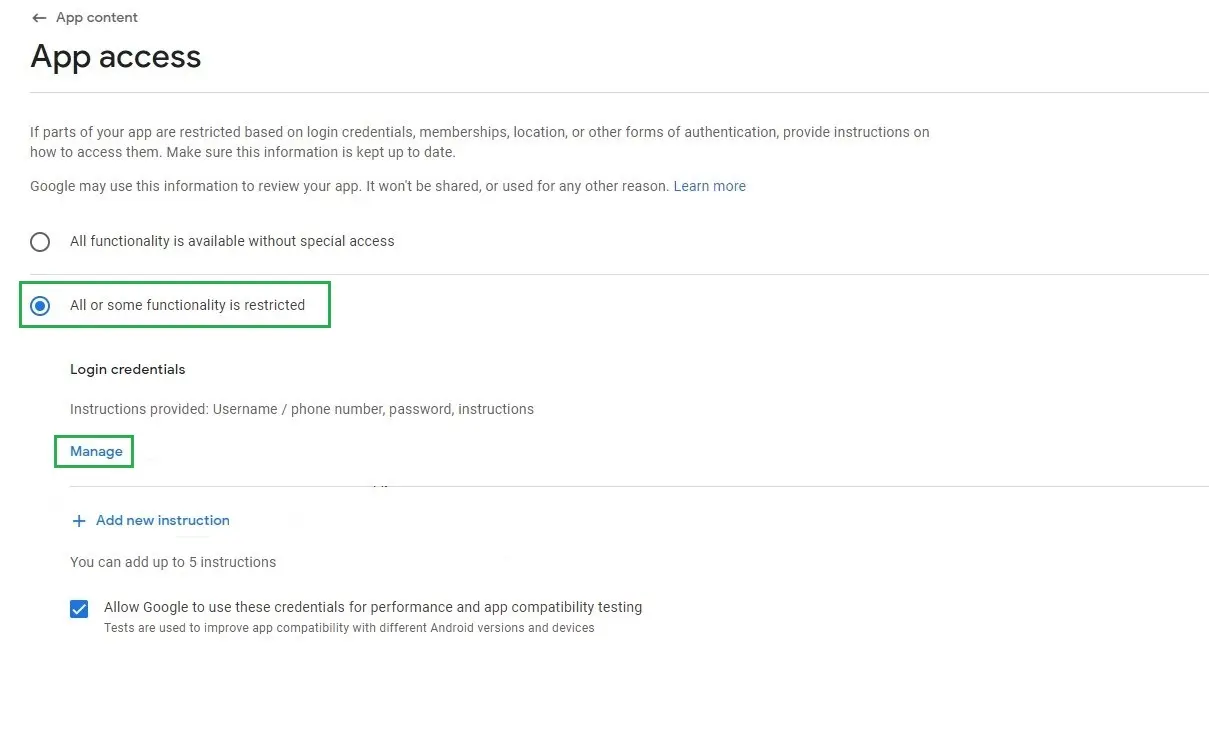
- In the App access section, choose All or some functions are restricted.
- Enter the test login credentials, by clicking on Manage, so that the app review team can have access to the test.
- Complete these fields with your login credentials.
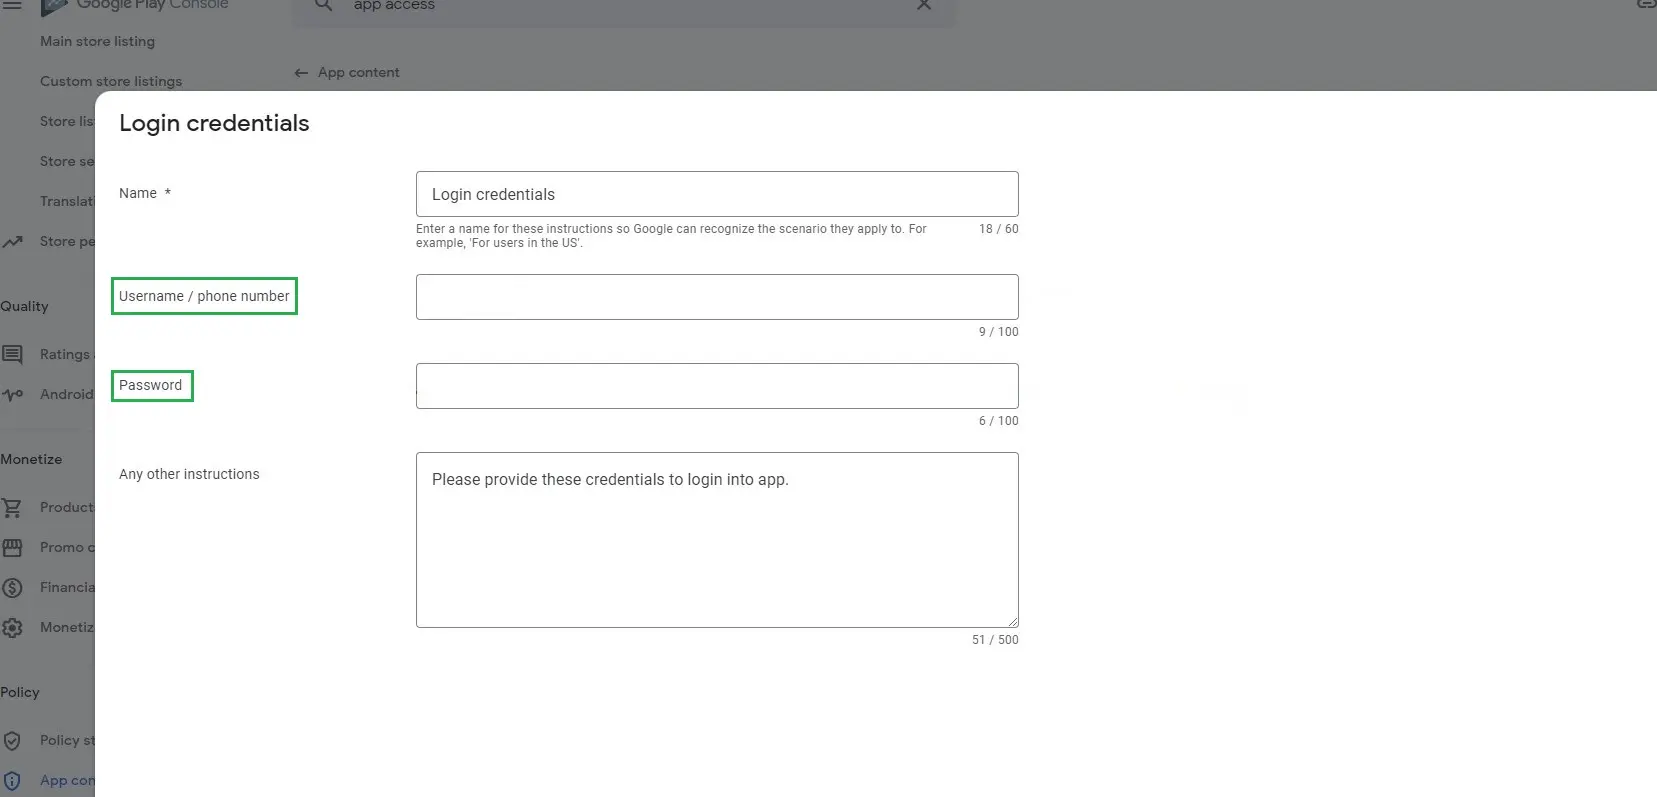
- Save your changes once you are done.