Speakers
 Updated 1 month ago
by
Caleb Kotey
Updated 1 month ago
by
Caleb Kotey
- Presenter vs Linked Speaker
- Adding new Speakers
- Filtering Speakers on the Attendees' List
- Editing Speakers information
- Creating speaker categories
- Assigning a speaker to a category
- Deleting speaker categories
- Linking Speakers to Activities
- Changing the display order of Speakers
- Adding Speakers from previous events
- Speaker portal and its use of communicating
- Sending automatic emails to Speakers
- Sending direct magic links to the Speaker's Activities
- Pre-event rehearsal
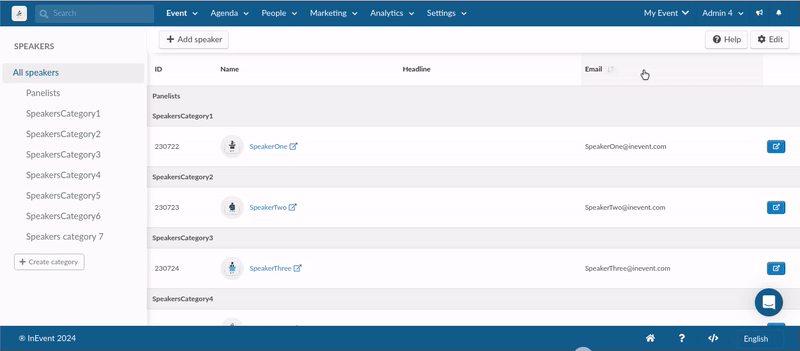
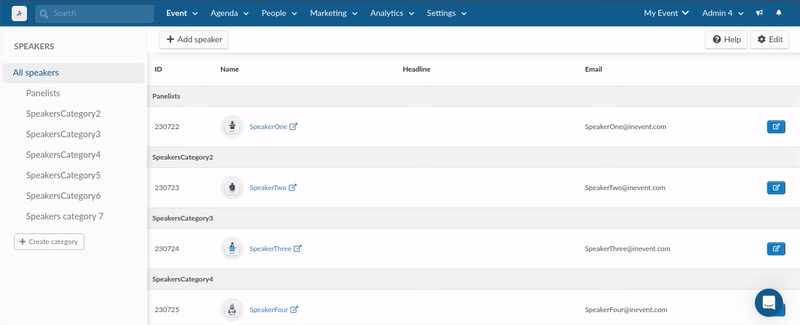
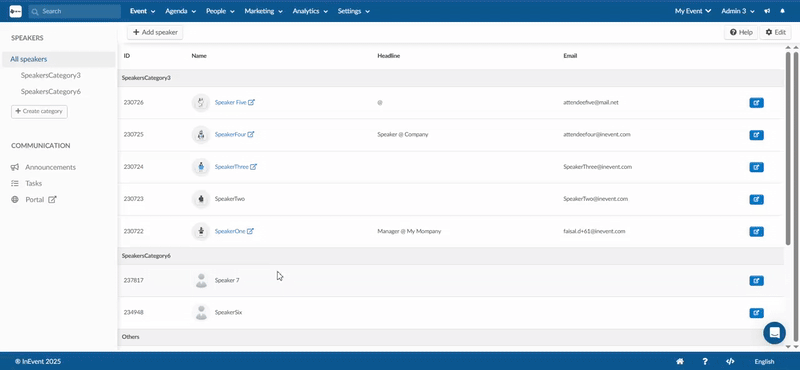
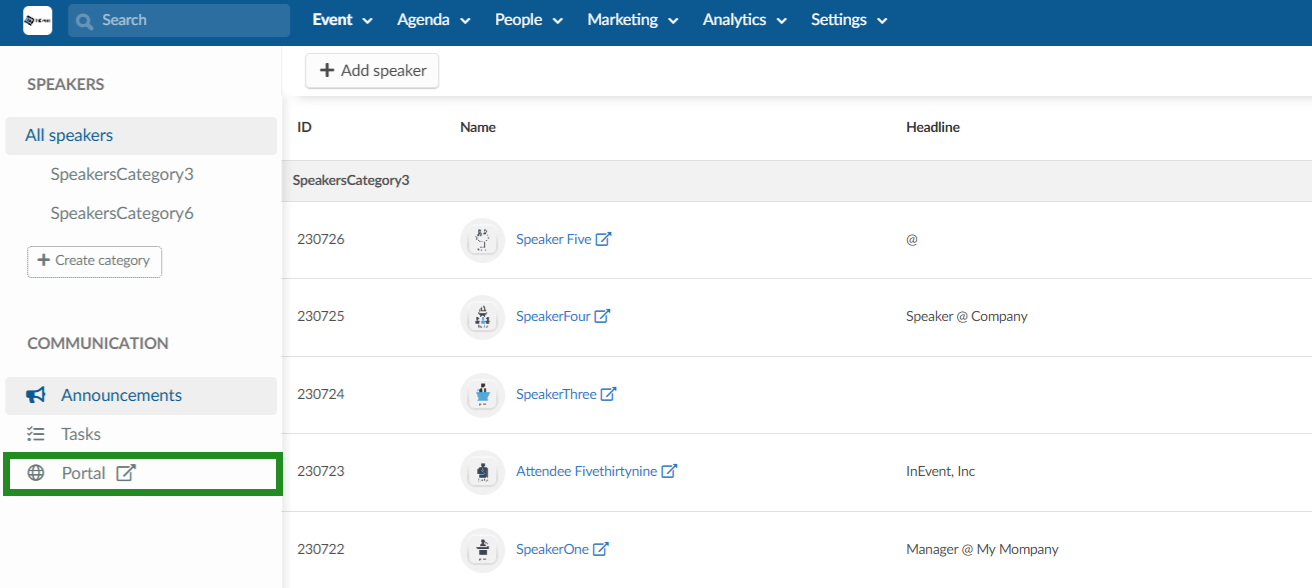
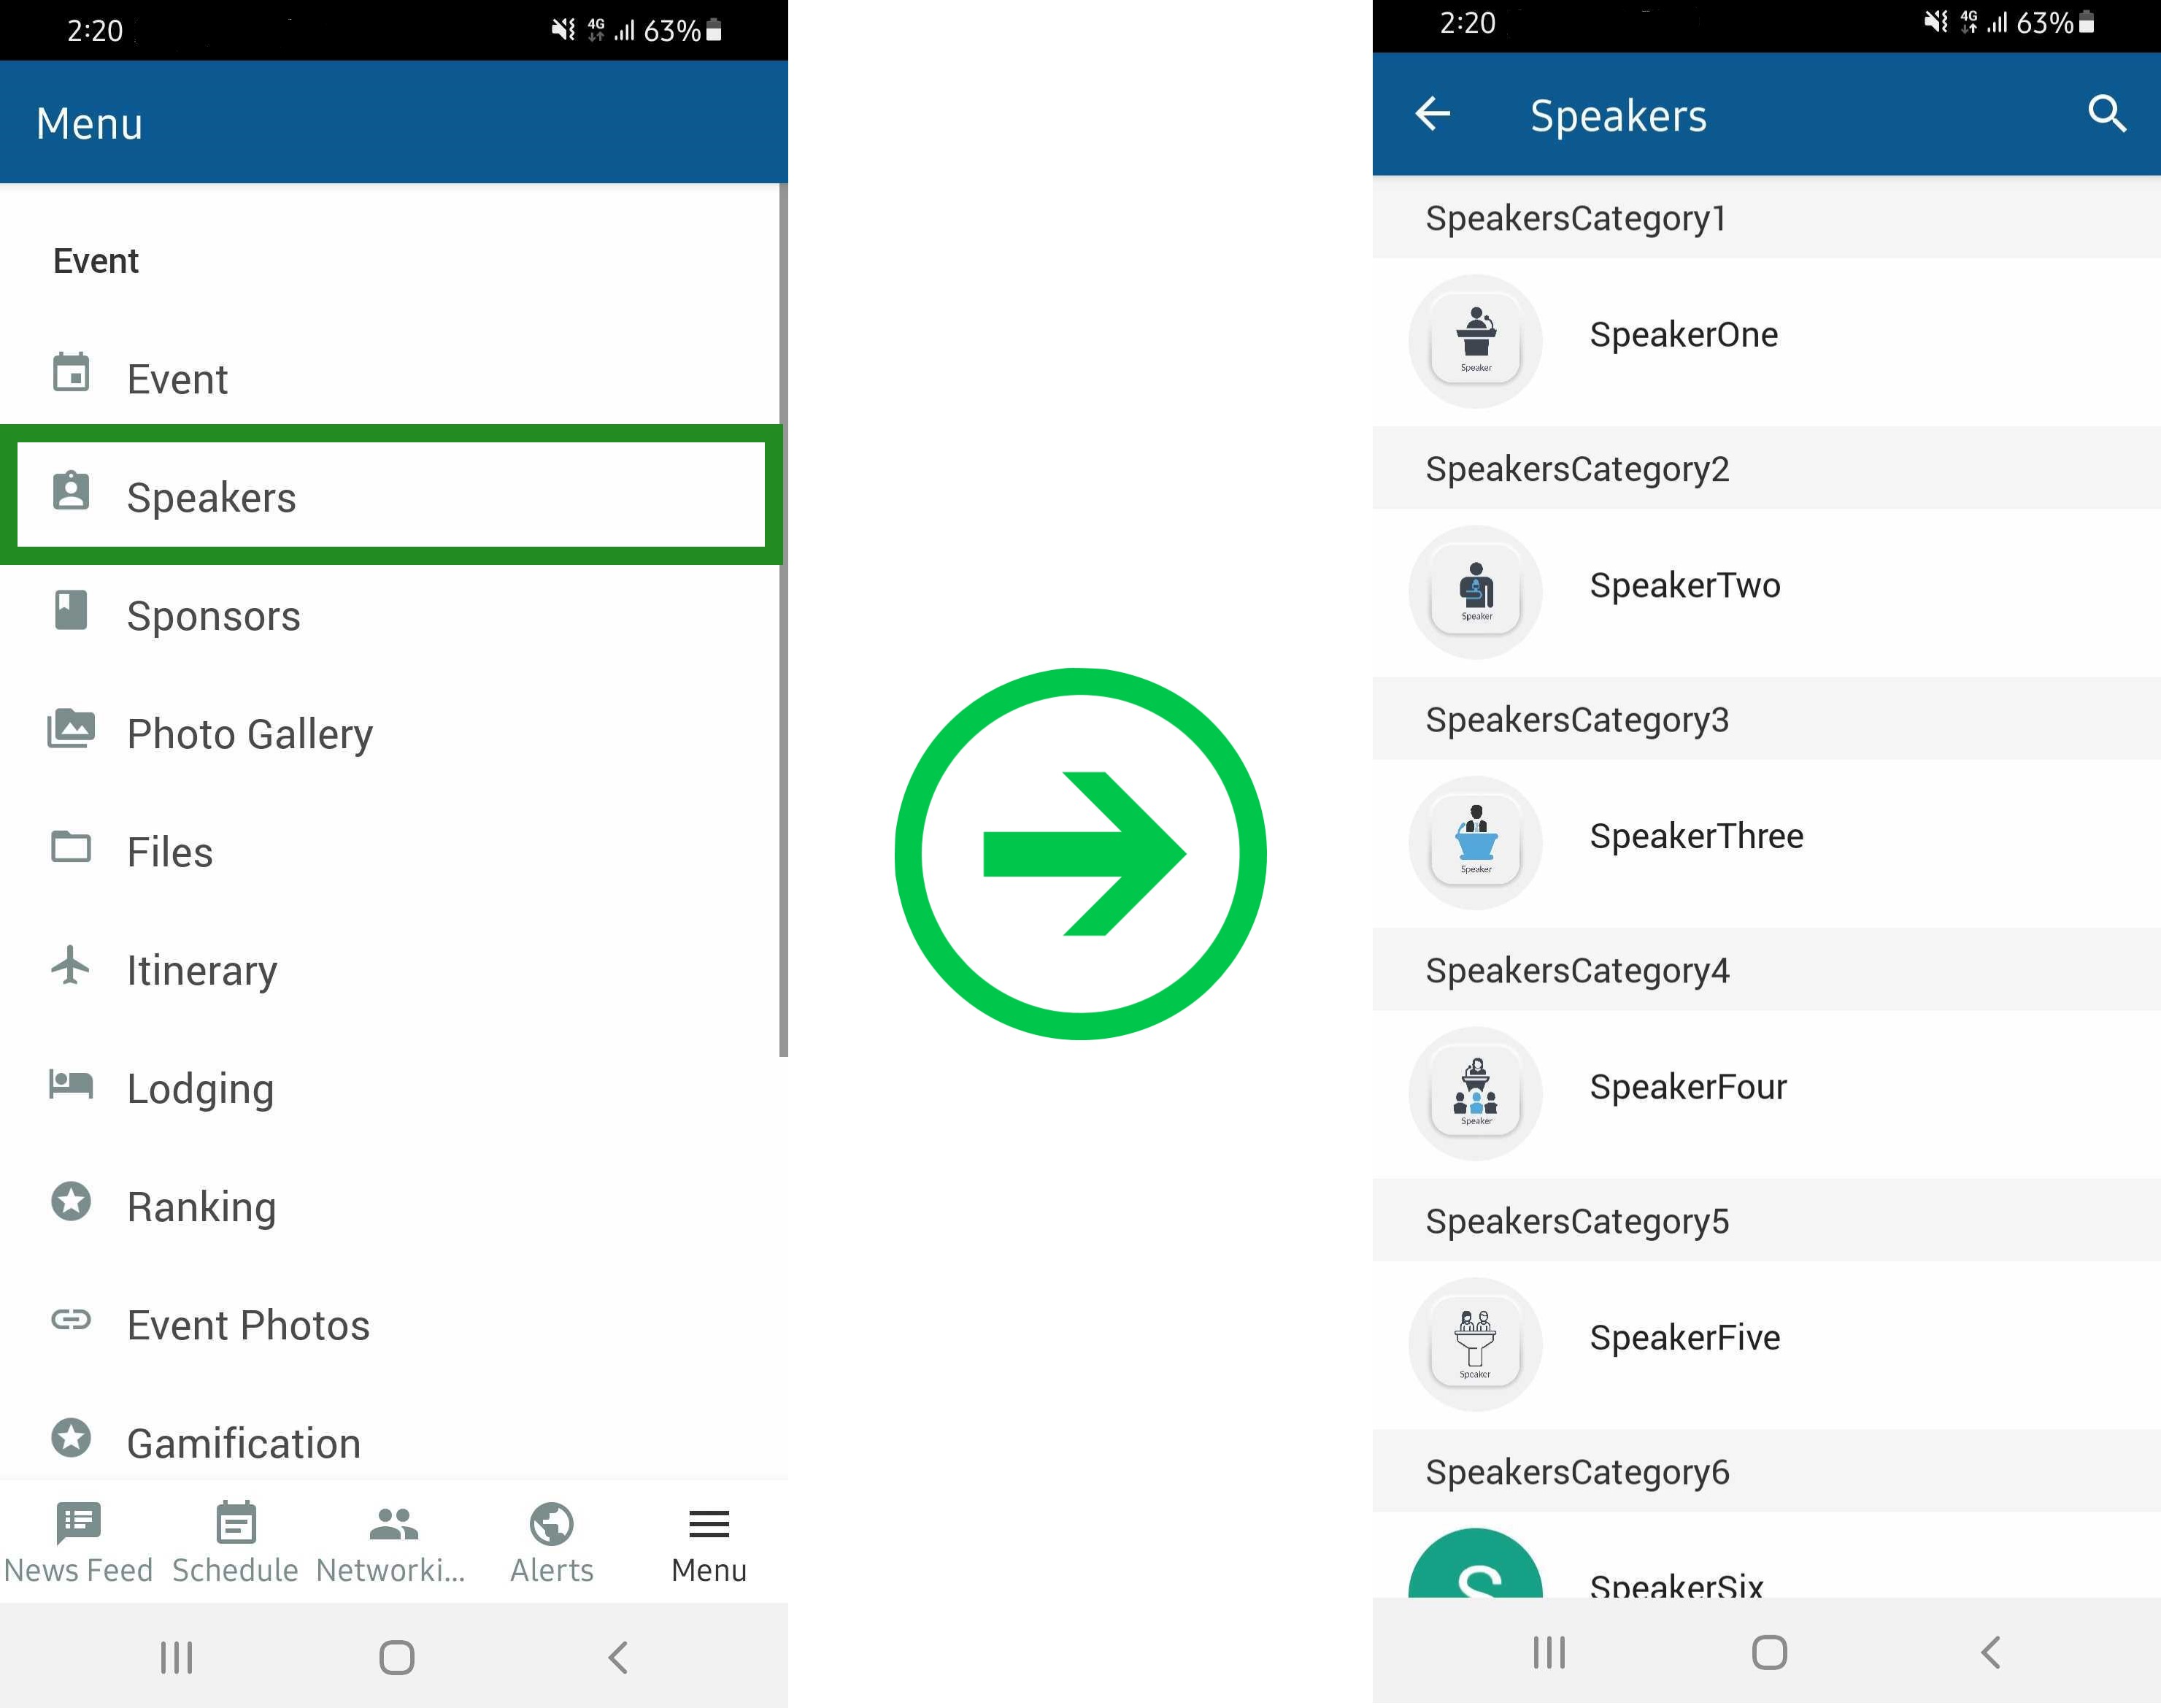
- Viewing Speakers
Adding speakers to your event is very simple! You can add speakers, associate them with the sessions they are interacting with, and provide them with access links easily.
Presenter vs Linked Speaker
It is important to understand the difference between Presenter and Linked Speaker, so you can choose which one suits best your type of event.
Below you find the common capabilities for both presenters and linked speakers:
- Being able to enter a room before the activity starts;
- Switch from public to private chat;
- Join the room with camera and microphone enabled;
- Share their screen for a presentation;
- Create polls at the Virtual Lobby and choose its visibility;
- Add/ remove files inside the activity.
- Access the speaker's portal.
Now that we have listed the common capabilities, here is what distinguishes one from another:
- Presenter: this is a type of permission an admin can choose for the attendee. It will allow this person to access all the activities with the capabilities described above.
- Linked Speaker: this is a way to grant an attendee presenter permissions restricted to certain activities.
Regardless of which option you may choose, either as a presenter or linked speaker, if you want their profile to be displayed at the website or at the details of an activity, you have to create a Speaker profile. To do so, please read the next section and follow the steps listed below.
Adding new Speakers
In case you decide to give all speakers the Presenter permission, once you add the attendees to your event you can change their permission to grant them access to all activities. But as mentioned previously, both will need to be listed under Event > Speakers anyway.
At the dedicated Speakers page
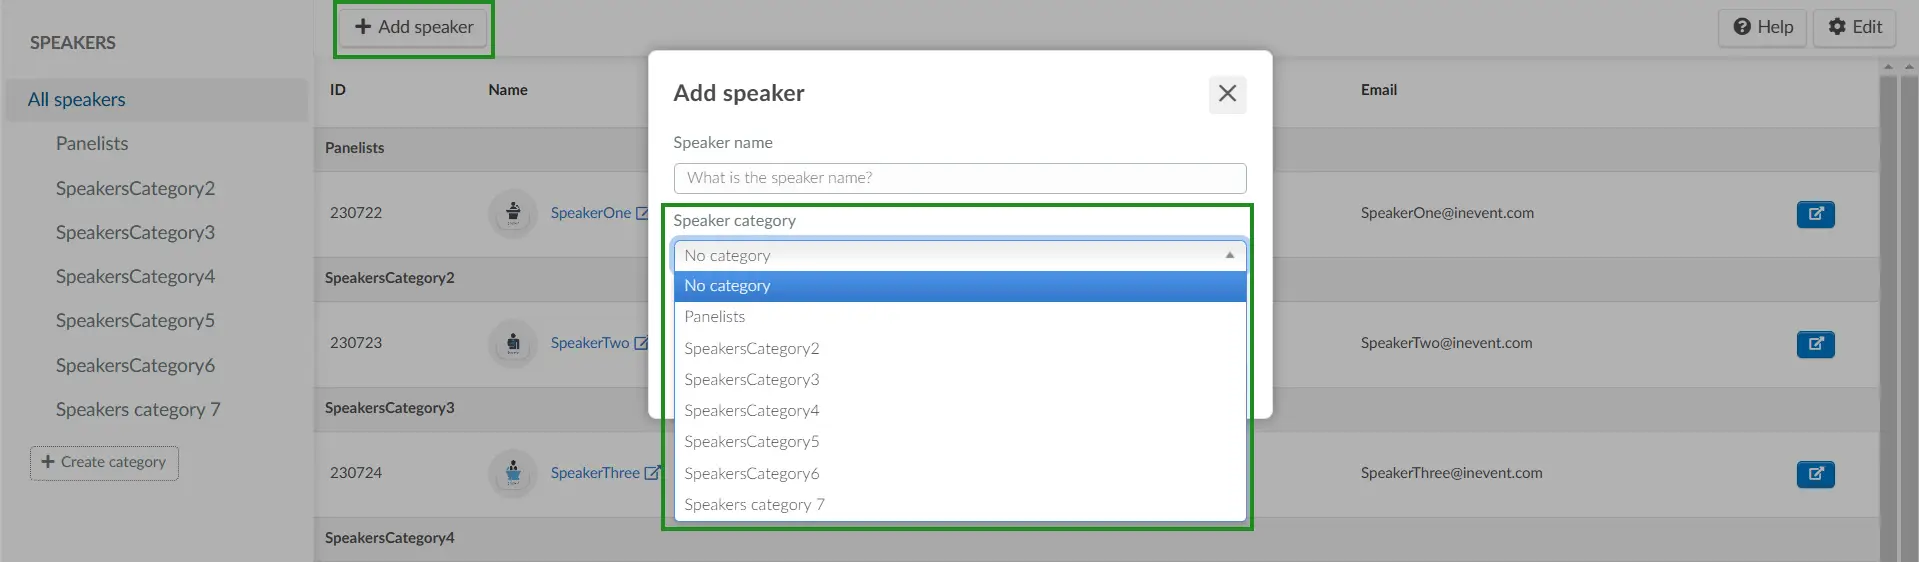
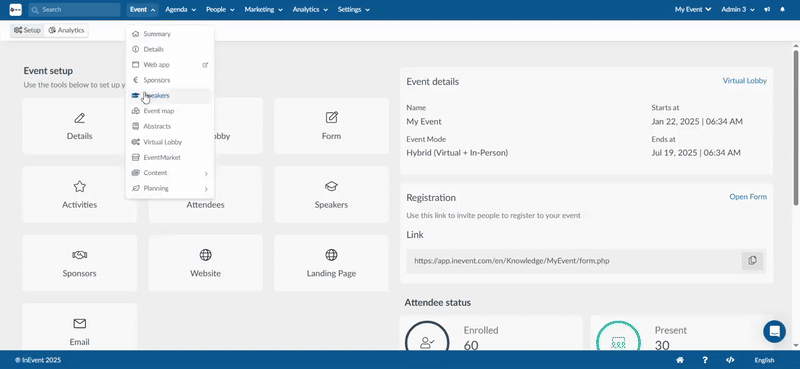
When you navigate on Event > Speakers, you will find the option to click the + Add speaker button. At the new window type the speaker's name and the category (optional). Once the information has been entered, click on the blue Create button.
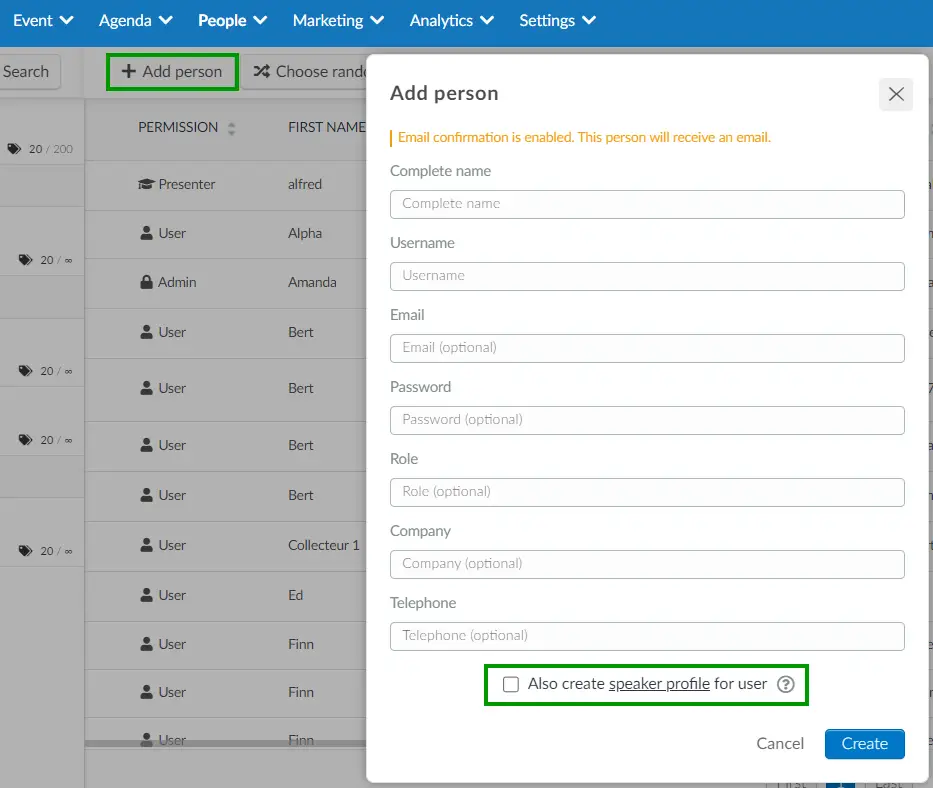
While adding an attendee
Another way to add a Speaker is to select the box for the Speaker profile while adding a new user under People > Attendees.
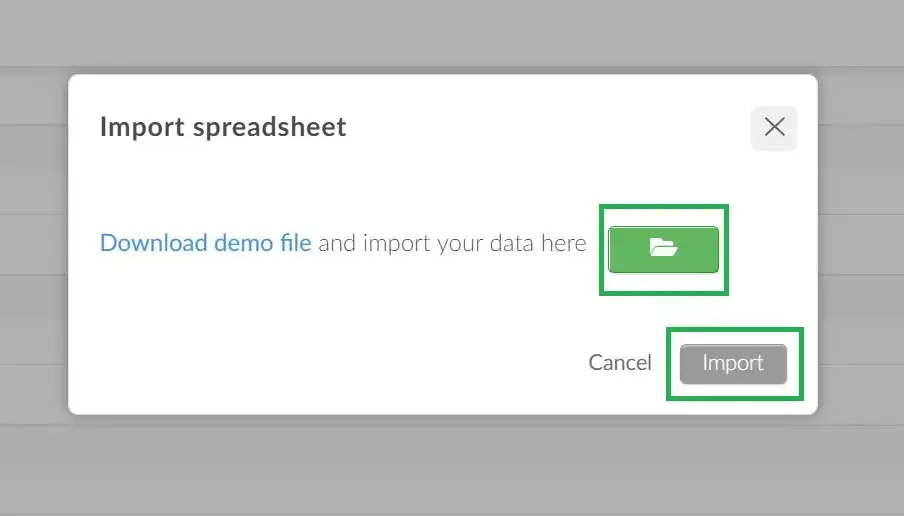
Via spreadsheet
You will be able to add multiple Speakers at once via spreadsheets. To do so, you will need to import an excel spreadsheet with all the information filled out. At the Event > Speakers page, press Edit > Import > Download demo file.
Then, enter the speaker's information onto the excel sheet. After saving the changes to the file you must upload the excel sheet back to the platform. To do this, click Edit > Import. Then, press the green button, select the file, and press Import.
Filtering Speakers on the Attendees' List
You can filter Speakers within the People > Attendees page by clicking Filter, selecting the Linked speakers filter, and clicking on Add filter. The page will then display only Linked speakers.
You can click on the academic cap icon to open the Speakers' Speaker profile in a new tab.
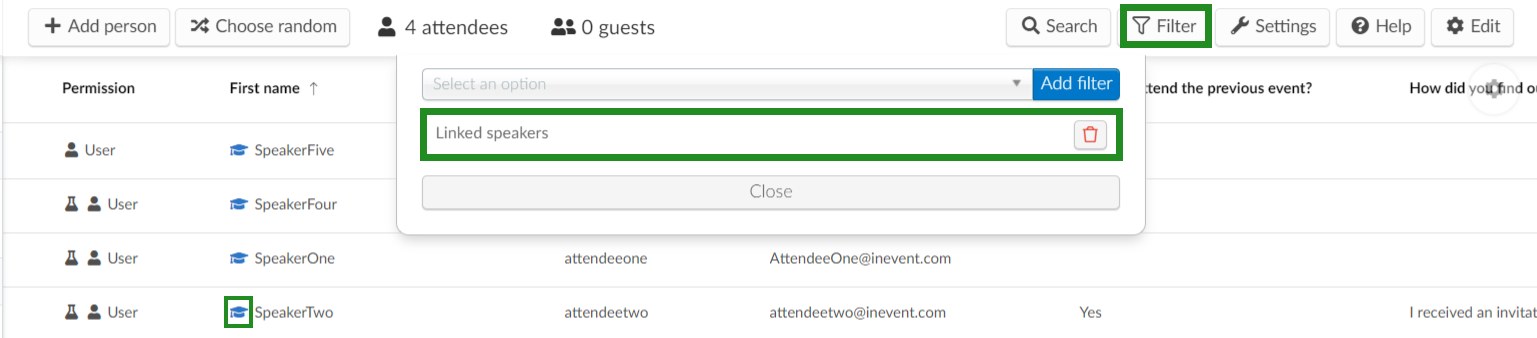
With the new tab open you will be able to edit the Speaker's profile as shown in the next section.
Editing Speakers information
To add or edit information, click on Edit and then click on the blue icon corresponding to the speaker's name. The Speaker information will appear on the right side. Click End after finishing the modifications.
You can change or add new information related to:
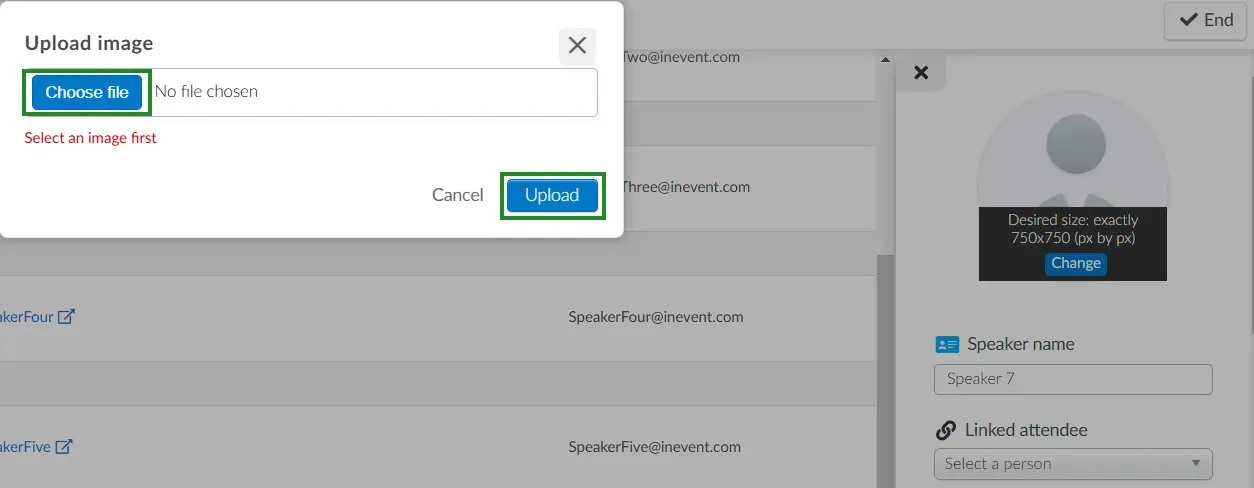
Image
The desired image size is 750 x 750 (px by px).
To add or update a speaker's image:
- Click on the Change button below the current speaker image.
- A prompt will appear, allowing you to upload a new image.
- Click Choose file to select the desired image from your device.
- After selecting the image, click Upload to save the changes.
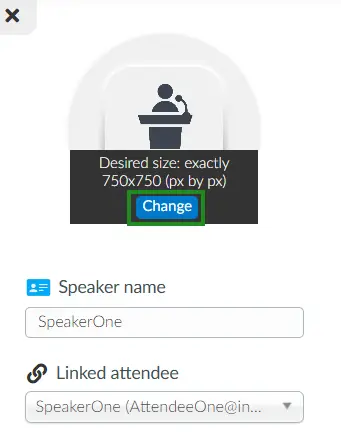
Linked attendee
This feature ensures your speakers will have access to the Virtual Lobby and therefore be able to enter the session they will present prior to the activity's starting time. It will also ensure having presenter capabilities (control over camera and microphone).
First, press Edit and link the attendee profile to the matching speaker, and press End when you're done.
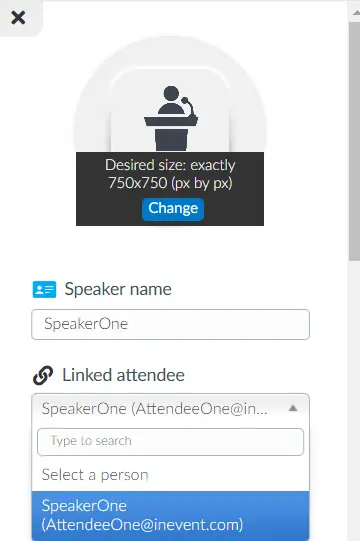
When you link a speaker to an attendee, their name will appear as a hyperlink. Clicking on the speaker's name will redirect you to the People > Attendee details page, where you can view all the information associated with that attendee.
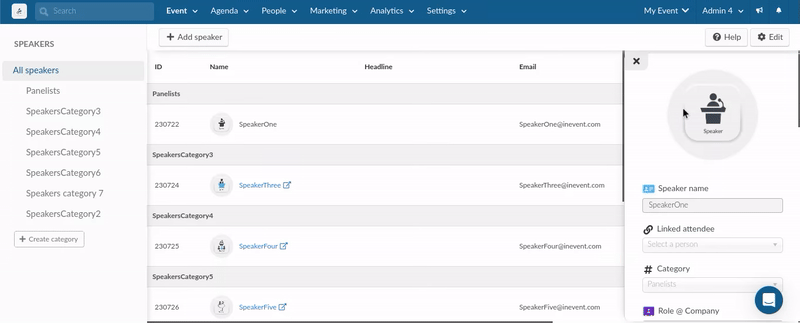
Speakers can be linked to existing attendee profiles to ensure consistency of information across the platform. The Linked Attendee field allows you to associate a speaker with an attendee using the attendee email. This linkage enables the system to connect both profiles so that information can be shared and synchronized.
See Automatic speaker profile creation & synchronization below for more details on how data is synced.
Additional information
Create a complete Speaker's profile by adding the role, company, email, and all related social networks such as Facebook, Instagram, Linkedin, Twitter, and website.
You can also write a brief description of the Speaker in the Mini-bio field, and add a category.
WYSIWYG
If a Speaker tag is created you can associate them with the Speaker's profile by clicking on the desired tag or by adding the tags to the spreadsheet that will be uploaded. This information will be available to attendees in both the app and the website.

You can also associate the speaker with an activity as well by clicking on Add activity button. This will show a add activity pop-up, where you can click in the field provided and select the activity you want to associate to the speaker from the drop-down menu.

Automatic speaker profile creation & synchronization
When a speaker is linked to an attendee profile, InEvent will automatically create the speaker profile and keep it synchronized using data from the associated attendee.
This linking can be done either through the platform interface or during speaker import using the linkAttendee column.
If a speaker is created or imported using only an email address and the linkAttendee reference, the system matches the speaker to an existing attendee profile. If a speaker profile does not already exist, it is created automatically and populated using available information from the attendee registration data.
Synchronization behavior
For speakers linked to attendee profiles, the attendee record acts as the source of truth.
Any updates made in People > Attendees or through the My Account page in the Virtual Lobby are automatically reflected in the corresponding speaker profile under Event > Speakers.
This ensures that speaker information remains consistent across the platform without requiring manual updates in multiple locations.
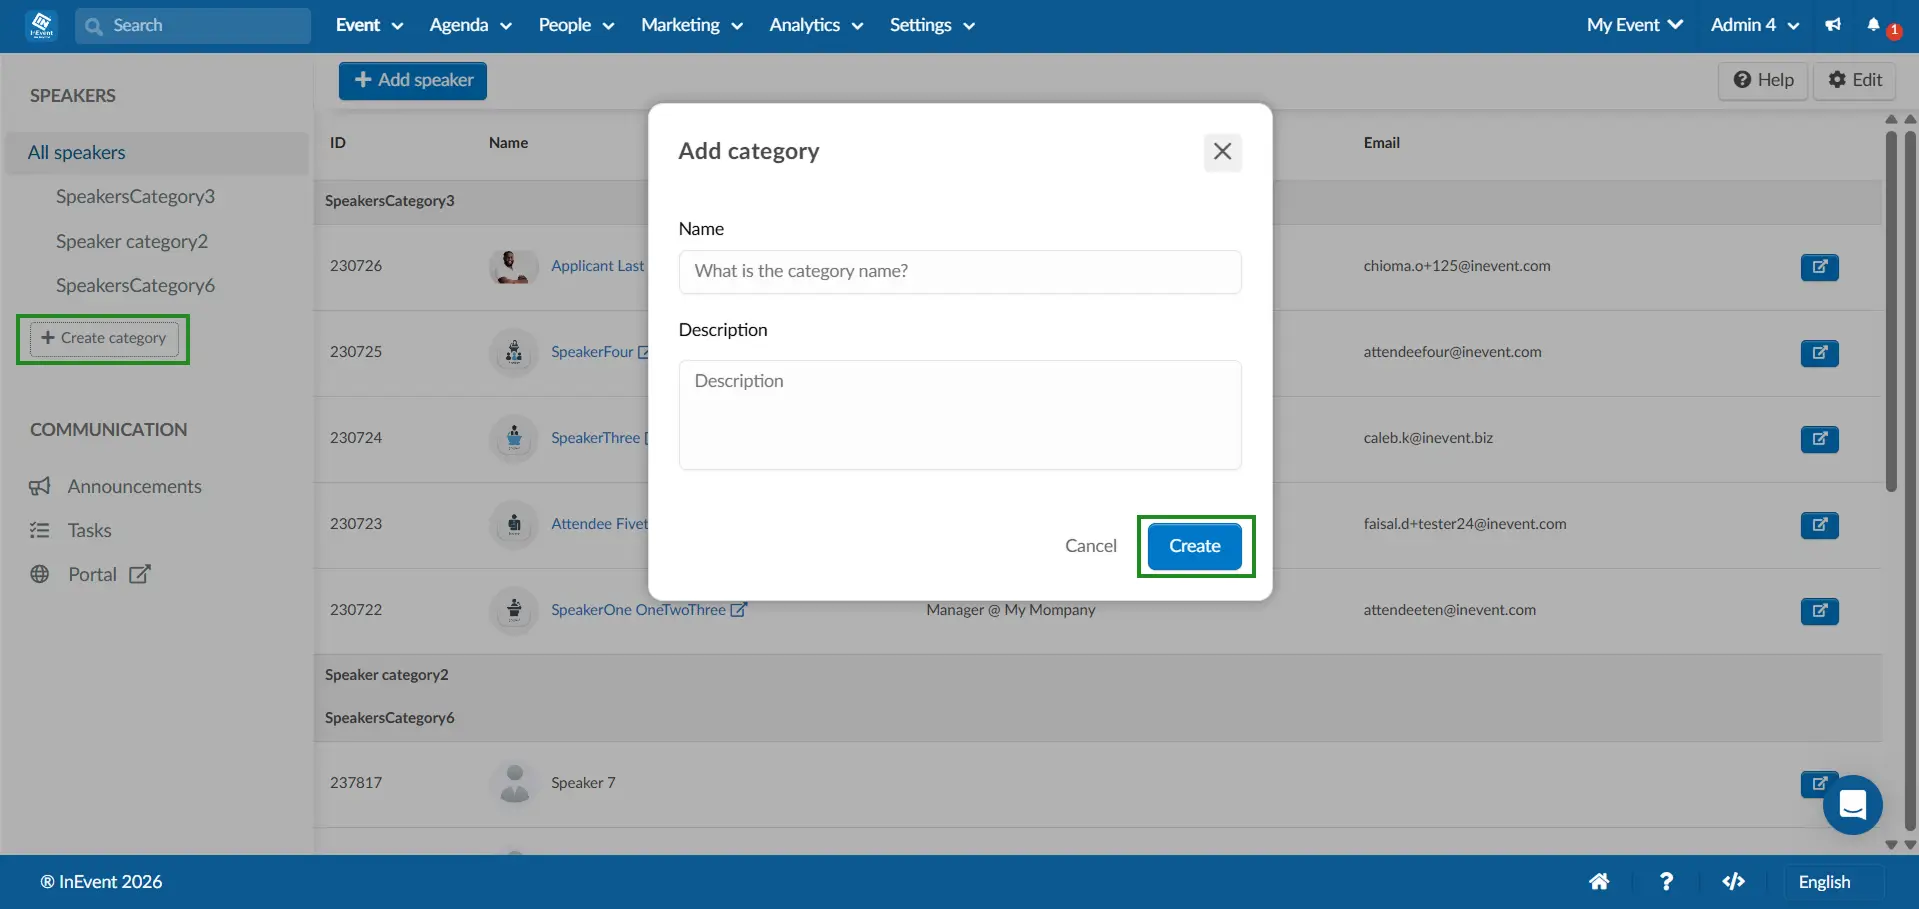
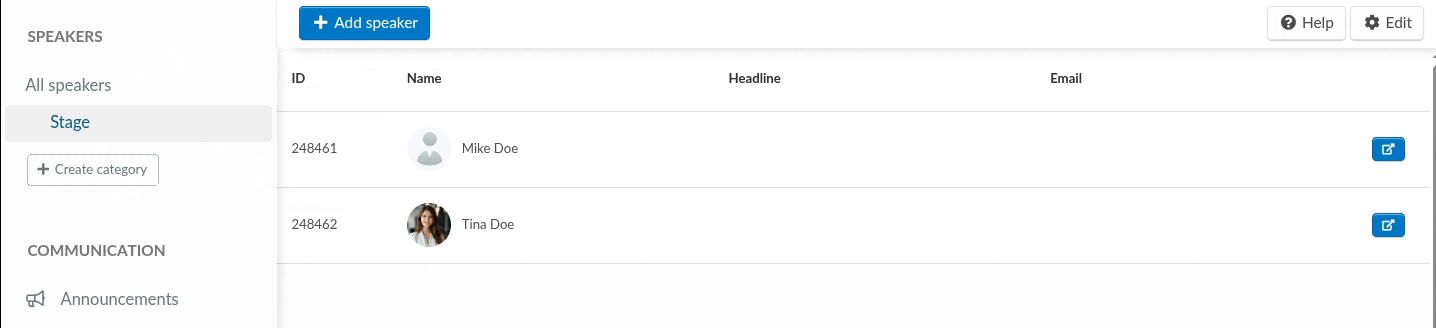
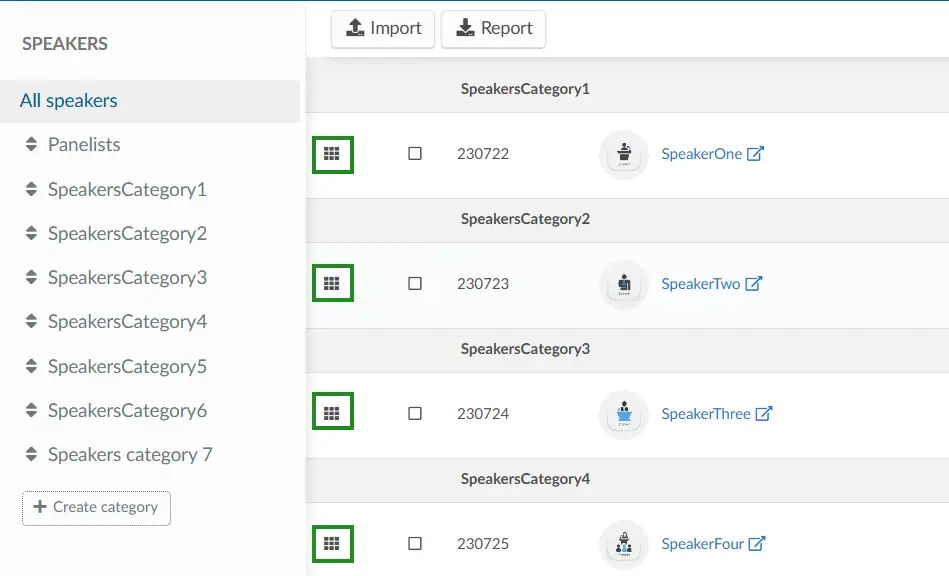
Creating speaker categories
You can easily organize your speakers into distinct categories for better management and access. To create your speaker category, follow the steps below:
- Navigate to Event > Speakers
- On the left panel of your screen click on the Create category button.
- Enter the desired category name
- Add a description for the category.
- Click Create.
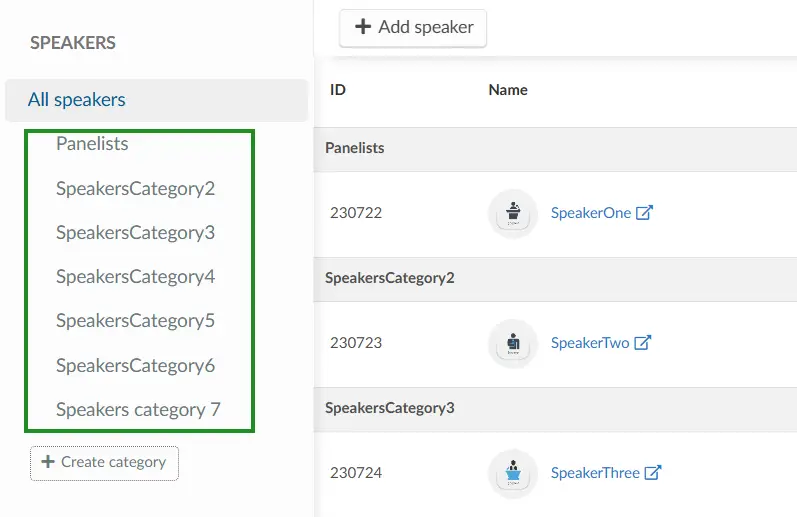
All your created speaker categories will appear on the left panel, providing organized and easy access.
Editing speaker category and description
You can update a speaker category and description at any time. To do this, click the Edit button located at the top-right corner of the page. Then, locate the specific speaker category and click the edit icon next to it. From there, you can modify the description and save your changes.
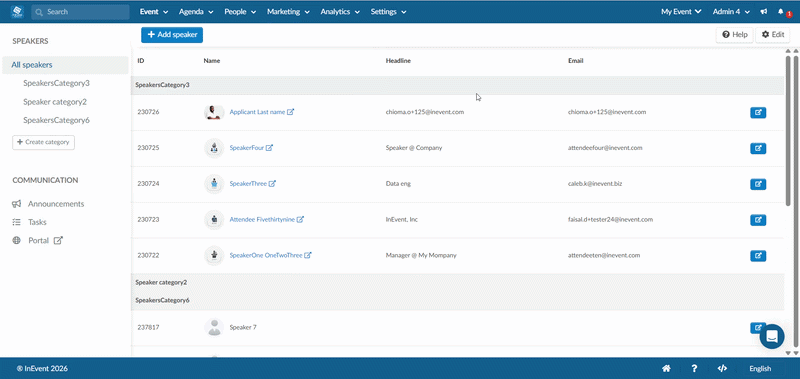
Assigning a speaker to a category
To assign a speaker to an existing category:
- Click the blue edit icon next to the speaker's name.
- Scroll down to the Category section.
- Select a category from the dropdown list.
You can also assign a category to a speaker during the speaker creation process by selecting the desired category in the Speaker category field.
Deleting speaker categories
Event administrators can delete speaker categories by clicking on Edit and on the red trash bin icon next to the category name. A confirmation pop-up box will be displayed, and after clicking Confirm, the target directory will be deleted.
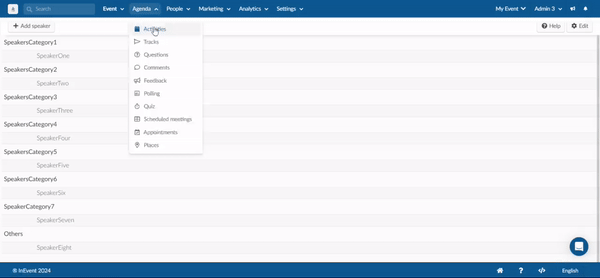
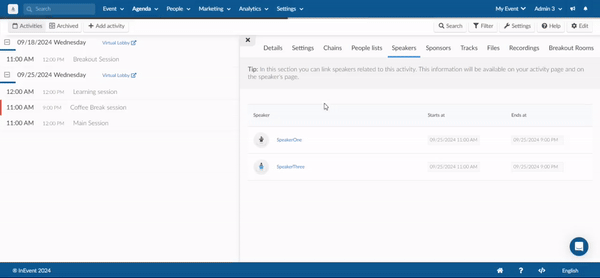
Linking Speakers to Activities
You can link speakers to an activity by clicking on the blue speaker details button corresponding to the speaker you wish to link. This will open a details card of the speaker from the right side of the platform. Click on Edit and scroll down till the end. Click on the Add activity button. This will open a add activity pop-up, where you can click in the field provided and select the activity you want to link to the speaker from the drop-down menu.
You can also link speakers to the activity by clicking Agenda > Activities. Click on Edit then choose an Activity. In the window that appears on the right, press Speakers, select the speaker using the drop-down bar, and then press Add speaker. When you have finished, press End and the speaker will be linked to the activity.
Setting start and end time for Speakers in Activities
You can set start and end time for each speaker in an activity by using the time and date selector which corresponds to the speaker after adding them to your activity.
The speakers' start and end time will be reflected in the Grouped logs of the Checklog reports.
Changing the display order of Speakers
To change the order the speakers are being displayed, click on Edit and then drag the speaker to the correct position using the dotted icon, outlined in the image below.
Can I reorder speakers in a session using the API?
Yes! You can set the display position of a speaker within a session using the API, without having to do it manually on the platform.
To do this, you will need to make a POST request to InEvent’s API. If you're not familiar with API requests, think of it as sending a structured message to the platform telling it exactly what change to make, in this case, which speaker should appear in which position.
You can send the request to:
POST https://api.inevent.com/
With parameters:
Parameter | Value |
action |
|
activityID | The ID of the session |
format |
version, timezone, and lang may appear in some requests depending on the environment, but are not required to update speaker order. |
When sending the request, make sure to select x-www-form-urlencoded as the body format. This is simply the way InEvent expects to receive data.
Then add the following:
Key | Value |
content |
|
Replace:
-
{{speakerID}}with the ID of the speaker -
{{position_number}}with the position you want the speaker to appear in (e.g.,1for first)
action, activityID, and format are sent as query parameters in the request URL, while the content field should be included in the request body using x-www-form-urlencoded format.Adding Speakers from previous events
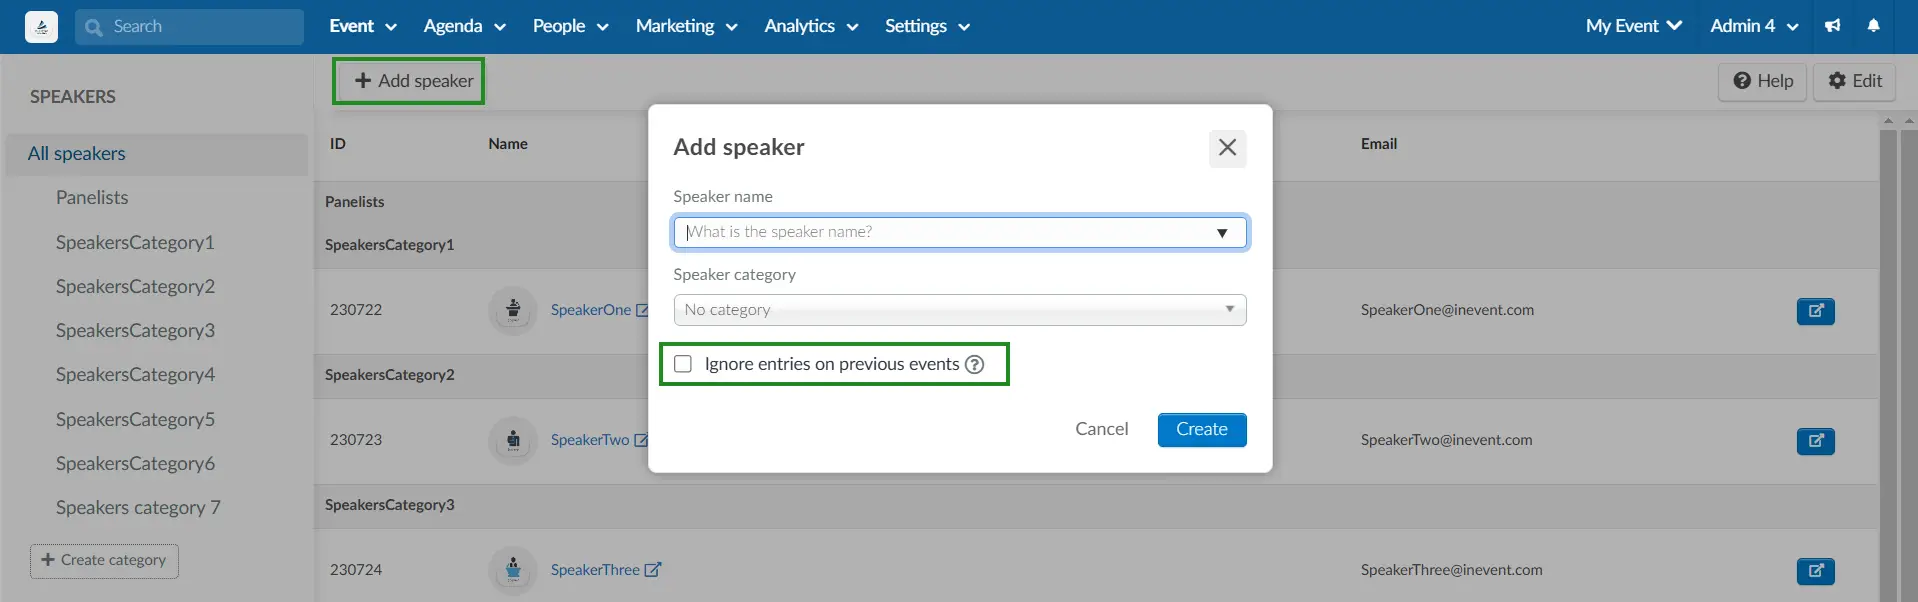
Once you create a speaker in an event, they will be saved on the company level so you can add them in new events, saving you time.
Click on + Add speaker and once you begin to type the speakers' name, a drop-down box will appear with previously saved speakers.
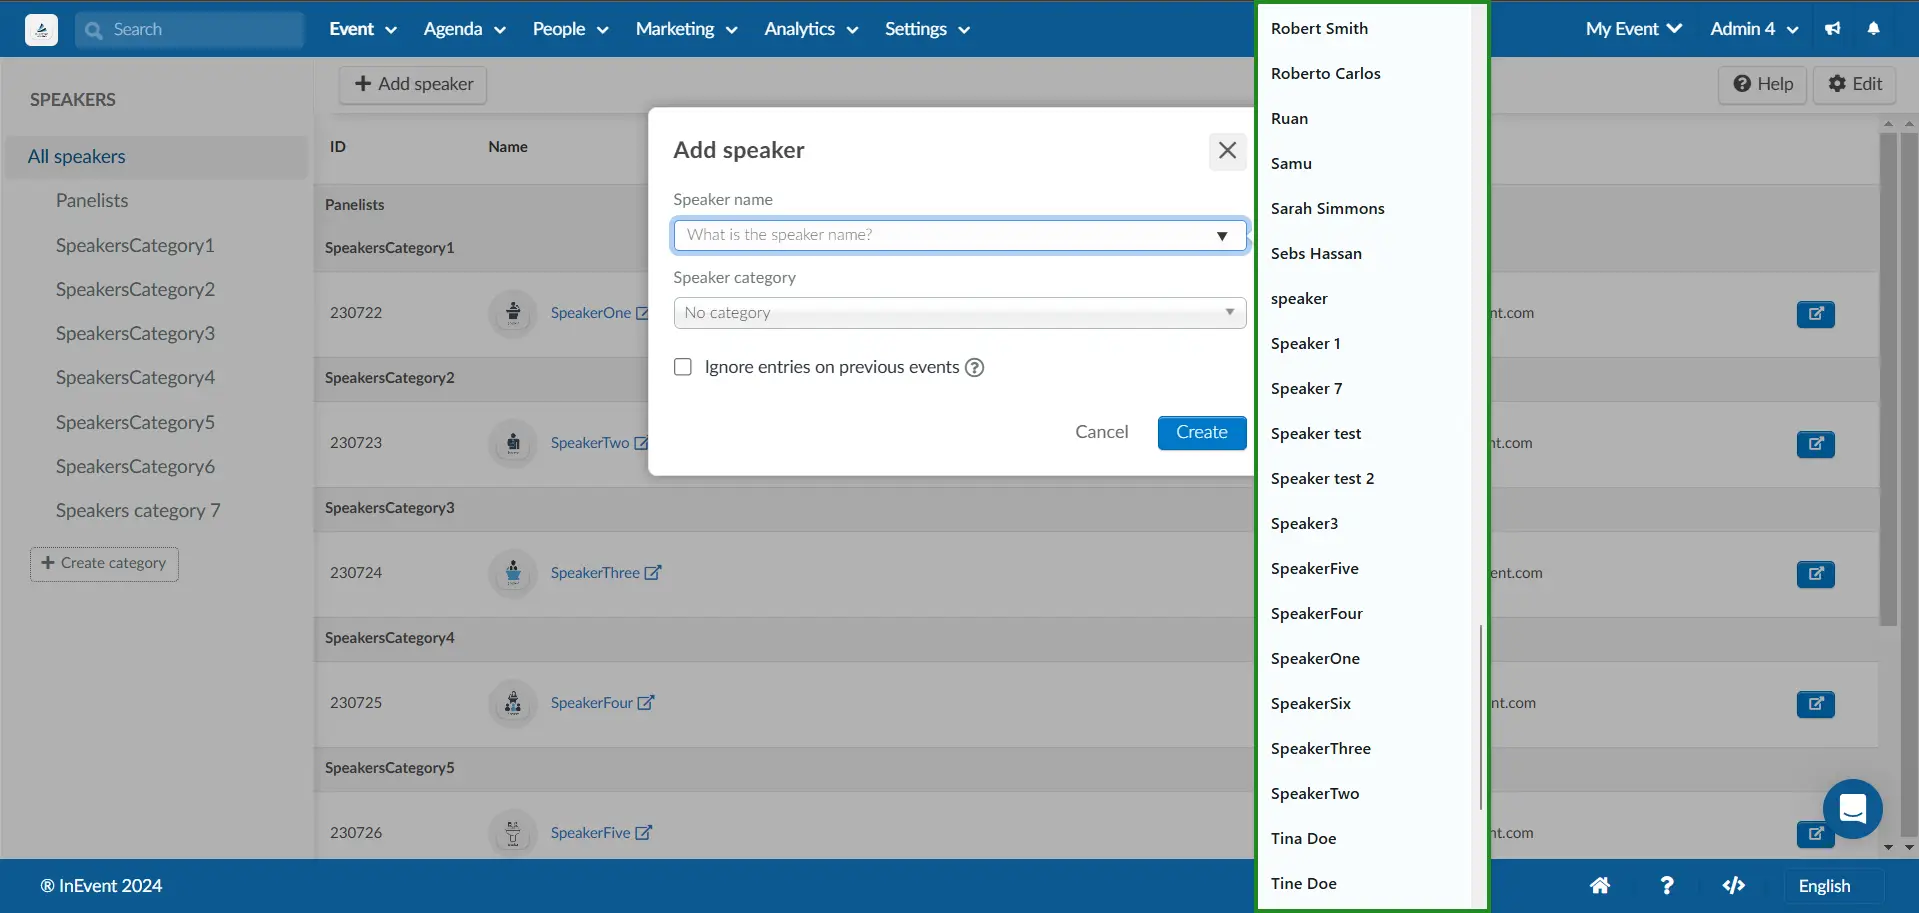
All the content from that speaker will be pulled to your new event.
Bypass cache
Manually
If you don't wish the platform to pull data from previous events, check the box that says 'Ignore entries on previous events' when adding the Speaker at the dedicated page:
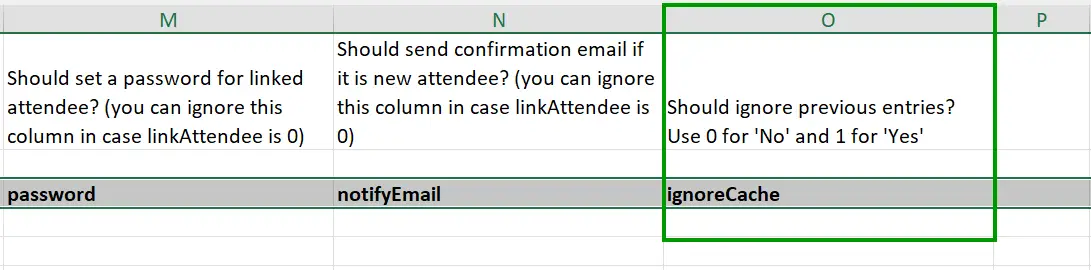
Using spreadsheet
If you are adding the Speakers using the spreadsheet, you can simply enter the number '1' at the column O of the Speaker's demo file.
Speaker portal and its use of communicating
On the Event > Speakers page in the InEvent platform, you can engage speakers through the Speaker Portal by posting announcements and assigning tasks. This provides an efficient way to share key event updates, keep speakers informed, and encourage proactive participation with a clear to-do list of tasks or missions.
Announcements
- Navigate to Event > Speakers > Announcements.
- Click the + Add announcement button.
- In the new window, write the announcement or brief description in the field provided.
- Click on the blue Create button to finish.
Tasks
- Navigate to Event > Speaker > Tasks.
- Click on the Add task button.
- In the new window write the task name and its description.
- Click on create to finish.
The created tasks will be displayed in the Tasks tab. If you want to edit the task name or its description, click on the blue details button corresponding to the task. This will open the details card of the task. Click on Edit to make the changes. Click on End to finish and refresh your browser to see the changes made.
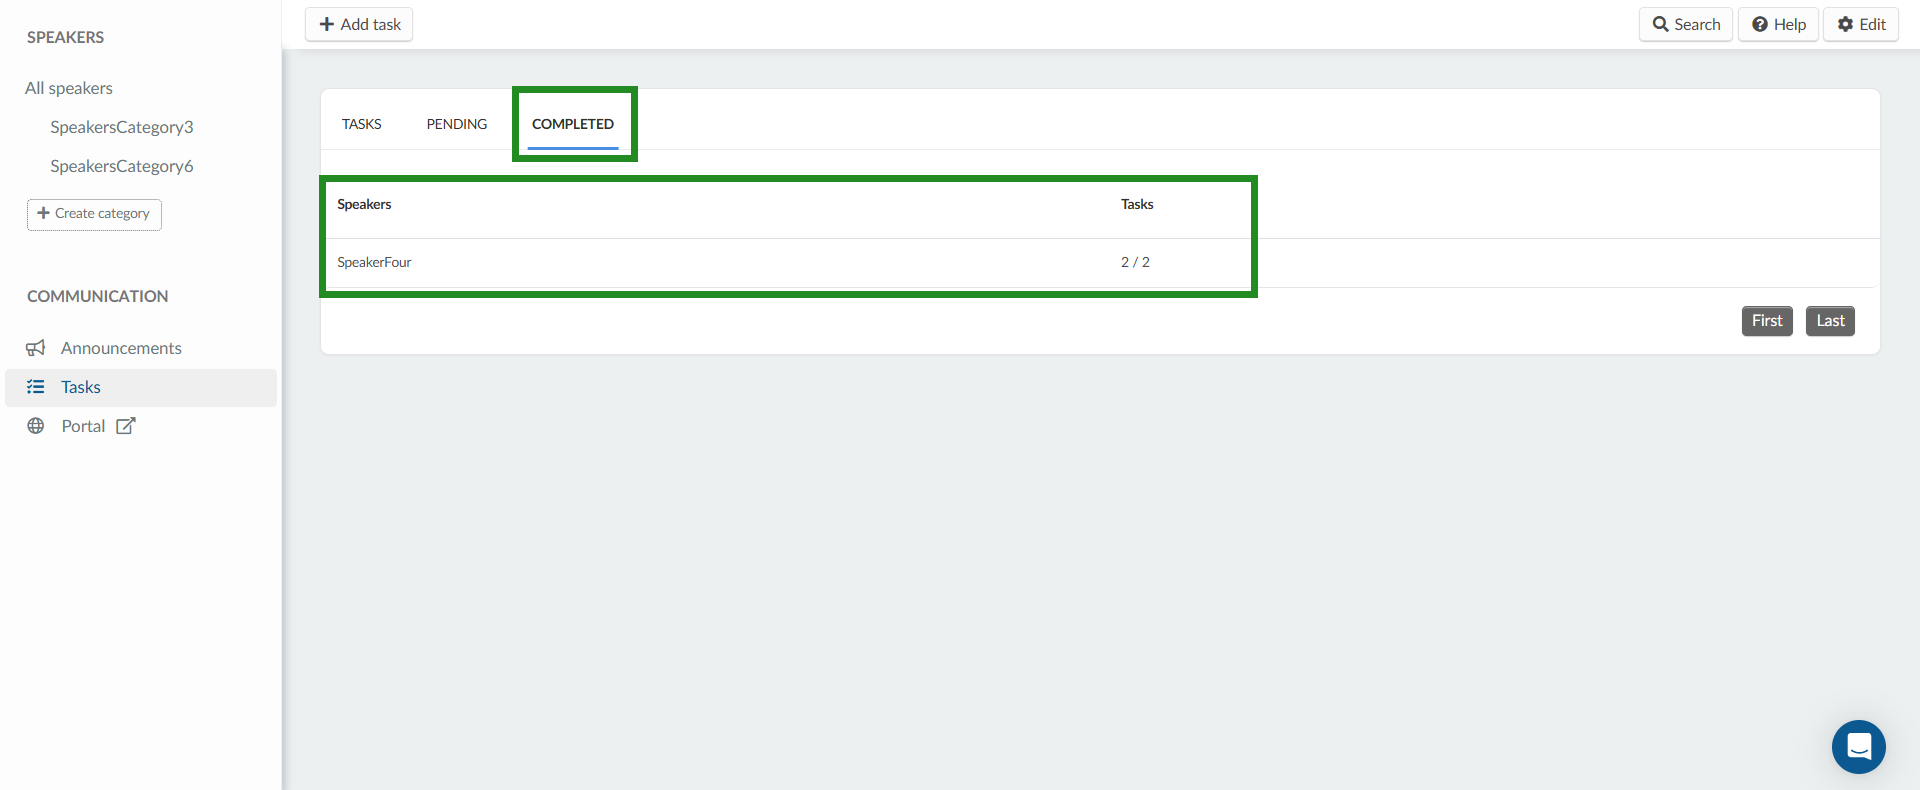
The pending tab shows the list of all speakers and the number of tasks they have completed out of the total tasks.
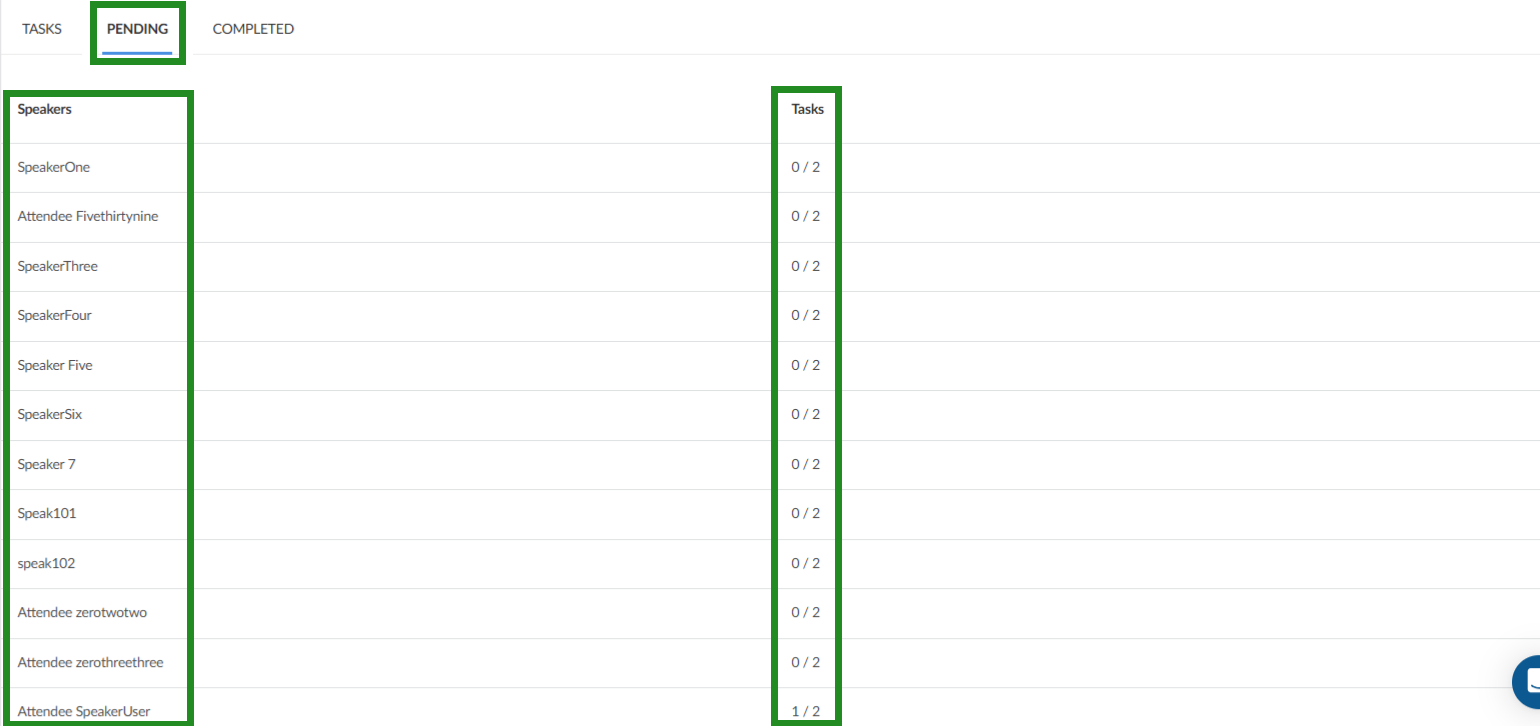
The Completed tab shows the speakers who have completed all the tasks.
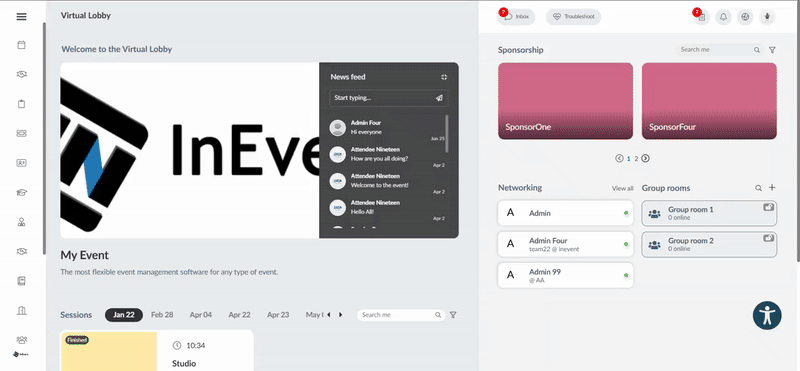
The speakers will have to click on the box corresponding to the tasks on the dashboard of their speaker's portal in order mark it as complete. Below is an example of how a speaker accesses the speaker's portal on the web app and completes a task.
To extract an excel report of all your tasks, navigate to Event > Speakers> Tasks. Click on the Edit button, then press the Report button at the top left corner of the page. You will receive a message letting you know that your excel sheet is being processed and will be sent to your email once completed.
The report will contain information such as: taskID, eventID, creatorID, name, description, target, dateCreated etc.
Portal
The speakers can access the Speaker portal from the menu on the left-side of the web app. To learn more about what actions the speakers can perform at the Speaker portal on the web app, refer to our Web app article.
Sending automatic emails to Speakers
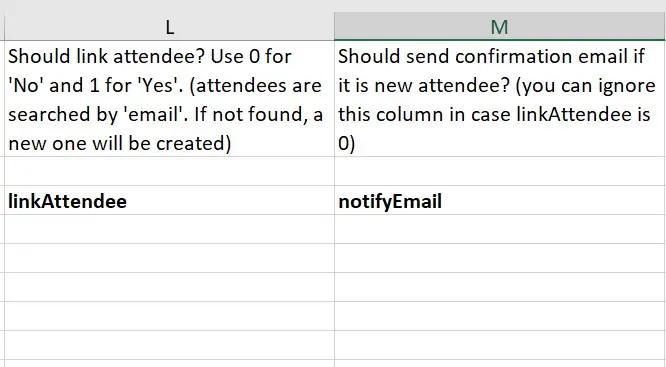
When entering speakers' information onto the excel sheet, you will see a column that says Should send the confirmation email if it is a new attendee?.
To answer this question, use 0 for No and 1 for Yes.
In case you didn't link the speaker to their attendee profile, you can safely ignore this question.
Refer to the Confirmation emai and other automatic emails article for more information.
Sending direct magic links to the Speaker's Activities
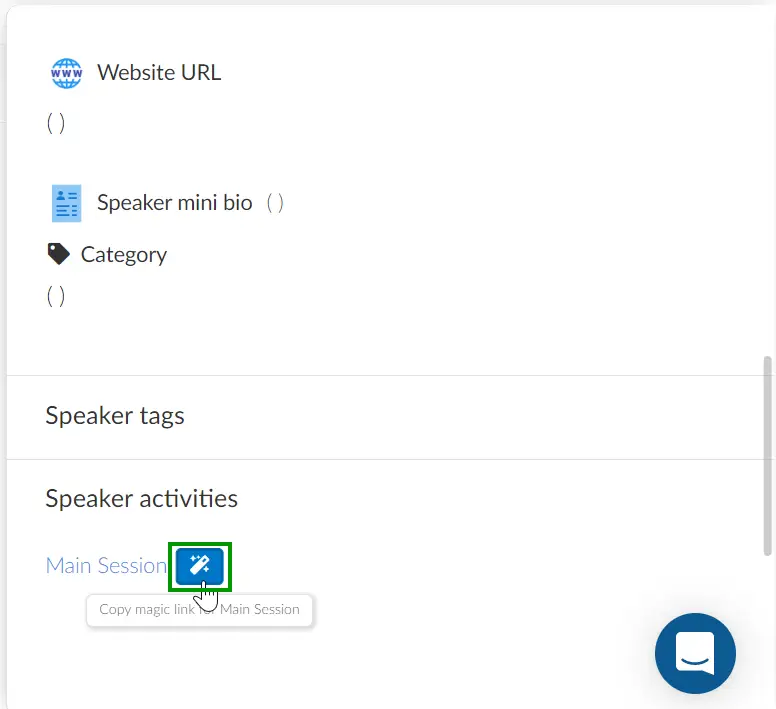
To minimize errors and make sure the Speakers find the correct activity they will be speaking at, you can send the link to the linked activity.
At the Speaker's profile, scroll down until you see Speaker activities, click on the magic wand icon as displayed below and copy to clipboard. That's it, you can now share the direct link with your speakers!
Alternatively, you can go to Agenda > Activity > select the activity and click on Speaker:
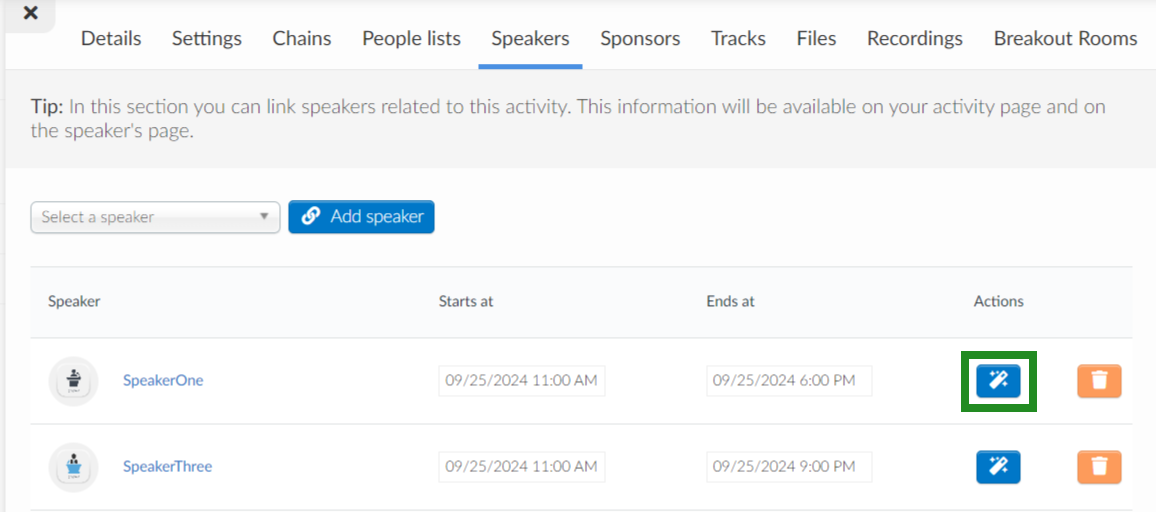
Once you click on the icon, the link will be copied so you can paste it and re-send it to the Speaker!
Pre-event rehearsal
Rehearsals are strongly recommended before the event so that Speakers can familiarize themselves with the Virtual Lobby as well as its features, as well as to ensure that the event proceeds smoothly. Below are some resources that can be shared with speakers before the rehearsal or dry run.
Viewing Speakers
Speakers can be viewed on the event website, in the email, in the Virtual Lobby and in the mobile app.
Viewing Speakers in the mobile app
To view the Speakers in the app, go to Menu > Speakers
Creating placeholders for speakers in the app
Placeholders for speakers can be created, and they will appear within the agenda’s activity details. To create a speaker placeholder:
- Go to Settings > Headings.
- Click on Add Heading.
- In the new heading pop up, select Agenda Label - Speakers as the heading type.
- Enter your desired Heading Value.
- Click Create to set up the speaker placeholder.
This allows you to organize and display speakers for your activity effectively.
Viewing Speakers in the Virtual Lobby
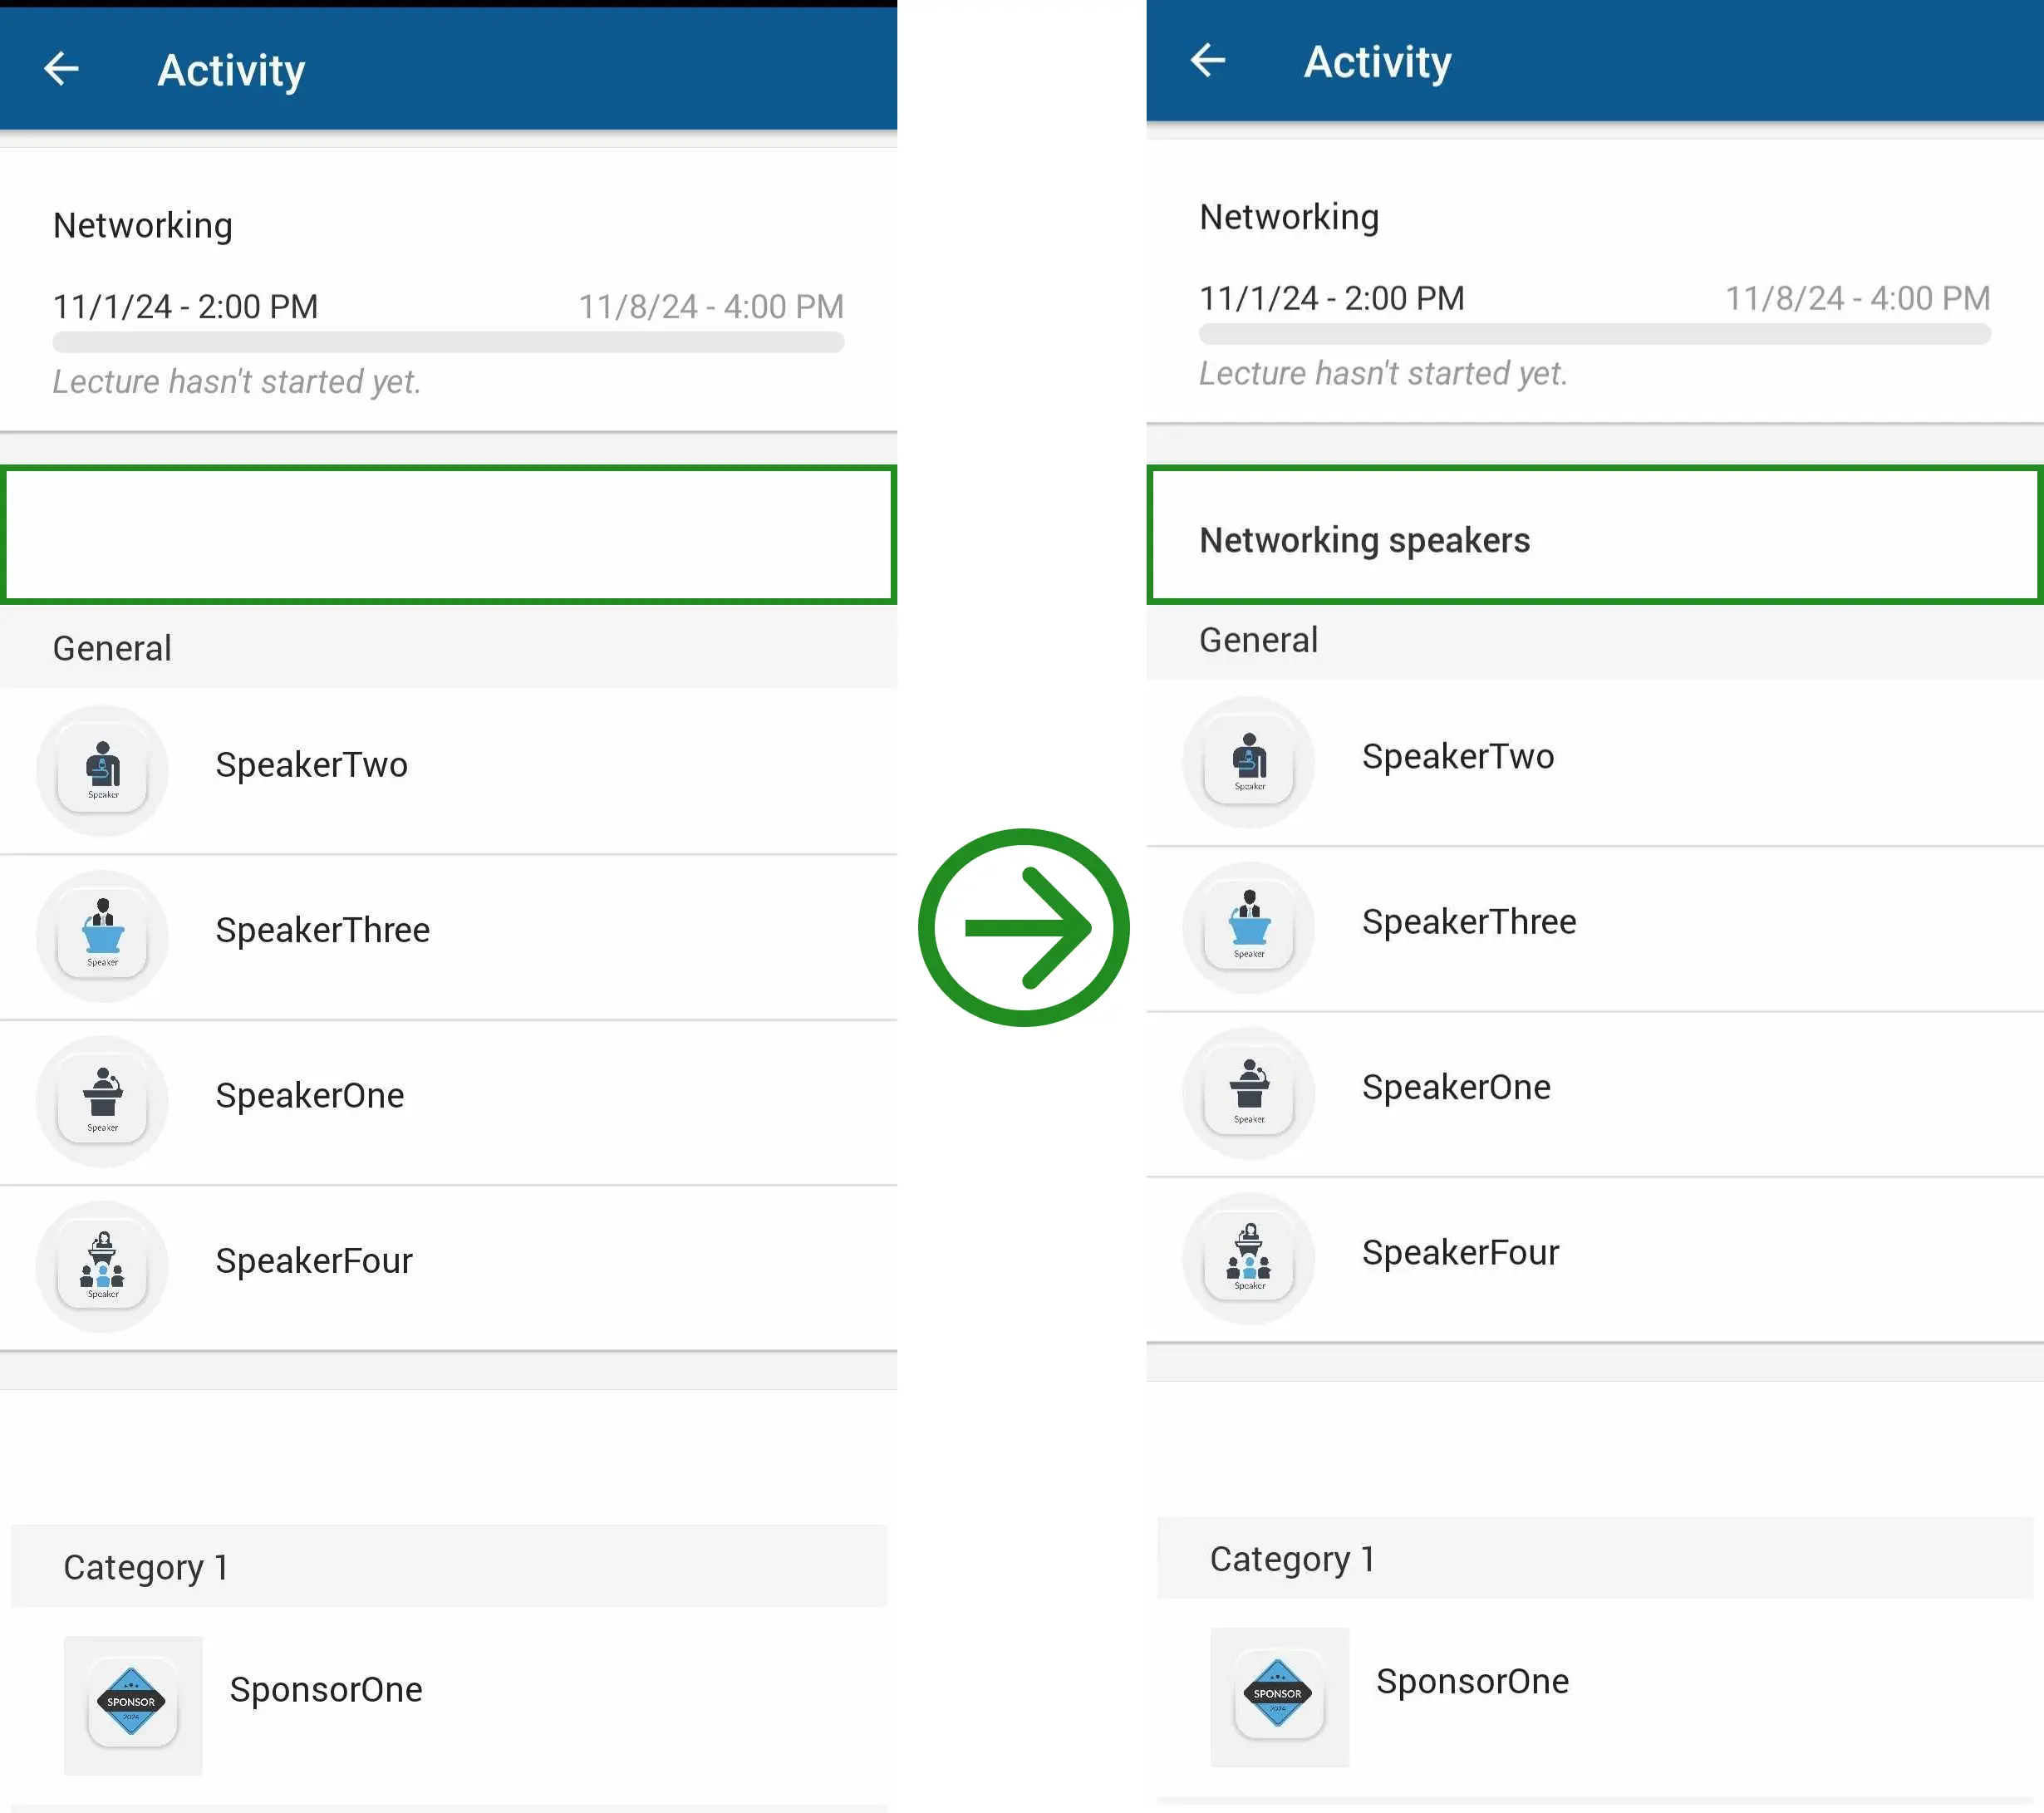
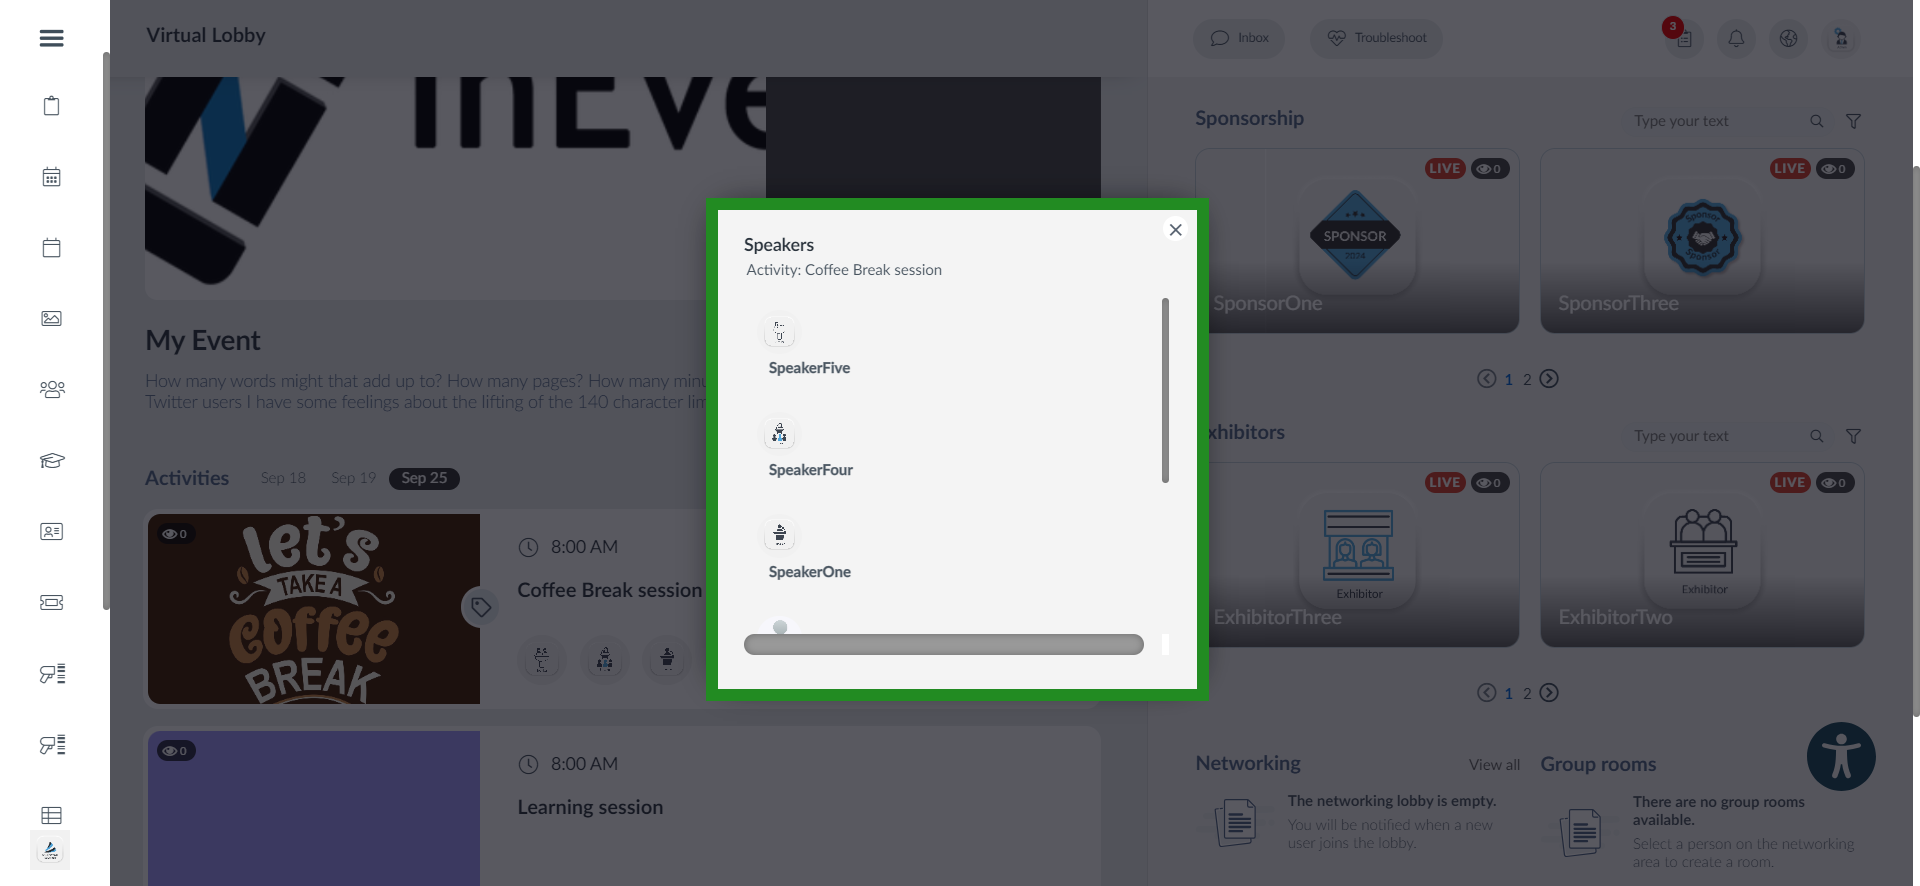
To view the Speakers in the Virtual lobby, you must have linked the Speakers to the activities in which they are participating in. In the lobby, they will appear in the activity room covers like this:
If there are more than five speakers assigned to an activity, you will see the + icon along with the remaining number of speakers. By clicking on this icon, it will display the complete list of speakers assigned to the activity.
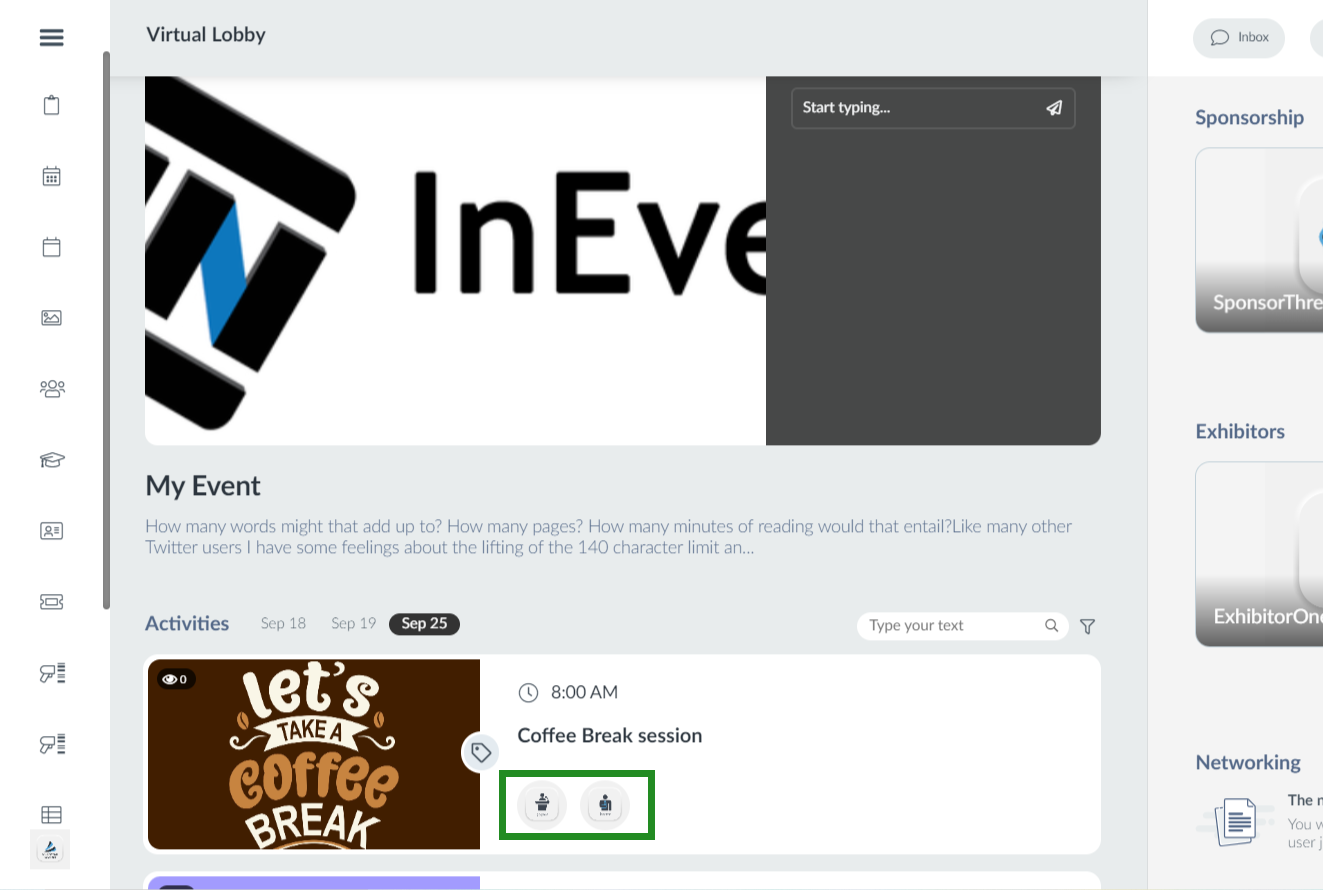
Inside the activity, the participants will see the Speakers at the base like this:
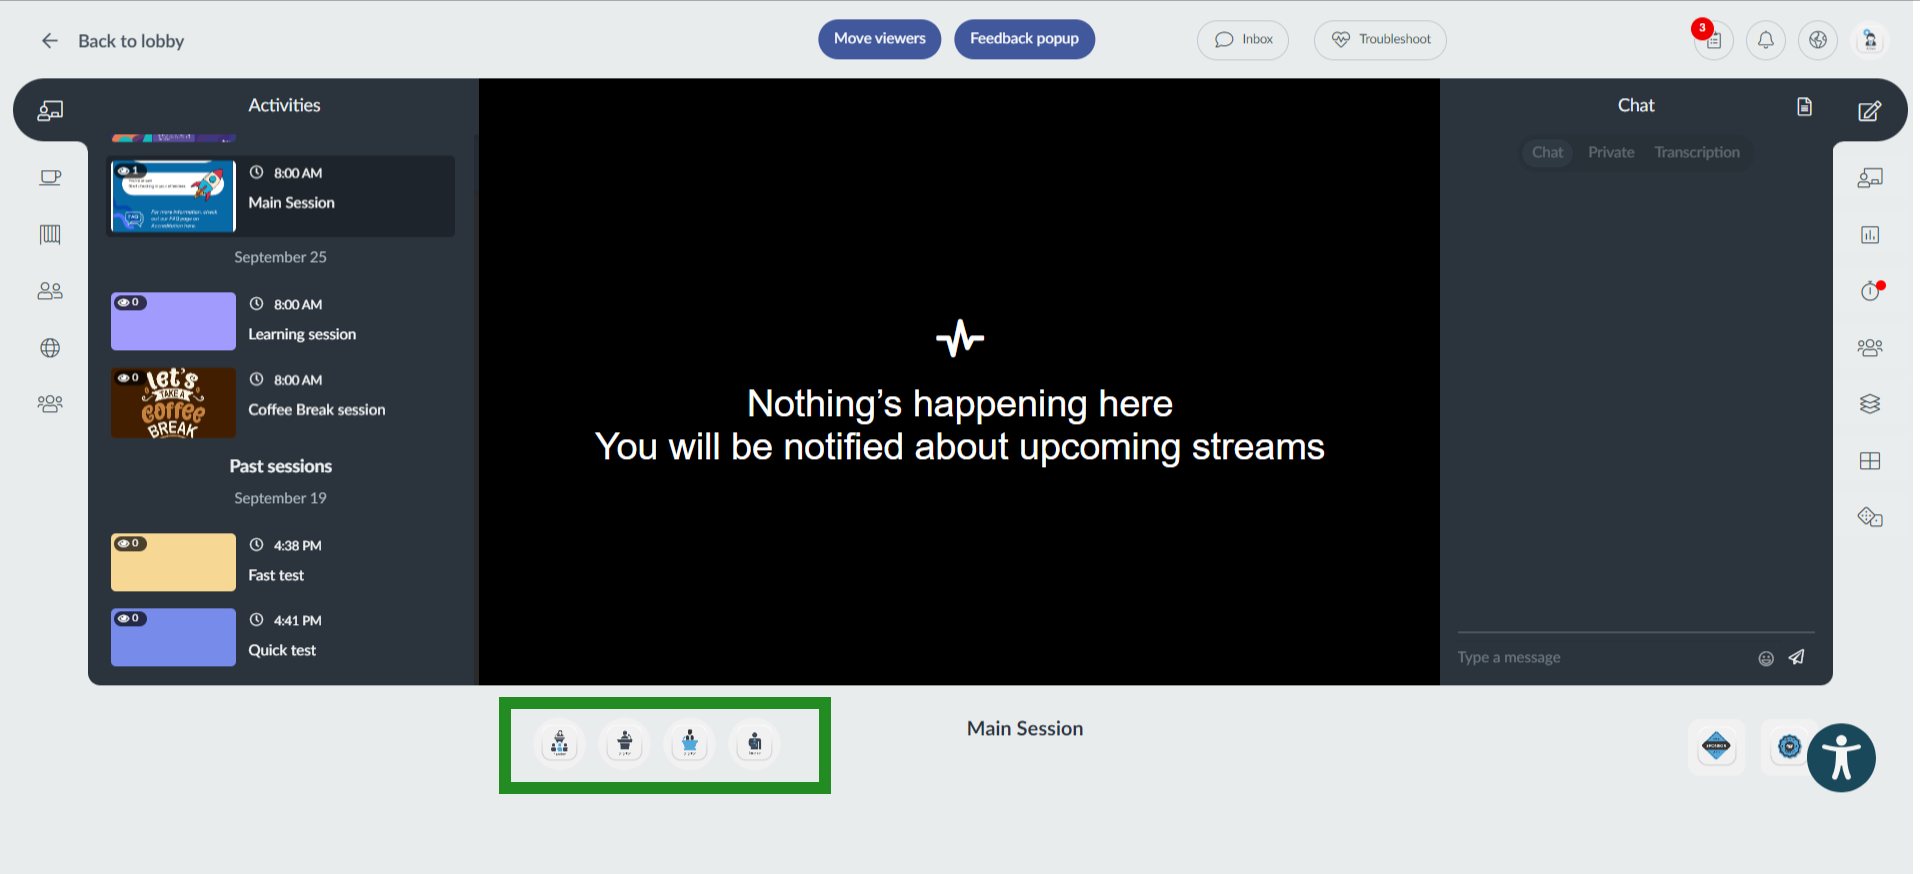

- You can also click on the speakers tab on menu on the left side, which will display all the speakers, with full navigation and access to their sessions.
Viewing Speakers on the Website
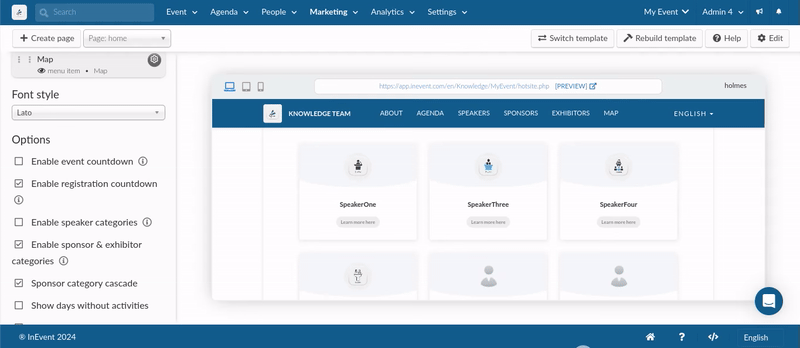
To have the Speakers' information displayed on the website, ensure to add the Speakers' section.
This will allow some information added under Event > Speakers to appear in your website.
Display Speaker categories on the website
If you have created Speaker categories under Event > Speakers, and you'd like your Speakers to be displayed on the website according to their categories, activate the Enable Speaker Categories under Options.
Viewing Speakers on emails
To show your event speakers on the email, follow the steps below:
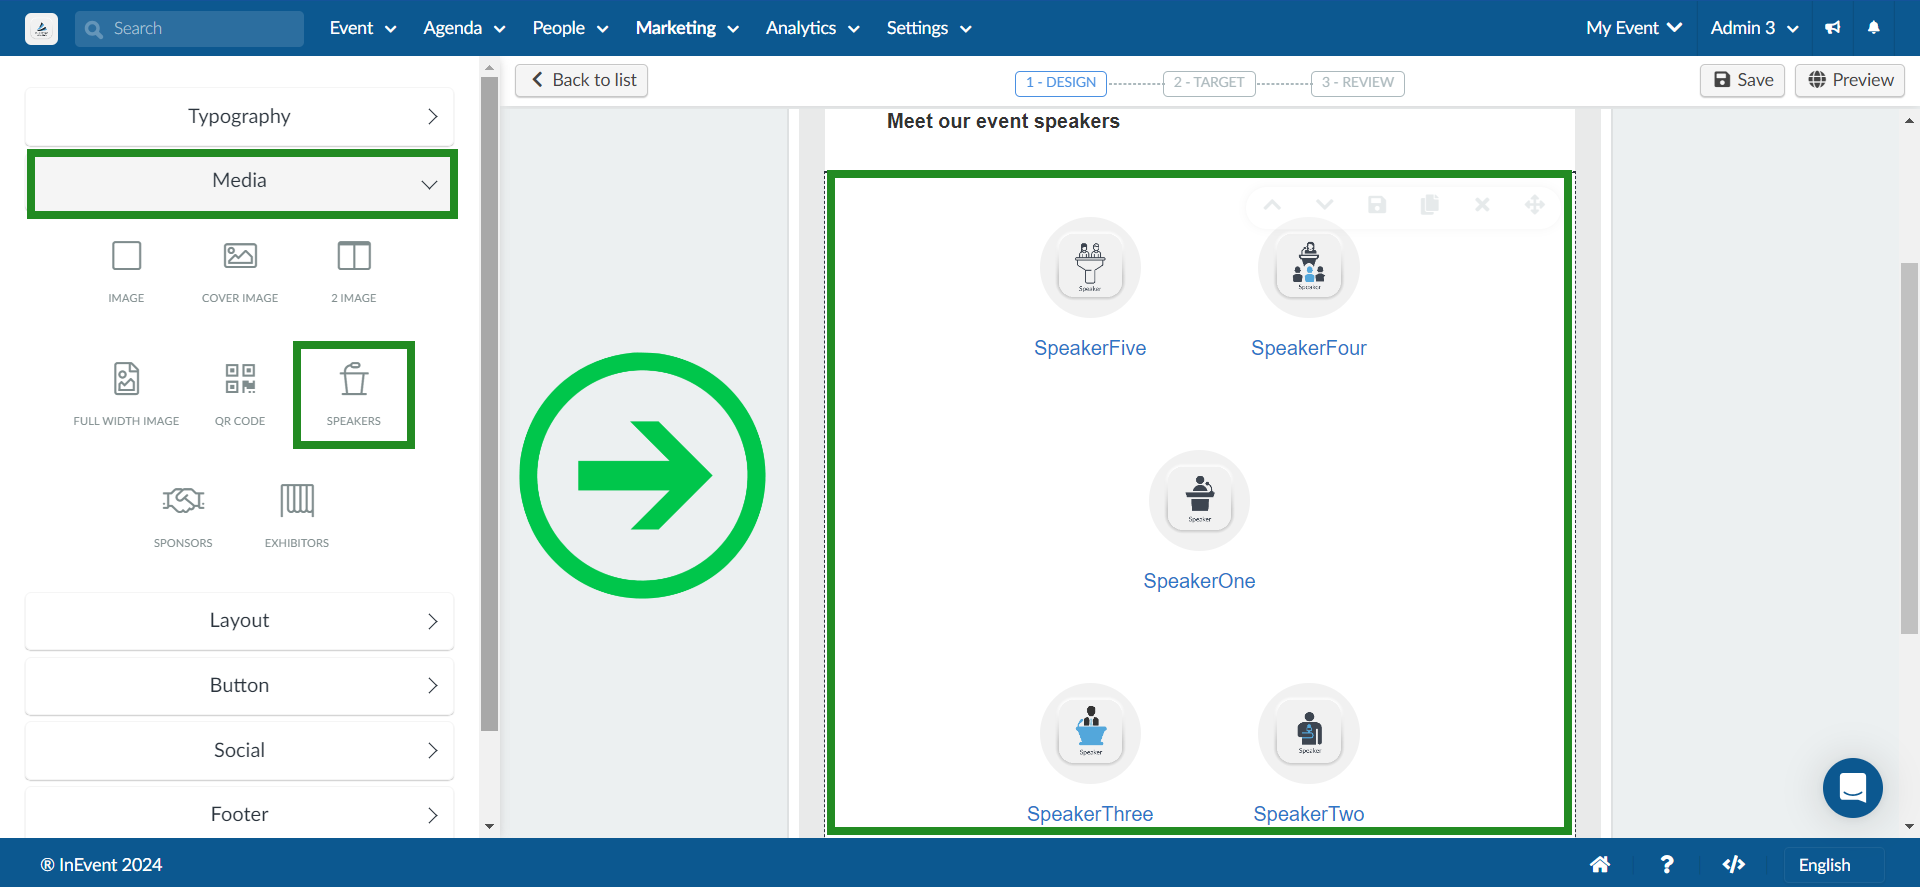
- Once you want to create your email, you will be on the Email creator page where you can find six section categories on the menu bar to the left.
- Under the Media category, you will see the option Speakers. Drag it from the left to the email on the right.
- A section showing all your event speakers with their pictures, names and roles will be added to your email.
Editing the speaker section on your email
By default, all the speakers you added under Event > Speakers will be displayed in your email.
- You can choose which speakers to hide/show by following the steps below:
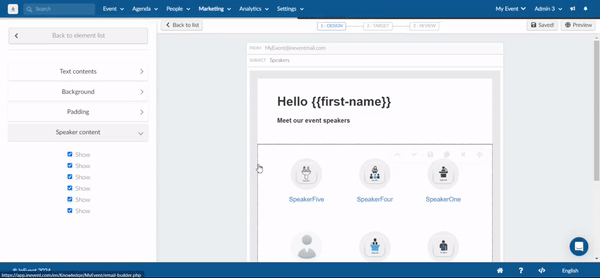
- Click on a speaker to open the section's settings.
- Under Speaker Content, uncheck the checkbox of the speaker you want to hide and check them again if you want to show them.
- You can also edit the size of the speaker profile pictures by following these steps:
- Click on a speaker to open the section's settings.
- Go to Text Contents and resize the profile picture as you wish.
- If you want to edit the Speaker's name or role follow these steps:
- Click on a speaker to open the section's settings.
- Go to Text Contents and change the speaker's name or role as you wish.
- If you want to edit the website links follow these steps:
- Click on a speaker to open the section's settings.
- Go to Text Contents and select the speaker's name.
- Press the hyperlink icon > edit the URL > Press Save.
Sending invitation emails to Speakers
You can send out emails to your event speakers with personalized and essential event information.
- Navigate to Marketing > Communication > Email creator.
- Click on New Email and select the Speaker Invite template from the System templates.
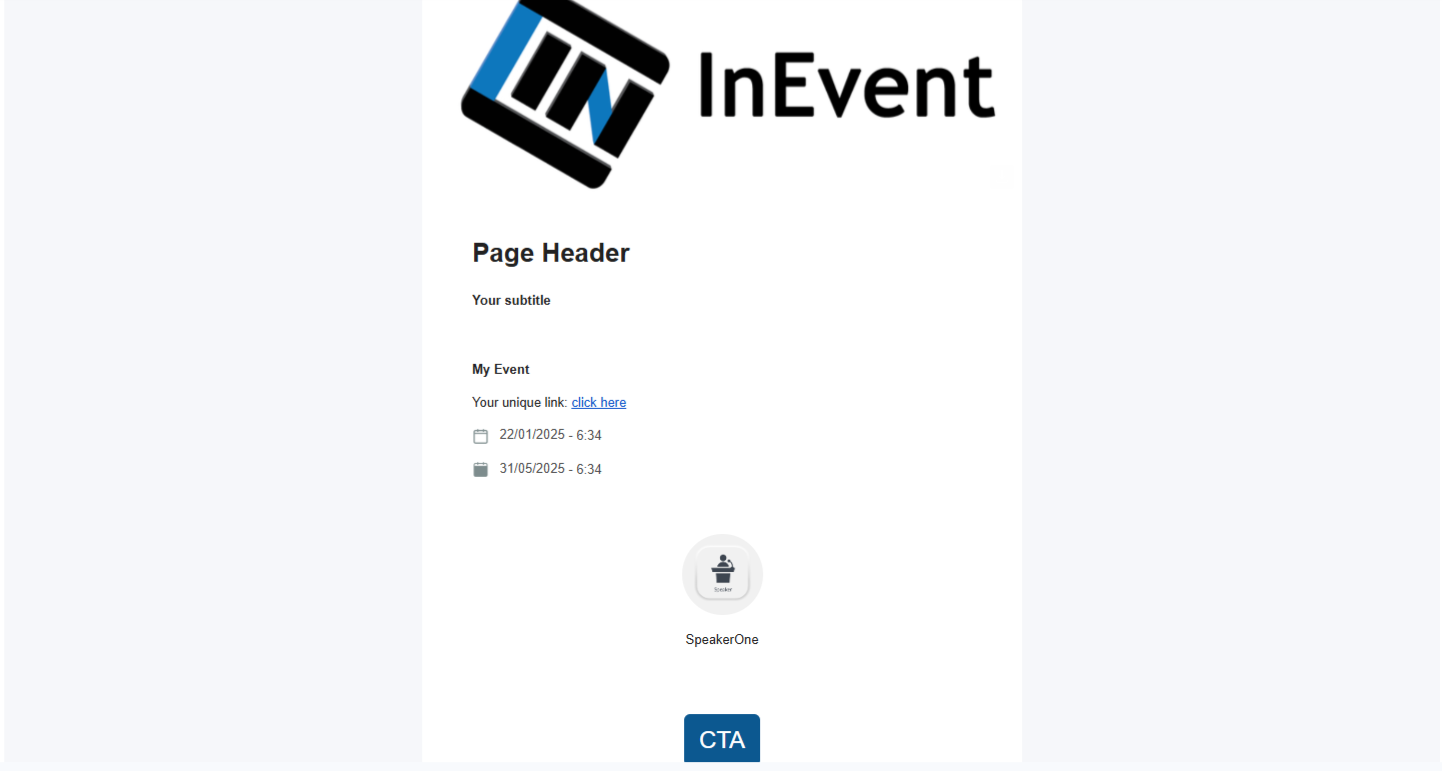
- The template will include:
- Event Name
- Unique event link
- Event Start & End Date and Time
- Speaker Name and Image
- Call-to-Action (CTA) button
You can add more sections and elements to customize the speaker invite template. For further information, refer to our Email Creator article. - Select the Speaker you wish to send the email to in the Target section of the Email Creator.
- Finally, in the review section, verify the email subject, set a trigger, configure reminders, and either send the email immediately or schedule a specific date and time for its delivery.

Below is an image of the email the speaker will receive.
Once the speaker clicks on the CTA (Call to action) button, it will re-direct them to the speakers page on the event web app, offering them information relevant to their participation.

Speakers' Linked activities
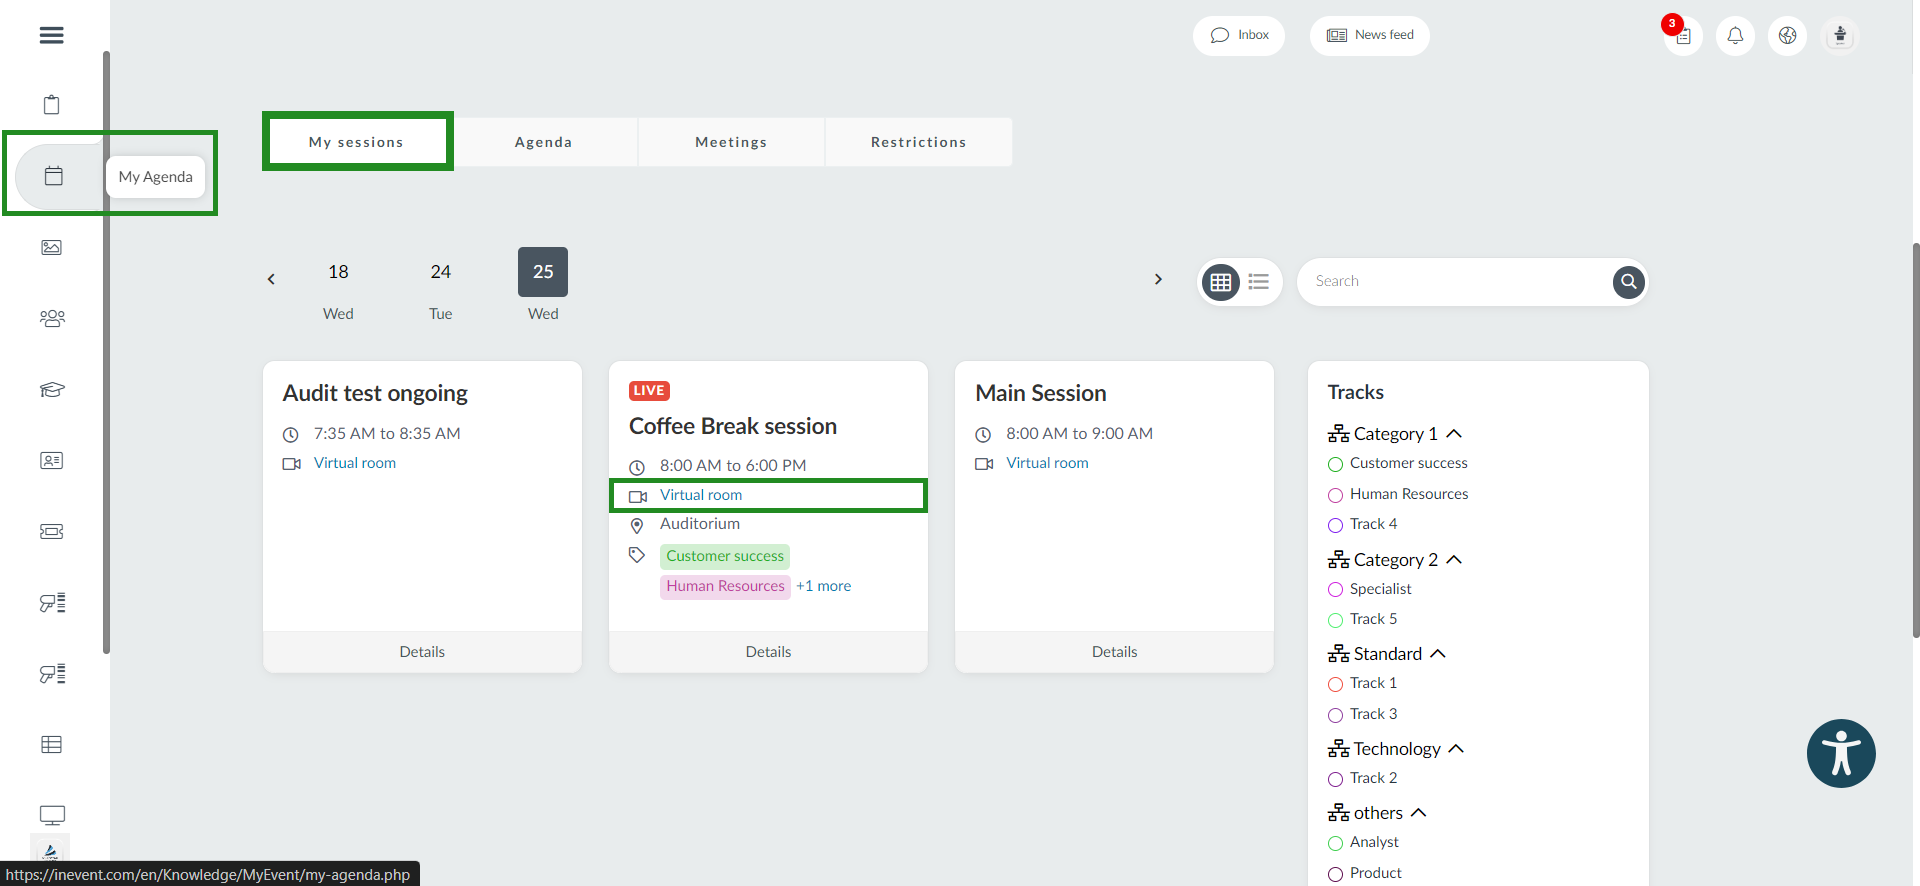
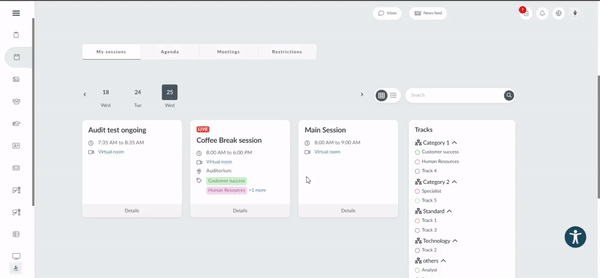
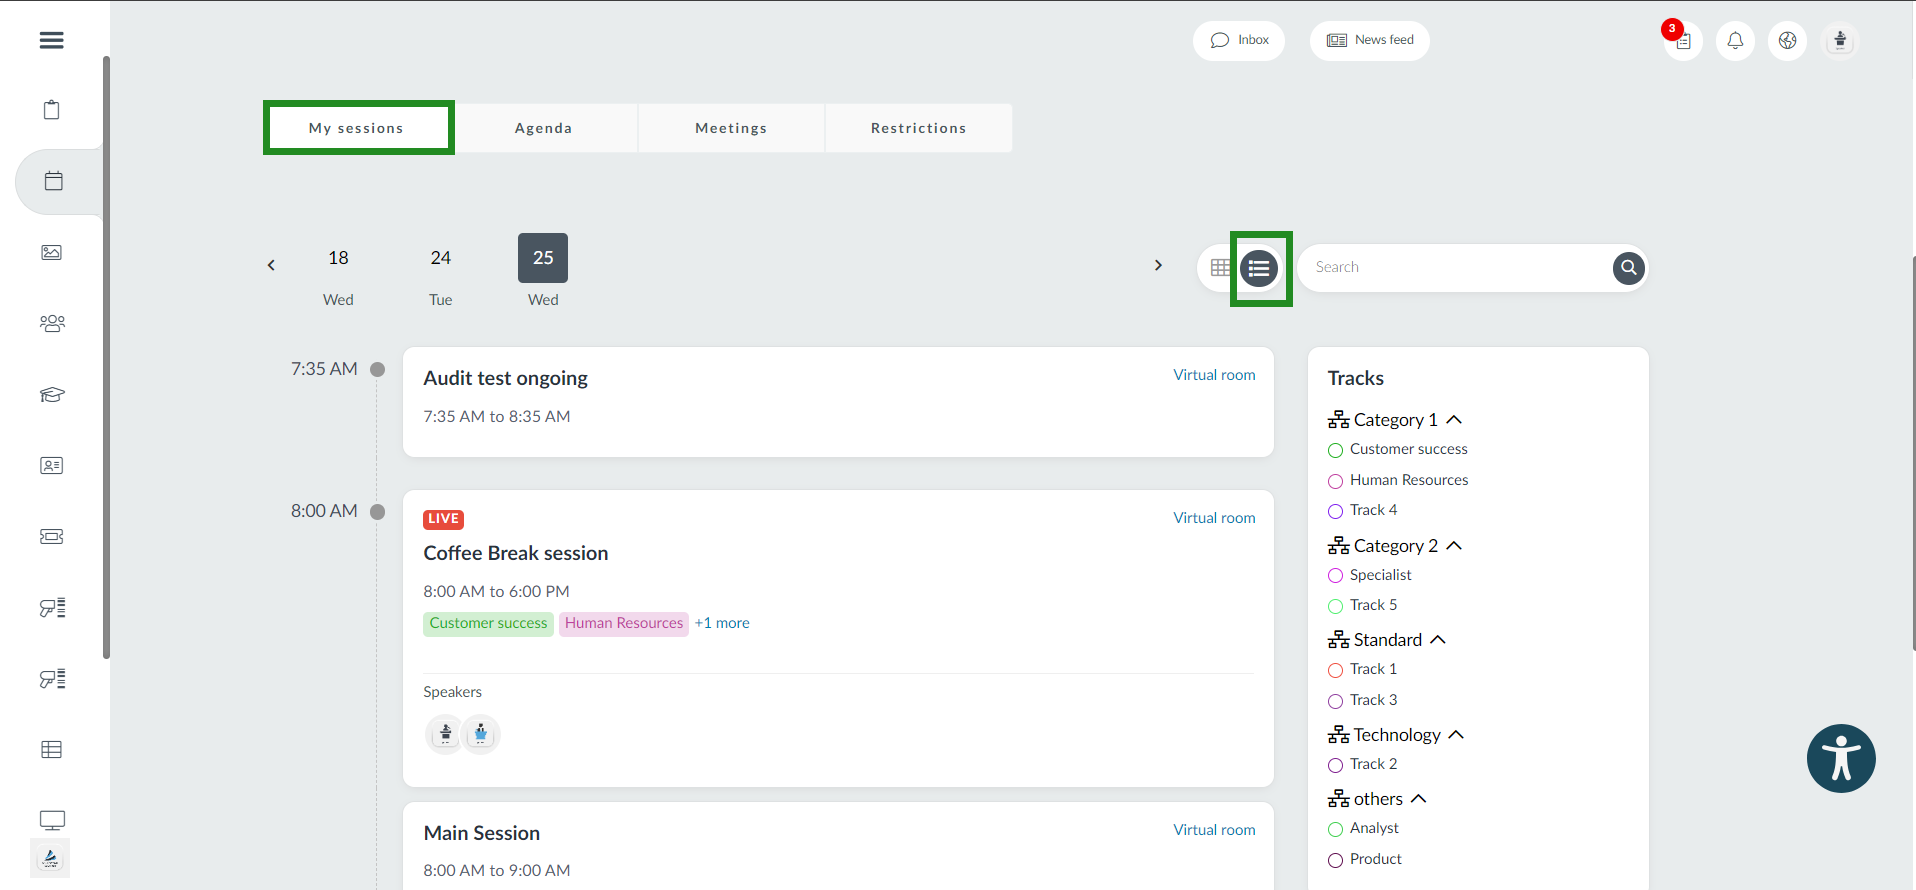
If you are a Presenter or a linked Speaker, you will have access to the activities you are presenting in through the My Sessions tab on the My Agenda page.
- Presenters will see all the activities of the event listed in this tab which they have access to.
- Linked Speakers will only see the activities they have been specifically linked to.
In this section, you can perform similar actions to those available in the Agenda tab, such as viewing details and interacting with activities.
To access an activity's room, simply click on the Virtual room button located on that activity's card.
By clicking on the Details button of an activity, you will be able to access more information about the activity. You can also perform various actions similar to those in the Agenda tab, including:
- Viewing and adding questions in the Questions field
- Viewing and adding comments in the Chat field in chat discussions.
- Viewing and answering polls in the Polls field.
- Pinning/unpinning the activity.
- Saving the activity to your calendar.
- Providing feedback on the activity.
- Viewing and uploading files that will be available within the activity.
If you are using the List view, the Details button will not appear on the activity's card.
Extract Speaker report
To extract an excel report of all your Speakers, simply click go to Event > Speakers, click on the Edit button, then press the Report button at the top left corner of the page. You will receive a message letting you know that your excel sheet is being processed and will be sent to your email once completed.

The report will contain information such as: speakerID, companyID, eventID, personID (if linked to an attendee), name, headline, image, email, social media links, speakerTags, etc.