In-store app approval on the Apple Store
Apps submitted to the Apple Store must undergo a review process to receive approval. After submitting your app for review, verify that you have fulfilled all requirements to ensure a smooth review process.
Creating a public event for approval
For an app to be approved on the Apple Store, a demo event must be created with adequate information and published. The event should have information such as event date and time, venue, cover, etc. This way, Apple can verify that your app is real and working.
Ensure that you add information to the following sections of your demo event:
Minimum requirements for your demo event
Below are some suggested minimum requirements for your demo event:
- Event Details: It is advised to enter the following information in the Event details page:
- Event address.
- Event cover.
- General description of your event.
- Set the status of your event to Published.
- Set to Visible to world.
- Contact information.
- Set a Reply-to email.
- Activities: The minimum number of activities you can add is 2.
- Speakers: The minimum number of speakers you can add is 2.
- Tags: The minimum number of tags you can add is 2.
- Live app tabs: It is recommended to keep the following live app tabs:
- Event information.
- Agenda.
- Speakers.
- Photos - add at least 5 photos from your past events.
- Content Feed - post at least 2 messages.
- Check-in.
- Access control.
- Custom “Terminate account” tab.
- Voucher.
- Custom Website: We advise your custom website contains the following sections:
- Event description.
- Speakers.
- Agenda.
- Registration form.
- Map.
- Photo Gallery (at least 5 photos from past events).
Creating a test account for review
For your app to be approved, it is necessary to create a test account which allows Apple reviewers to access and test all the features of your app that are behind the login screen.
To create a new user account, click on People > Attendees > Add person.
For example:
Name: Ash
Email: samplemail@apple.com
Password: xxxxxxxx
To insert the credentials on App Store Connect, complete the following steps:
- Sign in to App Store Connect.
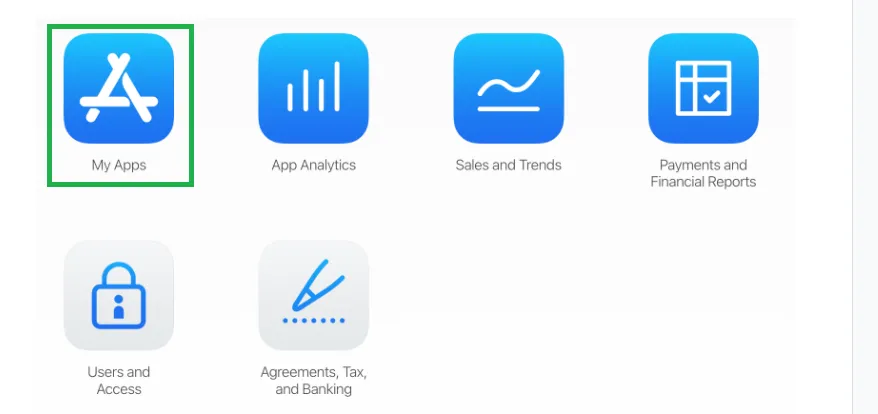
- Click on My Apps and select the app you want to submit for review.
- In the app's details page, click on App Store (or Prepare for Submission if you’re submitting a new version).
- Scroll down to the App Review Information section.
- In the Sign-in Information field, provide the test account credentials you created.
- Double-check all the information you’ve entered, ensuring it’s accurate and complete.
- Click Submit for Review to send your app to Apple for review.
Creating a custom menu for account termination
Apple requires all apps that support account registration to also support account termination. As a result, adding an account termination option to your app is essential.
To create a custom menu that allows account termination, complete the following steps:
- Navigate to Settings > Tabs.
- Click the Live App button on the top left corner of the screen.
- Click the New Item button. A pop-up box will appear.
- Enter the title for the menu (for example: Terminate account) in the Item title box.
- Enter the link to the InEvent Account termination page
https://inevent.com/terminate.phpin the Item link box. - Click Create to add the custom menu.
Requesting Multicast Networking Entitlement for badge printing
Using the official InEvent iOS app, you can create and design badges, define specific badges for groups of attendees, and control attendee check-ins as well as print attendee badges during in-person events.
In order to use the iOS badge printing feature with your white-label app, it is necessary for you to request the Multicast Networking Entitlement for your app to Apple.
To request the Multicast Networking Entitlement for your app, navigate to Apple's Multicast Networking Entitlement Request page and log in using your Apple Developer credentials. Then, submit a request for the following entitlements:
<key>com.apple.developer.networking.wifi-info</key>
	<true/>
	<key>com.apple.external-accessory.wireless-configuration</key>
	<true/>
	<key>com.apple.developer.networking.custom-protocol</key>
	<true/>
	<key>com.apple.developer.networking.multicast</key>
	<true/>