Magic link
 Updated 4 weeks ago
by
Caleb Kotey
Updated 4 weeks ago
by
Caleb Kotey
- Generating a magic link
- Removing the magic link from your confirmation email
- Magic link request email
- Magic links duration
- Sharing the magic link with other people
- Finding the magic link that was sent out
- Global admins using the magic link
- Using the magic link to direct to a page other than the Virtual Lobby
Participants have a few options on how to access the Virtual Lobby, the simplest one is by using the magic link. The magic link is a unique link that allows attendees to join the Virtual Lobby without having to go through the login page. Once they click on their magic link, they will be taken directly into the Virtual Lobby.
Generating a magic link
First, you will need to access the email editor functionality and then add the magic link to your emails.
Accessing the email editor
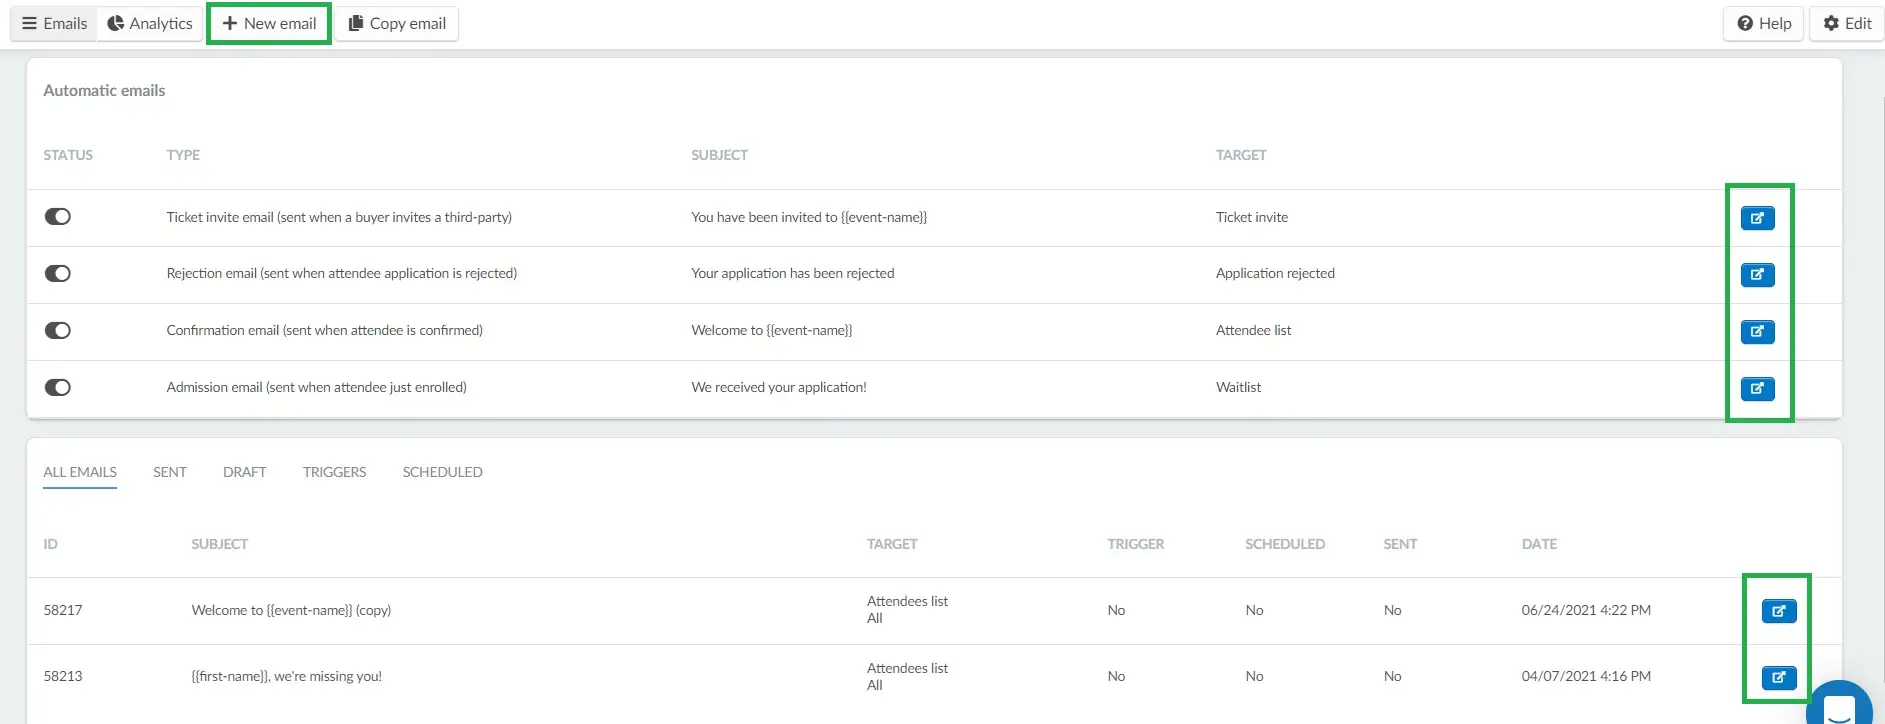
To generate a magic link, press Marketing > Communication > Email Creator. On this page, you can either select an existing email you wish to add the magic link to by clicking on the blue button on the right-hand side, or you can create a new email.
Adding the magic link or its hyperlink to an email
You can either have the magic link being displayed on the body of the email, or you can have a hyperlink containing the magic link for each participant.
Dynamic content: adding the link itself to the email
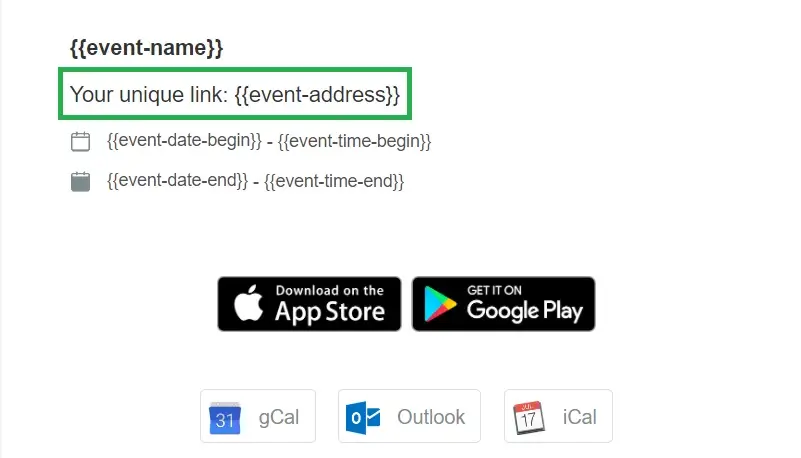
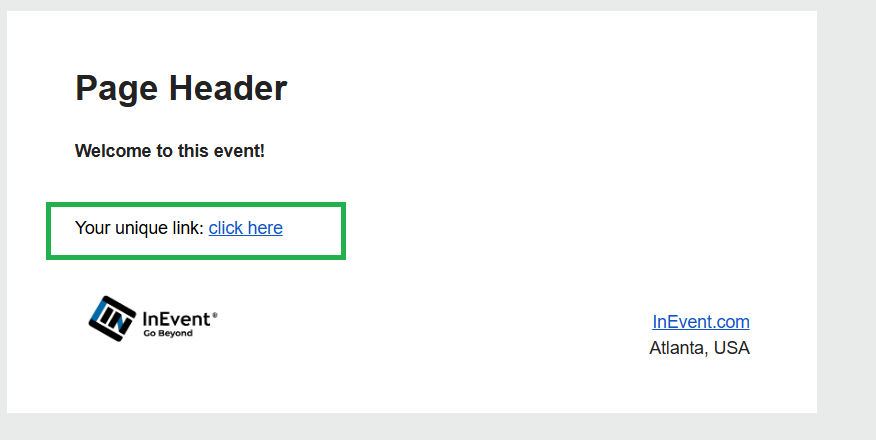
By default, in your online events, the dynamic content called Your unique link: {{event-address}} will automatically become your exclusive, non-transferable link to join the Virtual Lobby.
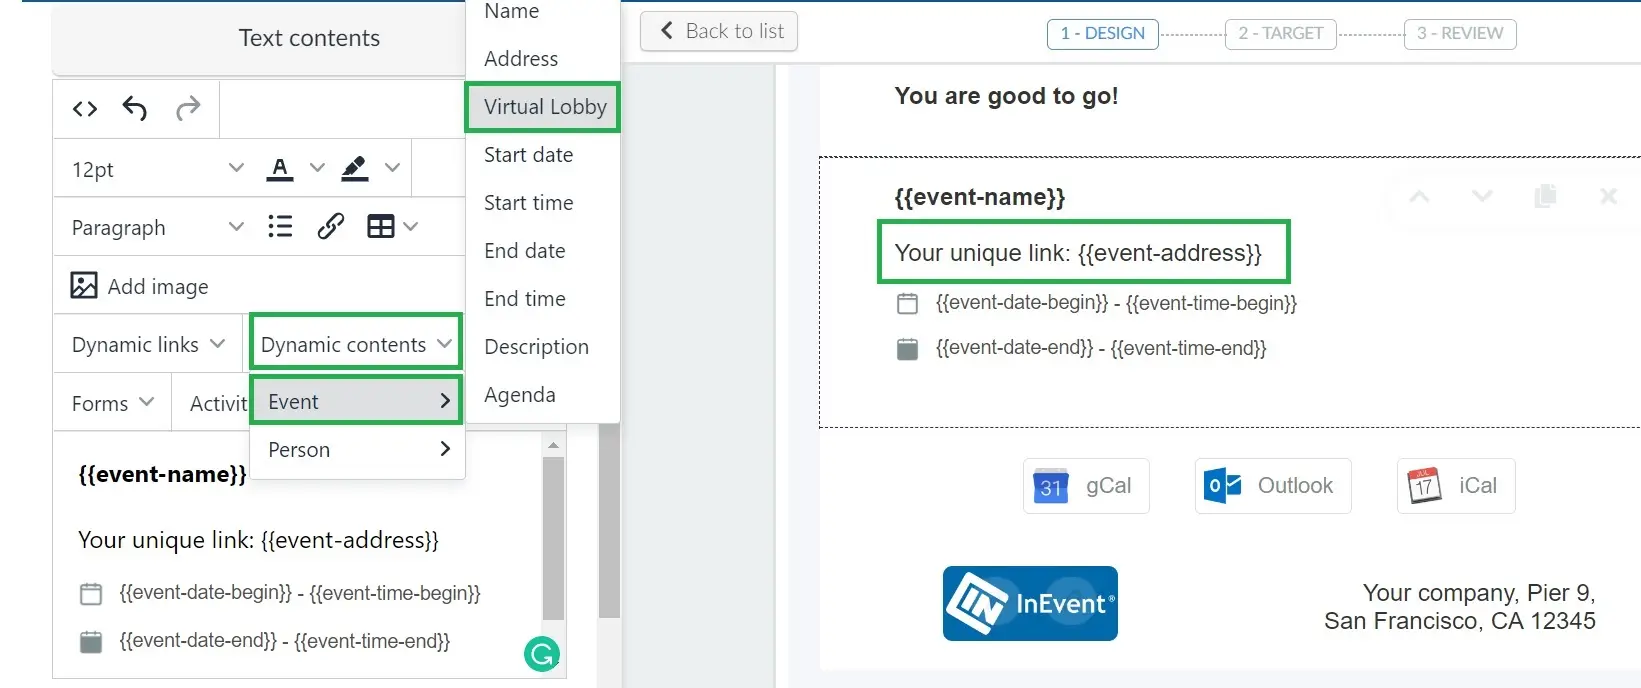
To add the dynamic content called containing the magic link to an email, click on your email information and an edit box will open up on the left side. Then, press Dynamic content > Event > Virtual Lobby.
Now, you should see Your unique link: {{event-address}} on your email, as shown in the image below:
By doing so, the participant will receive an email with the magic link attached to it, as shown below:
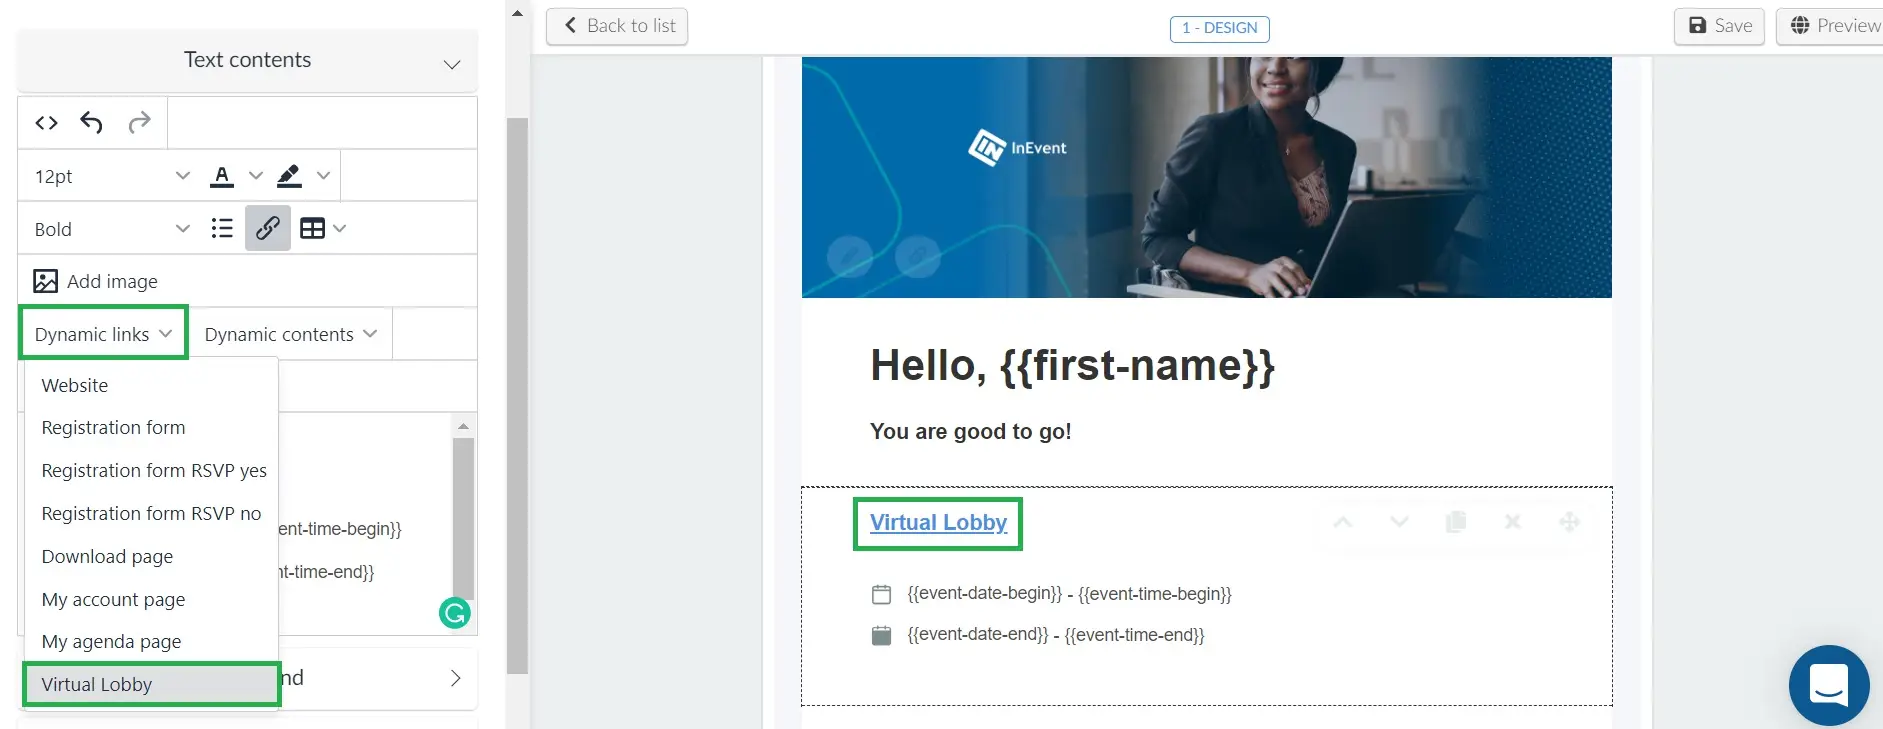
Dynamic link: adding a hyperlink to the email
To add the Virtual Lobby dynamic link to an email, click on your email information and an edit box will open up on the left side. Then, press Dynamic links > Virtual Lobby.
Now, you should see Virtual Lobby hyperlink on your email, as shown in the image below:
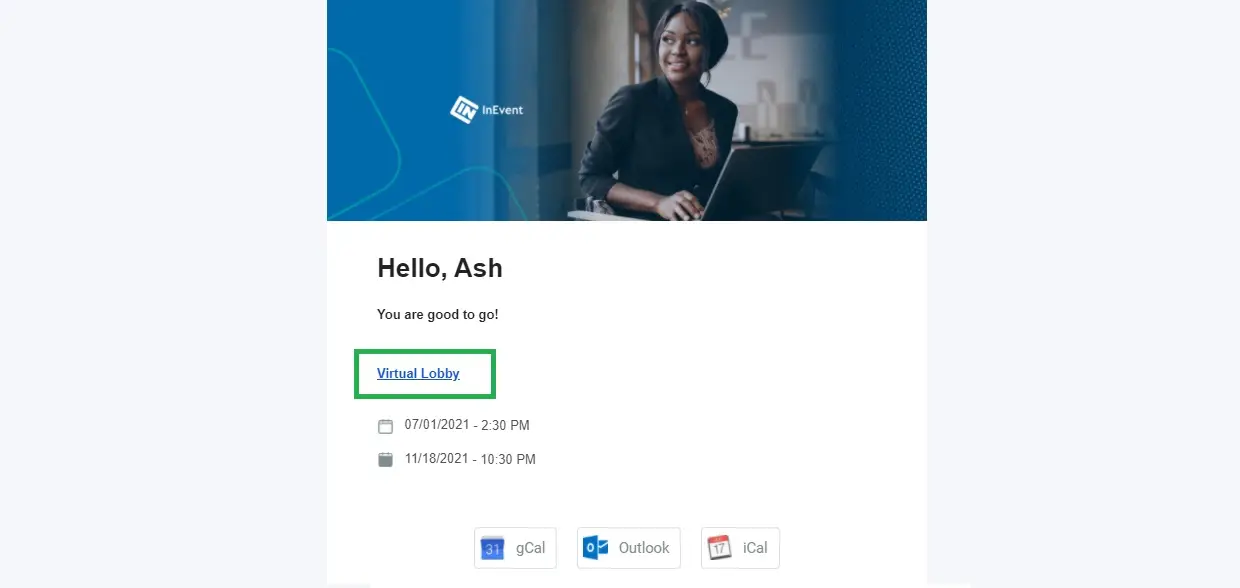
By doing so, the participant will receive an email with the hyperlink containing the magic link displayed on it, as shown below:
Removing the magic link from your confirmation email
You can disable the magic link by removing {{event-address}} from the email.
In case you remove the magic link, make sure to add the user credentials (password and username) to the confirmation emails so your attendees can still join the Virtual Lobby.
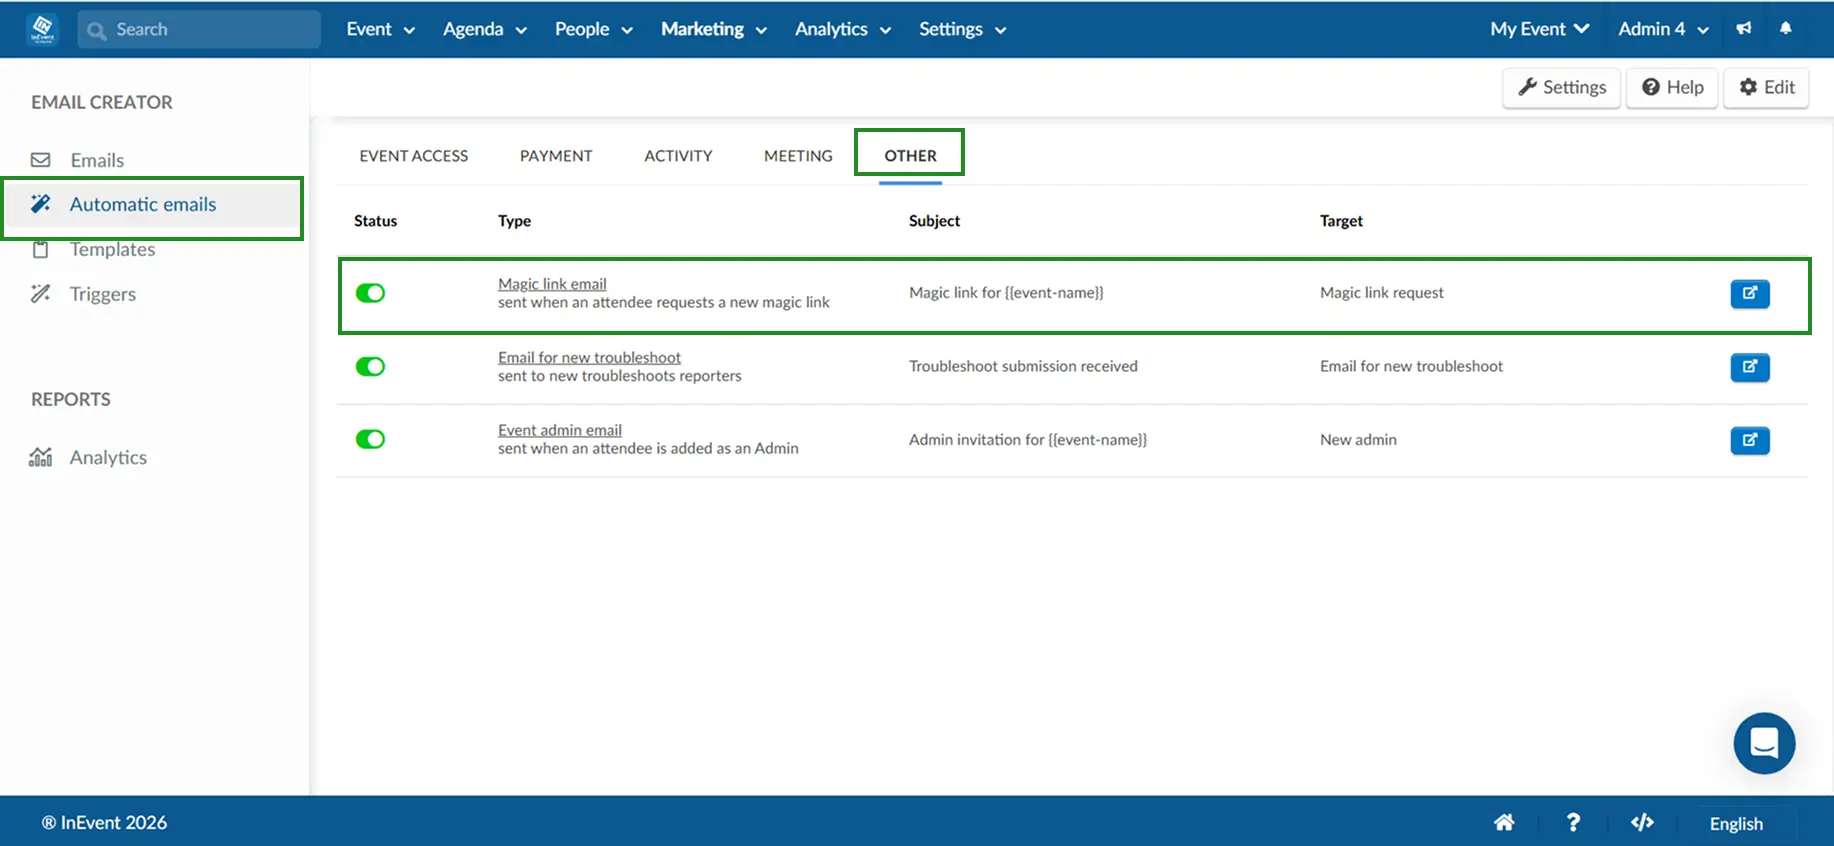
Magic link request email
When attendees request a new magic link, an automatic email containing a new access link is sent to their email address.
Event administrators can enable and customize this email by navigating to Marketing > Communication > Automatic emails and scrolling to the Others section, where the Magic link request email template is available.
Once customized, attendees who request a new magic link will receive the updated email content.
Magic links duration
They last until you generate new ones.
There are two cases that will force this situation:
- If the magic link isn't used after 30 days from the moment it was generated;
- If the participant logs off from the Virtual Lobby.
In both situations, the participant needs to follow the steps described below.
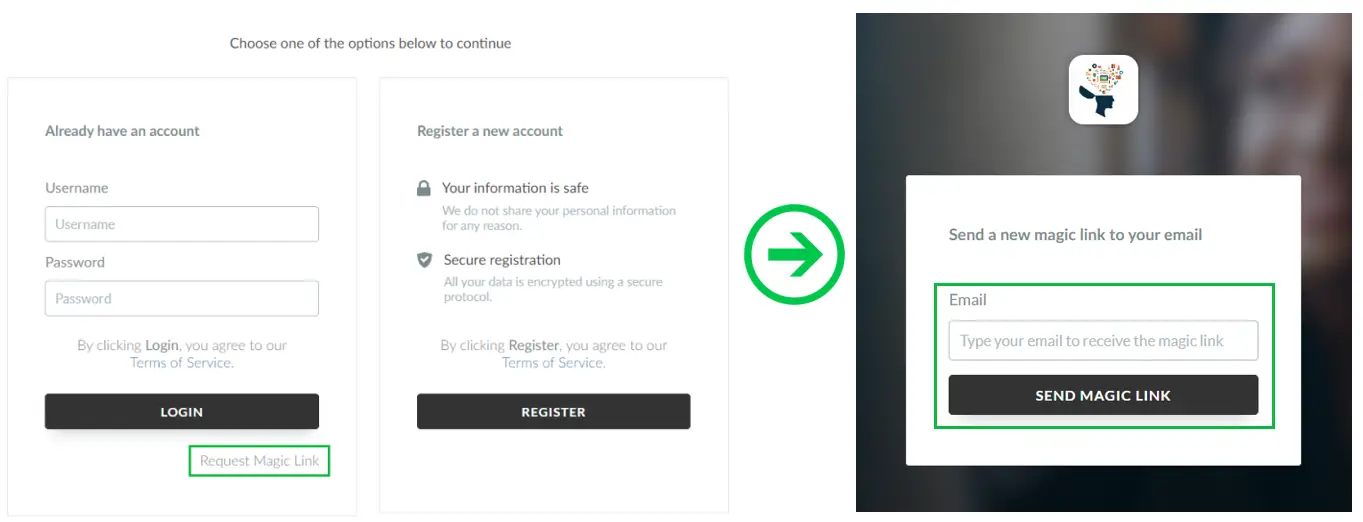
Invalid magic link
Once an attendee logs off instead of just closing the tab from the Virtual Lobby, their unique link will become invalid and instead of being taken to the Virtual Lobby after pressing their unique link, they will be taken to the login page.
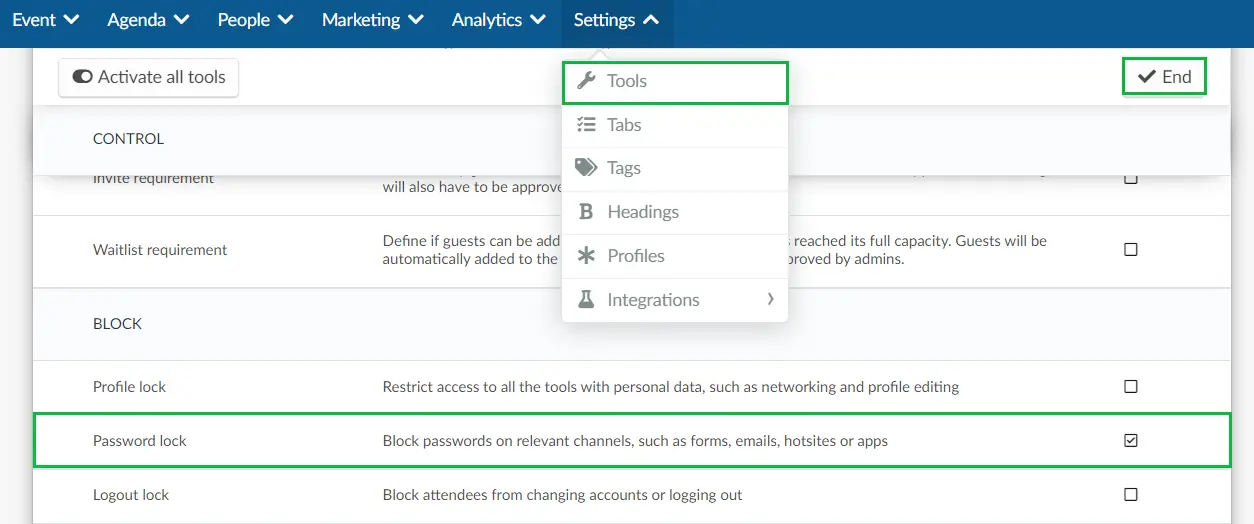
To allow attendees to request a new magic link, you will need to enable password lock. To do this, go to Settings > Tools > Edit and under the Block section, tick the Password lock checkbox. Press End to save changes.
Now, your attendees will see the Request magic link option on the login page. They will need to click on it and a new page will open. They will need to type their email address and press Send magic link for a new unique link to be sent to their email.
In case you'd like to prevent attendees from logging out so they do not invalidate their unique link, make sure to enable the Logout lock.
To do so, press Settings > Tools > scroll down until the Block section and enable Logout lock.

Sharing the magic link with other people
The magic link is a unique, exclusive, and non-transferable link.
Finding the magic link that was sent out
To an attendee
If you need to find the URL for the Magic Link that was sent out to one of your attendees, please follow the steps below:
- Go to People > Attendees
- Select the Attendee you wish to
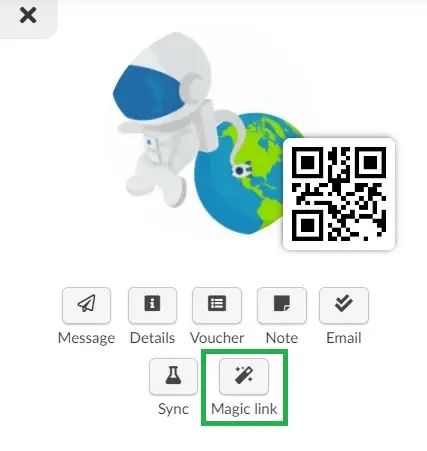
- Press the button that says Magic link and the link will be copied so you can paste it and re-send it to the attendee.
To the Speakers
You can follow the same steps above or you can send a direct link to the activity they will be speaking at, which includes the magic link. There are two different ways to do so:
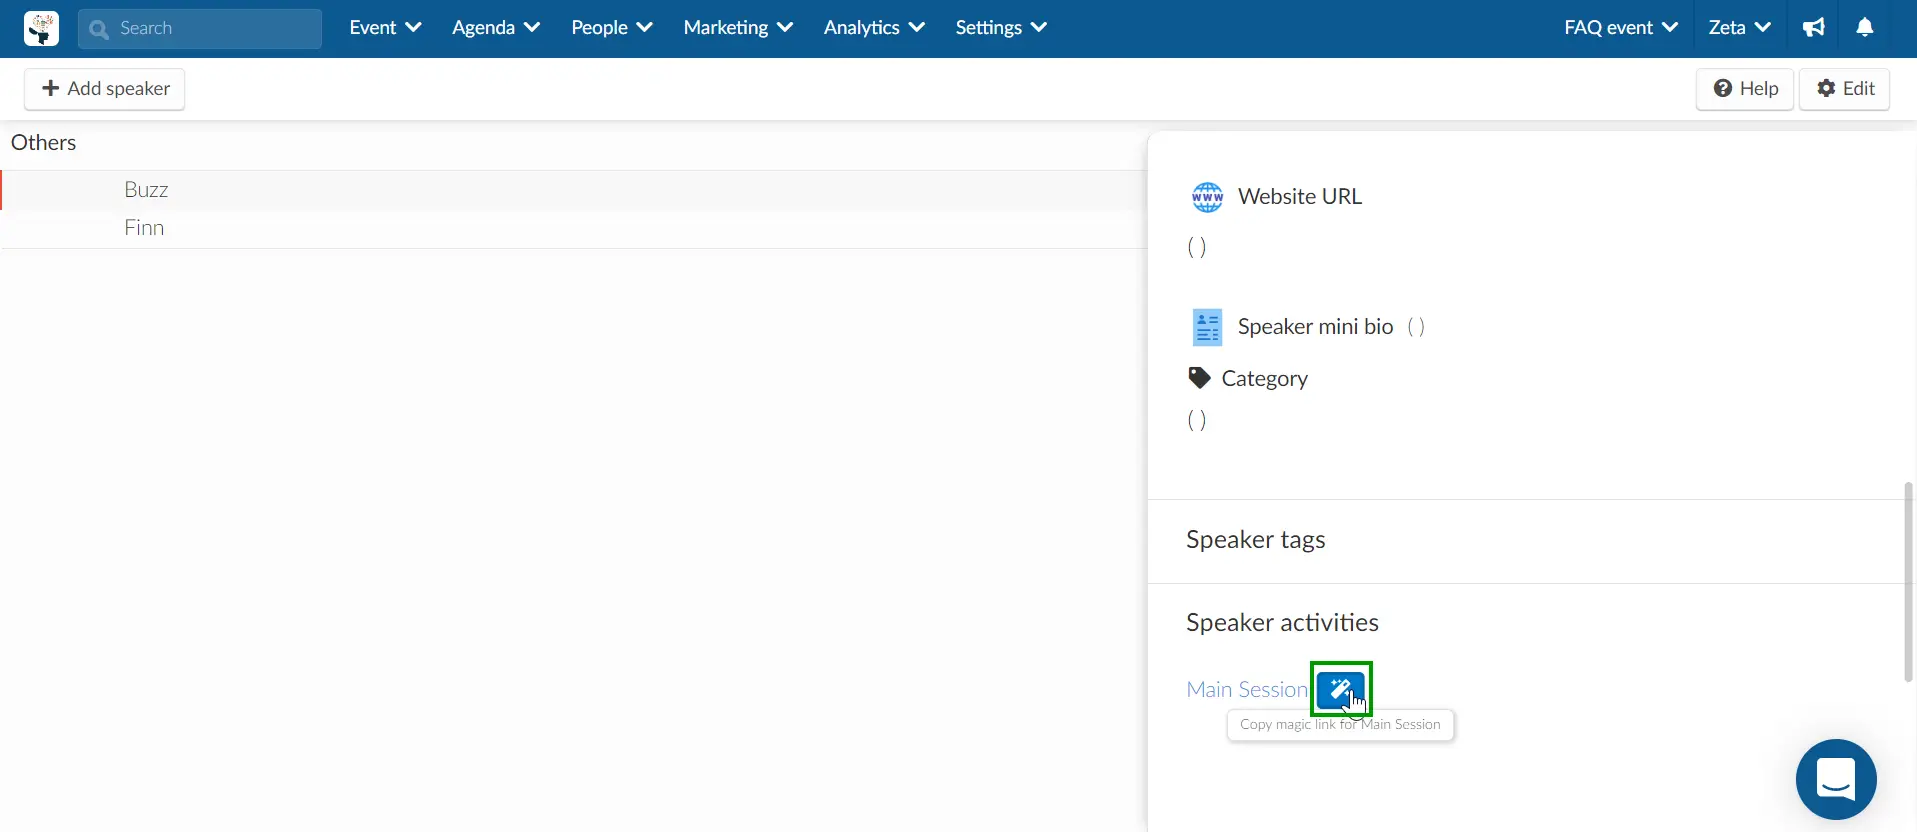
- Go to Event > Speaker
- Select the Speaker you wish to send the link
- A new tab will open on the right, scroll down to the bottom until Speaker activities, click on the magic wand icon.
Or you can go to Agenda > Activity > select the activity and click on Speaker:
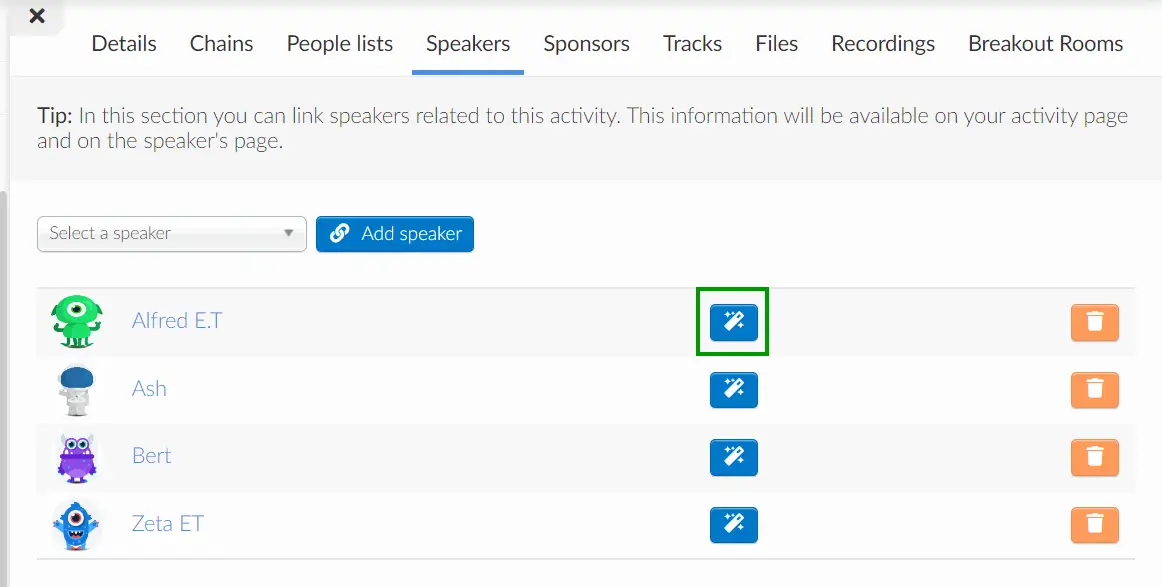
The link will be copied so you can paste it and re-send it to the Speaker!
Global admins using the magic link
If global admins use the magic link to access the platform, they will only have access to the Virtual Lobby and not the back-end. For further information, refer to the Login to the InEvent Platform: company administrators article.
Using the magic link to direct to a page other than the Virtual Lobby
By default, the magic link takes the users to the Virtual Lobby but if you prefer to redirect the users to the My Agenda page, for example, follow the steps listed below:
- First, you need to get the link to the destination page you wish the participants to land on when they click on the magic link sent by email. For example, the URL of the My Agenda.

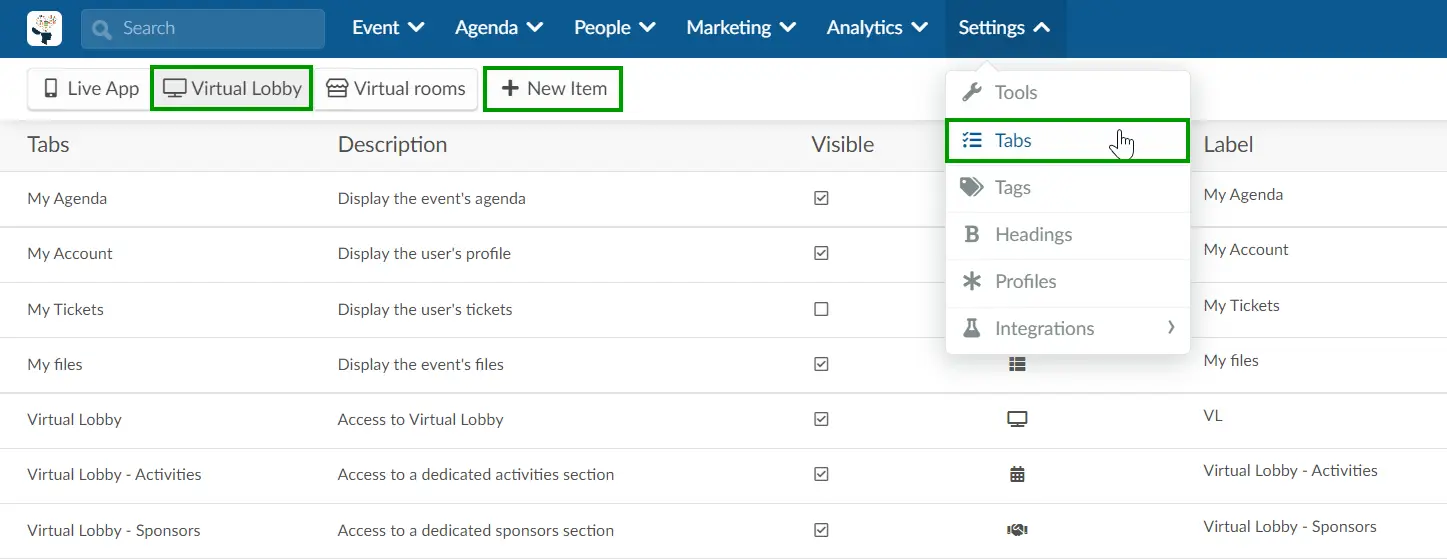
- Then create a new tab for the Web, by going to Settings > Tabs > Virtual Lobby. And press +New Item
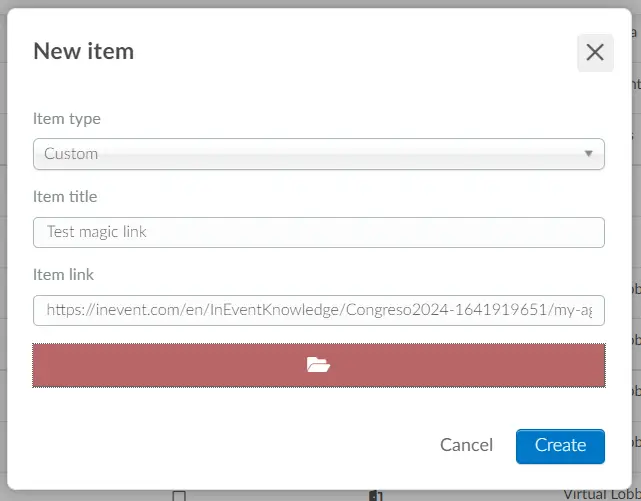
- With the new window open, enter the Item title and the Item link (the URL of the destination page you saved in the first step).
- Click on the new tab created, click on Edit and make sure you select the option Embed - Yes
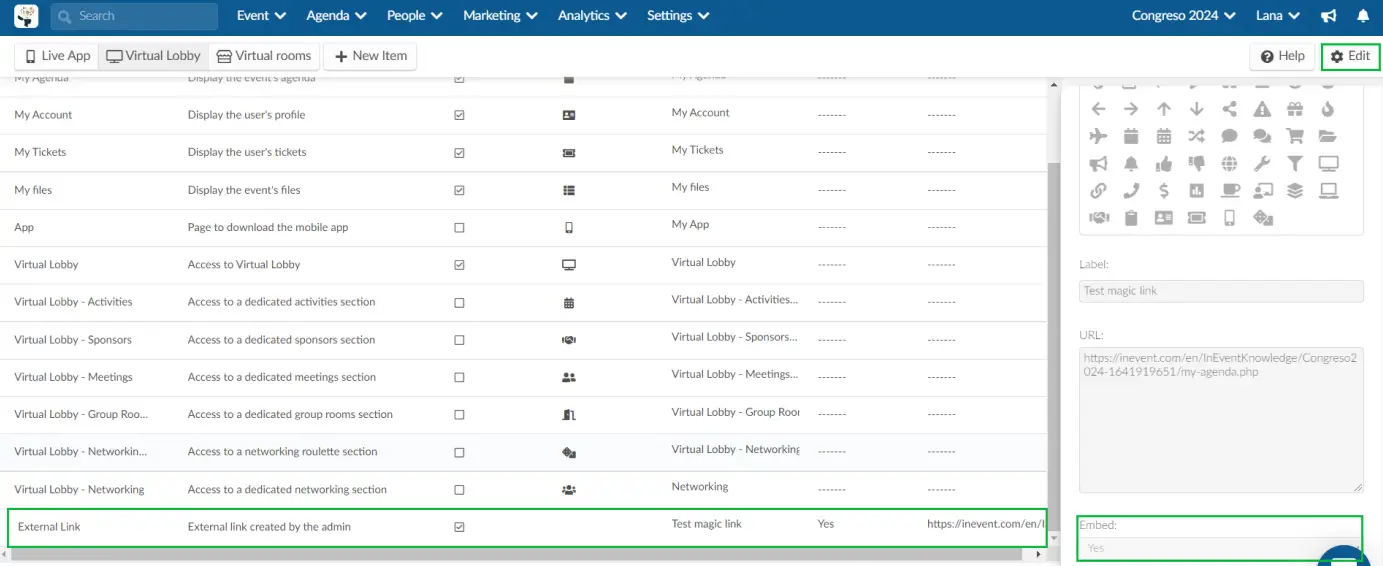
- Go back to the Virtual Lobby and open this new tab that was created and copy the part of the URL starting from: tab-embed.php as it shows in the image below:

- Now go to Marketing > Communication > Email creator. Click on the blue button to customize the Confirmation email. Remove the Your unique link: {{event-address}} and instead insert the Dynamic link > Virtual Lobby. And with the right click of the mouse, select the option link

- Then you swap out the live.php and replace it with that part of the URL mentioned above (tab-embed.php?eventTabID=1501049). You will see two question marks (?) in the new URL, replace the second one with &
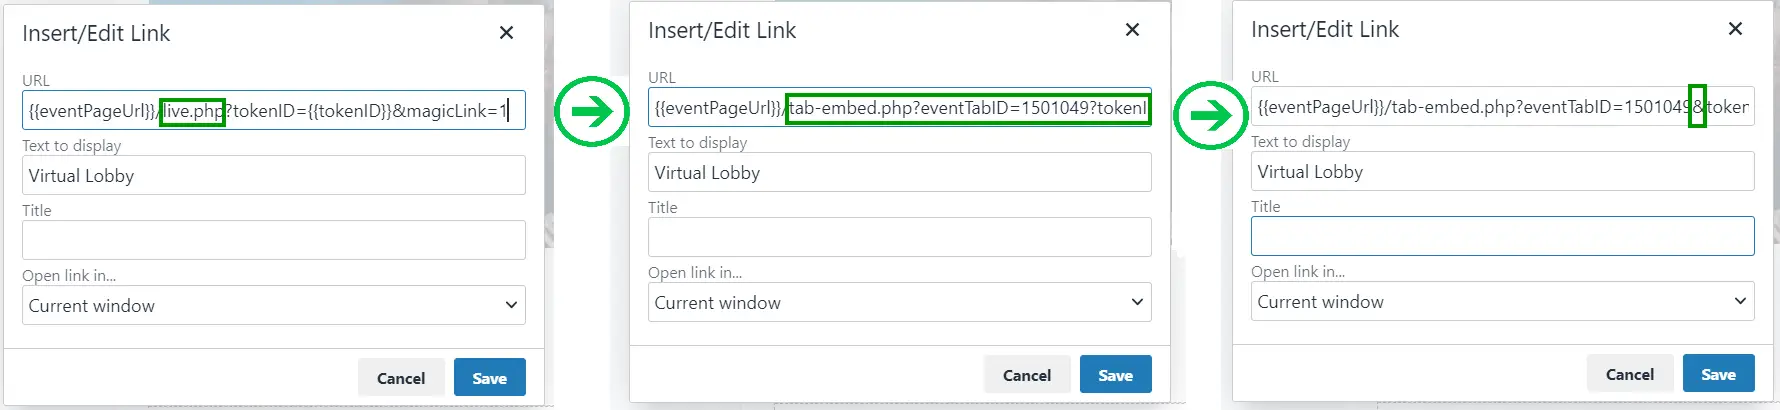
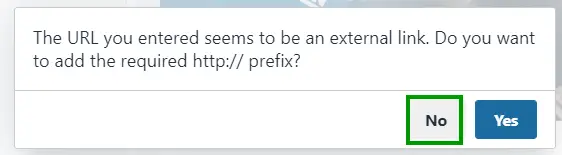
The URL will look like this:
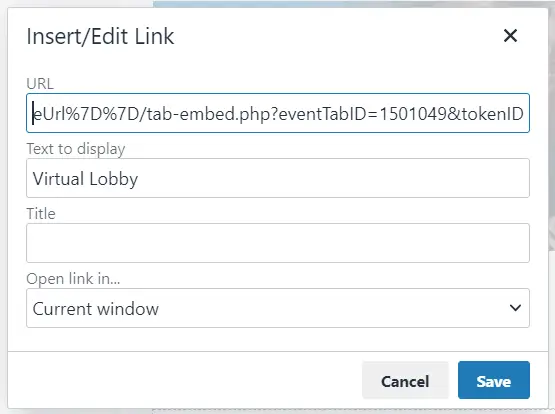
- Once you click Save, a new pop-up window will appear asking if you want to add http:// prefix, select NO. You are all set and good to go!