Networking guide for event organizers
 Updated 3 months ago
by
Faisal Durrani
Updated 3 months ago
by
Faisal Durrani
This article aims to teach you, the event organizer, to set up networking options that enable interactions between attendees within the Virtual Lobby. These include:
Enabling the Networking feature
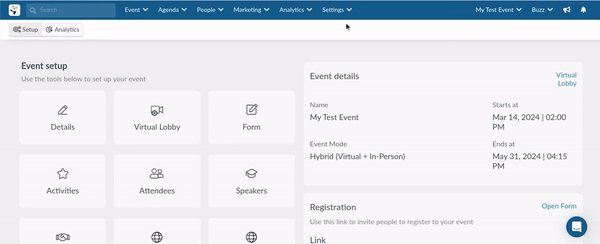
To enable this option, go to Settings > Tools and find Networking under the Live section. Click on Edit, and toggle on the corresponding button to enable the feature.
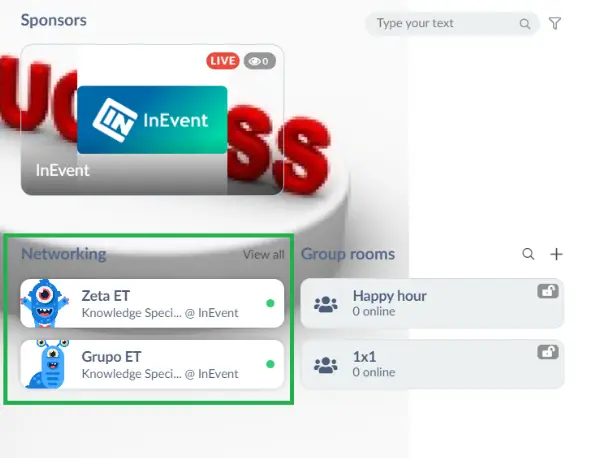
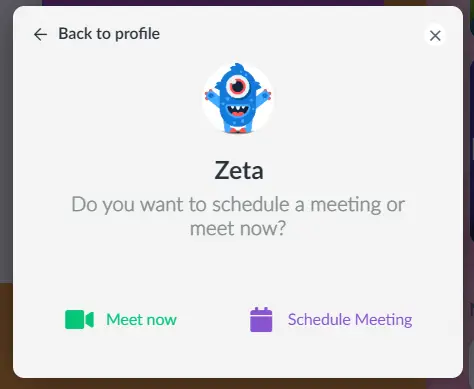
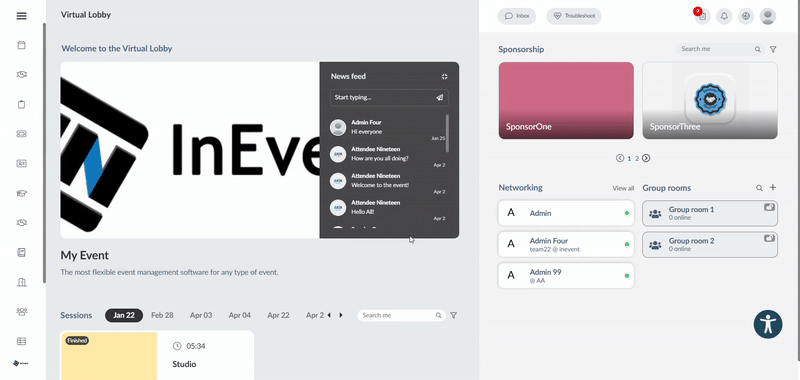
If you activate Networking, a list of the attendees who are present at your event will be displayed on the main page of the Virtual Lobby and they will be able to send each other video requests.
Meetings
After following these steps your attendees will be able to have instant meetings or schedule a meeting for later.
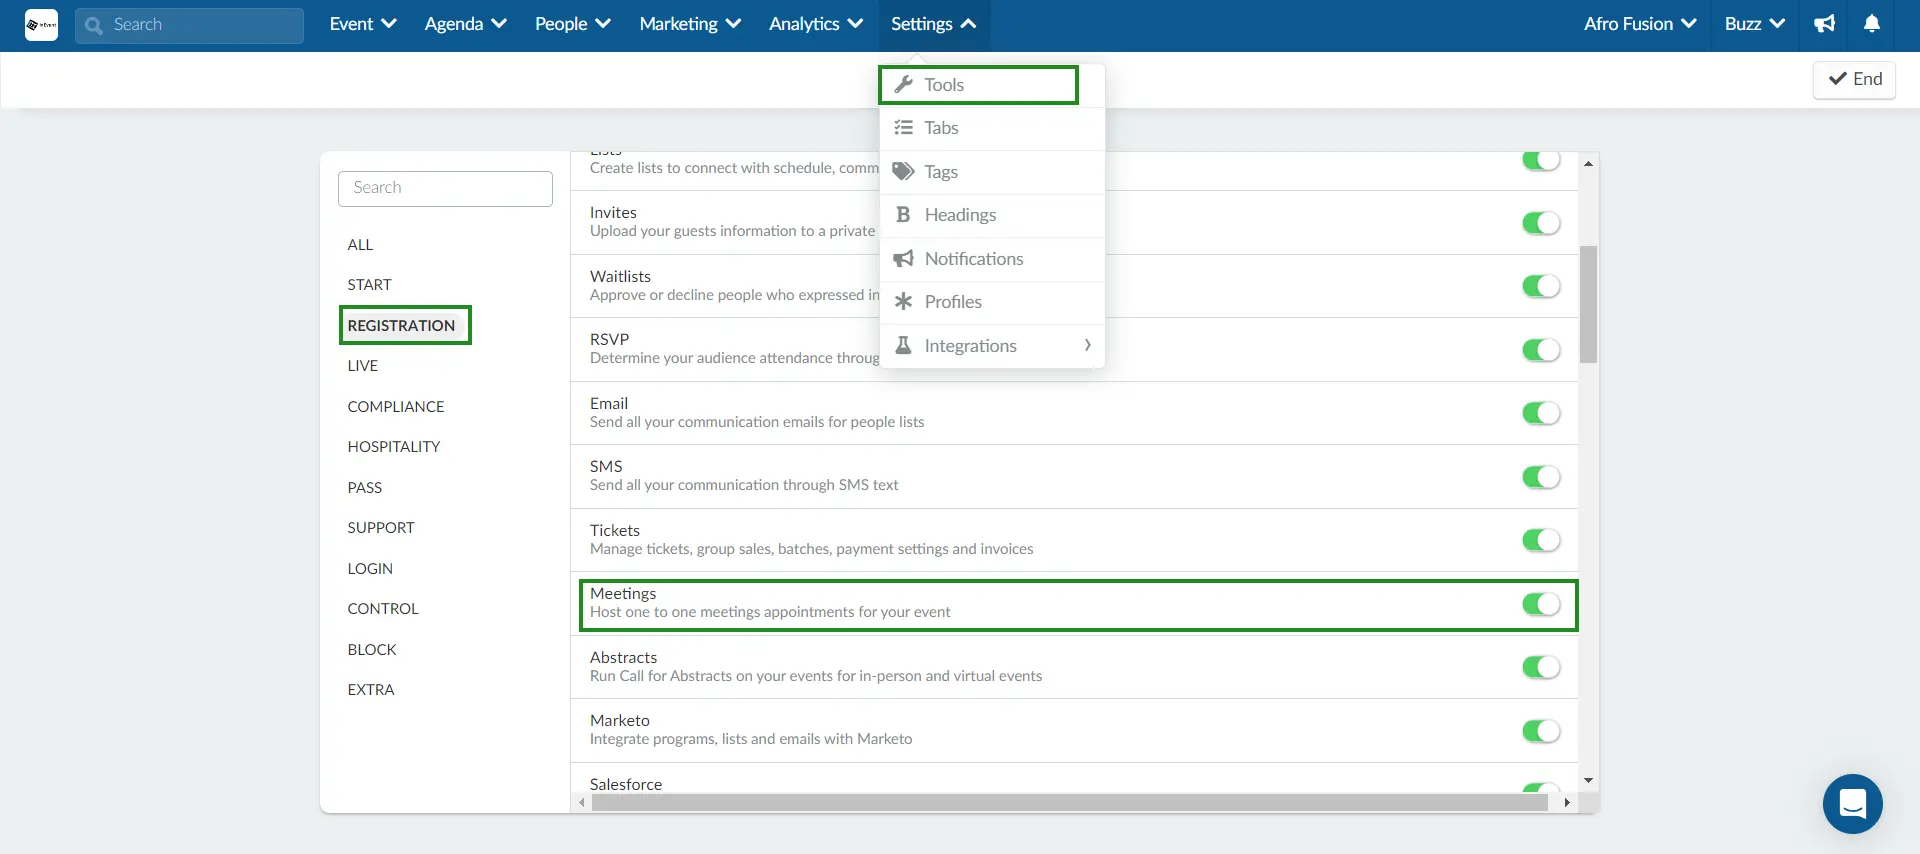
Your attendees will be able to see the Schedule Meeting option only if you enable the Meetings feature for the Virtual Lobby. To do so, go to Settings > Tools > select the Registration section > press Edit and toggle on the Meetings button. Press End to save changes.
Group rooms
Creating group rooms in the platform (backend)
If you would like to create a networking space for your attendees to join, you can create a group room.
To do so, follow these steps:
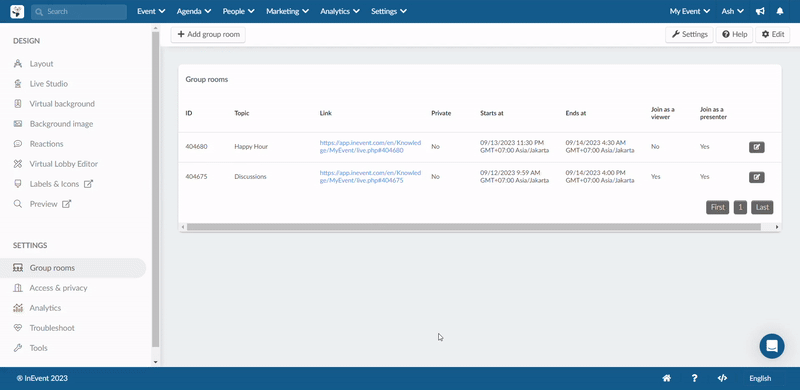
- Go to Event > Virtual Lobby > Group rooms.
- Click on the + Add group room button at the top left corner of the page.
- Enter the necessary details in the pop up that appears:
- Topic: The discussion topic of the group room.
- Is Private?: Toggle the button on to set make the group room private or toggle it off to make it public.
- Start at: Set the start date of your group room (optional).
- End at: Set the end date of your group room (optional).
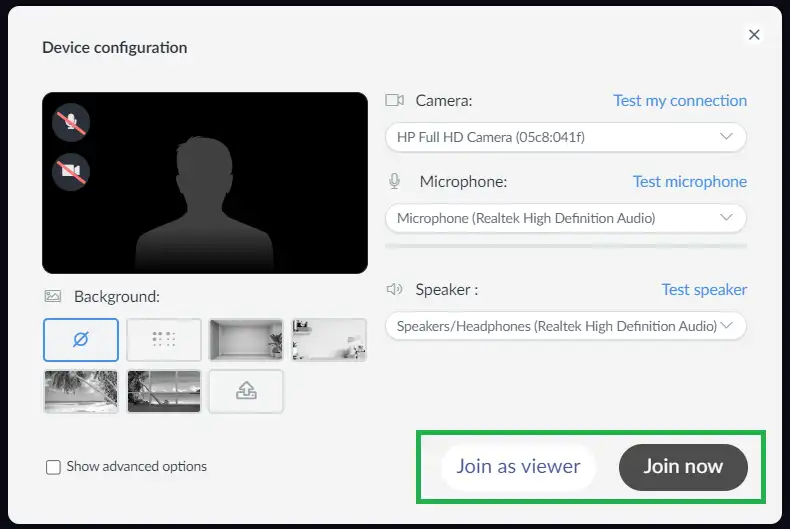
- Join as a viewer: Toggle this button off if you want attendees to be able to join only as viewers - without camera and microphone.
- Join as a presenter: Toggle this button off if you want attendees to be able to join only with presenter permissions - camera and microphone enabled.
- Click on Create.
If both the Join as a viewer and Join as a presenter options are enabled, attendees will have the choice to join as a presenter (camera and microphone enabled) by clicking on Join now or as a a viewer (without camera and microphone) by clicking on Join as viewer.
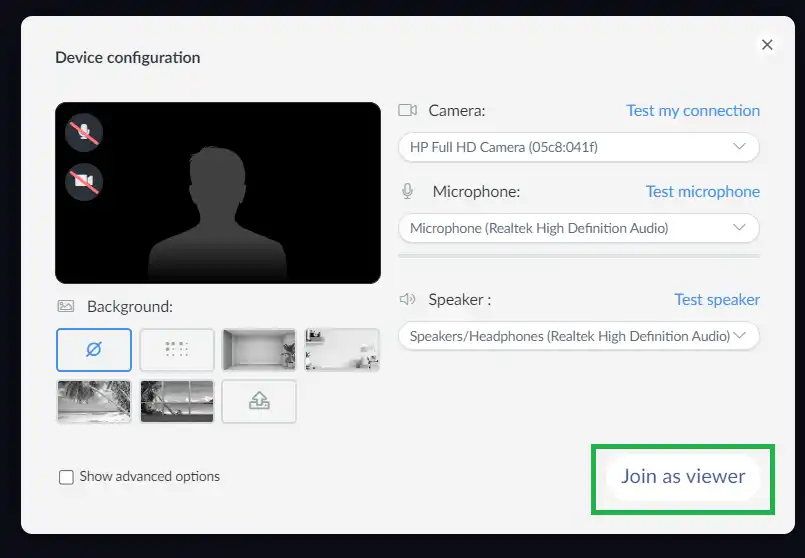
If only the Join as a viewer option is enabled, attendees can only join as viewers - without camera and microphone access. They will only see the Join as viewer button when joining the room. However, other presenters can invite them to speak once inside the room, which will allow them enable their camera and microphone.
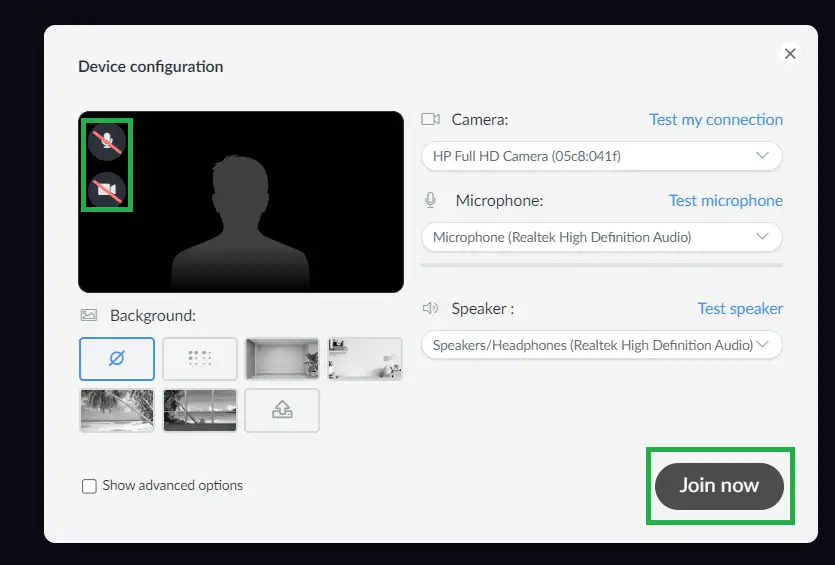
If only the Join as a presenter option is enabled, attendees can only join as presenters with their camera and microphone enabled. They will see only the Join now button when entering the group room.
All group rooms that have been created will be visible:
- In the group rooms section of the Virtual Lobby where an open or closed padlock on the room will indicate if this is a public or private room.
- In the group rooms tab in the Virtual Lobby where you will find group rooms displayed with a table layout. To learn how to customize tabs in the Virtual Lobby, click here.
You will be able to have up to 17 people on camera in a group room. To learn more about this limit, click here.
Editing group rooms
You can edit group rooms created in the platform. To do this, follow the steps below:
- Click on Edit at the top right corner of the Group rooms page.
- Click on the blue button beside the group room you wish to modify. and a new window will appear.
- Make the modifications as you wish. You can modify the following:
- The group room's name.
- Start and end date.
- Toggle on or off the Join as a viewer or Join as a presenter button.
- Click on Done once done to save your changes.
Deleting group rooms
To delete the group rooms created in the platform follow the steps below:
- Click on the Edit button at the top right corner of the Group rooms page.
- Tick the checkbox(es) beside the group room(s) you wish to delete.
- Click on the Remove button at the top right corner.
- Click on the Remove button again in the confirmation pop-up that appears.
- Click End to finalize your changes.
Creating group rooms in the Virtual Lobby
To create a group room in the Virtual Lobby, refer to the Networking: instructions for participants article.
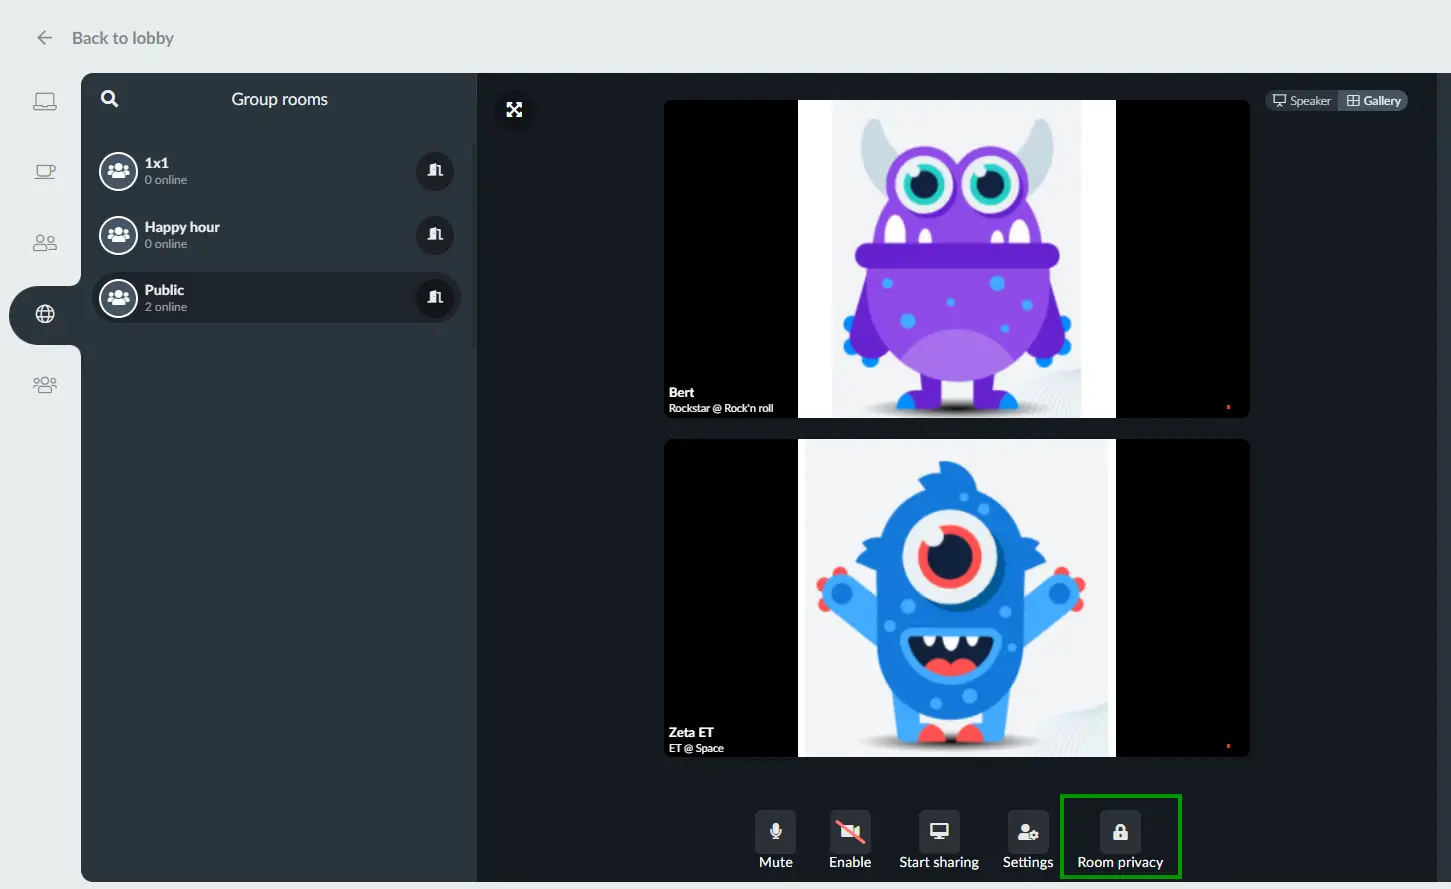
Switching from public to private
After creating a public group room, you can still make it private even if you are already inside the room by pressing the Room Privacy button, as shown in the image below:
A pop-up message will appear asking to confirm the action:
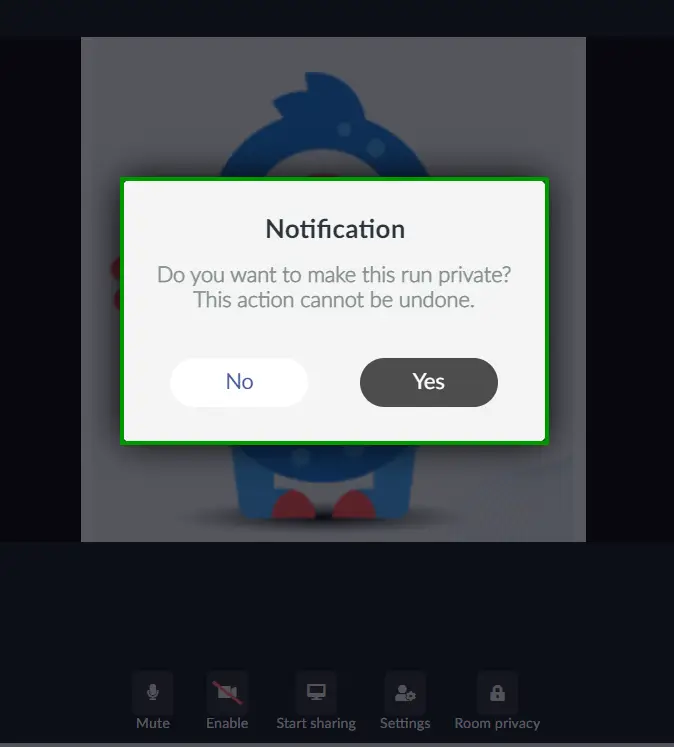
Once again, when confirming the action, only you who created the group room will see the change at the left Group rooms menu:
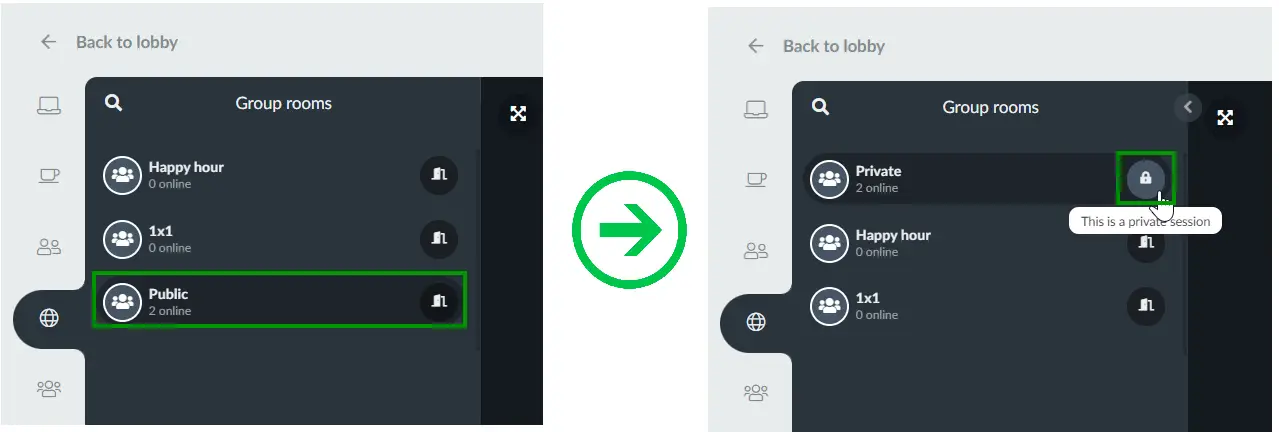
For the other people in the room, the group room that became private will no longer be displayed on the list of Group rooms at the left menu same as shown above, it will simply 'disappear' from the list.
Accessing group rooms after the event ends
You can prevent users from accessing group rooms after your event has reached its end date by disabling the Files and recordings after event date tool. When this tool is disabled, users will no longer be able to enter or view any rooms once the event ends, even if the rooms were originally set to stay open post-event.
To disable the tool:
- Navigate to Settings > Tools at the event level.
- Select the Block section.
- Locate the option Files and recordings after the event ends.
- Toggle the button off to disable access.
- Click End to save your changes.
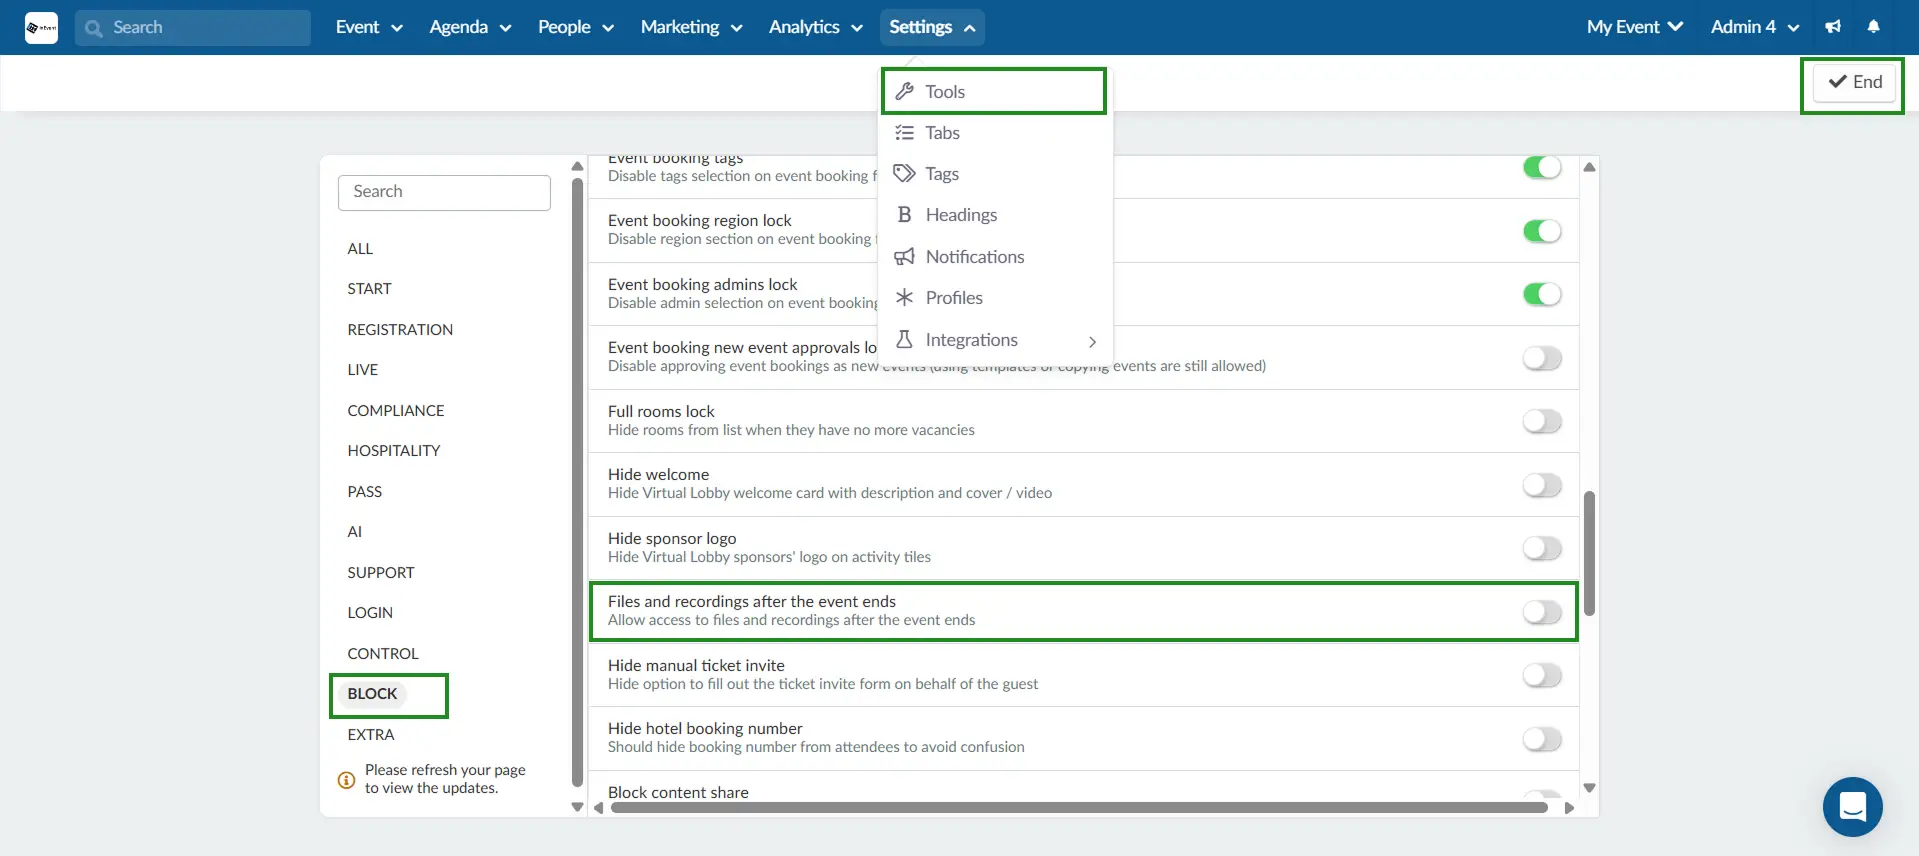
Once disabled, this will prevent users from accessing the group room sessions.
Speed Networking
Using the speed networking, your participants will be able to engage in 1x1 meetings randomly assigned.
Networking via the mobile app
To learn more about networking via the mobile app, refer to the Networking via Mobile app article.
Tabs
If you wish to have tabs for Networking, Group Rooms, Meetings and Speed Networking in the Virtual Lobby, go to Settings > Tabs and click on Web app. Then, make sure the tabs Virtual Lobby - Networking, Virtual Lobby - Group Rooms, Virtual Lobby - Meetings, and Virtual Lobby - Speed Networking are set to Visible.
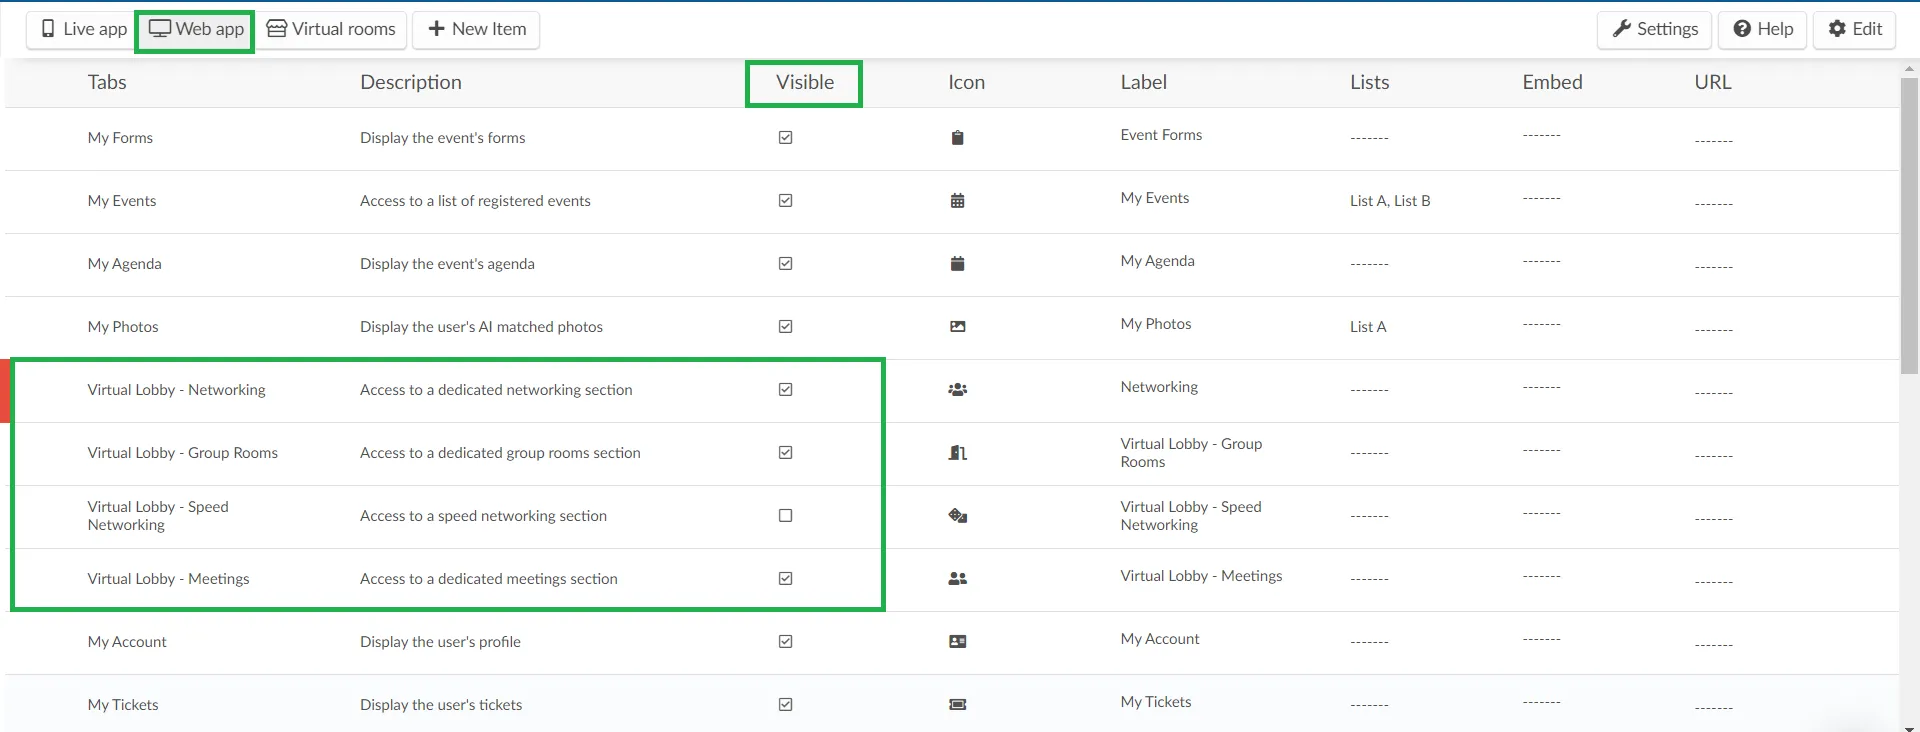
To edit an existing tab, you will need to click the Edit button in the top right corner. Next, click on the existing tab you wish to edit and a window will open to the right. Here, you have the option to edit the name of the tab in each language and its icon. You can also change the order of the tabs. Refer to the Tabs article for more details on this.
Enabling AI Networking
The AI Networking is a chat-based feature that helps attendees connect with the most relevant people during your event. It analyzes interests and profiles, suggests meaningful matches, making networking more efficient, engaging, and valuable. This ensures participants spend less time searching for connections and more time building relationships.
To enable the AI Networking feature, follow the steps below:
- Navigate to Settings > Tools.
- Select the AI section.
- Toggle on Networking AI to activate the tool.

To enable the tool at the company level:
- Go to Company > Account > Tools.
- Select the AI section.
- Toggle on Networking AI to activate the tool.
- Return to the event settings and repeat the event-level steps above.

Once enabled, attendees will see the AI Networking option on their Networking tab and can begin connecting with relevant personnel. To learn more about how attendees can use this tool, refer to our Networking: Instructions for participants article.

Privacy Restrictions
The privacy restrictions feature allows you create communication restrictions between participants belonging to 2 different lists when using the Networking and Speed Networking pages or in Live sessions in the Virtual Lobby. For example, participants from List A will not be able to view or interact with participants from List B in both networking channels and vice versa.
To learn more about this, refer to this article: Privacy restrictions.
Networking options for attendees in the Virtual Lobby
Participants can opt to be available and visible in your event's networking list or not.
Refer to the Networking: instructions for participants article to learn more about it.