Virtual Lobby Settings
 Updated 11 months ago
by
Chioma Okenwa
Updated 11 months ago
by
Chioma Okenwa
Virtual Lobby is a tool that allows your events to happen virtually. An online environment that can broadcast from a large networking event, a single session, or even several simultaneous sessions of individual conversations.
This article intends to show you how to set up the Virtual Lobby including how to create group rooms, how to check the Virtual Lobby analytics as well as how to set up the access policy and tools.
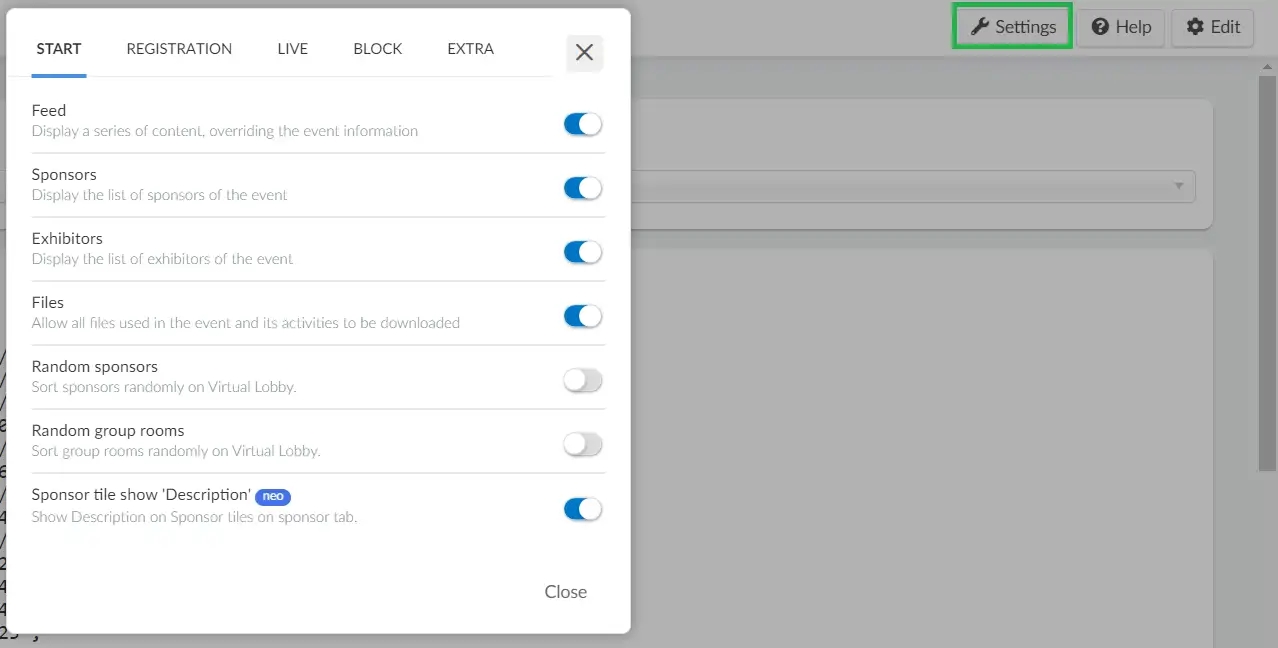
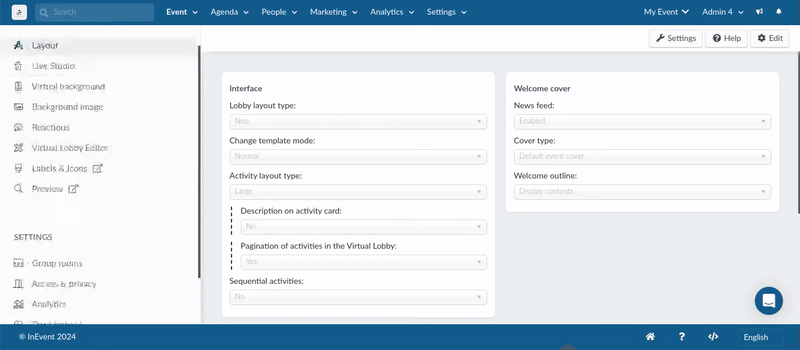
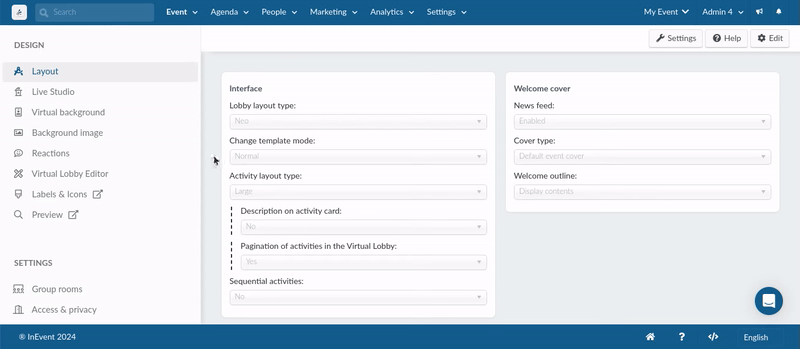
Configuring your Virtual Lobby settings
To set up your Virtual Lobby preferences, go to Event > Virtual Lobby > and you will find the Settings tab on the left-hand menu.
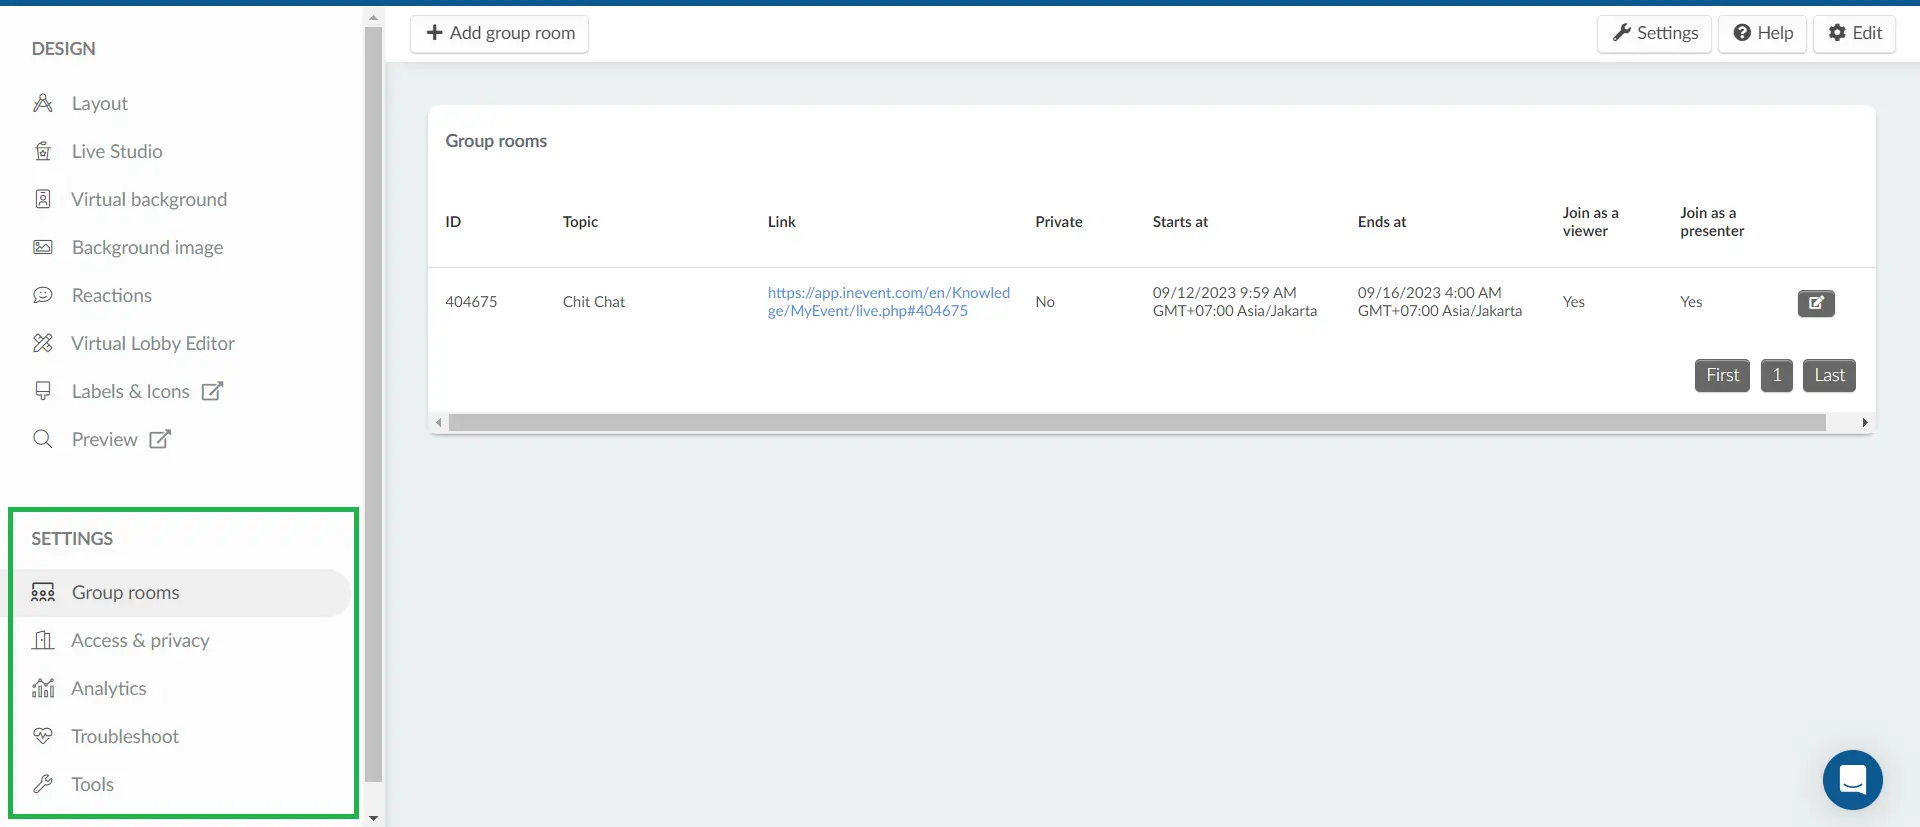
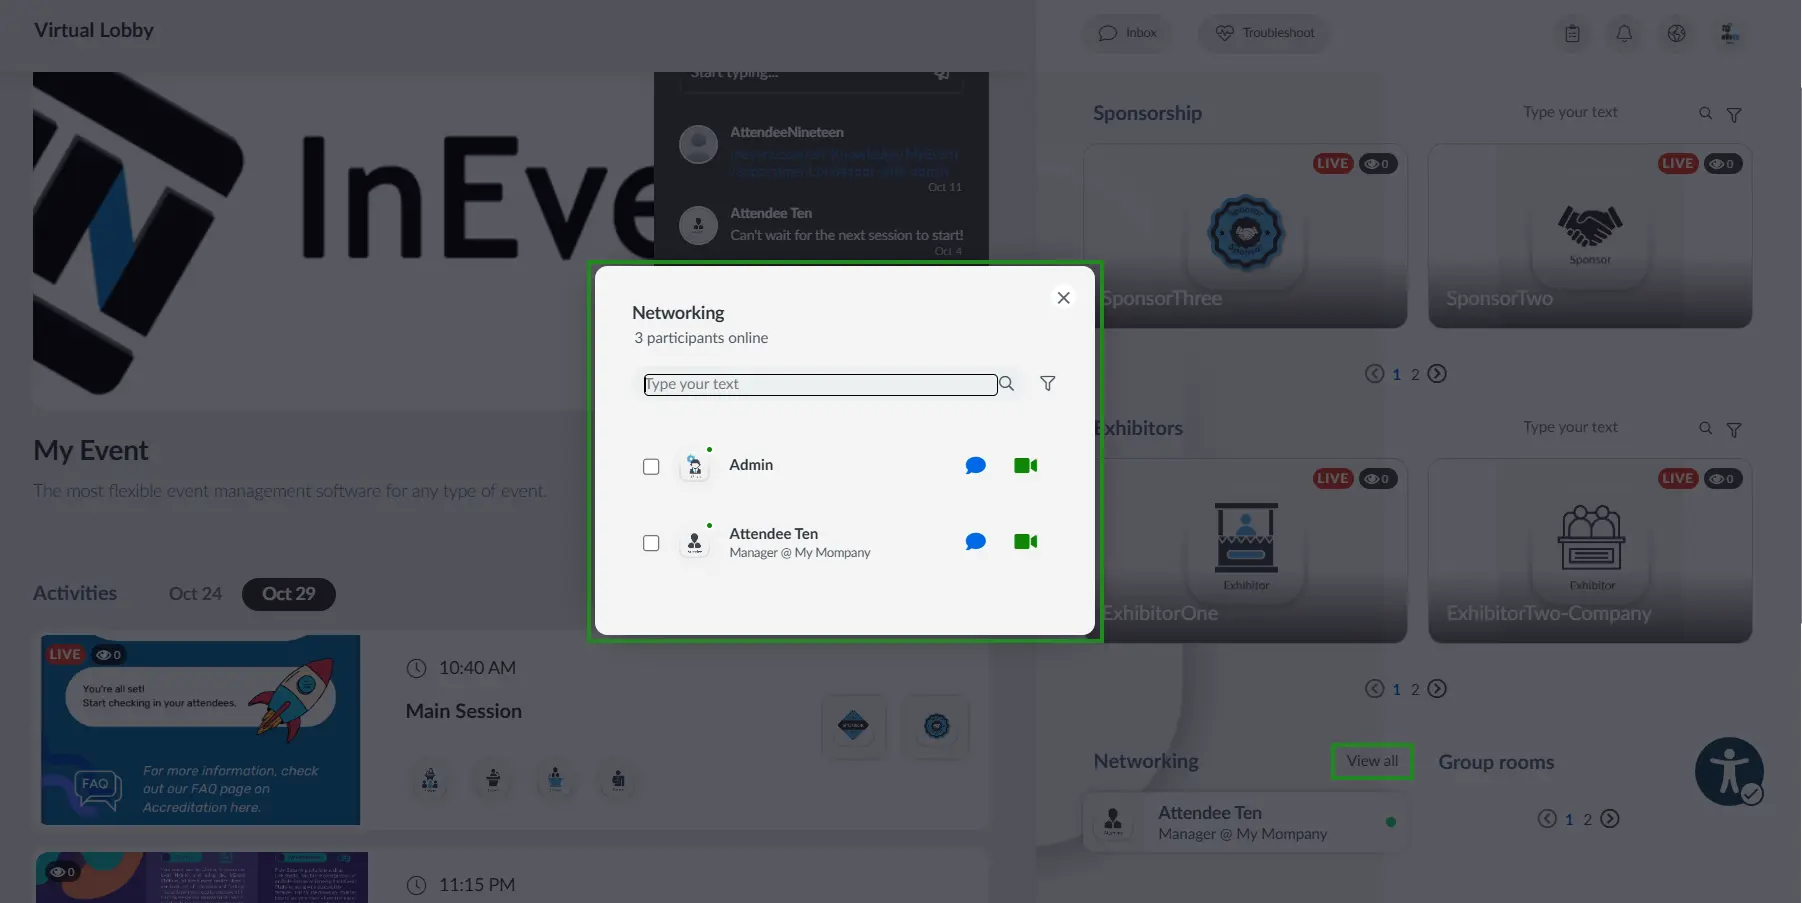
Group rooms
When a group room is created in the Virtual Lobby (frontend), it will disappear as soon as all people inside the room leave. On the other hand, if an administrator creates a group room in the platform (backend), it will be permanently displayed in the Virtual Lobby, even if the room is empty.
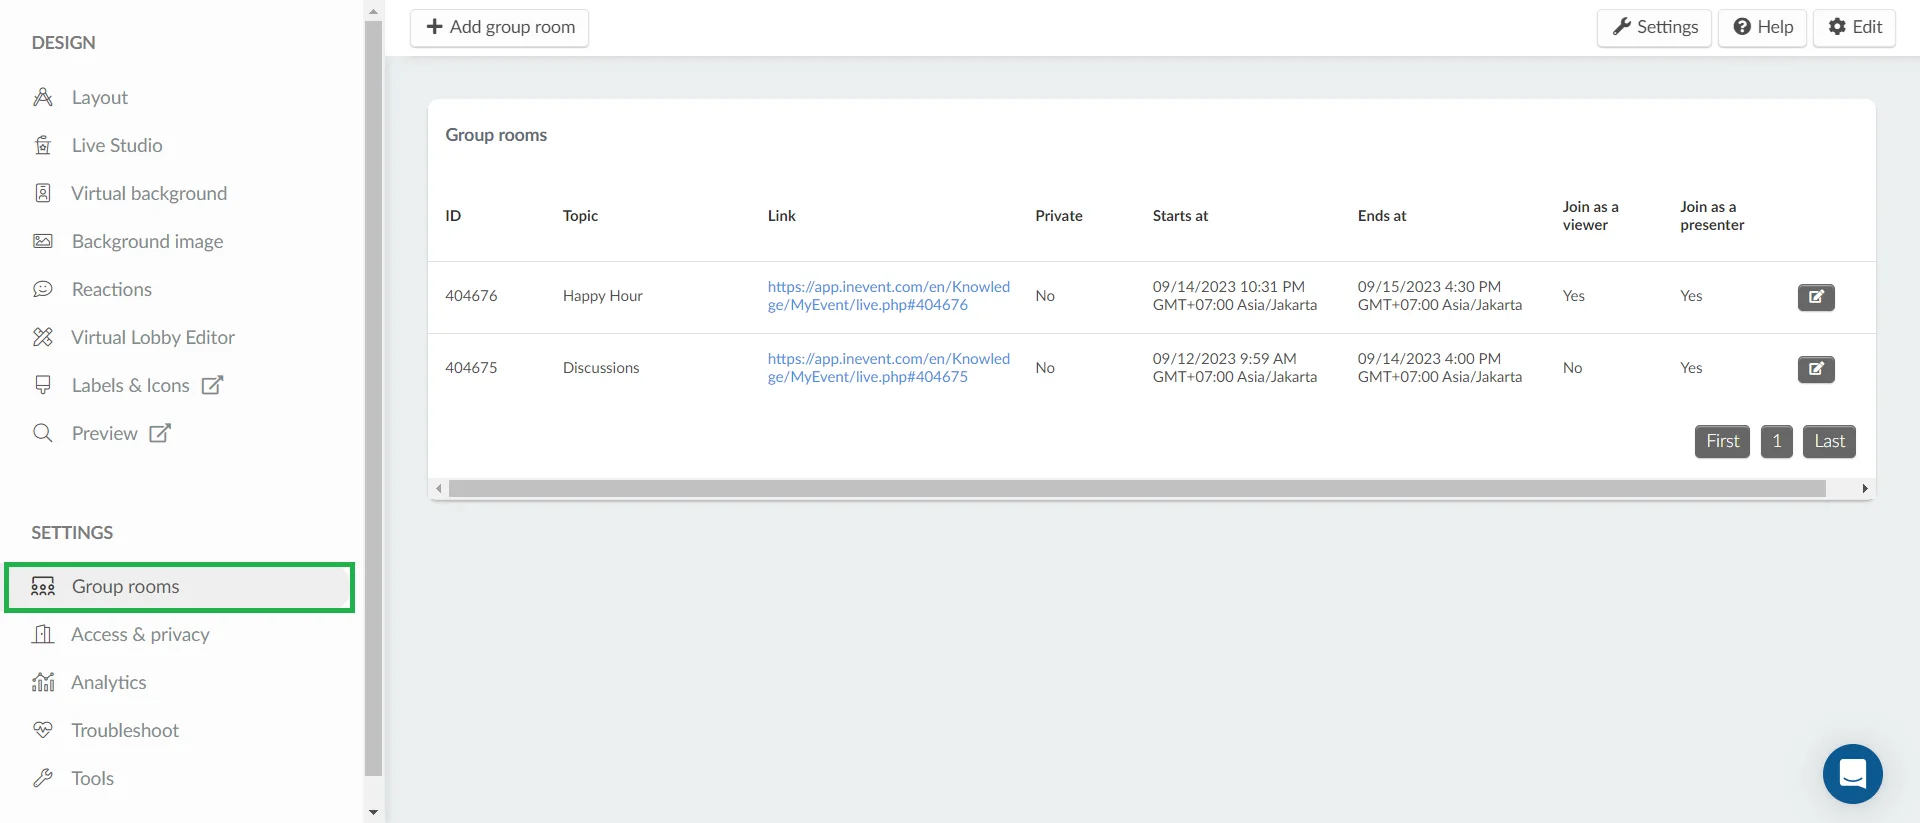
Refer to the Networking guide for event organizers article to learn more about how to create group rooms.
Access & Privacy
Access policy
Define whether you would like the attendees to be able to join activities before their start time and after their end time.
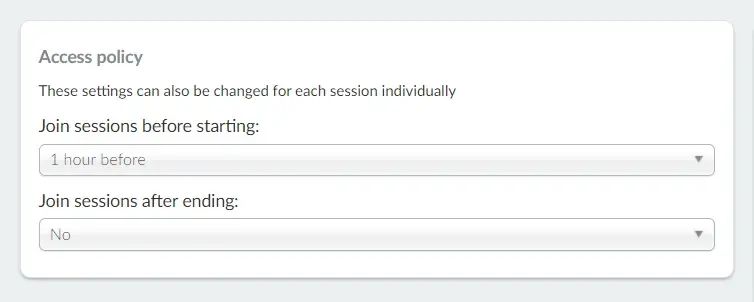
- Join sessions before starting
If you select No, the attendees will not be able to join the activities before their scheduled start time.
If you would like attendees to be able to join the room before all activities start, you will be given the option to decide if they should be able to join 5, 15, 30 minutes, or 1 hour prior to the activity's start time.
- Join sessions after ending
If you select No, the attendees will not be able to join activities after their scheduled end time.
If you would like attendees to be able to join the rooms after the activities end, select Yes.
Speed Networking
Speed Networking
To set up the length of the networking sessions, press Edit and set the maximum time allowed for each session. You should leave these fields empty if there's no limit on how long these sessions should be.
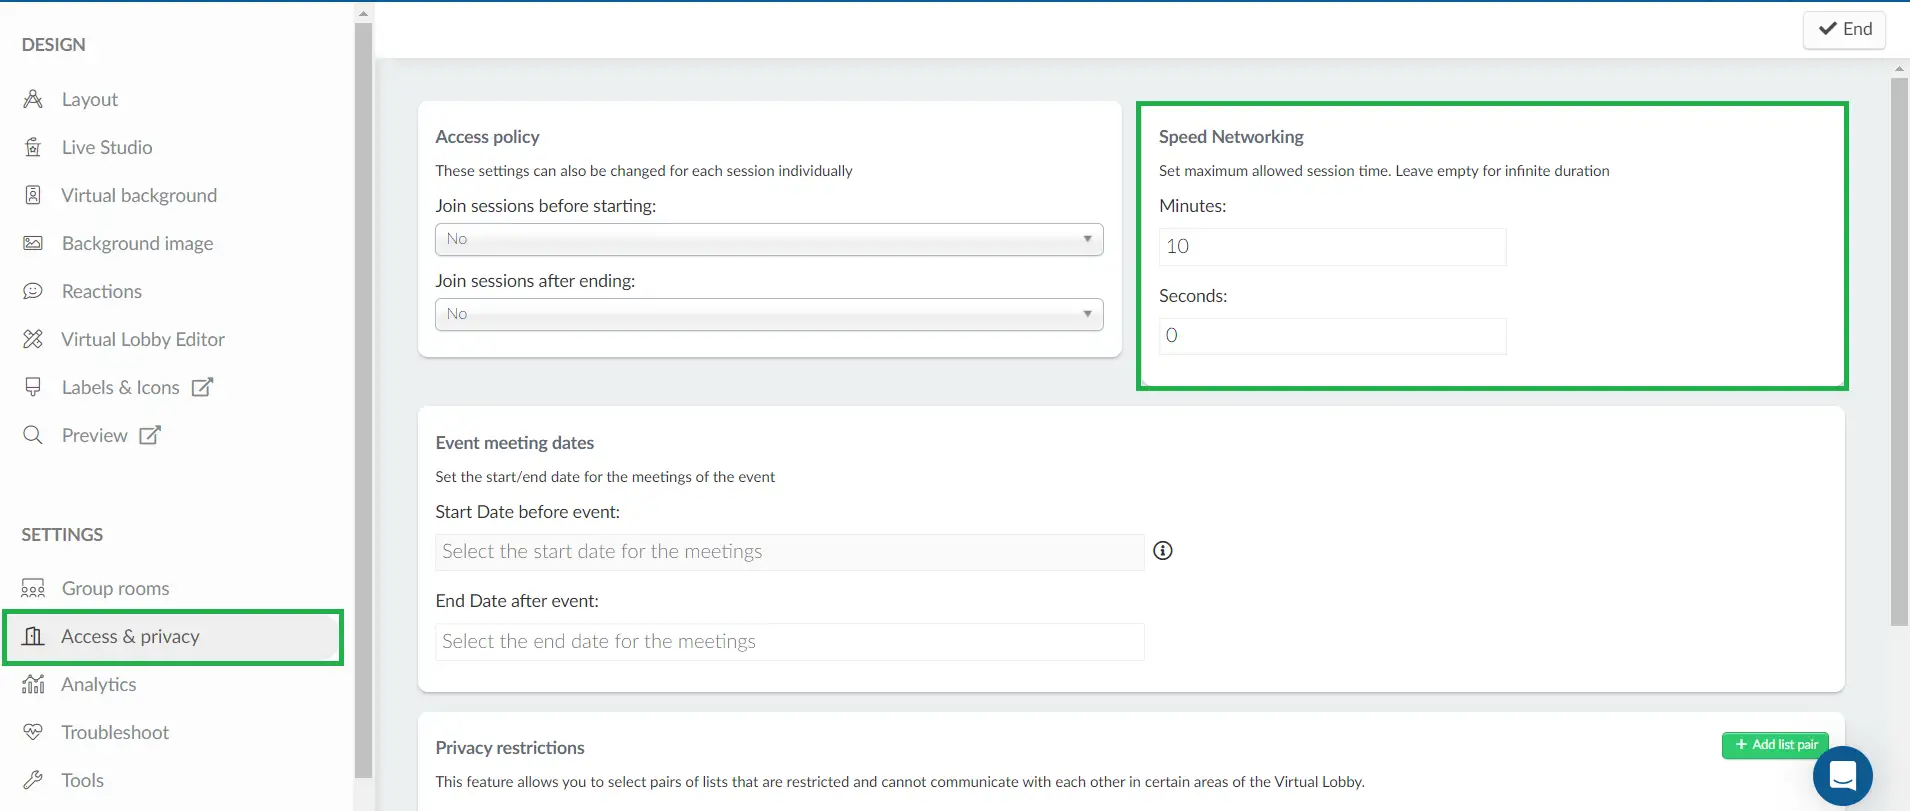
Event meeting dates
This tool allows your attendees to book meetings outside the event dates bound.

- To add a Start date before event, this field needs to be edited before the event starts.
- To add an End Date after event the date needs to be before the End of event access.
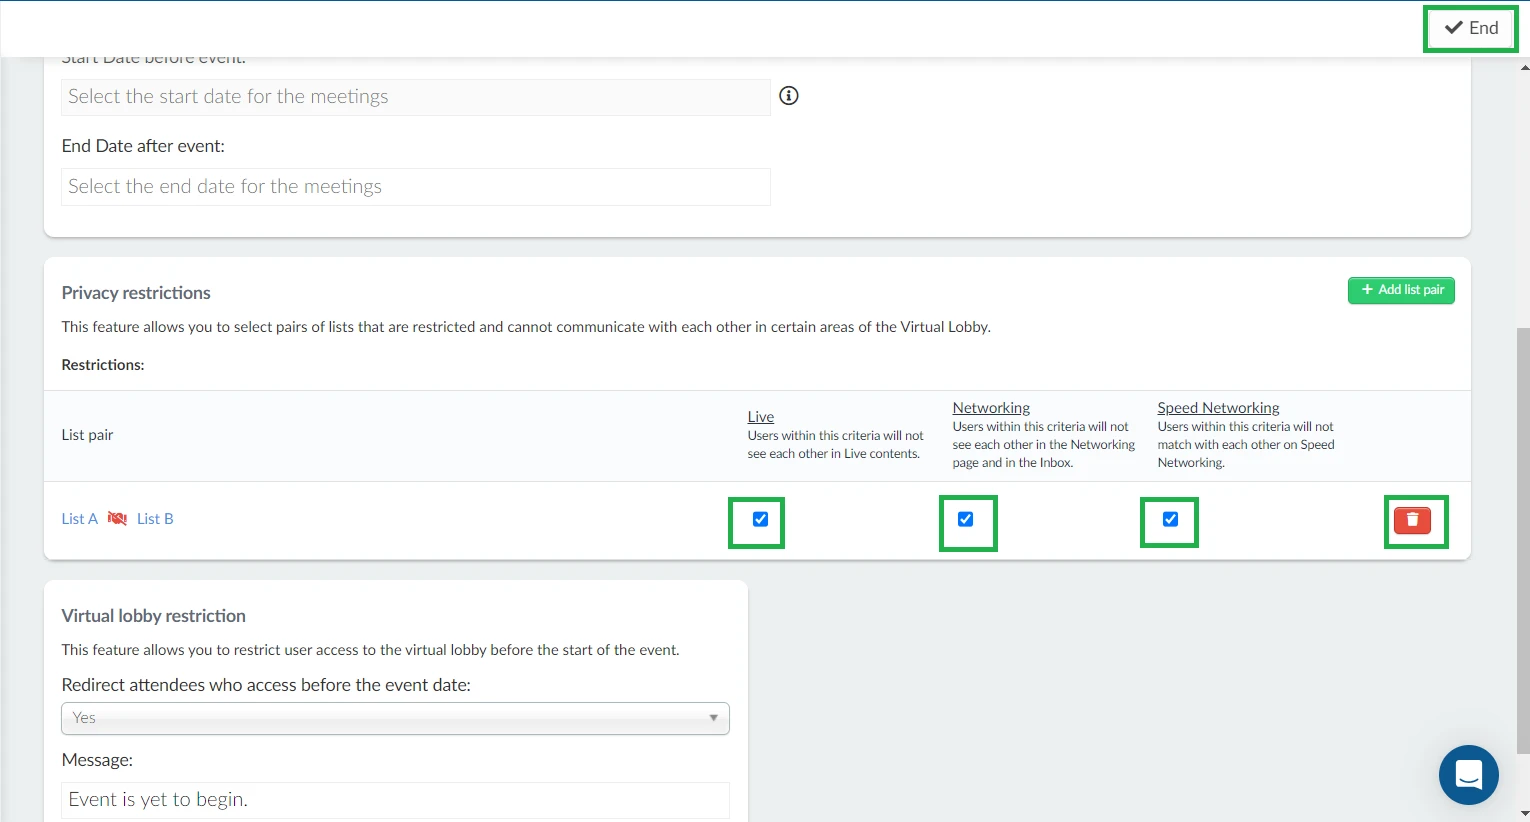
Privacy Restrictions
This option enables you to set restrictions for interactions between users who belong to two different lists, specifically for Live contents (activities, sponsor rooms, exhibitor rooms, group rooms), Networking, and Speed Networking features."
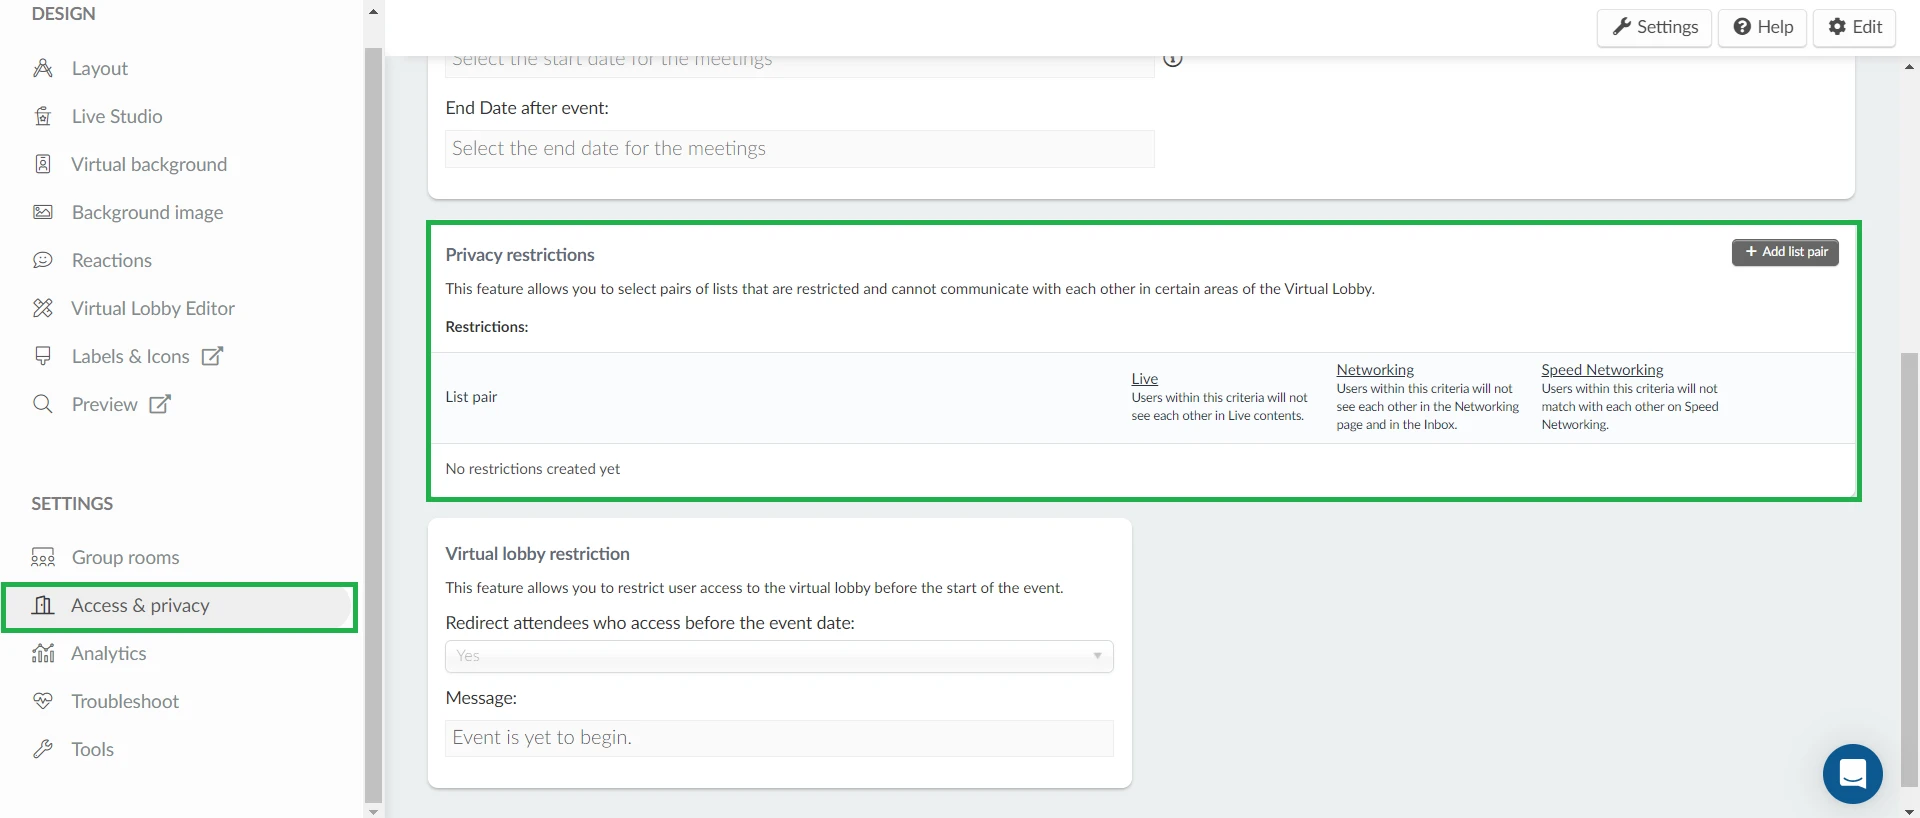
- To add the lists to the Privacy restrictions, click on Edit > +Add list pair > select the lists using the drop-down menus > click Add. This action will apply the restrictions simultaneously to the Live, Networking and Speed Networking features.
If you do not wish to apply the privacy restriction simultaneously on the Live, Networking and Speed networking features, click Edit and untick the box of the one you do not wish to apply restrictions to.
When using the Live restriction, the group of attendees that belong to the restricted lists will be unable to do the following:
- See and network with each other from the People and Networking tabs inside activity rooms, sponsor rooms, exhibitor rooms, or group rooms. Additionally, attendees belonging to the restricted lists will have no access to each other's information when sending messages from the Chat tab. Clicking on their names will not reveal any details about the other user.
- View each other in the Networking section of the Virtual Lobby.
When using the Networking restriction feature, users belonging to the restricted lists will not be visible to each other from the Networking tab or Inbox section
When using the Speed Networking restriction feature, users belonging to the restricted lists will be completely restricted from speed networking with each other in the Speed networking tab and also inside activities.
To remove the privacy restriction completely, simply click on Edit and then click on the red trash icon beside the paired lists or untick all the checkboxes corresponding to Live, Networking and Speed Networking. Click on End to save your changes.
Virtual Lobby restriction
This feature allows you to restrict attendees' access to the Virtual Lobby before the event's start date. To do this, follow these steps:
- Click Edit at the top right corner of the page.
- Scroll down to the Virtual Lobby restriction field.
- In the Redirect attendees who access before the event dropdown menu, select Yes.
- Optionally, you can add a custom message that attendees will see when trying to access the event before its start date in the Message field.
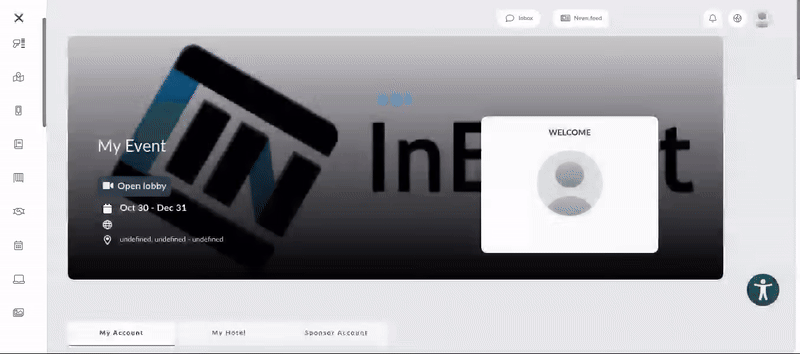
Once you've completed these steps, if an attendee attempts to access the Virtual Lobby before the event's start date, they will see the message that you've added in the Message field and will be redirected to the My Account tab. They won't be able to access the Virtual Lobby page until the event begins.
Analytics
Here you will be able to find the virtual lobby reports, including how many views your sessions have received, who has viewed your sessions, and how long each attendee spent in your sessions.
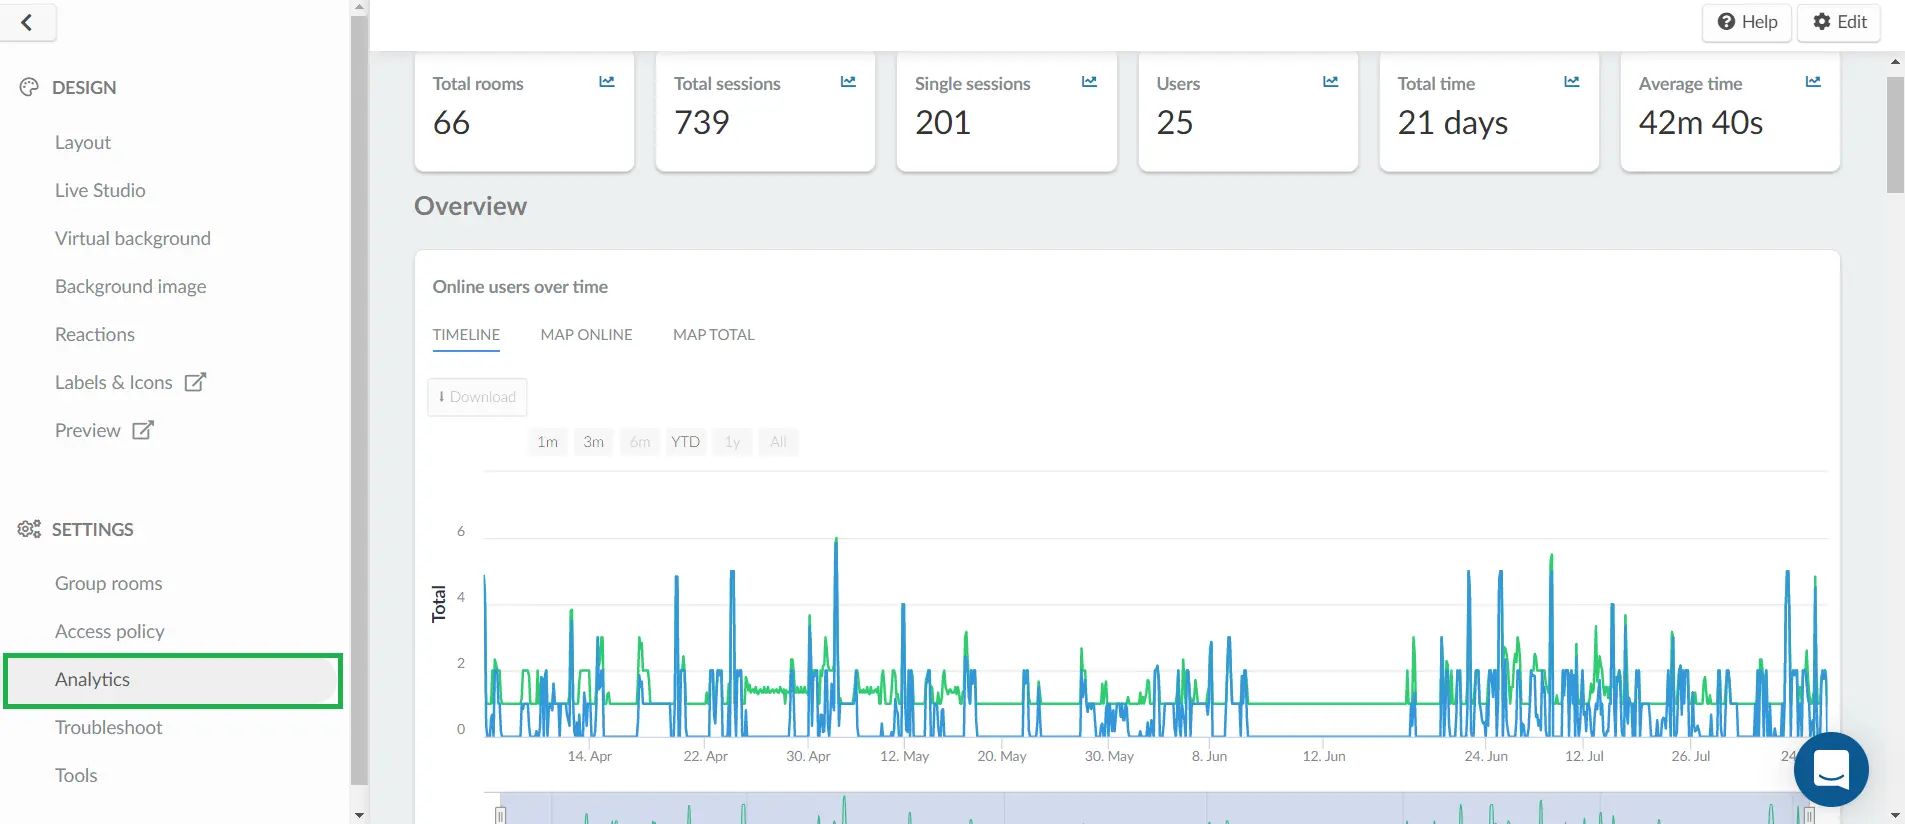
For further information on the Virtual Lobby reports, refer to the Virtual Lobby reports article.
Troubleshoot
This area is dedicated to checking the reports submitted when using the Troubleshoot button from the Virtual Lobby.
You will find the following information on the page's dashboard :
- ID: The Id of the participant who raised a report.
- Person: Name of person who raised the report.
- Report: The troubleshooting report raised.
- Solved: Yes/No indicating if the report has been solved or not.
- Date: The date and time the troubleshoot report was submitted.
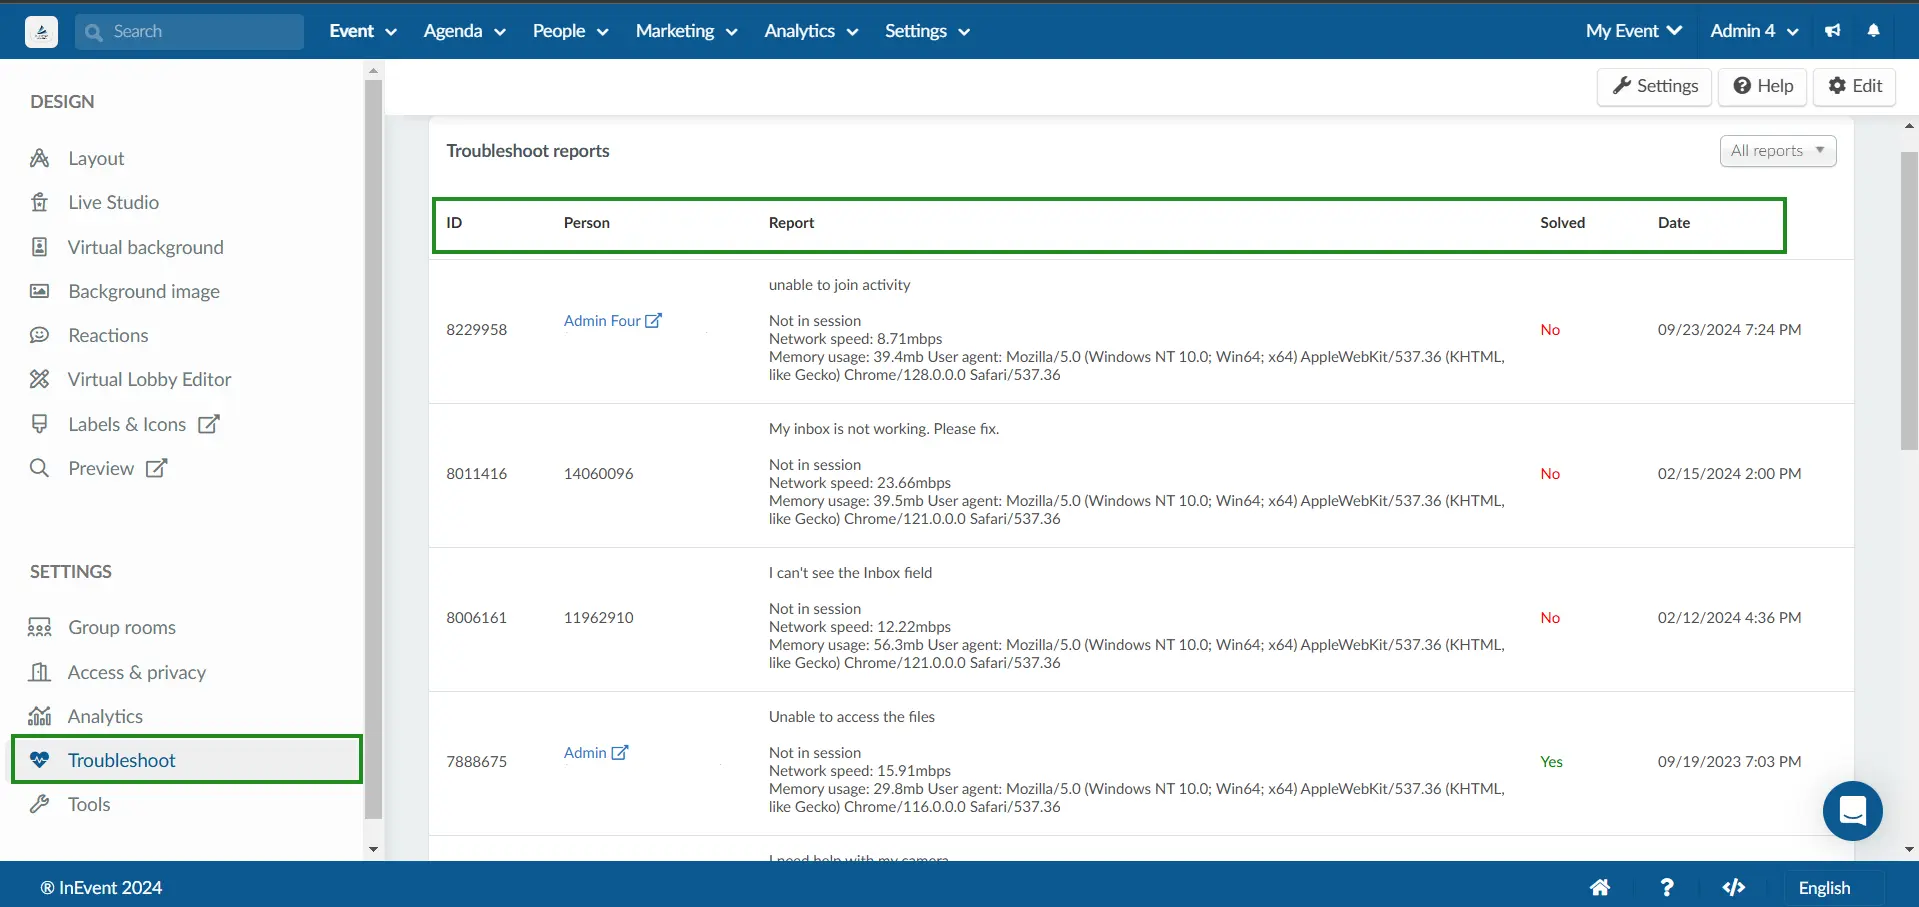
To learn more about Troubleshoot reports, refer to the Virtual Lobby: Troubleshooting guide article.
Tools
In the Tools page, you will find a list of the WebRTC IP addresses. To learn more about the WebRTC provider offered by InEvent, refer to the WebRTC Service Provider.
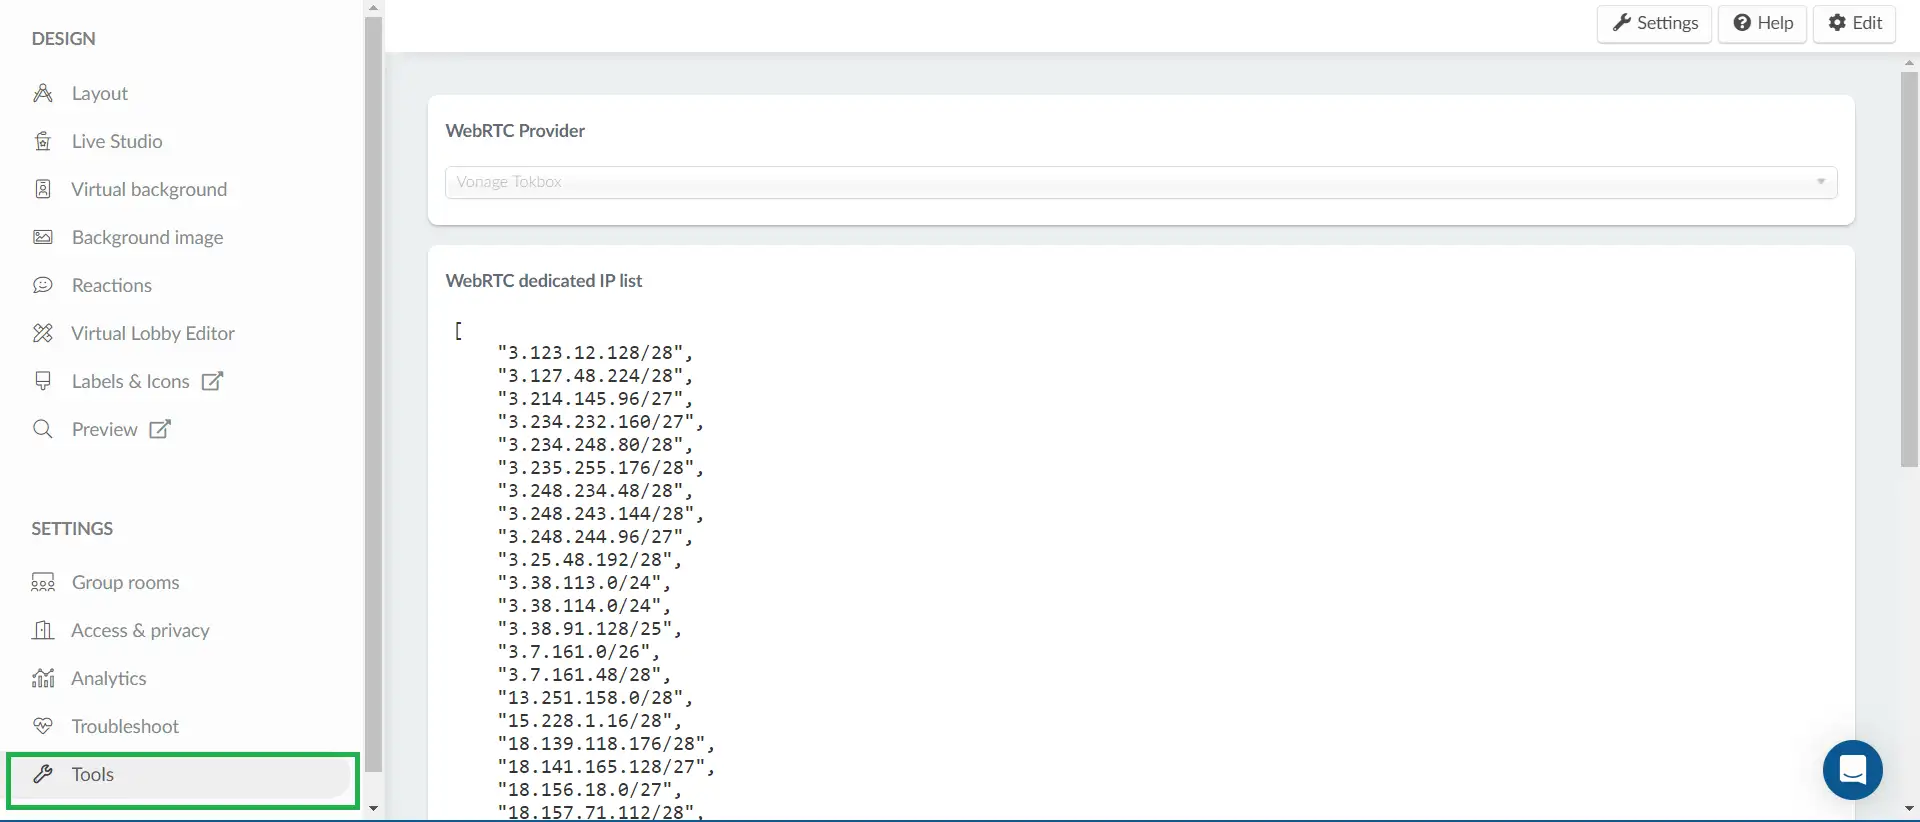
To see the list of tools which can be controlled from the Virtual Lobby page, click on the Settings button at the top left corner of the page. You can activate or deactivate these tools by toggling on or off their respective buttons. Refer to the Virtual Lobby tools article to learn more about each Virtual Lobby tool.