Setting up the My Agenda page: guide for event organisers
 Updated 1 week ago
by
Lorenzo
Updated 1 week ago
by
Lorenzo
- Enabling or disabling the Agenda feature
- Setting your agenda on the platform
- Enabling the My Agenda tab for the Web app
- Creating two agendas: the general agenda and the individual one
- View activities in List, Posters, or On-demand views
- Delaying an activity through the app
- Polling on My Agenda
- Hiding the end time of activities
- Uploading files to activities
- Using the AI Agenda Builder for your event
InEvent has an agenda page where all of an event's activities can be placed and scheduled within the start and end dates of the event. The number of activities that can be posted is unlimited and event organizers can display a brief description of their activities.
Enabling or disabling the Agenda feature
To enable this feature, go to Settings > Tools > press Edit > scroll down to Agenda under the Start section. Click on Edit to enable and tic the Then, make sure the Agenda checkbox is checked.
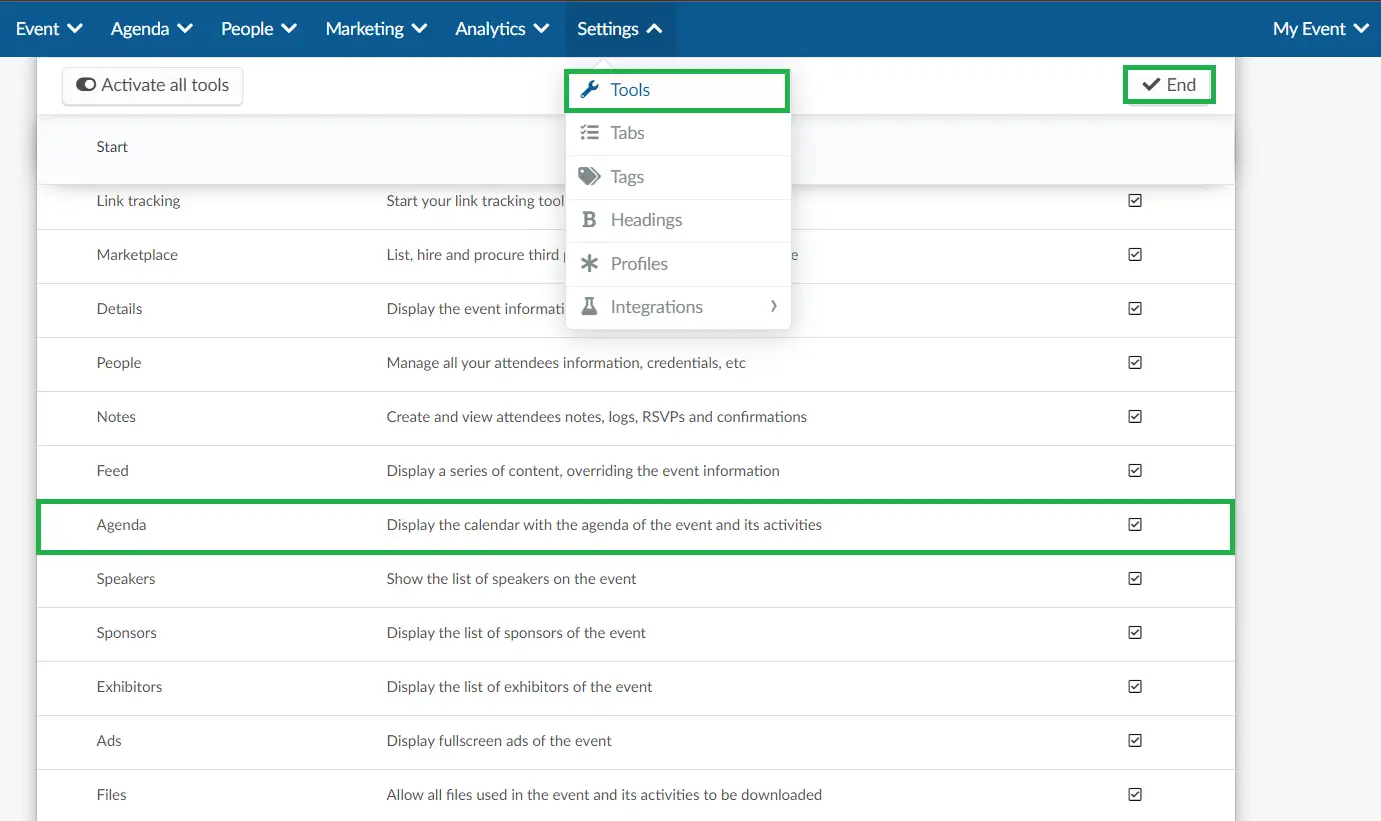
Setting your agenda on the platform
Check our Agenda Management article to see in detail how to organize and update your event activities' information.
Enabling the My Agenda tab for the Web app
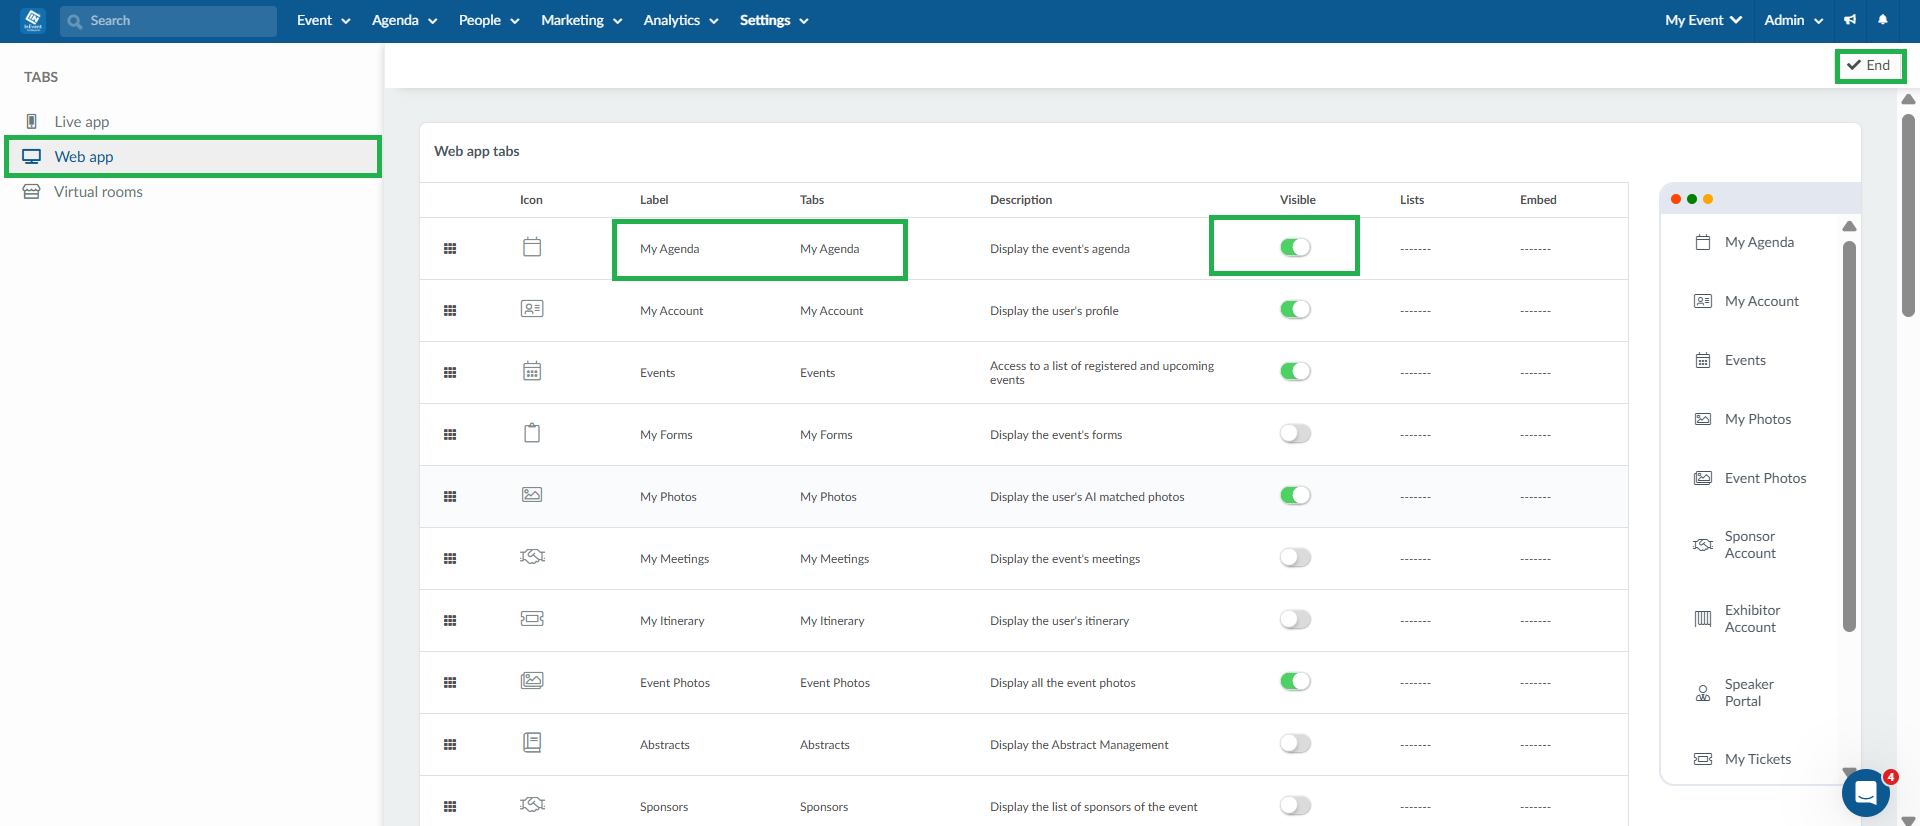
To ensure that the My Agenda page is displayed on the Web app:
- Go to Settings > Tabs.
- Select Web app in the left-hand corner of the page
- Click Edit.
- Toggle the Visible checkbox for the My Agenda tab.
- Click End to save your changes.
Creating two agendas: the general agenda and the individual one
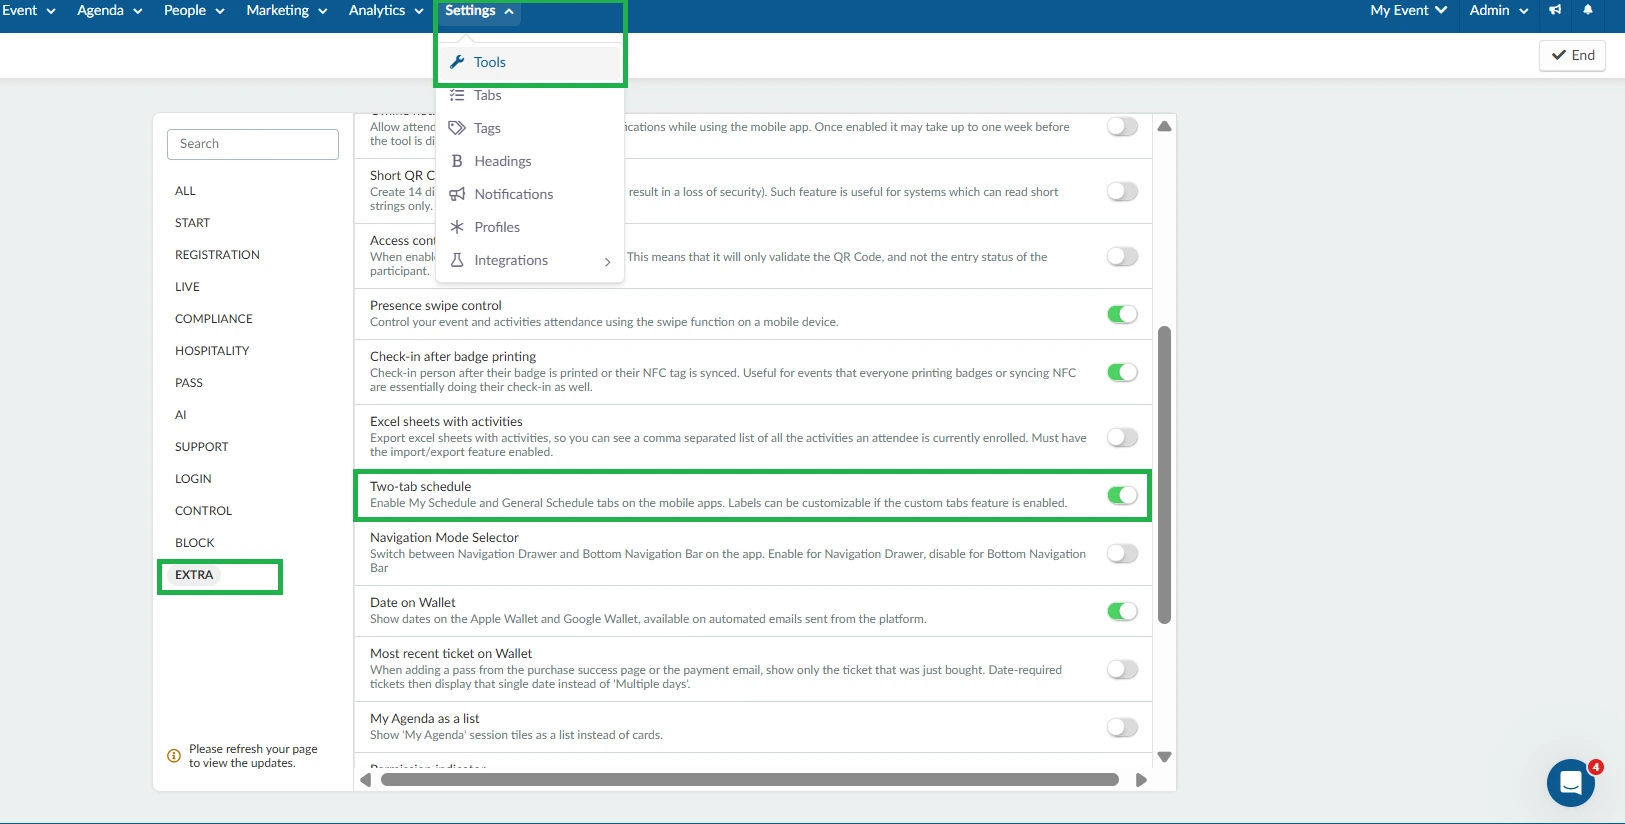
To have the attendees' agenda separate from the event's full schedule, it is necessary to enable the Two tab schedule feature in the platform, on Settings > Tools > press the Edit button in the top right corner, then in the Extra section, tick the Two-tab schedule checkbox to enable the tool. Click on End to save your changes.
Now, attendees will see the My schedule tab in the My Agenda tab of the Web app and also in the mobile app. The tab will display only the activities they are enrolled in.
View activities in List, Posters, or On-demand views
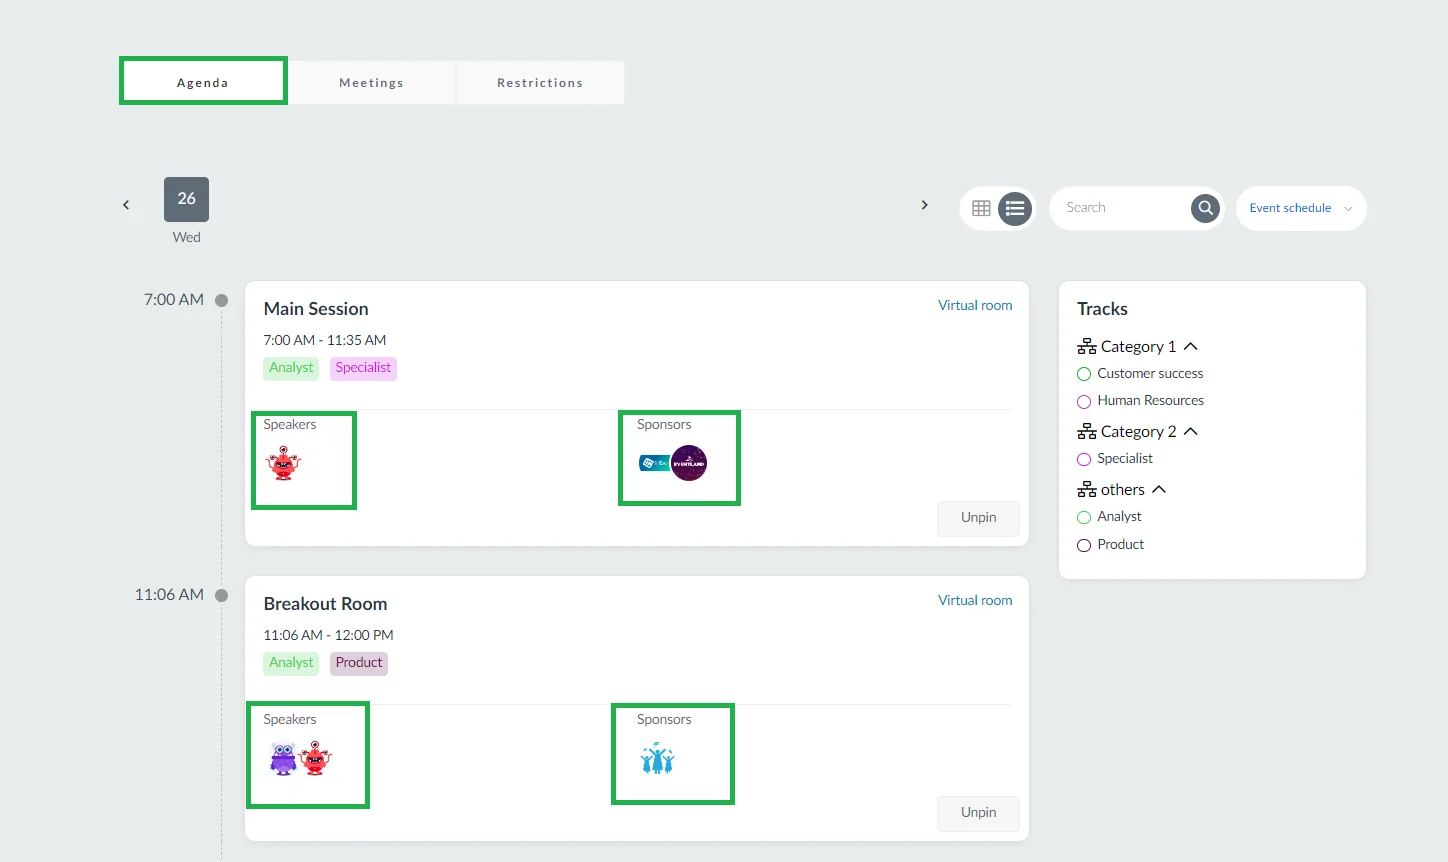
To display the activities on My Agenda as a list, you can enable on Settings > Tools. Click on Edit and scroll down to locate the My Agenda as a list tool under the Extra section, press the toggle button and click on End.
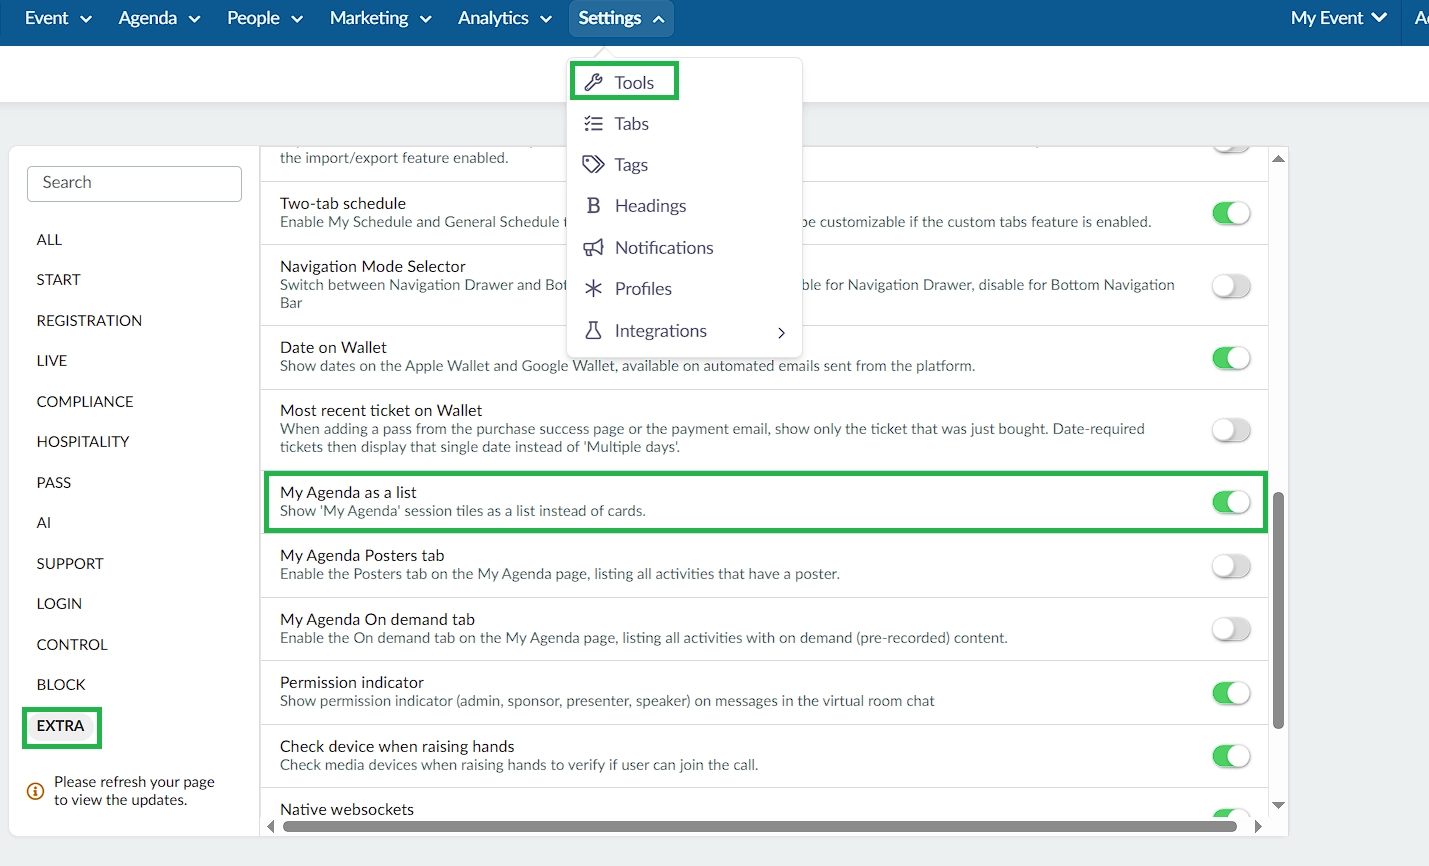
This will give a different layout for the activities, also displaying the Speakers and Sponsors:
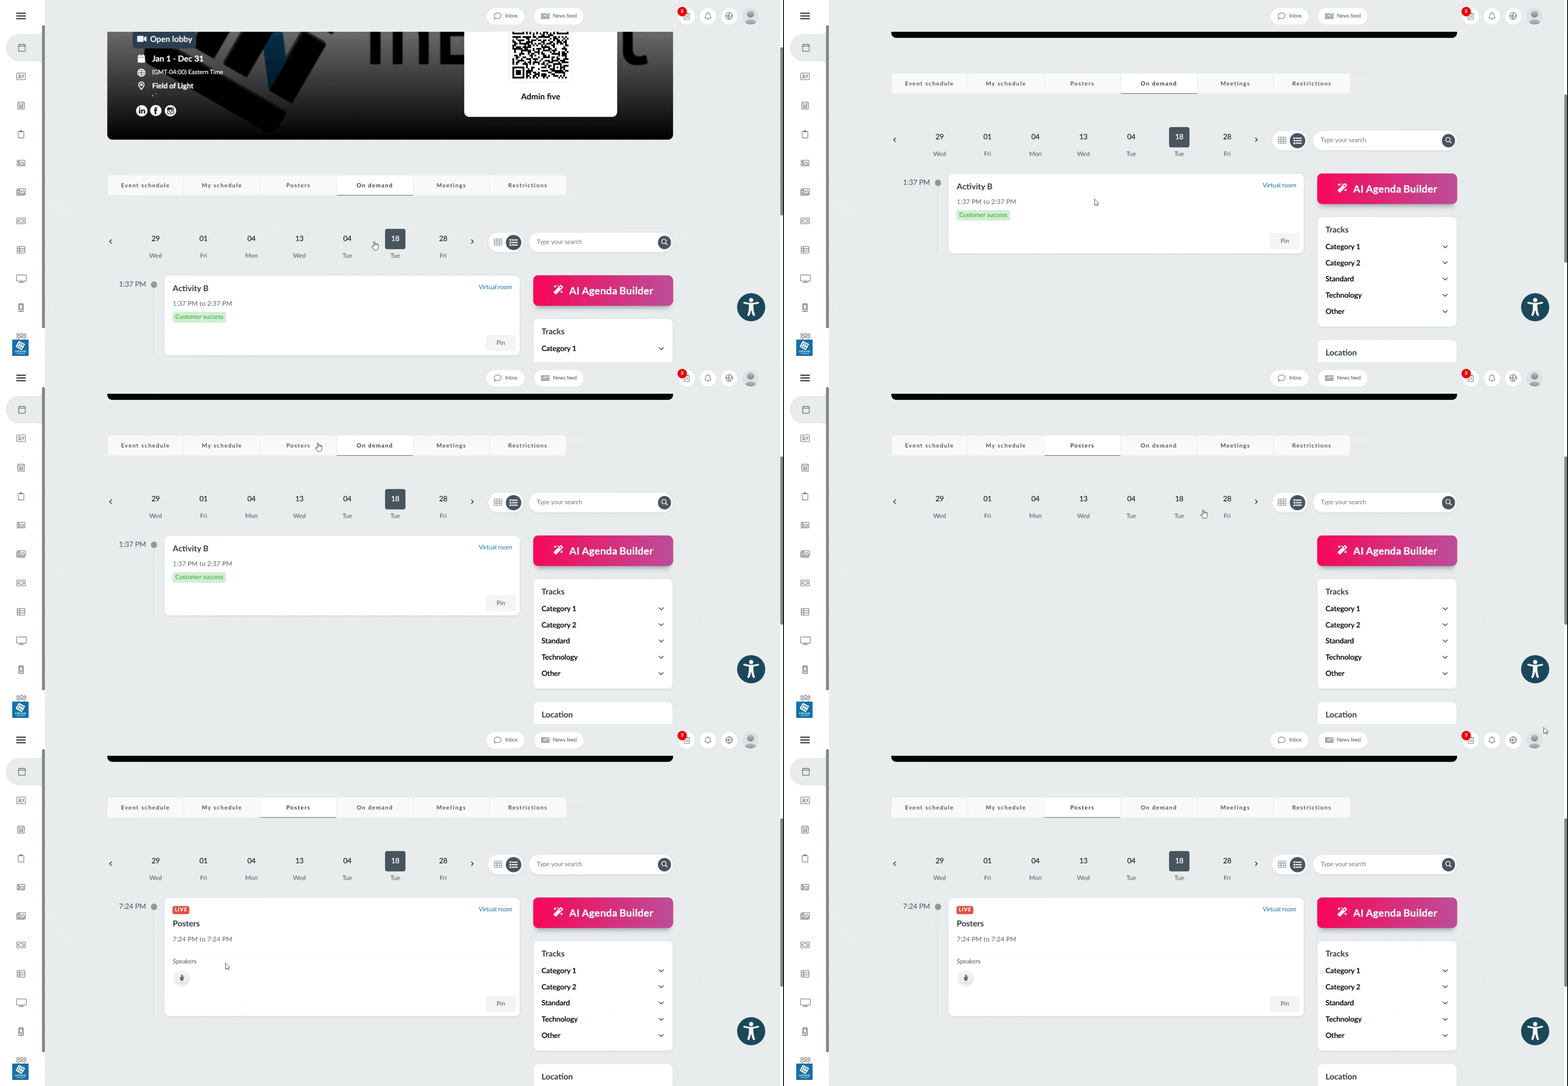
You can display Posters and On-demand activities in separate tabs. These tabs display the activities regardless of whether an attendee is enrolled in them.
To display an activity in either tab, you must first enable the activity as a Poster or On-demand activity.
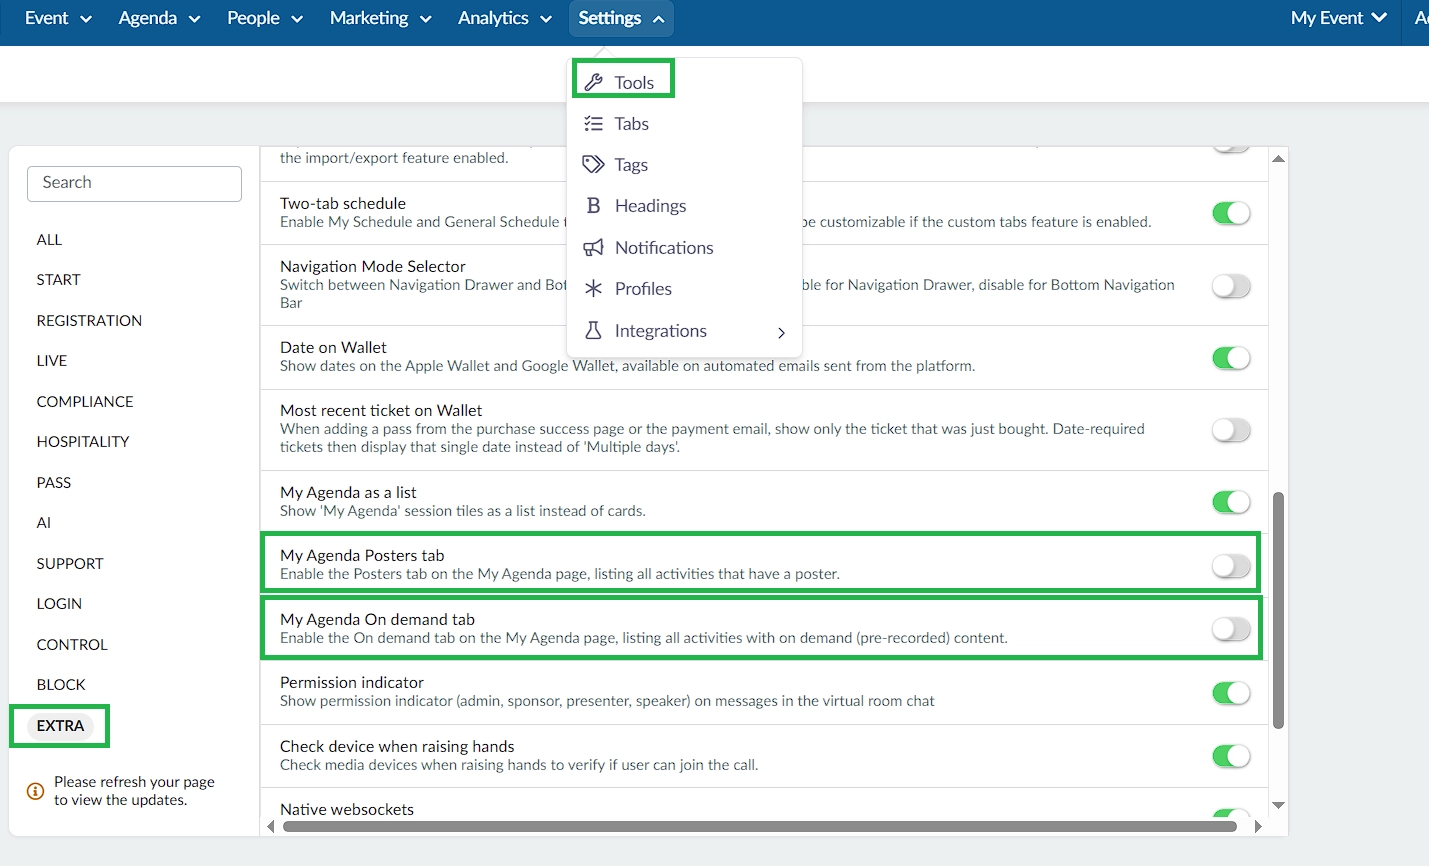
To enable the Posters and/or On-demand tabs, go to Settings > Tools and click Edit. Scroll down to the Extra section and locate My Agenda Posters tab and/or My Agenda On demand tab. Toggle on the tab(s) you want to display, then click End.
Below is how it would appear in the My Agenda web page:
Delaying an activity through the app
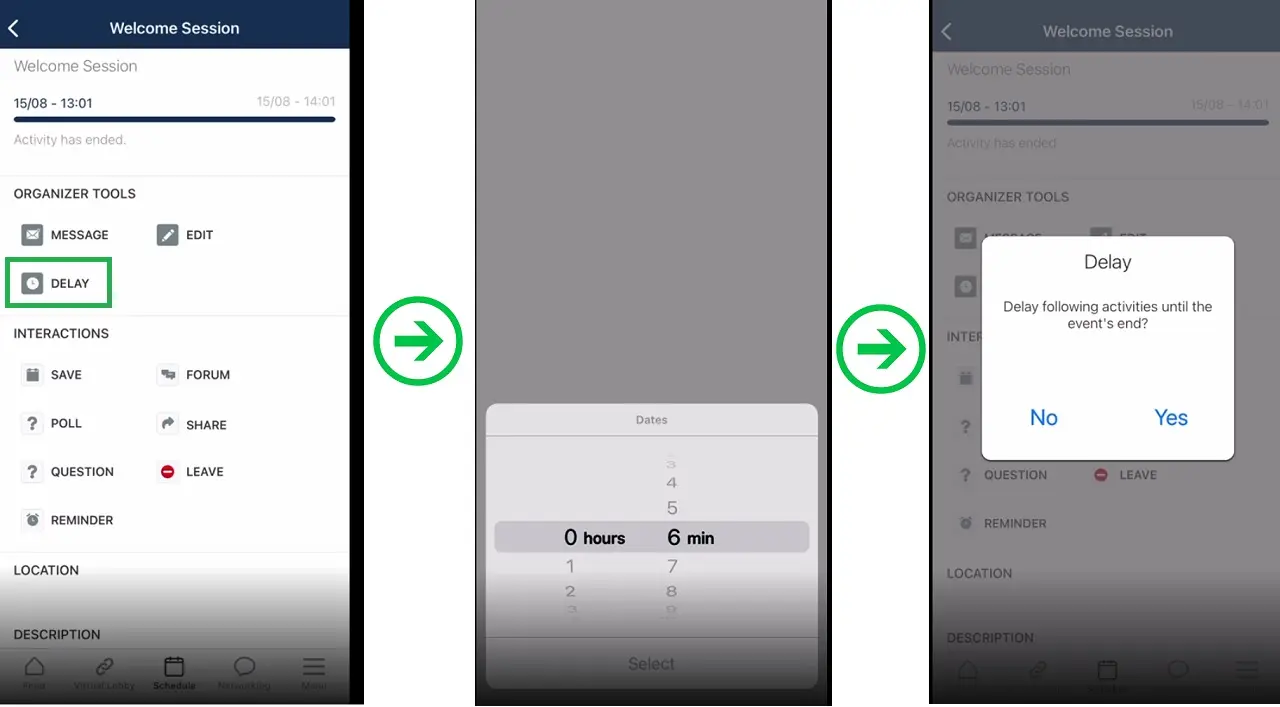
Administrators can delay activities through the app. To do so, choose an activity from the schedule and tap Details. Then in the Organizer tools section, press Delay. Select how many minutes you would like to delay the activity for and press OK.
You also have the option to either delay or not the subsequent activities, so the activities that come after will be delayed and activities will not overlap.
Polling on My Agenda
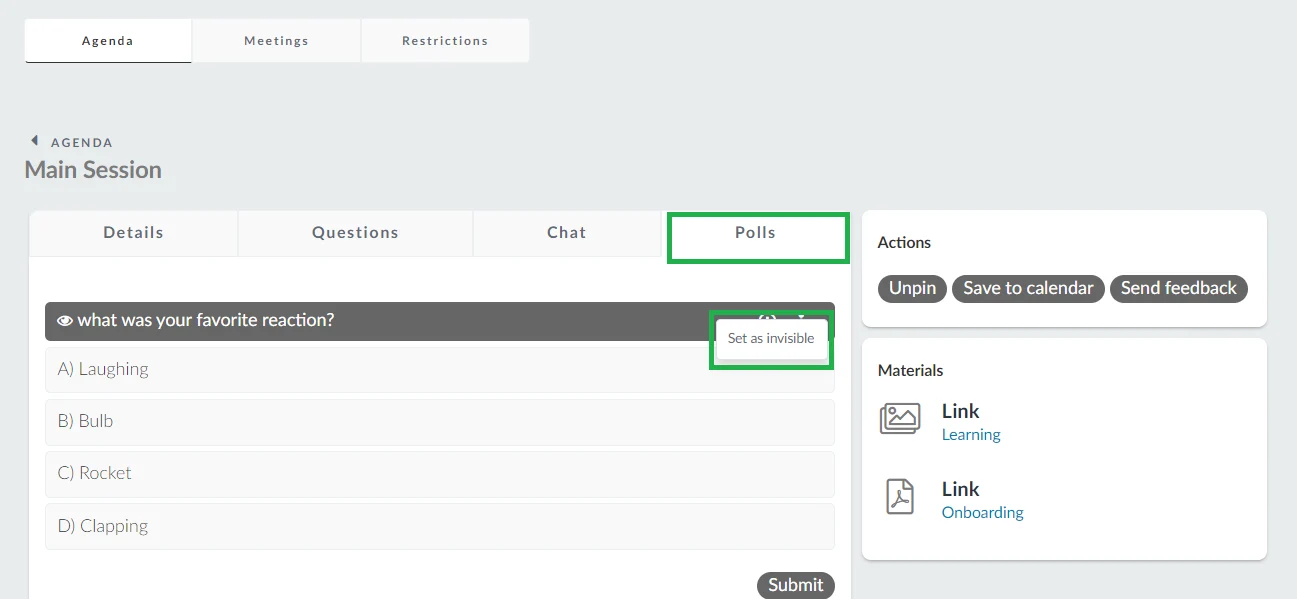
Admins have the option to control the visibility of polls in an activity from the My Agenda tab. To manage poll visibility, click on the activity's Details > Polls > and press the three dots icon to set the poll as visible/invisibe.
Hiding the end time of activities
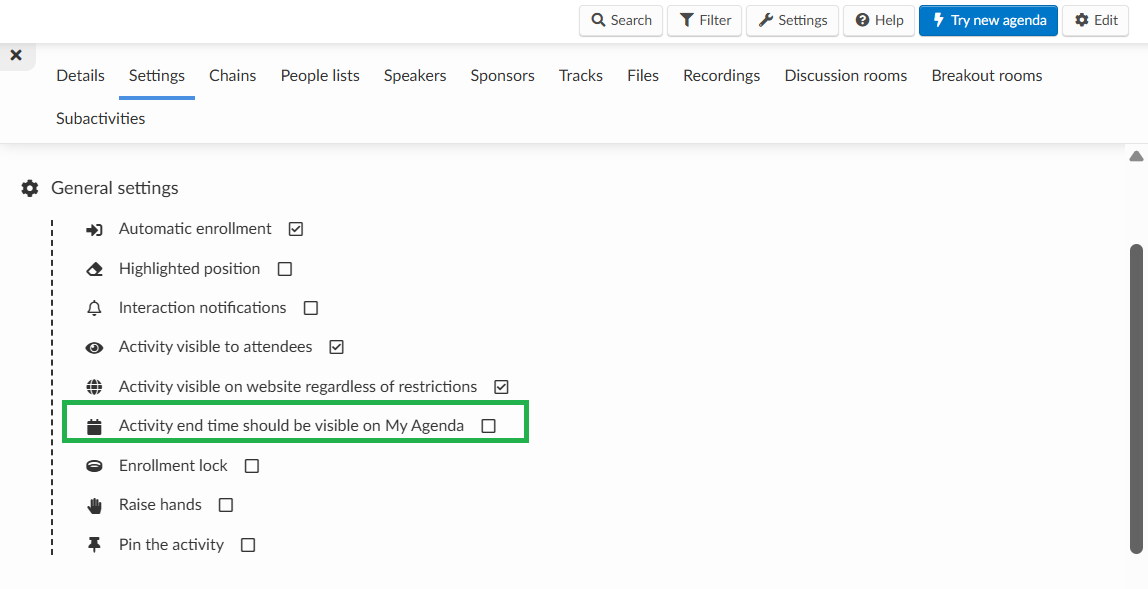
If you do not want attendees to see the end time of an activity, you can disable this option from the Agenda > Activities page. Select the specific activity, go to Settings, and disable Activity end time should be visible on My Agenda.
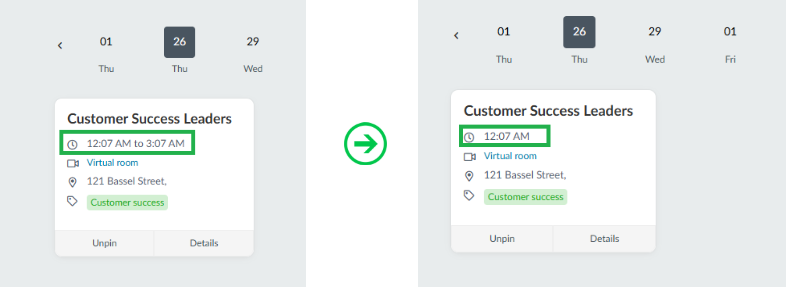
Once this is done, the end time of the activities will be removed from the activity's card.
Uploading files to activities
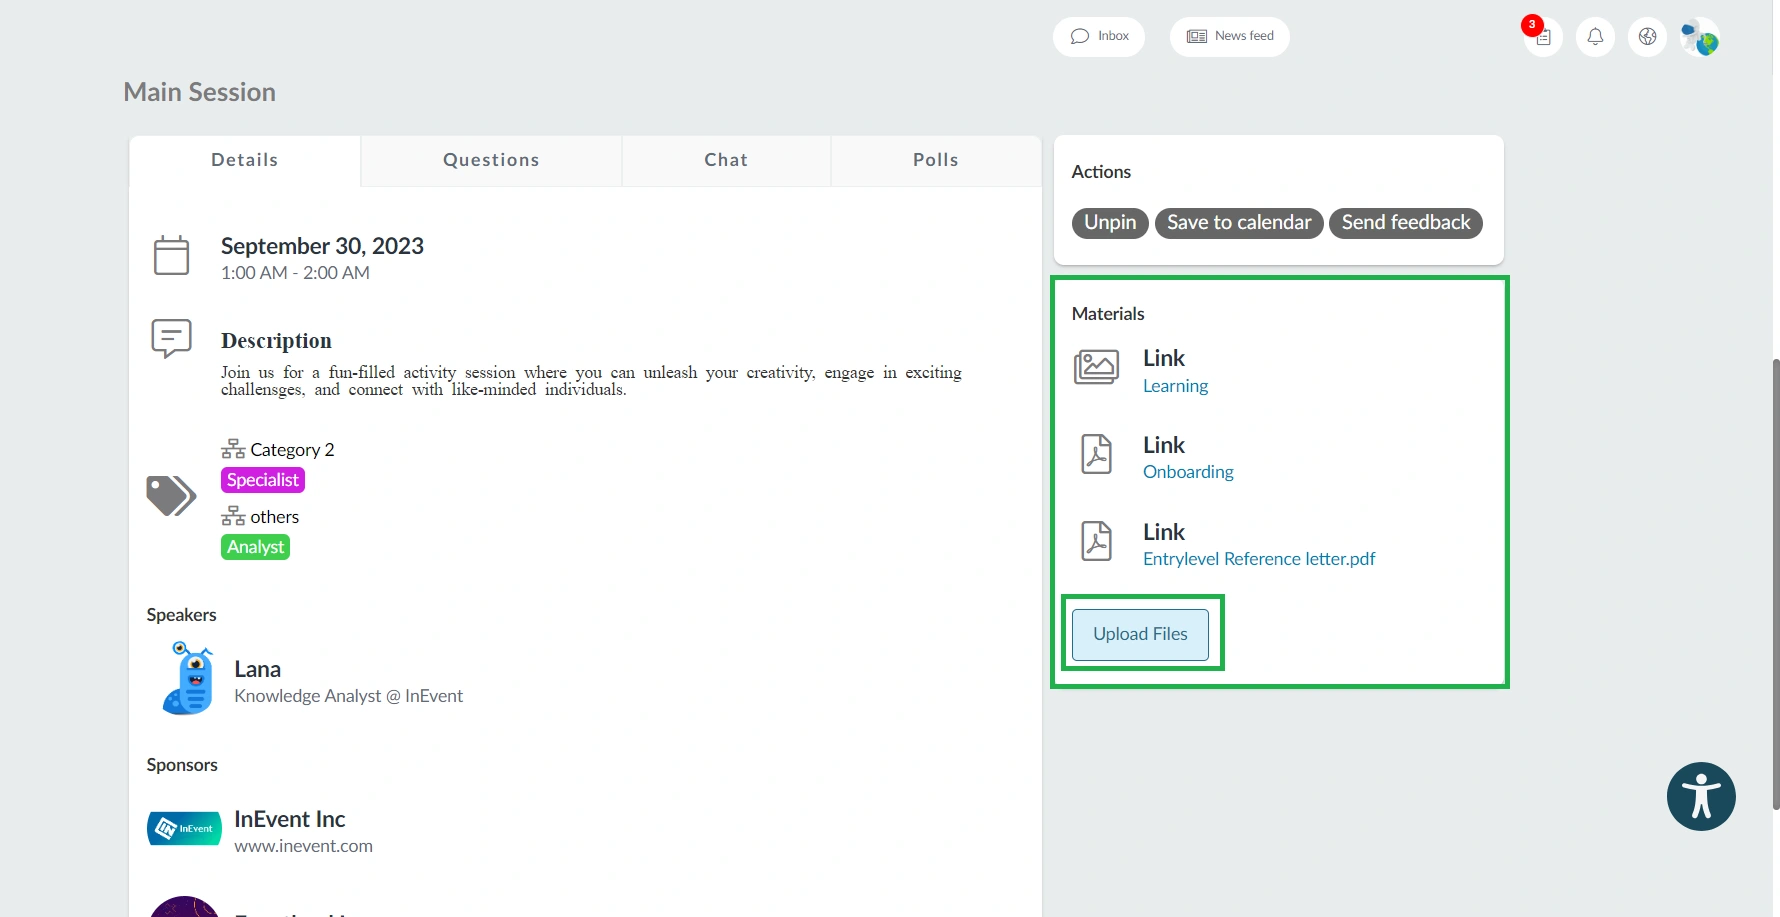
If you are an Event admin, Staff, Presenter or Linked speaker, you will be able to upload files directly to activities you are pinned to, under the Materials section from the My Agenda page.
For more detailed information on this, please refer to the Files and documents article.
Using the AI Agenda Builder for your event
The AI Agenda Builder is a chat-based feature that helps attendees quickly create a personalized agenda. This makes the attendee experience smoother, more engaging, and less overwhelming, especially for events with many sessions. To learn more about how to use this tool, refer to the AI Agenda Builder article.
