My Agenda page for attendees
 Updated 2 weeks ago
by
Chioma Okenwa
Updated 2 weeks ago
by
Chioma Okenwa
- Accessing My Agenda page
The My Agenda page gives you a central view of the event programme, including the full schedule of activities, your personalized agenda, and any meetings scheduled with other attendees. It helps you easily keep track of the sessions and meetings that are relevant to you throughout the event.
Accessing My Agenda page
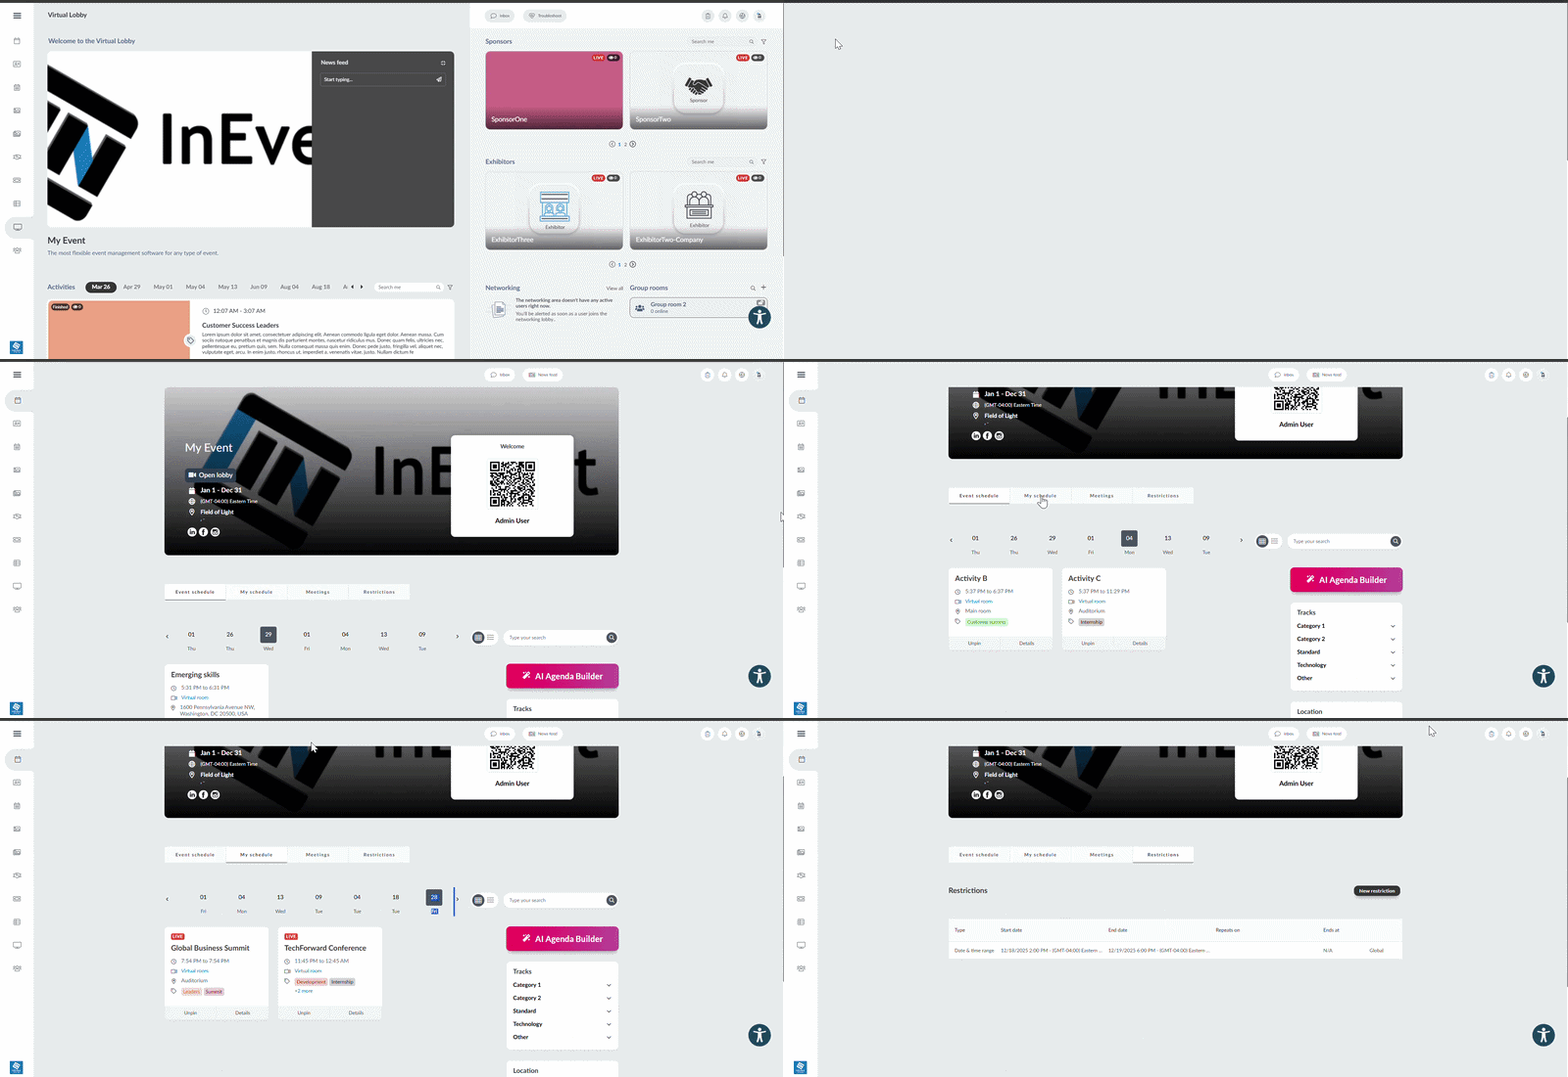
You can access the My Agenda page by clicking the three-line menu (☰) in the top-right corner of the web app, then selecting My Agenda. On this page, you will see all the event's schedule as well as your personalised schedule, and meetings.
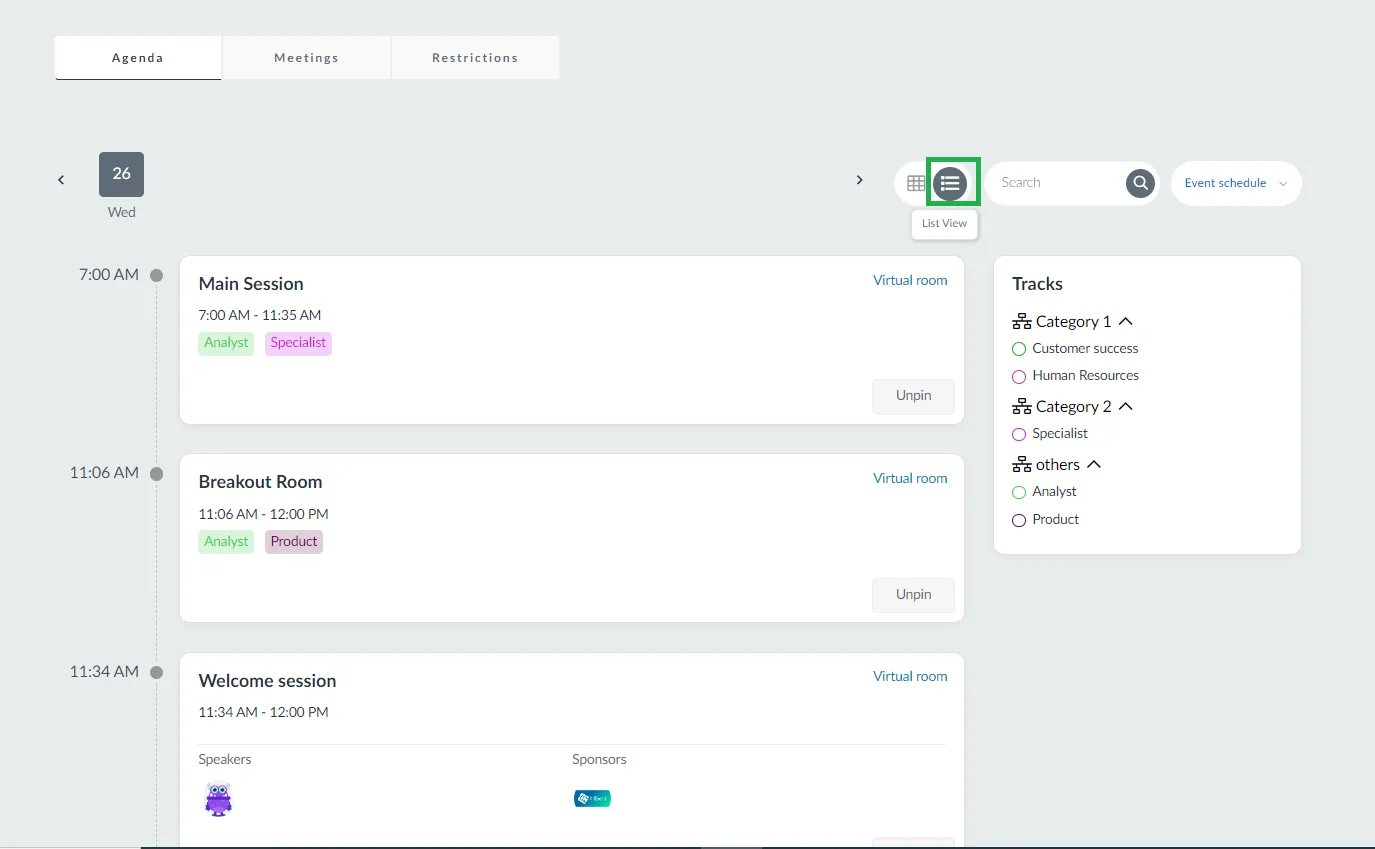
You can choose to see the agenda as a list by clicking on the list icon button:
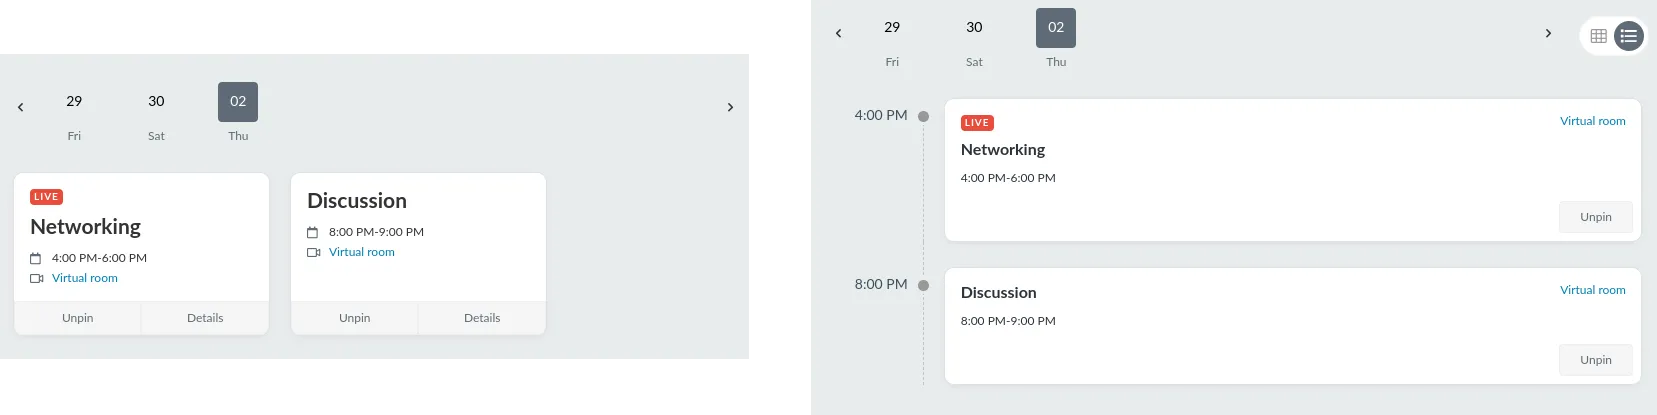
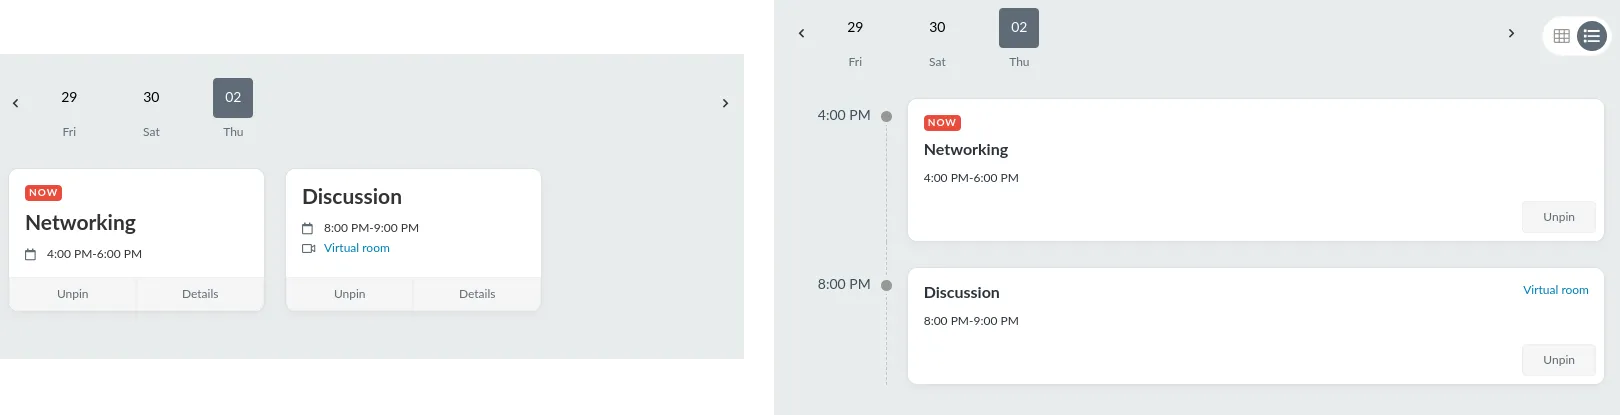
Activities that are ongoing in a virtual room is indicated with a Live status. Below is how the indicator looks in tile view and list view:
Activities that are ongoing, but without a virtual room is indicated with a Now status. Below is how the indicator looks in tile view and list view:
Searching for activities
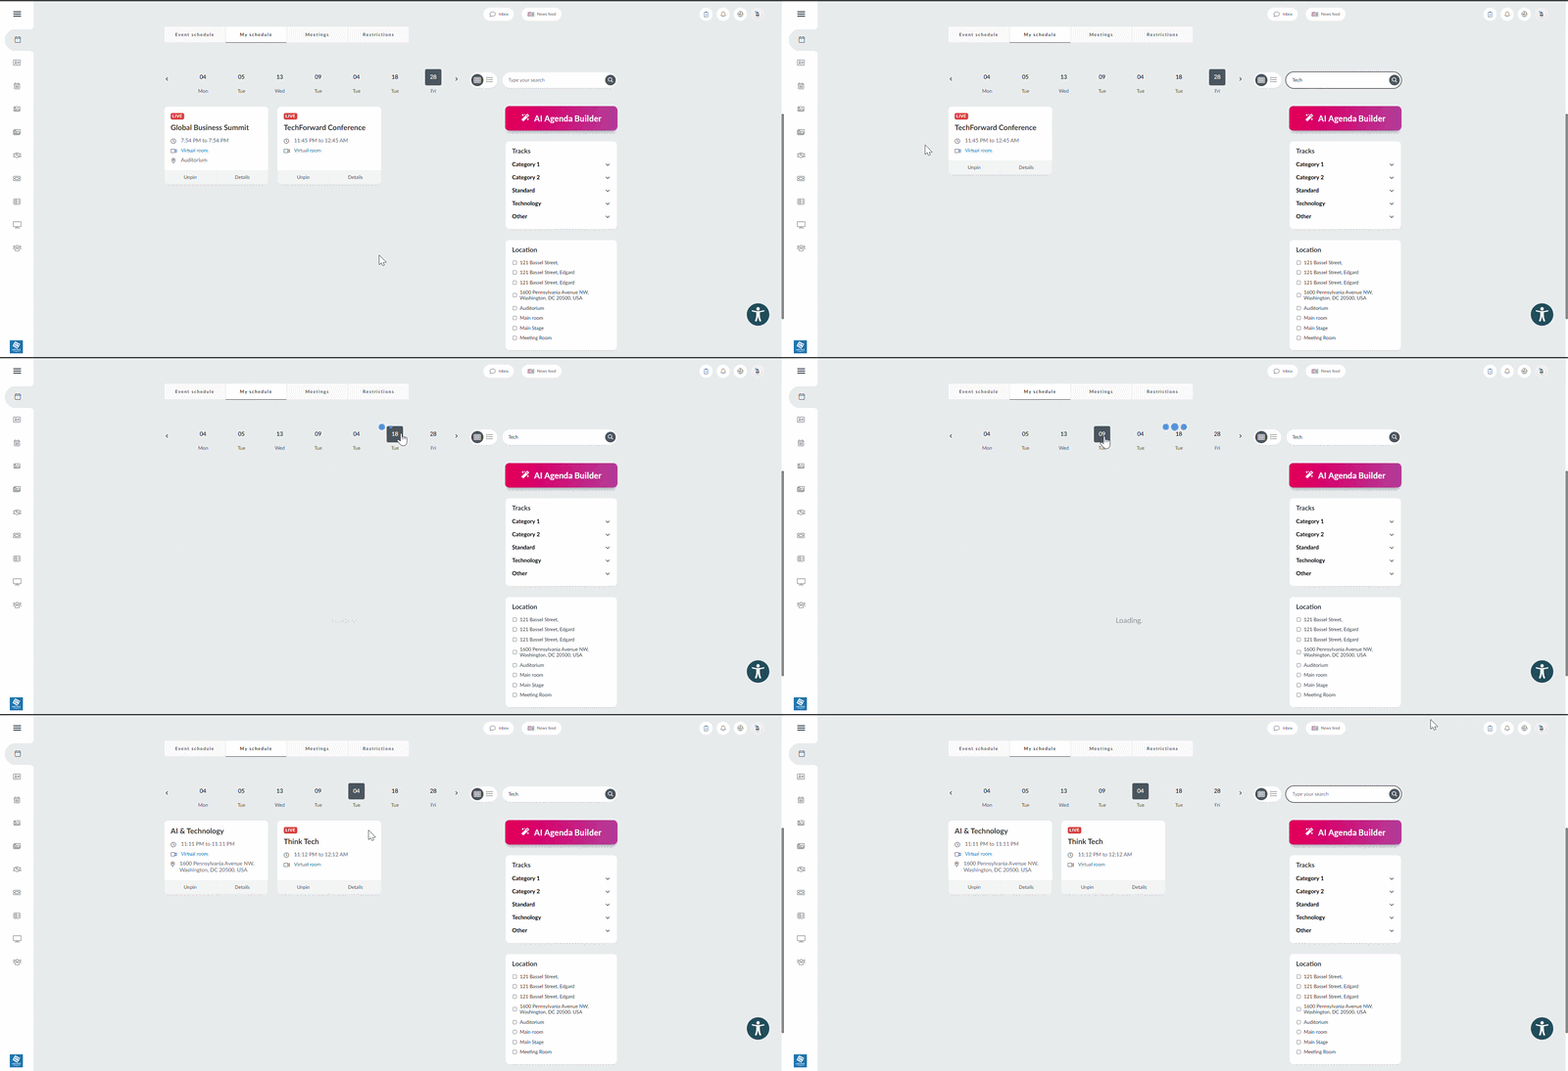
If you have a large number of activities, the search feature allows you easily search for a specific activity by typing a key word from the title of the activity you are looking for in the Search box and clicking the Search icon. This will display the activities with that key word for the specific date selected.
Searching by tracks
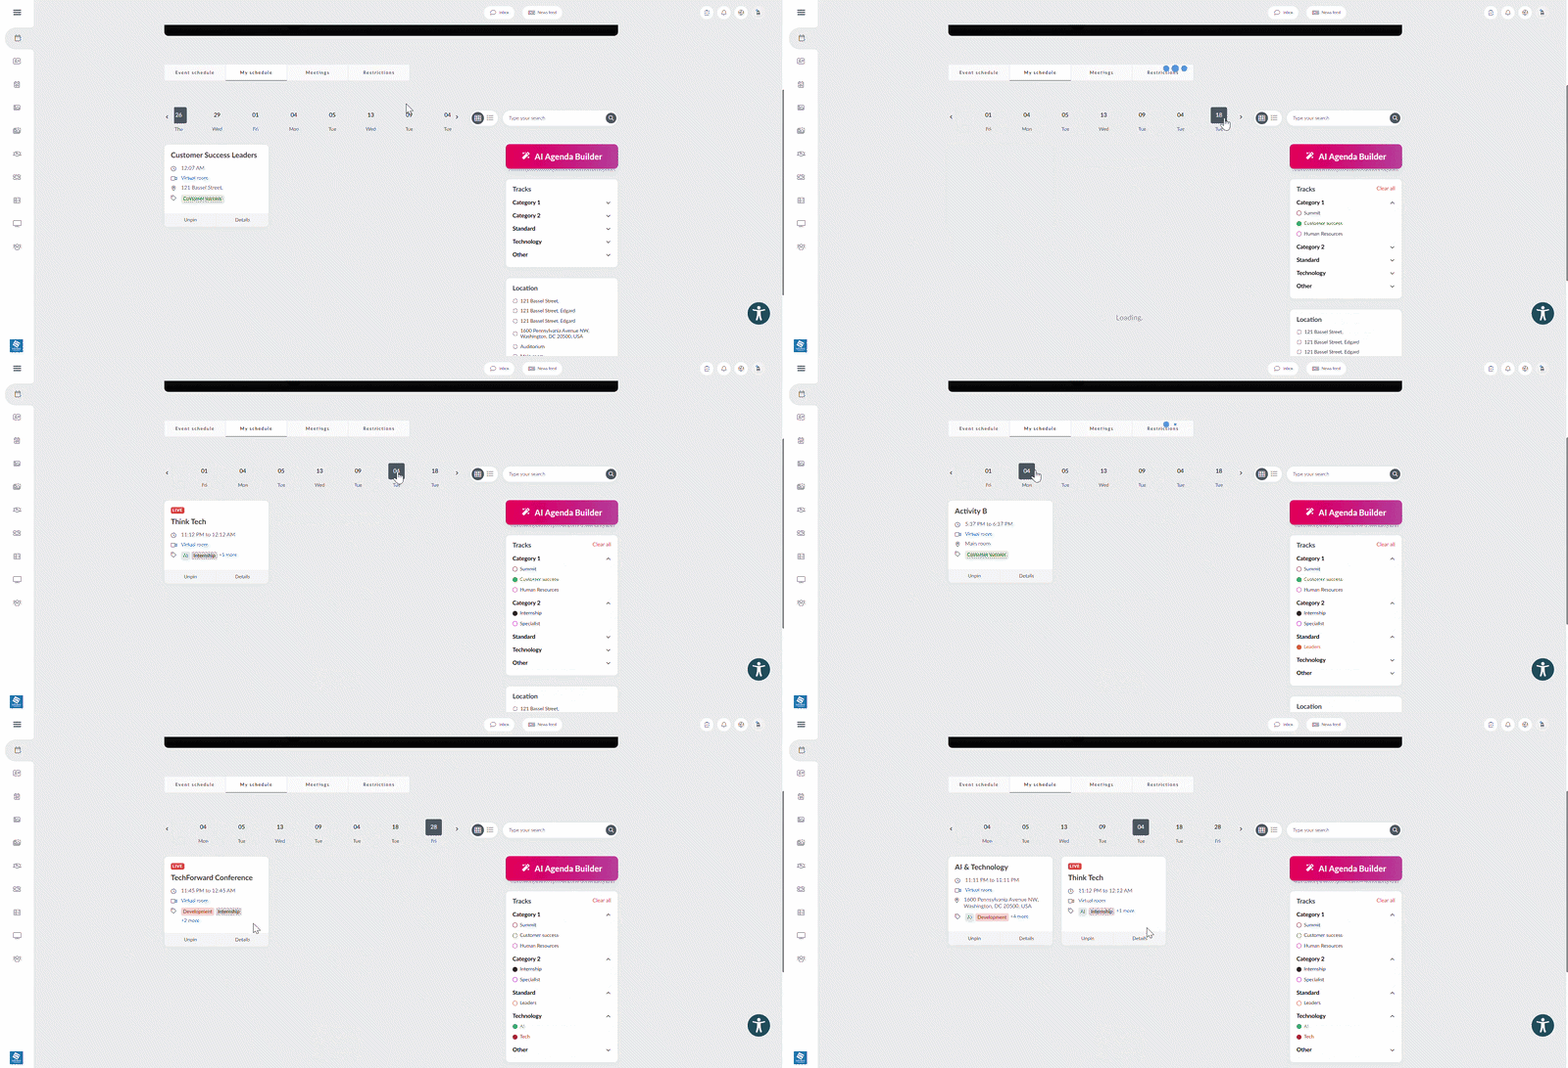
You can search for activities by the tracks associated with them. This will filter the event activities by their tracks. Click on the activity dates to see the activities related to a track. Only activities linked to the tracks will be displayed.
Click the arrow button in the Tracks field. to unfold them.
If you would like to fold the tracks in a category, simply click on the arrow button beside the track category.
You can filter event activities by their associated tracks to quickly find sessions related to a specific topic or category especially when browsing through a large number of activities
To filter activities by track:
- Click the arrow button in the Tracks field to expand the available tracks within a category.
- Select a track to view the activities associated with it.
- Click on the activity dates to view the sessions scheduled for each day.
- Click on Clear all to clear all selected tracks at once, or simply unclick a selected track.
Only activities associated with the selected track will be displayed.
Searching by location
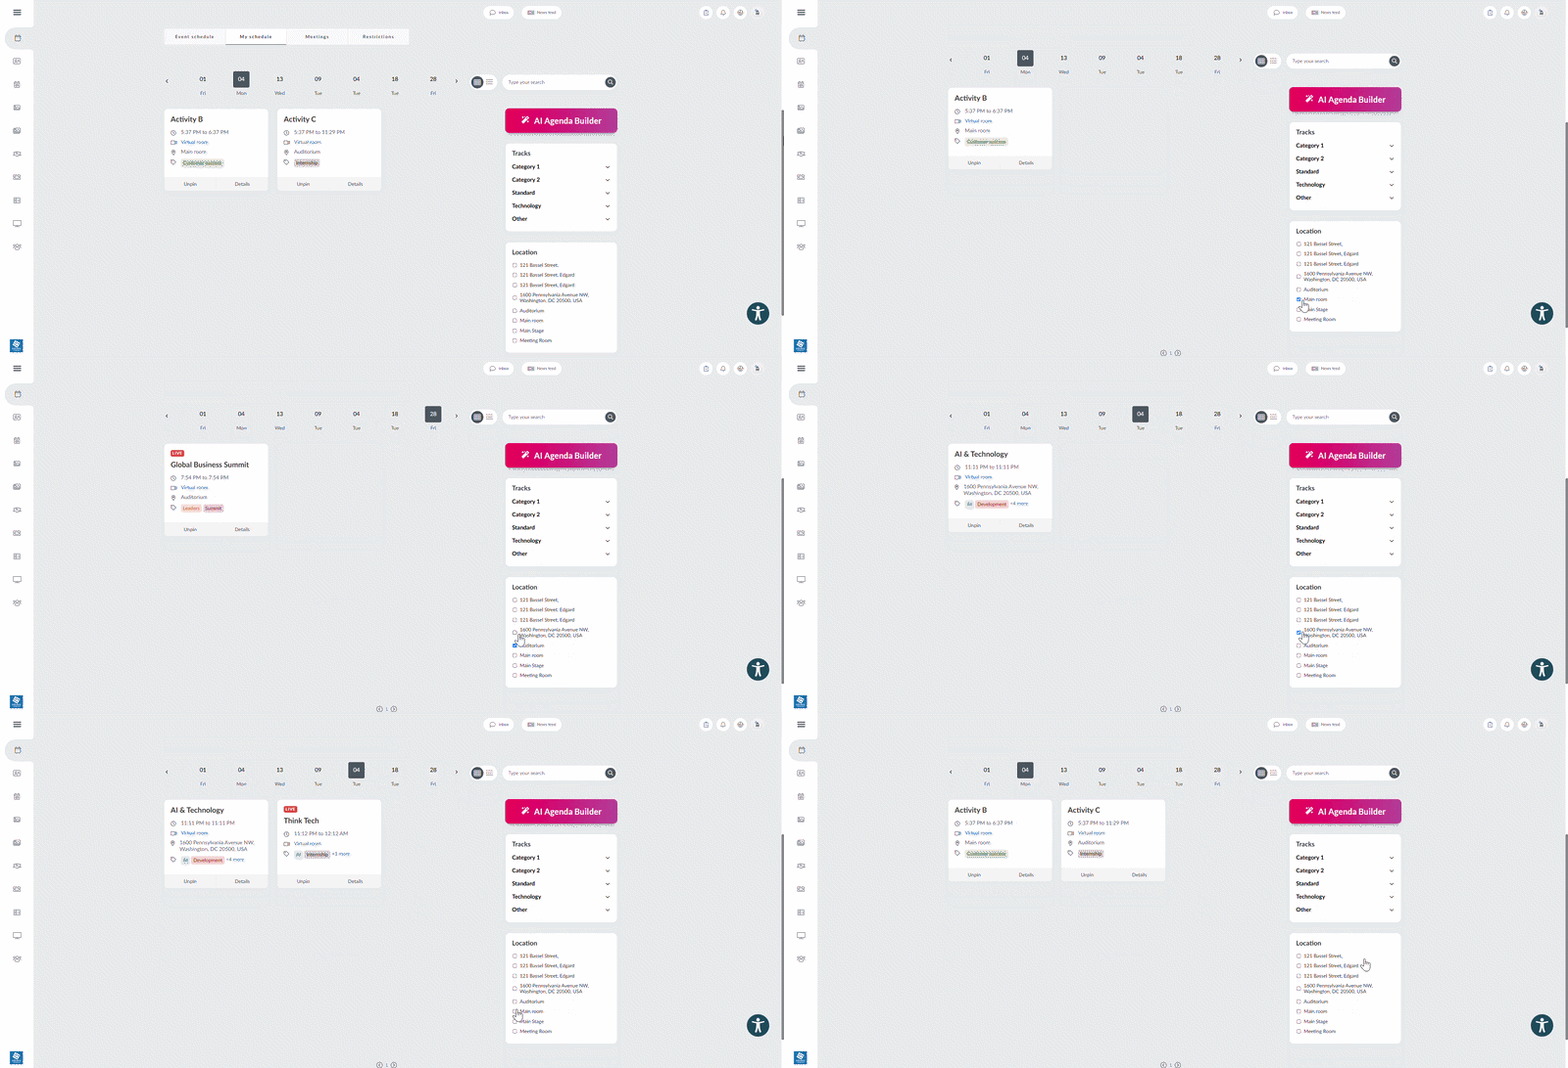
This feature allows you to filter activities by their location. Click on a specific location to view all activities taking place there.
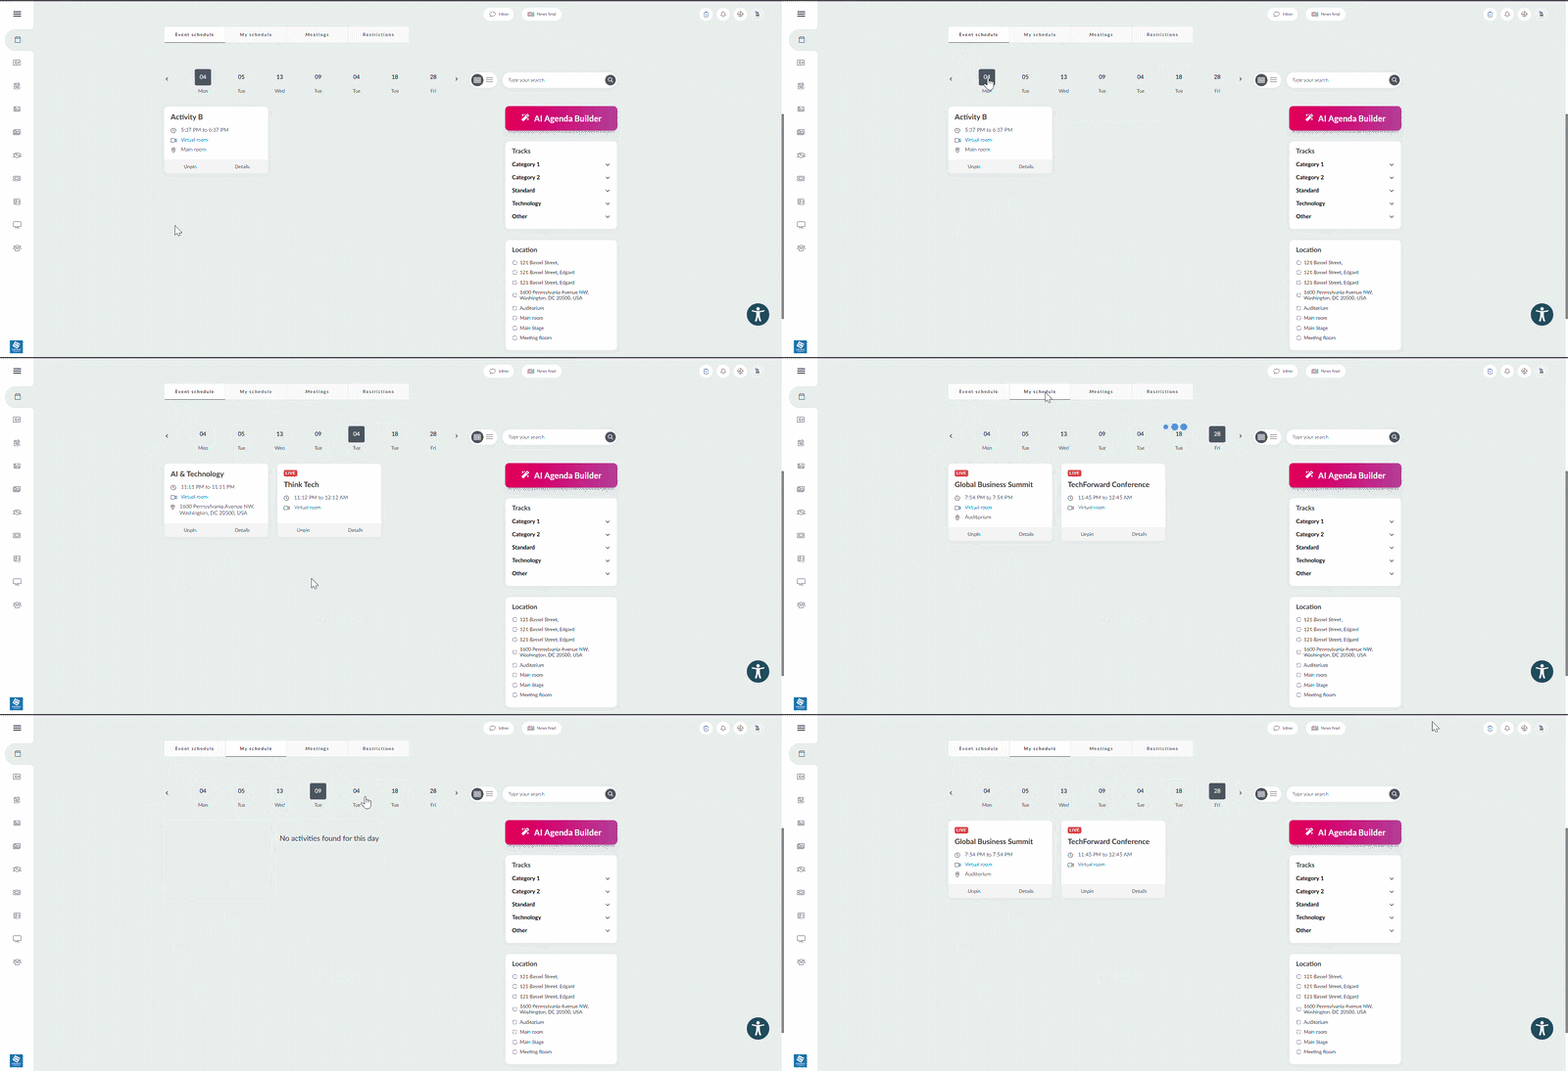
Event schedule vs My Schedule
On the Agenda page, you may see two schedules:
- Event schedule: Displays all activities available at the event, including activities you are not registered for.
- My schedule: Displays only the activities you are registered for.
Activity details
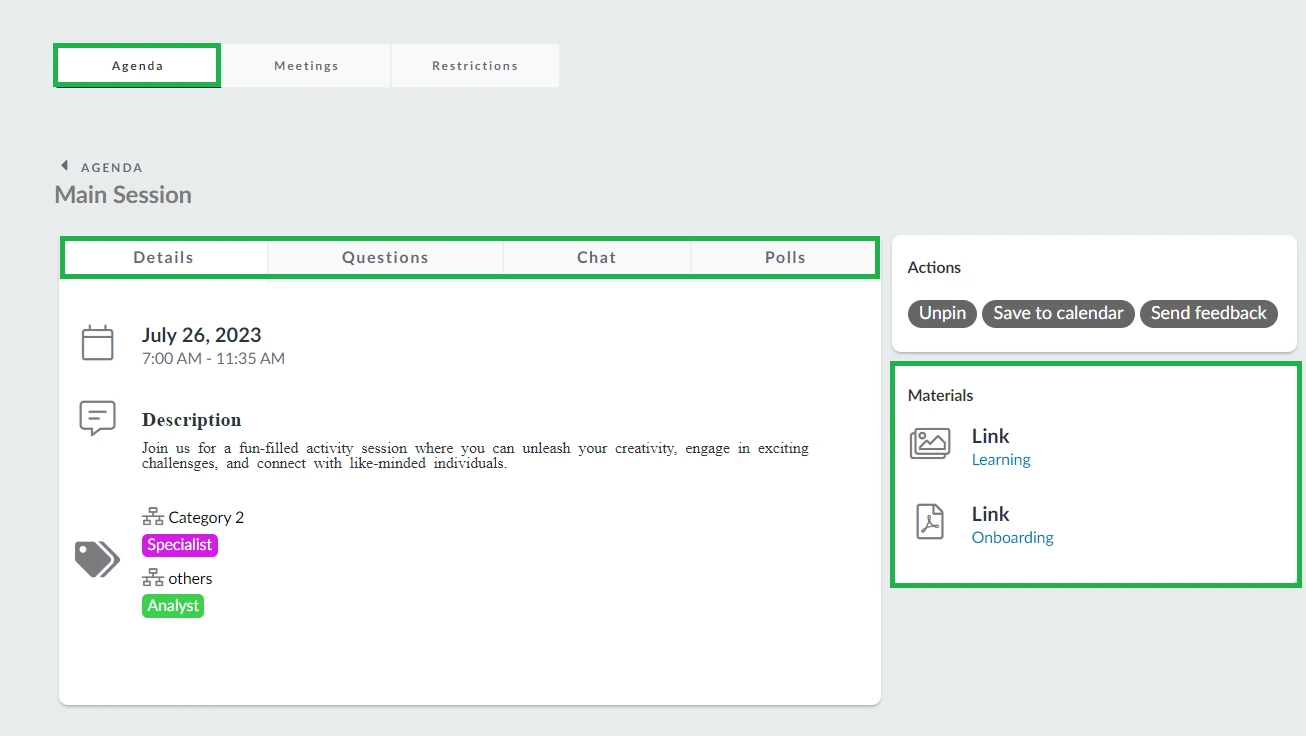
Click Details button on an activity card to open a new page where you can view information about the activity, including its date and time, speakers, tracks questions, comments, and polls.
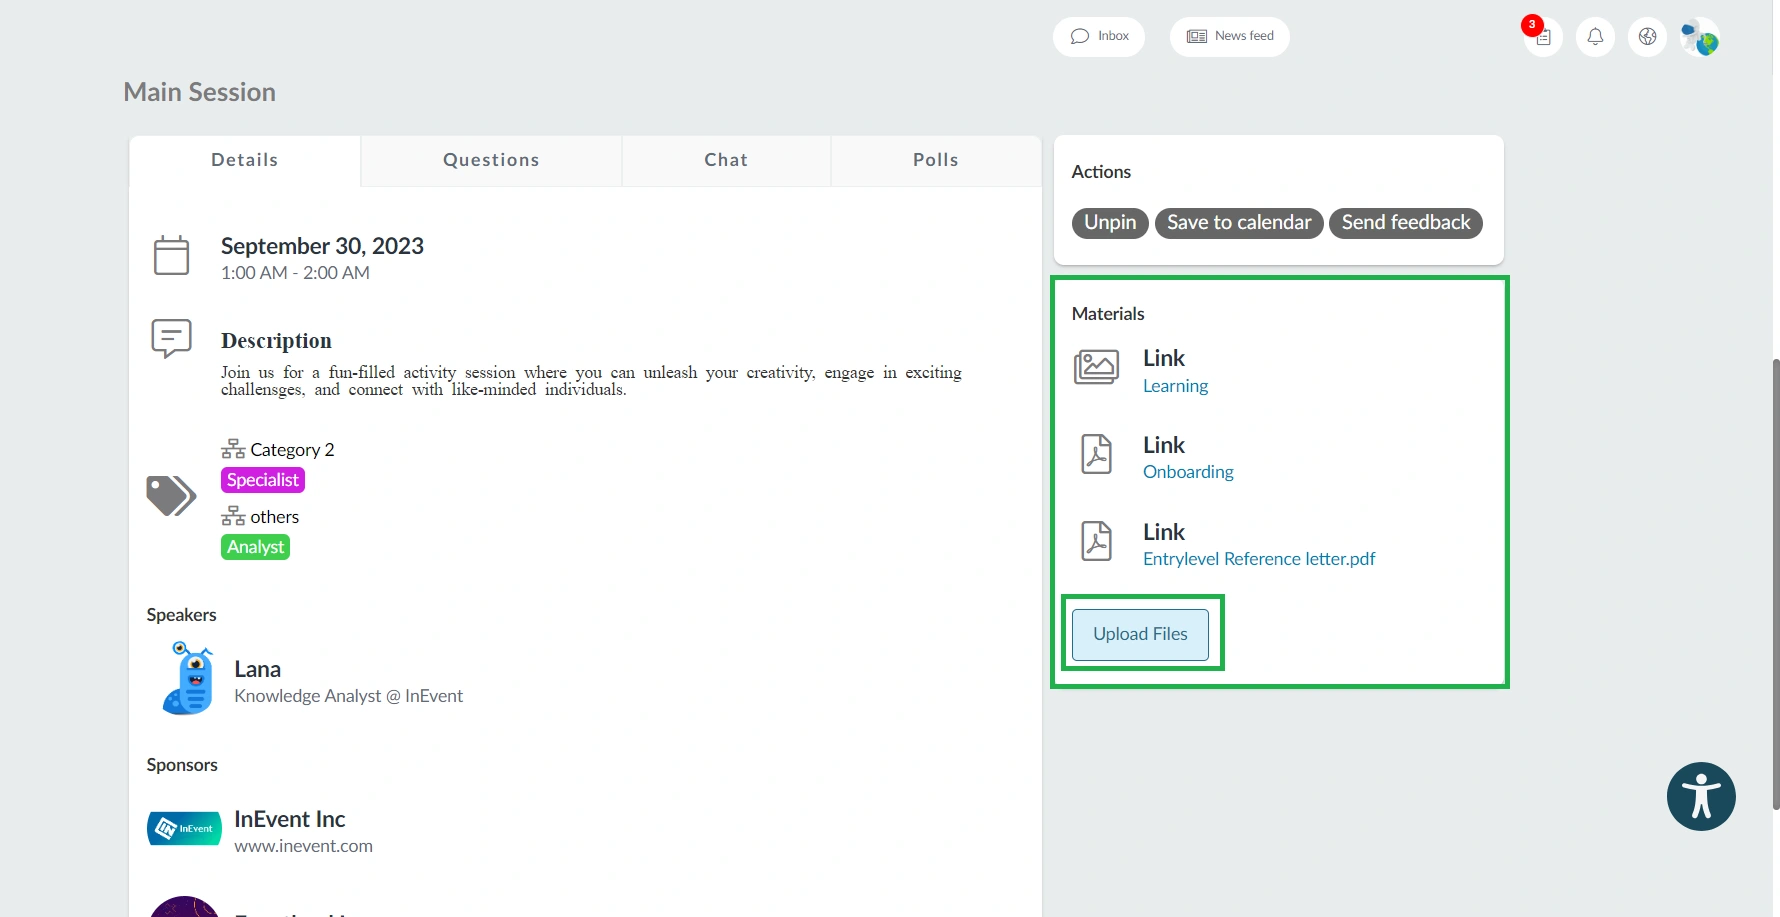
Any files made available for the session can also be accessed from the Materials field on the left-hand side of the page.
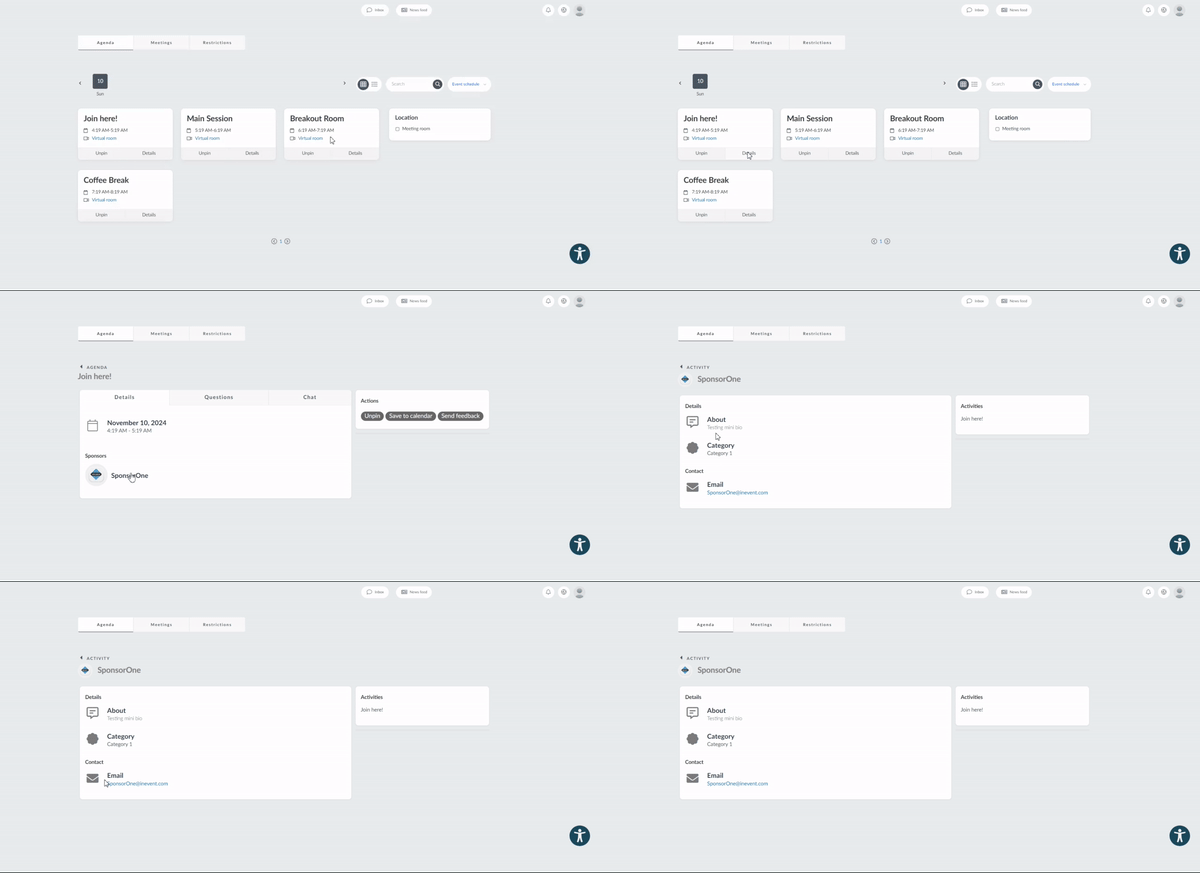
The details section will also show the sponsor logo if a sponsor is linkedv to the activity. Clicking on the sponsor logo will reveal the following sponsor details: short description, sponsor category and sponsor email address.
Actions
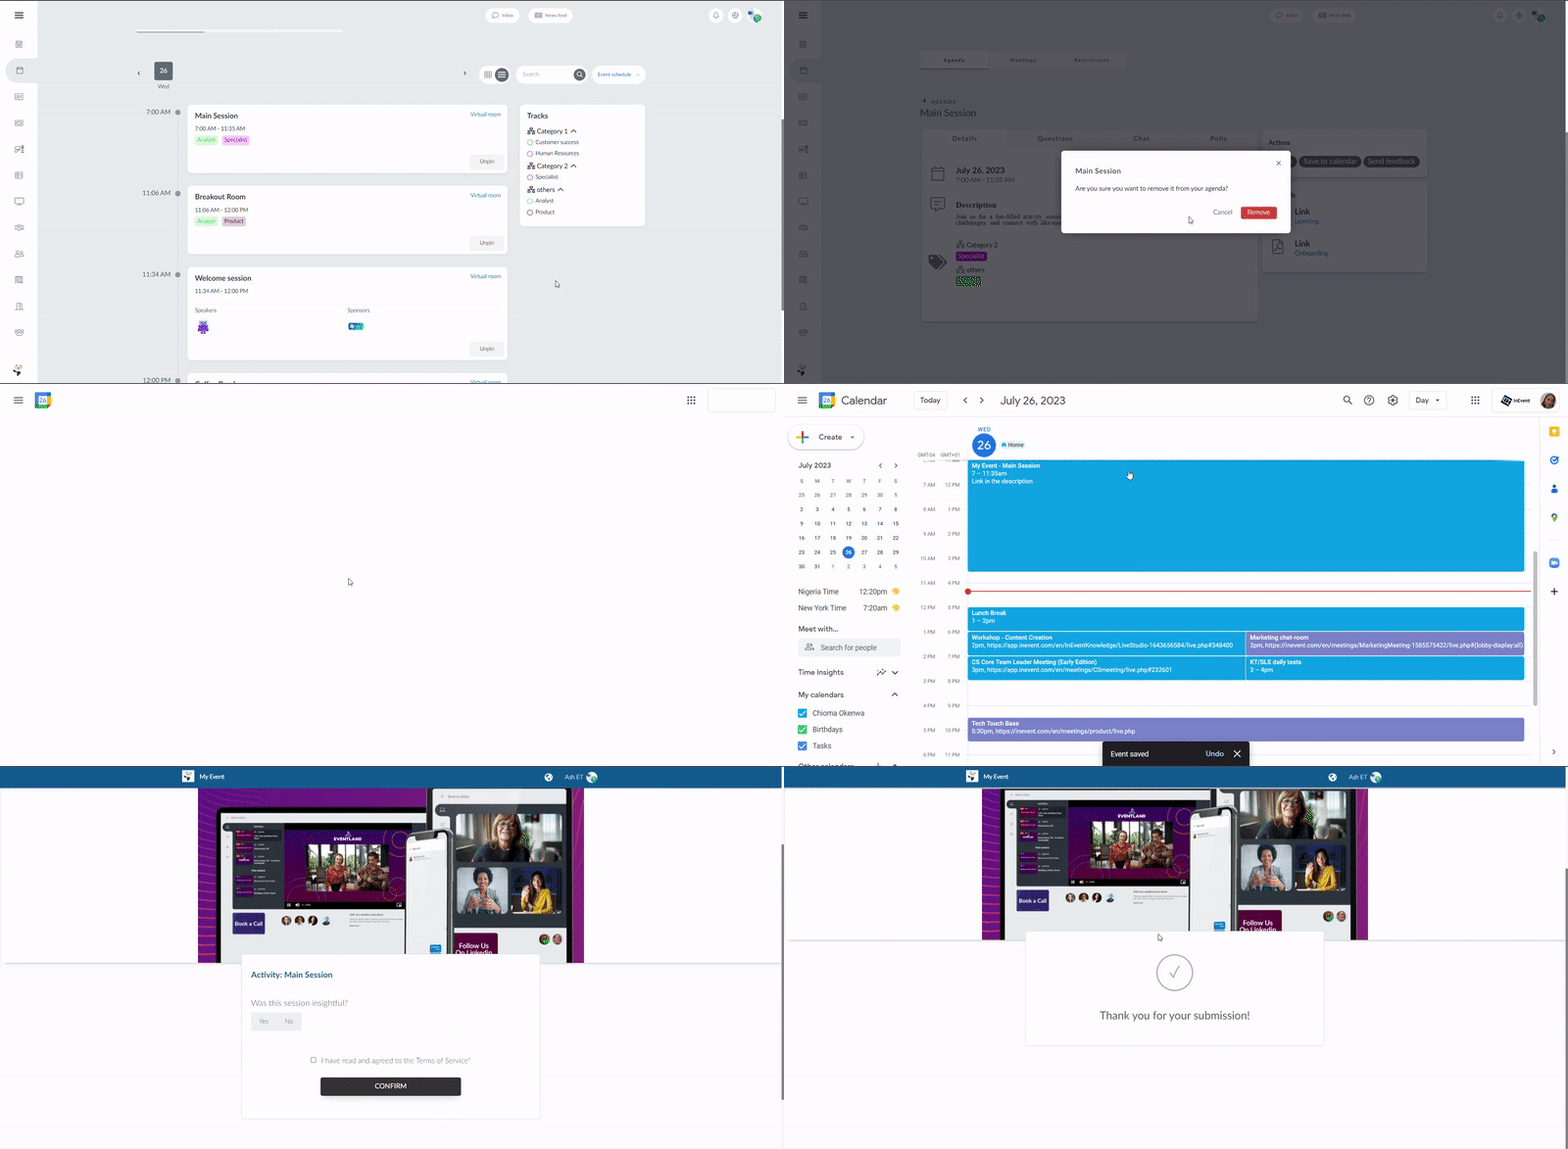
If the My Agenda is displayed as cards and not as lists you can click on the Details of the activity. The Action menu will be displayed on the right with the following: Pin/Unpin, Save to calendar, Send feedback.
- Pin/Unpin: All the activities in which you are enrolled in will be pinned, and the activities in which you are not enrolled will be unpinned. Clicking on Unpin will remove an activity from your schedule , and clicking on Pin will add an activity your schedule. When pinning/unpinning activities, a confirmation pop-up will appear for you to confirm your action.
- Save to calendar: There are 3 possibilities to save the activity in your calendar, in the gif below the activity is saved in the Google Calendar. It can also be saved on Outlook and/or Apple Calendar
- Send feedback: If feedback was created for this specific activity, when clicking on it a new tab will be open for you to submit a feedback.
Claiming credits
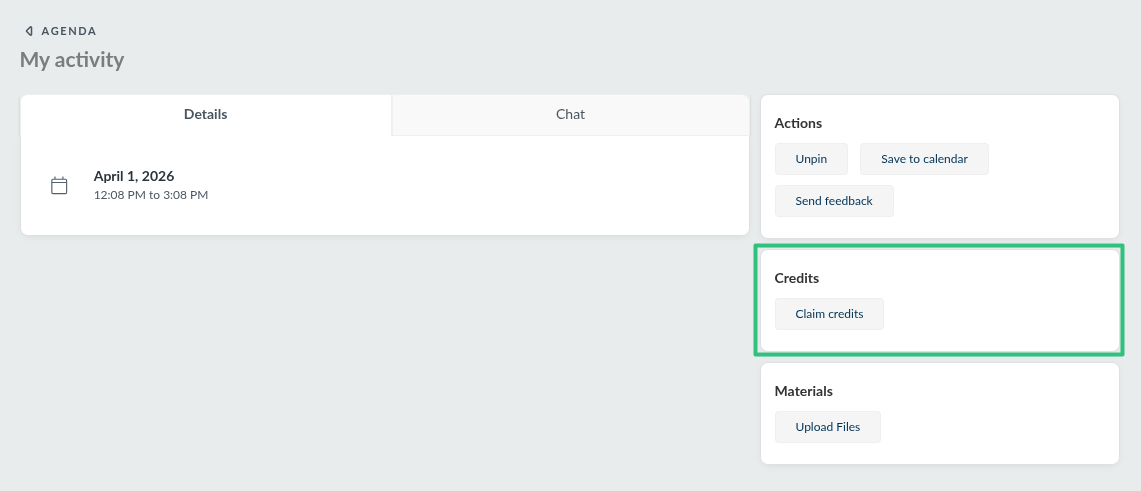
Your event organizer may require you to access or interact with a defined external site to complete attendance credit units. In such cases, you will be able to navigate to the external site and claim your credits by clicking the Claim credits button and completing the required action or interaction.
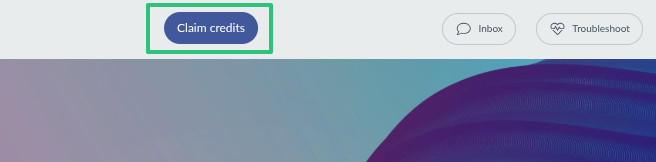
You can also enter the applicable session room and click the Claim credits button located at the top of the page.
AI Agenda Builder
The AI Agenda Builder is a smart tool that helps you quickly find sessions that match your interests without having to browse every activity manually. Using your selected preferences and event details, the AI recommends sessions you might want to attend. You will be able to use the AI assistant if enabled by the event organizer.
To learn more on how to use the AI tool, refer to the AI Agenda builder article.
Uploading files to activities
If you are an Event admin, Staff, Presenter or Linked speaker, you will be able to upload files directly to activities you are pinned to, under the Materials section from the My Agenda page.
For more detailed information on this, please refer to the Files and documents article.
My sessions page for Presenters and Linked Speakers
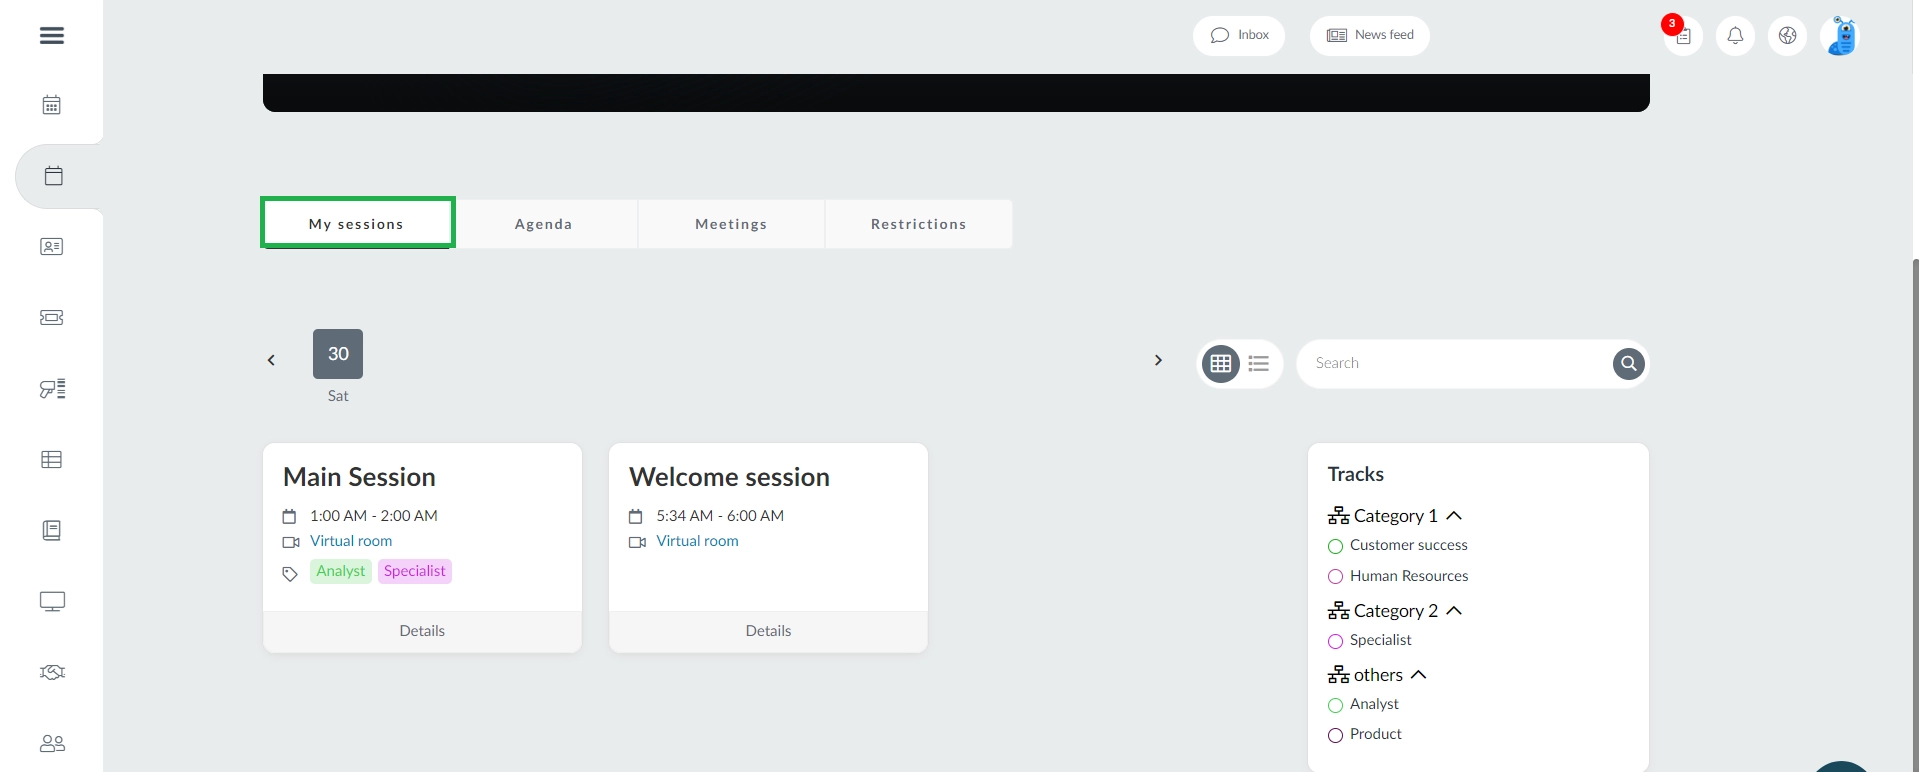
If you are a Presenter or a Linked speaker, you will notice the My sessions tab appearing before the Agenda tab.
- Presenters will have access to view all activities of the event on this page.
- Linked Speakers will only see the activities they are linked to.
Both Presenters and linked Speakers can perform similar actions to those available on the Agenda tab, with few exceptions:
- They won't see the Pin/Unpin button on the activity's card.
- They won't see the Event schedule/My Schedule filter.
Accessing the event's agenda via the mobile app
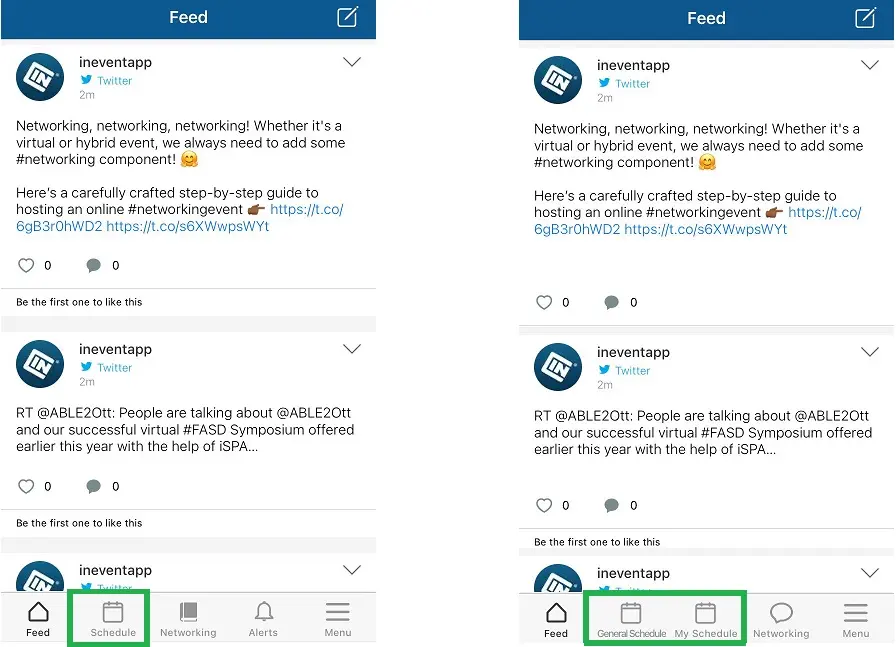
To view your agenda, access the Schedule tab. Here you will see all the activities and dates and times they are going to be held.
If the Two-tab schedule option is enabled, you will see two tabs: General Schedule and My Schedule. The My Schedule tab only lists the activities that the attendee has enrolled in, while the General Schedule will show all the free activities that are not restricted to lists available for attendees to enroll in.
In the image below, on the left-hand side, the two-tab schedule is disabled. On the right-hand side, the two-tab schedule is enabled.
Searching for activities in the app
You can search for activities using the following types of queries:
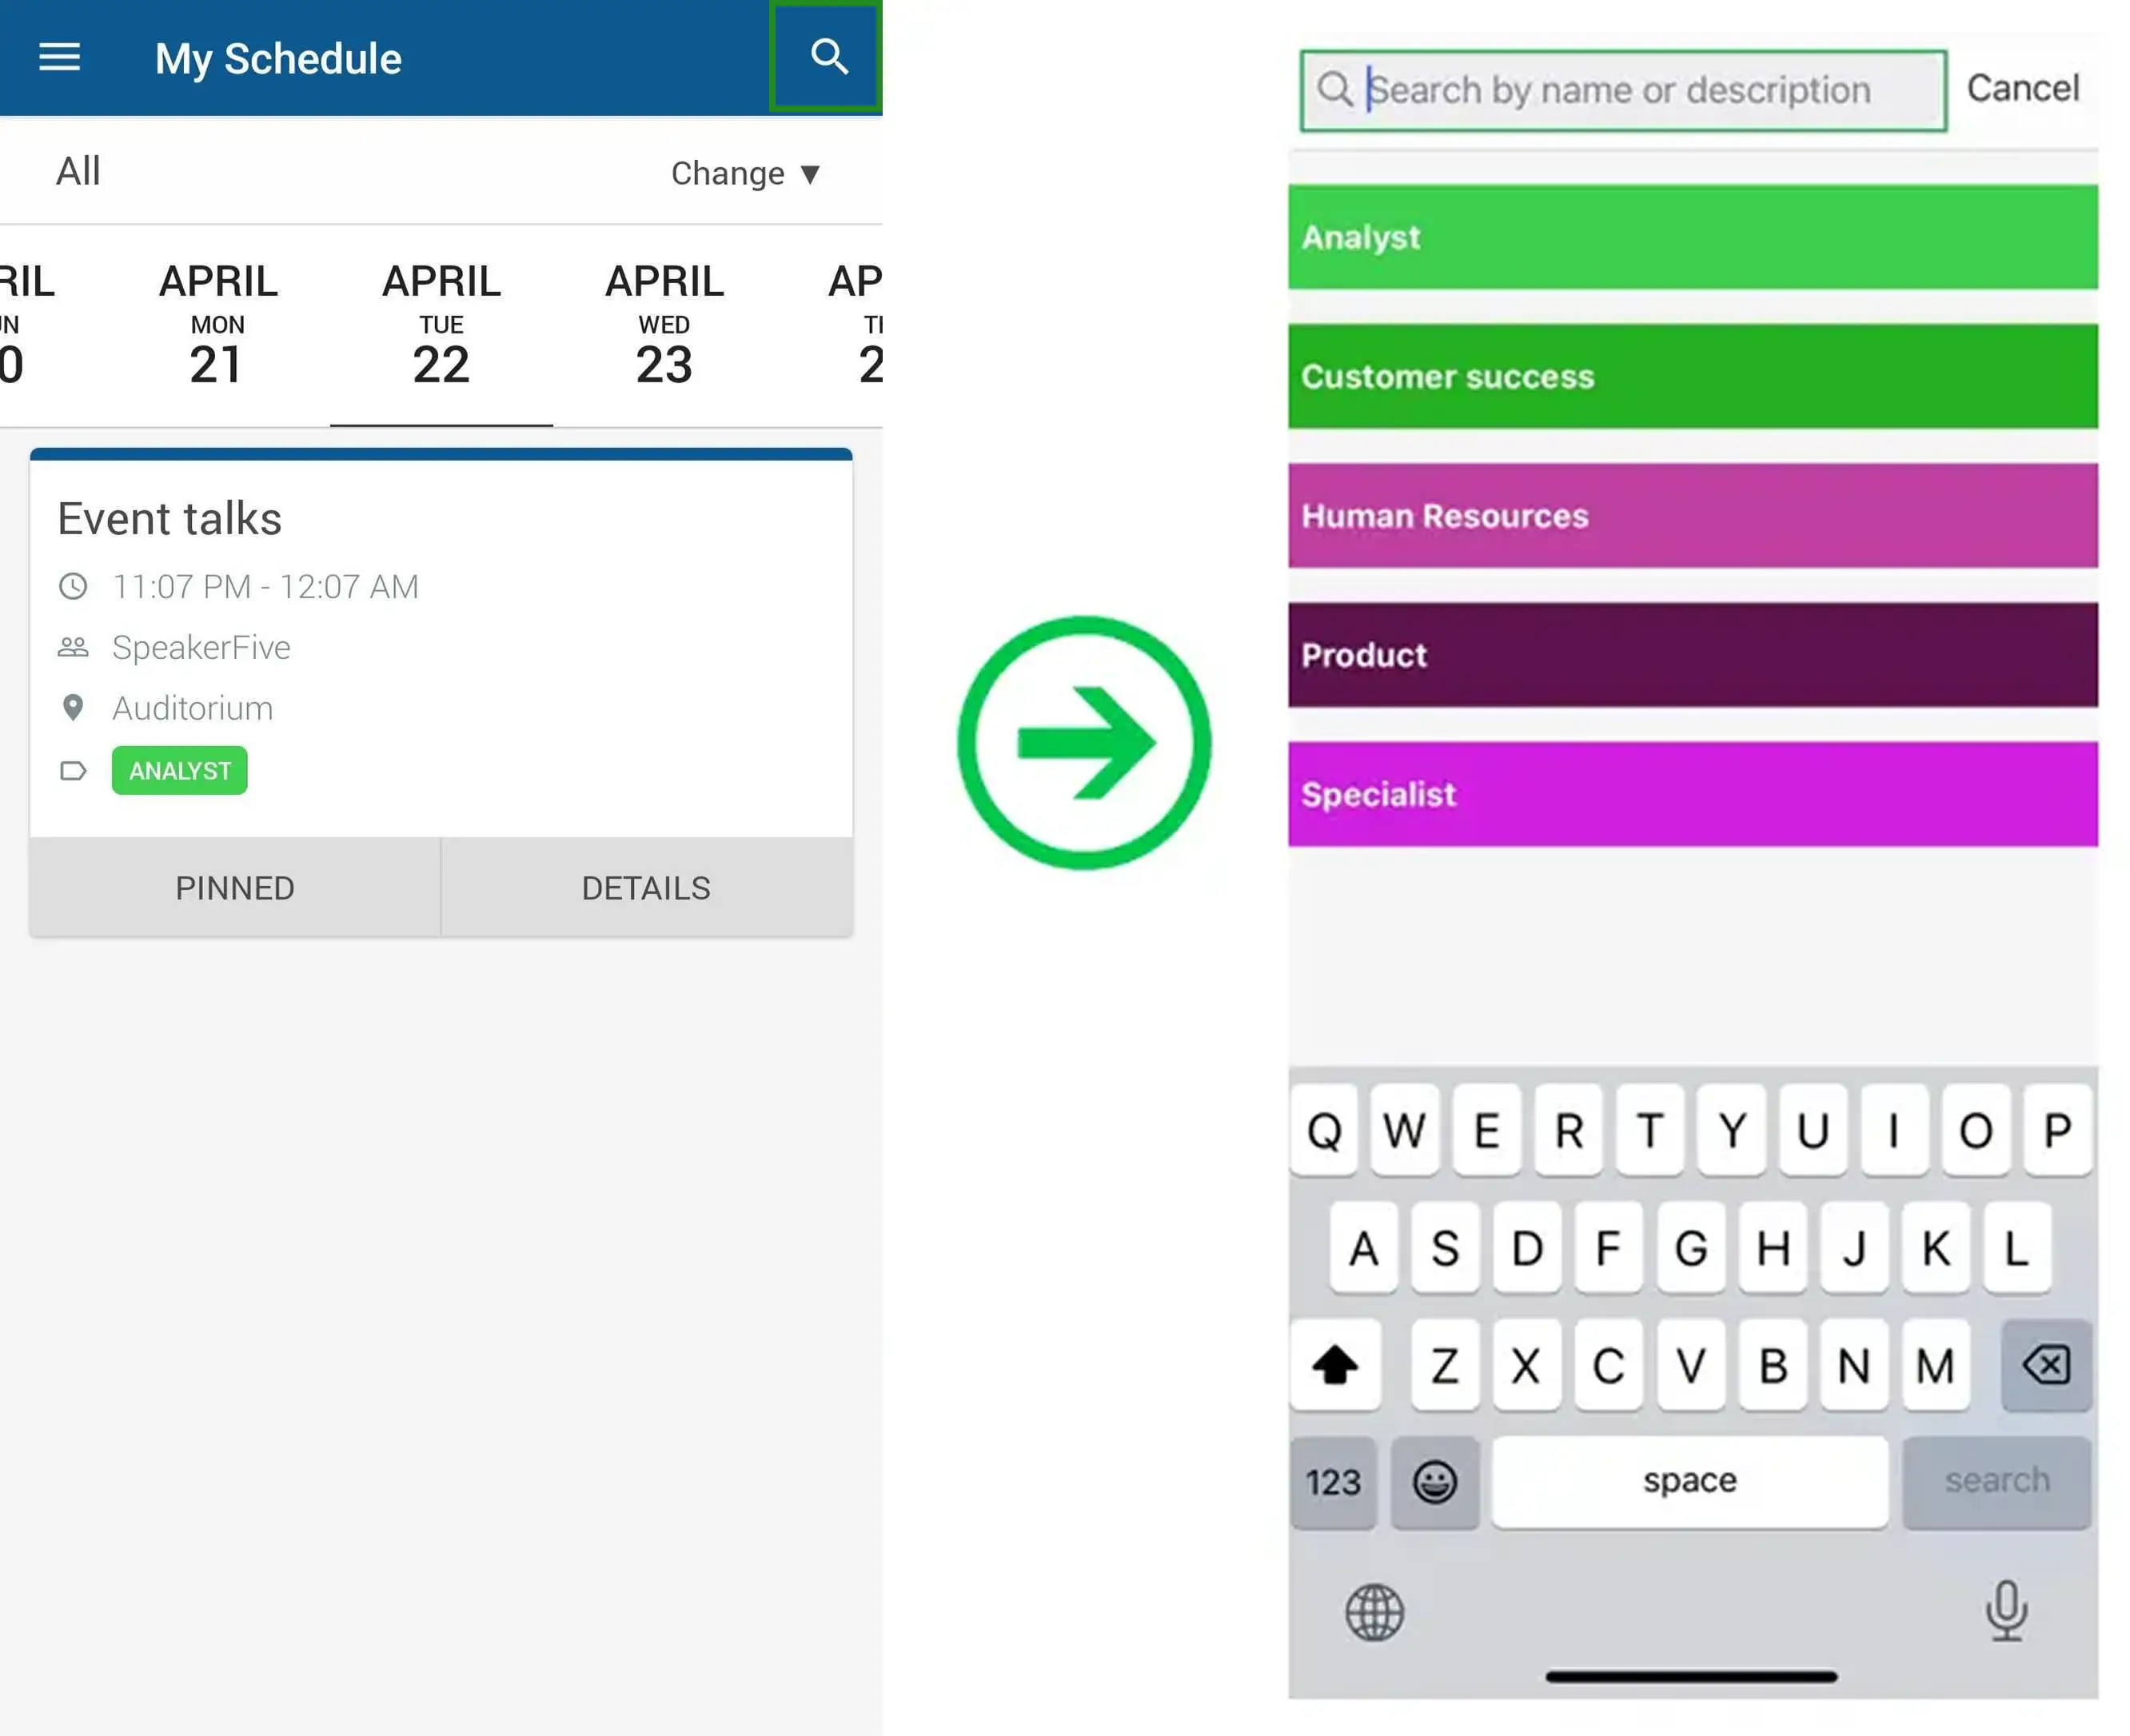
- Activity Name or description: Click on the magnifying glass in the top right corner and search by the activity's name or description.
- Tracks: Click on the magnifying glass in the top right corner and select the tracks corresponding to the topics of interest.
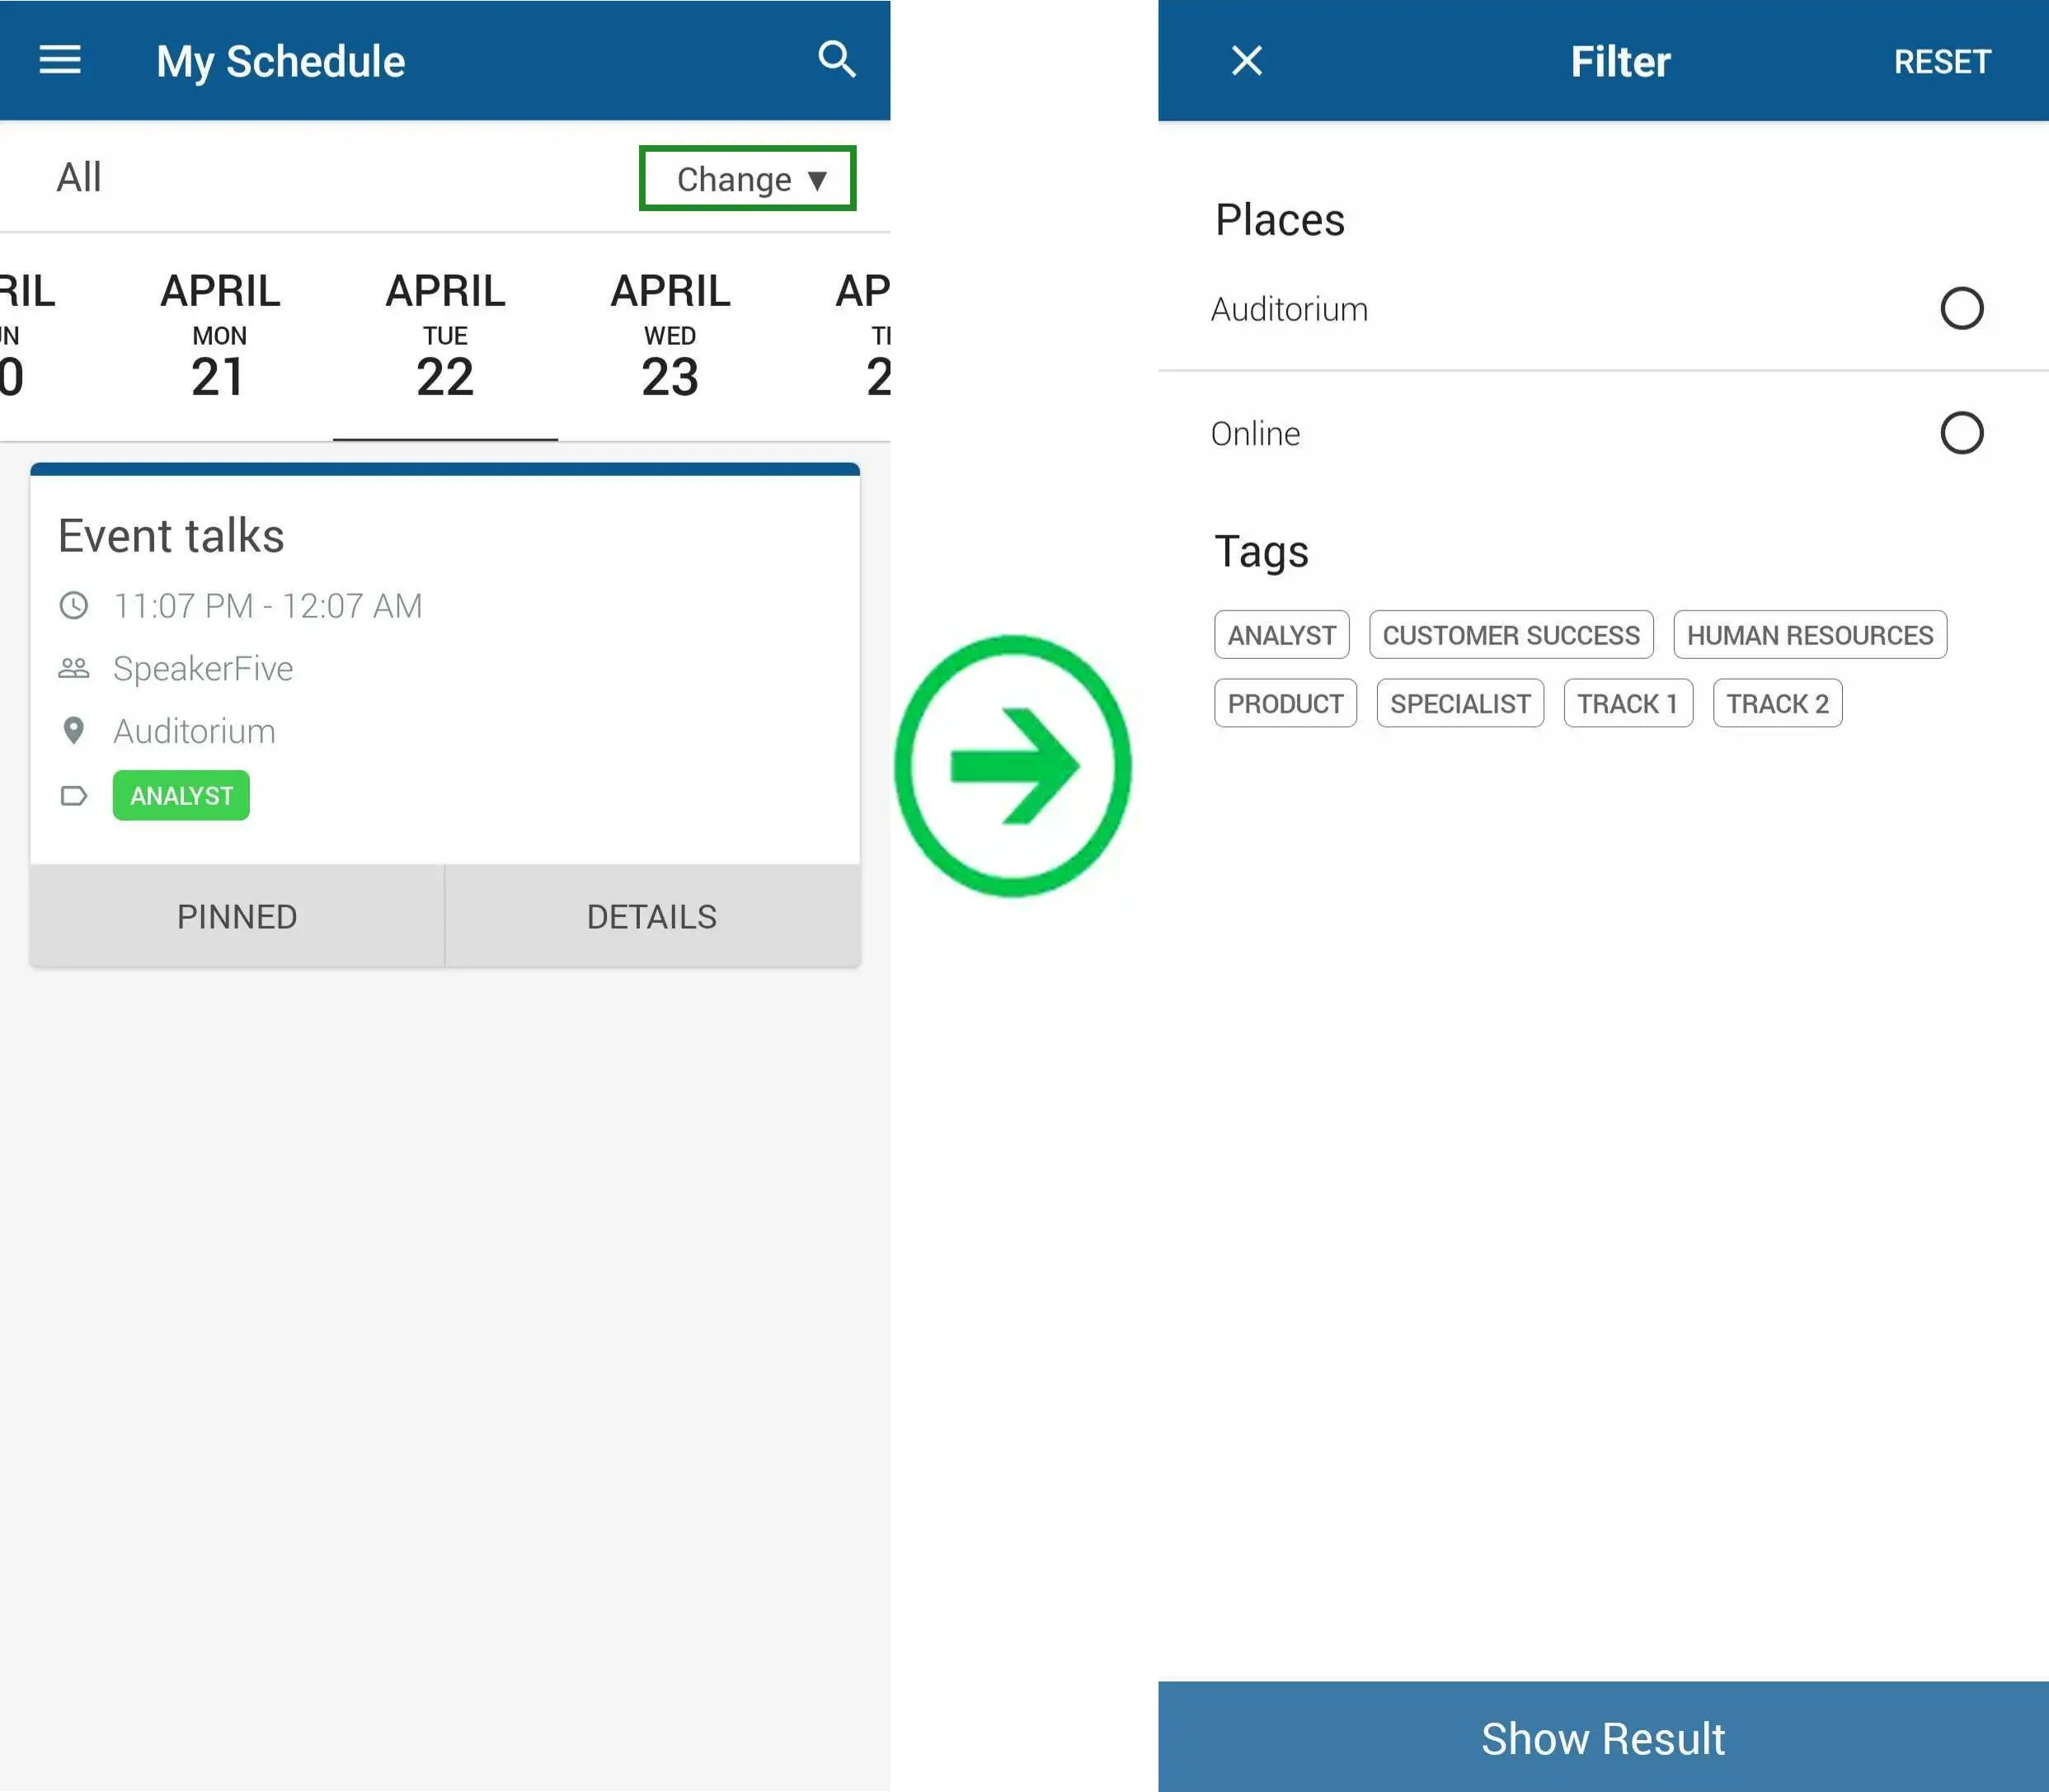
- Location: Click on Change, select the places where activities will take place (you can also select the tags corresponding to the topics of interest), and click the Apply button at the bottom of the screen.
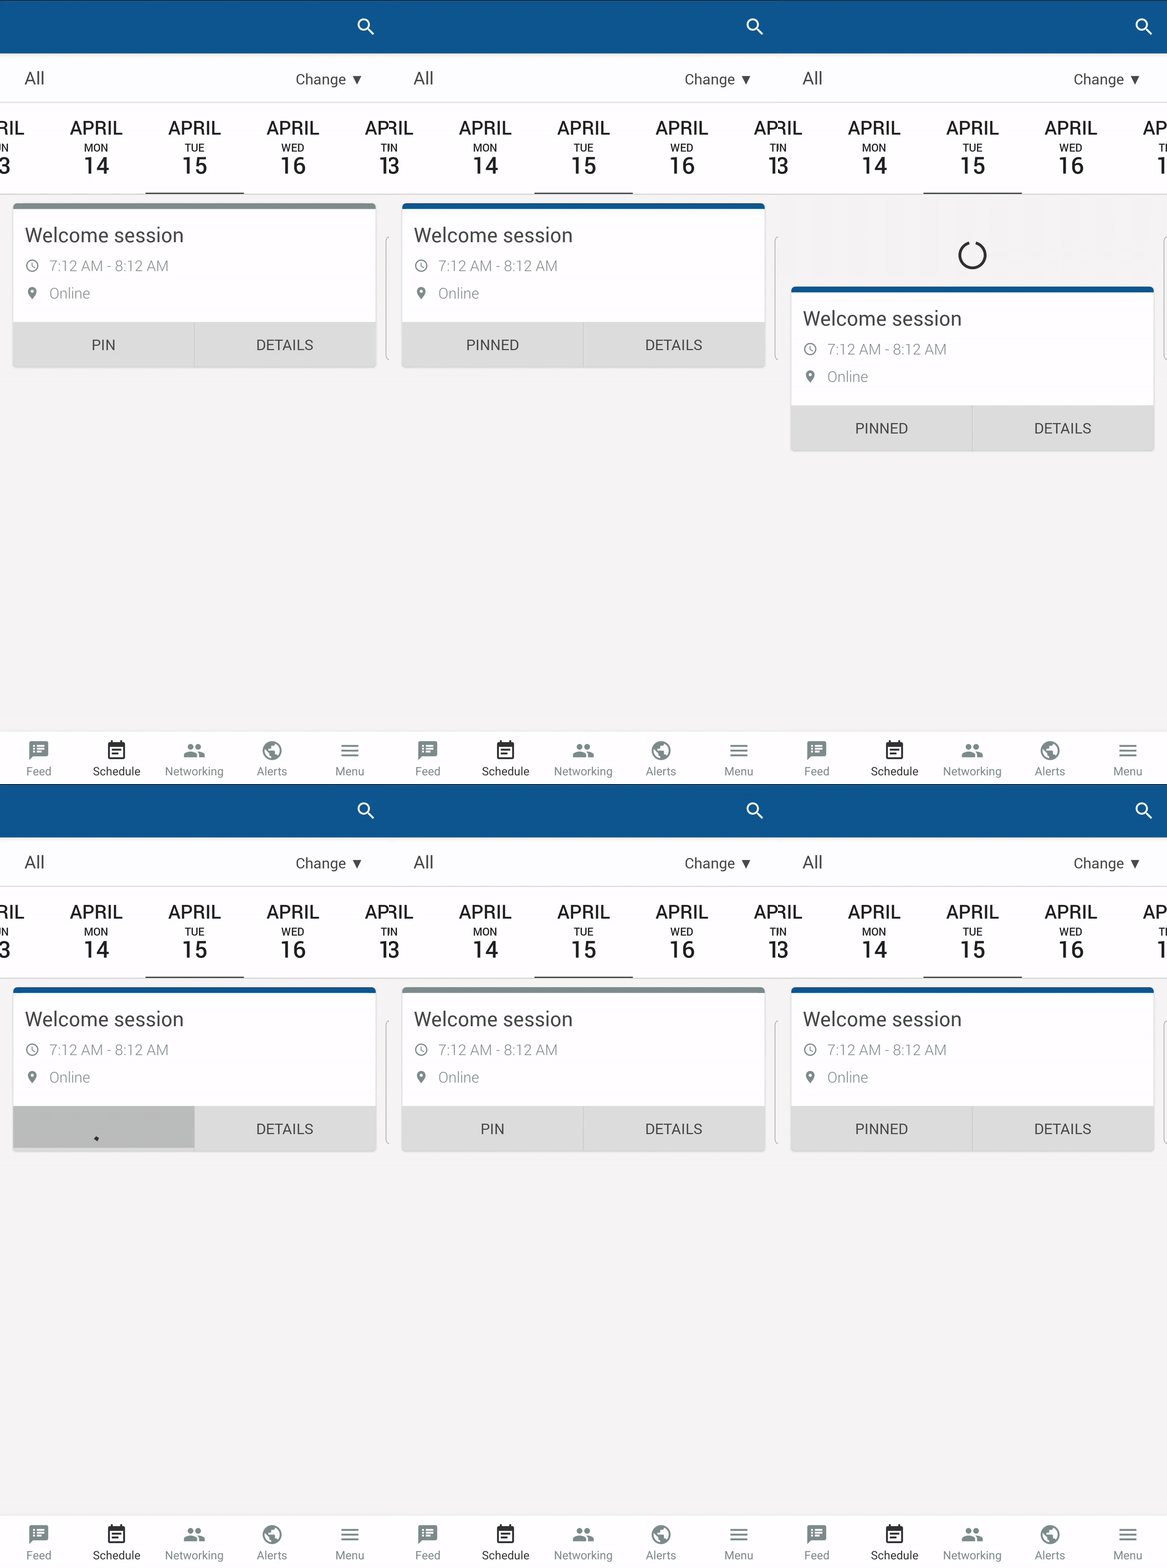
- Pin/Unpin activities: Activities in which you are enrolled in will be pinned, and the activities in which you are not enrolled will be unpinned. Clicking on the Pin button will add an activity to your schedule, and clicking on Unpin will remove an activity from your schedule. When pinning/unpinning activities, a confirmation pop-up will appear for you to confirm your actions by clicking on Yes.
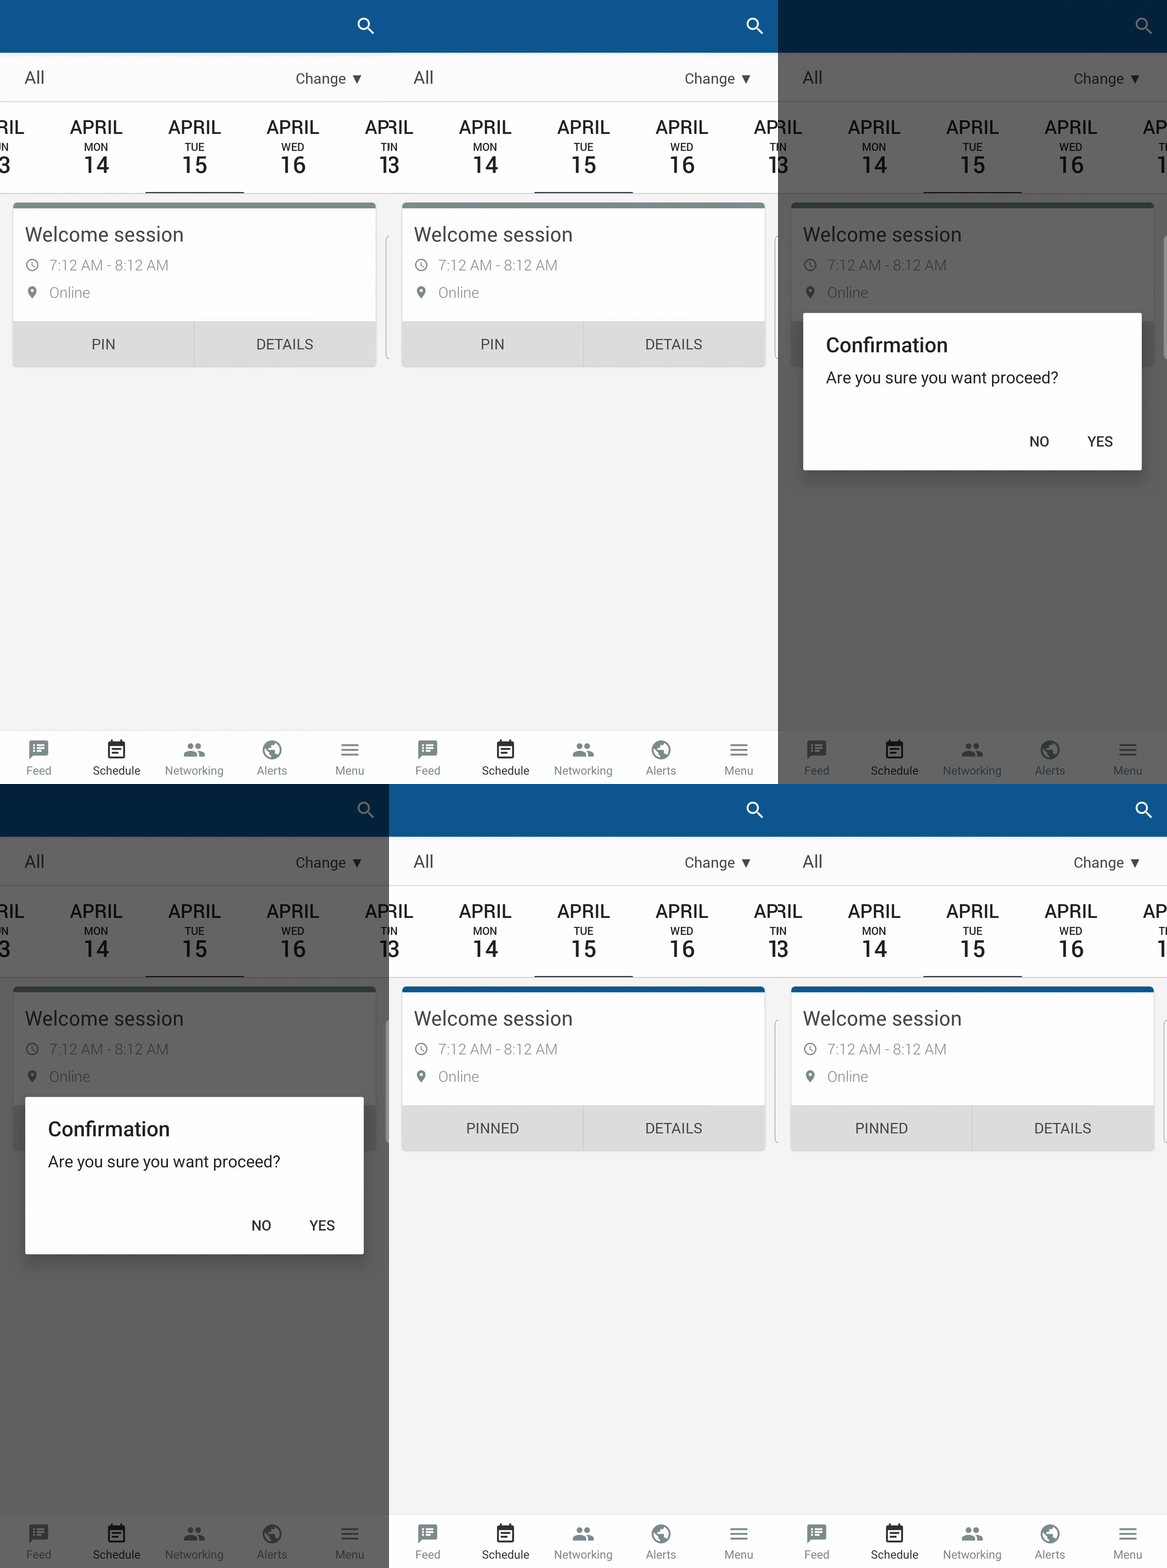
If the Instant activities enrollment tool has been enabled by the event admin, the confirmation pop-up will not appear when you click on pin/unpin as shown below:
Activity Details
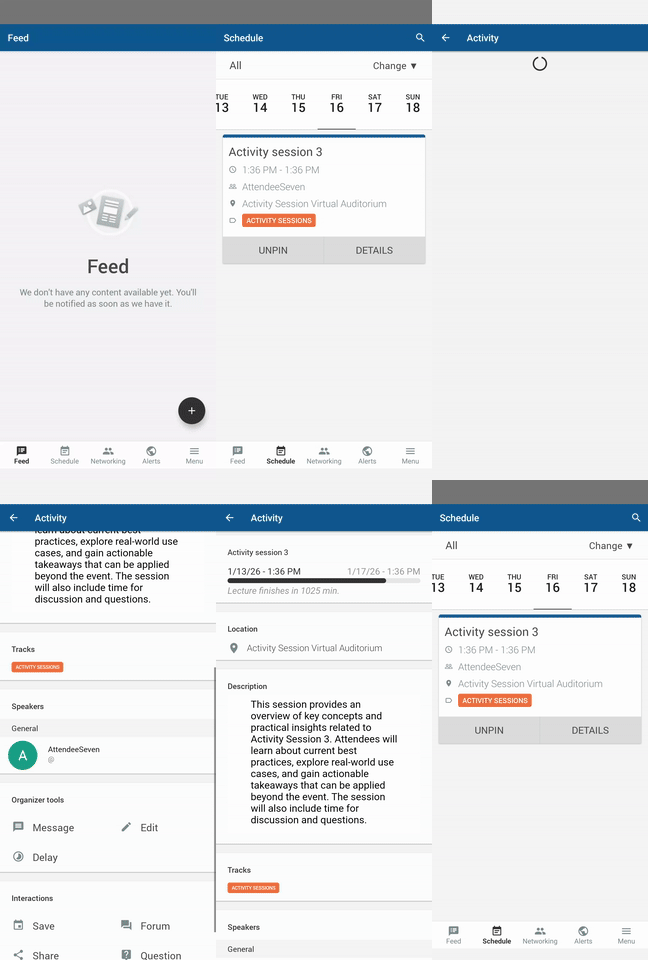
Inside the activity details, you will find information such as session name, time, location, details, tracks, and speakers. Attendees can see these information:
- Session name: Displays the title of the activity or session, helping attendees quickly identify the content.
- Time: Shows the scheduled start and end time of the session so attendees know when it takes place.
- Location: Indicates where the session is happening, such as a room name, stage, or virtual space. For more information, refer to our Event Places article.
- Details: Includes the session description or additional information provided by the organizer, such as an overview, objectives, or key highlights.
- Tracks: Displays the tracks associated with the session, helping attendees understand the theme or category of the activity. For more information refer to our Tracks article.
- Speakers: Lists the speakers assigned to the session, including their names and profiles when available. For more information on linking speakers to Activities, refer to our Speakers article.
Accessing your meetings
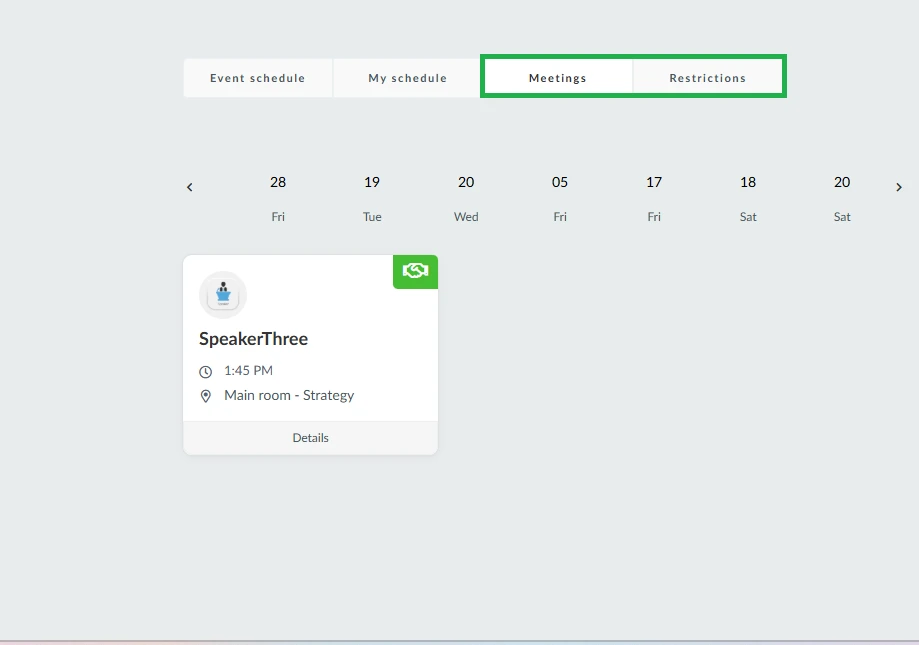
From the Meetings page, you can view all your scheduled meetings with other participants. To learn more about scheduling and joining meetings and setting restrictions, refer to the Meetings article.