In-person event guide
 Updated 3 months ago
by
Faisal Durrani
Updated 3 months ago
by
Faisal Durrani
Organizing an in-person event demands careful planning and a thorough grasp of both technical and logistical intricacies. In this guide, we'll walk you through the elements which help ensure the successful execution of your in-person event at InEvent, as well as some beneficial services and tips that could facilitate the process.
Configuring your event mode
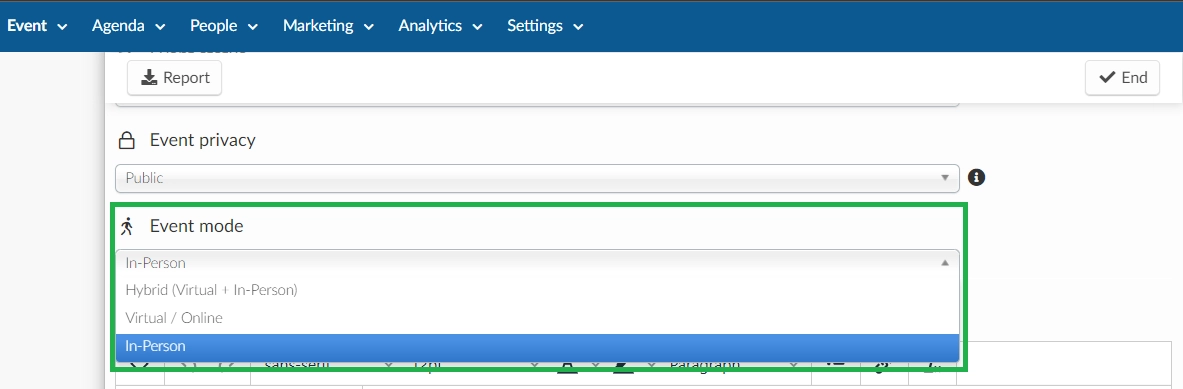
The first step is to set your event to an in-person event.
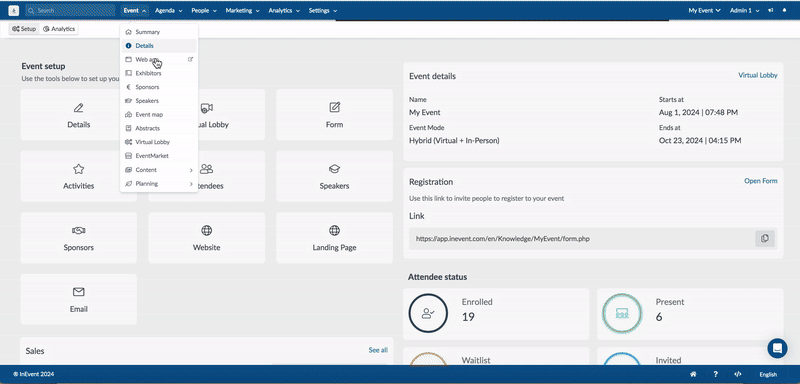
- Navigate to the Event > Details page of your event.
- Click on Edit.
- Scroll to the Event Mode field and select In-person.
- Click End to save your changes.
Now that your event is set to the In-person mode, It is time to learn cabout the necessities for a successful In-person event.
Native App
If you are planning to boost engagement and facilitate connections among attendees, the mobile app is the right choice for your in-person event. On the app, you can print attendee's badges, promote the event's agenda, share information through the news feed, have the participants answering surveys or asking questions through their phone, networking with other participants and much more.
Below is a gif highlighting how intuitive it is to navigate through the app. You can customize the contents of the app to your liking:

Web app
The Web app is a software application that runs in a web browser and can be accessed over the internet. Once your event is set to an In-person mode, participants can access the event via the web application using their browser.
- Ensure compatibility with browsers:
- Chrome (Mac/PC) 56 or most recent (best experience)
- Firefox (Mac/PC) 44 or most recent (recommended alternative)
- Safari (Mac) 11 or most recent (recommended alternative)
- Chrome (Android) 80 or most recent
- Safari (iOS) 11 or most recent.
- Customize the web app to include the necessary tabs for your in-person event like My Agenda, My Account, Event Photos, Networking, etc. from the Settings > Tabs > Web app page:

Below is a gif showing what the web app looks like via a web browser:
Abstract Management
The Abstract Management feature organizes submitted abstracts and facilitates the review, approval, and rejection process. It also provides and displays data related to the submitted abstracts. The Abstract Management feature is also available for in-person events, and all functionalities work in the same way as for hybrid or virtual events.
Access control
With the access control feature, you can efficiently manage and monitor participant entry and exit at your event. Each attendee will have a unique QR code, which you can scan to check them in or out, enhancing security and reducing fraud. To set up this feature, navigate to Settings > Tools and enable the Access control option by toggling the button in the Pass section. You can choose between reading QR codes only once or allowing multiple scans, depending on your event’s security needs.
Badge printing
Badge printing is an important part of event management because it helps with attendee identification, enhances security, and often facilitates networking by making it easy for people to see who is who. Using the InEvent platform, you can easily create and design badges, define specific badges for groups of attendees, and event organizers can easily control attendee check-ins as well as print attendee badges during in- person events via the app.
The supported printers are:
- Brother QL 710W, QL 720NW, QL 810W, QL 820NWB.
- Zebra ZD 200 Series, ZD 400 Series, ZD 600 Series
Internet specifications
When organizing in-person events, reliable internet connectivity is essential for both the organizers and attendees. The internet requirements can vary based on the size of the event, the type of activities planned, and the expectations of the participants. Here's a breakdown of internet recommendations for in-person events:
- Minimum Bandwidth: For small events (less than 50 participants), a minimum of 10-25 Mbps download and 3-5 Mbps upload speeds might suffice, primarily for basic activities like checking emails or accessing event apps.
- Recommended Bandwidth: For medium to large events (50-500+ participants), a minimum of 50-200+ Mbps download and 10-50+ Mbps upload speeds. Larger events with thousands of participants, or those requiring live streaming or real-time interactions, might need even higher speeds (200-500+ Mbps).
- Considerations: The number of connected devices, type of activities (e.g., streaming, downloads, presentations), and whether the event has heavy internet usage (e.g., live polls, social media interaction).
Setting Up a Dedicated Wi-Fi Connection for Printers
When managing events, ensuring that all aspects of your tech setup run smoothly is crucial. One often-overlooked detail is the Wi-Fi connectivity for printers. To optimize performance and avoid potential disruptions, it's highly recommended to establish a dedicated Wi-Fi network specifically for your printers. Here’s how you can set this up effectively:
- Acquire a Separate Router or Access Point: To create a dedicated network, you will need an additional router or access point. This device will broadcast a separate Wi-Fi signal that your printers will connect to.
- Configure the Network: Set up the new router or access point with a unique SSID (network name) and password. Ensure that this network is distinct from your main event network to avoid confusion.
- Connect Your Printers: Connect each printer to the new Wi-Fi network using the network credentials you set up. This can typically be done through the printer’s settings menu or control panel.
- Test Connectivity: Before the event begins, test each printer on the new network to ensure they can connect and print without issues. This step is crucial to identify and resolve any connectivity problems in advance.
- Communicate with Your Team: Inform your event staff about the separate network for printers. Provide them with the necessary login details and instructions to ensure they can manage printer tasks effortlessly during the event.
InEvent's bundle packs
InEvent's Bundle Packs provide an all-encompassing solution by adding top-tier hardware and expert services to your software subscription. With these bundles, you can efficiently create on-site solutions, ensuring that attendee check-ins are as fast as possible. They address all your software and hardware needs in one place, guaranteeing maximum data security and operational ease.
Builder Staff support
The builder staff are highly skilled professionals who can take on the task of building, designing, and configuring your InEvent platform according to your specific requirements. The Builder Staff can help customize the platform to meet your in-person event needs.
Onsite support
InEvent offers an On-Site staff solution that helps provide in-person support during your event. This service is available exclusively to clients who purchase the Elite Bundle. On-Site Staff are crucial for managing operations on the ground, ensuring everything runs smoothly, and addressing any issues that arise in your event in real-time.
Final preparation
To ensure your in-person event runs smoothly, it is crucial to verify all elements are functioning correctly before the event. We suggest you follow the steps below:
- Test all software tools (native and web apps) to ensure they are fully operational.
- Conduct a final check on hardware (printers, internet) and AV setups.
- Run a rehearsal or mock event if possible to identify and resolve any potential issues