Dynamic lists
With the Dynamic Lists tool, event organizers can view and manage a list of attendees based on specific filters they select. This functionality helps streamline the process of organizing and categorizing attendees efficiently, ensuring that organizers can easily access and work with tailored subsets of attendee information.
As new attendees register and meet the selected criteria, they are automatically added to the appropriate lists, ensuring that the information is always up-to-date and easily accessible.
Creating a Dynamic list
To create a dynamic list, follow the steps below:
- Navigate to People > Dynamic lists.
- Click on the Create dynamic lists button at the left corner of the page. A new window will be displayed.
- Enter the List's name.
- Select a Search filter specific for your list from the dropdown.
- Select a Status filter from the dropdown.
- Click on Create. This will instantly display the attendees who match the selected filters from the People > Attendees page.
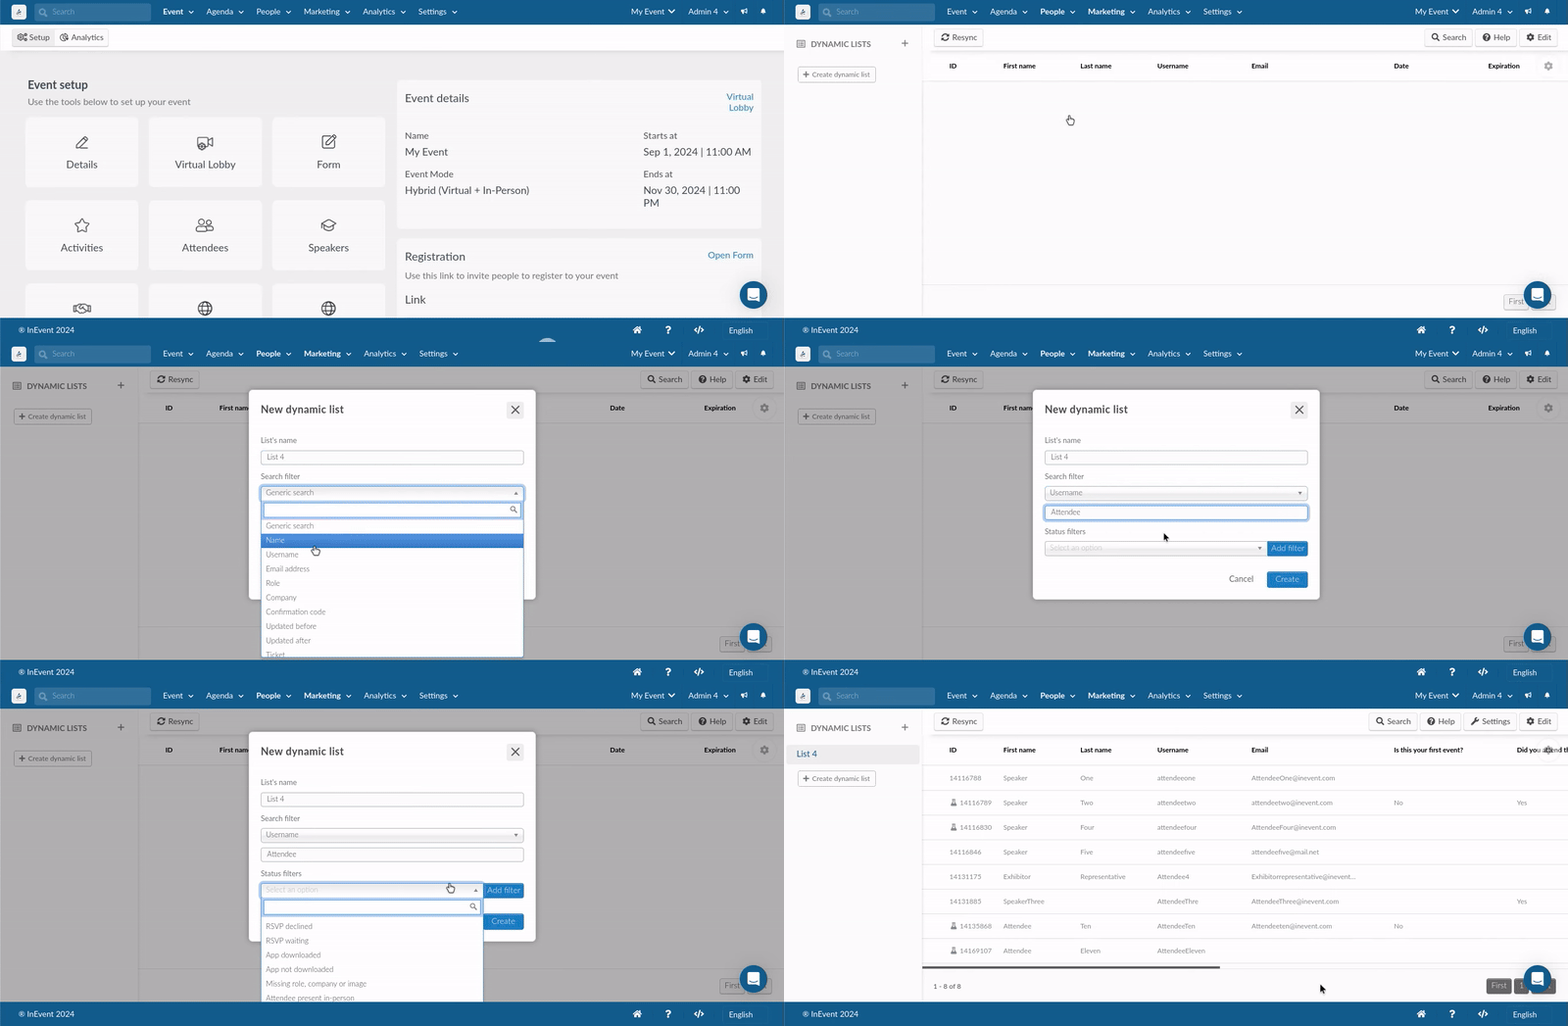
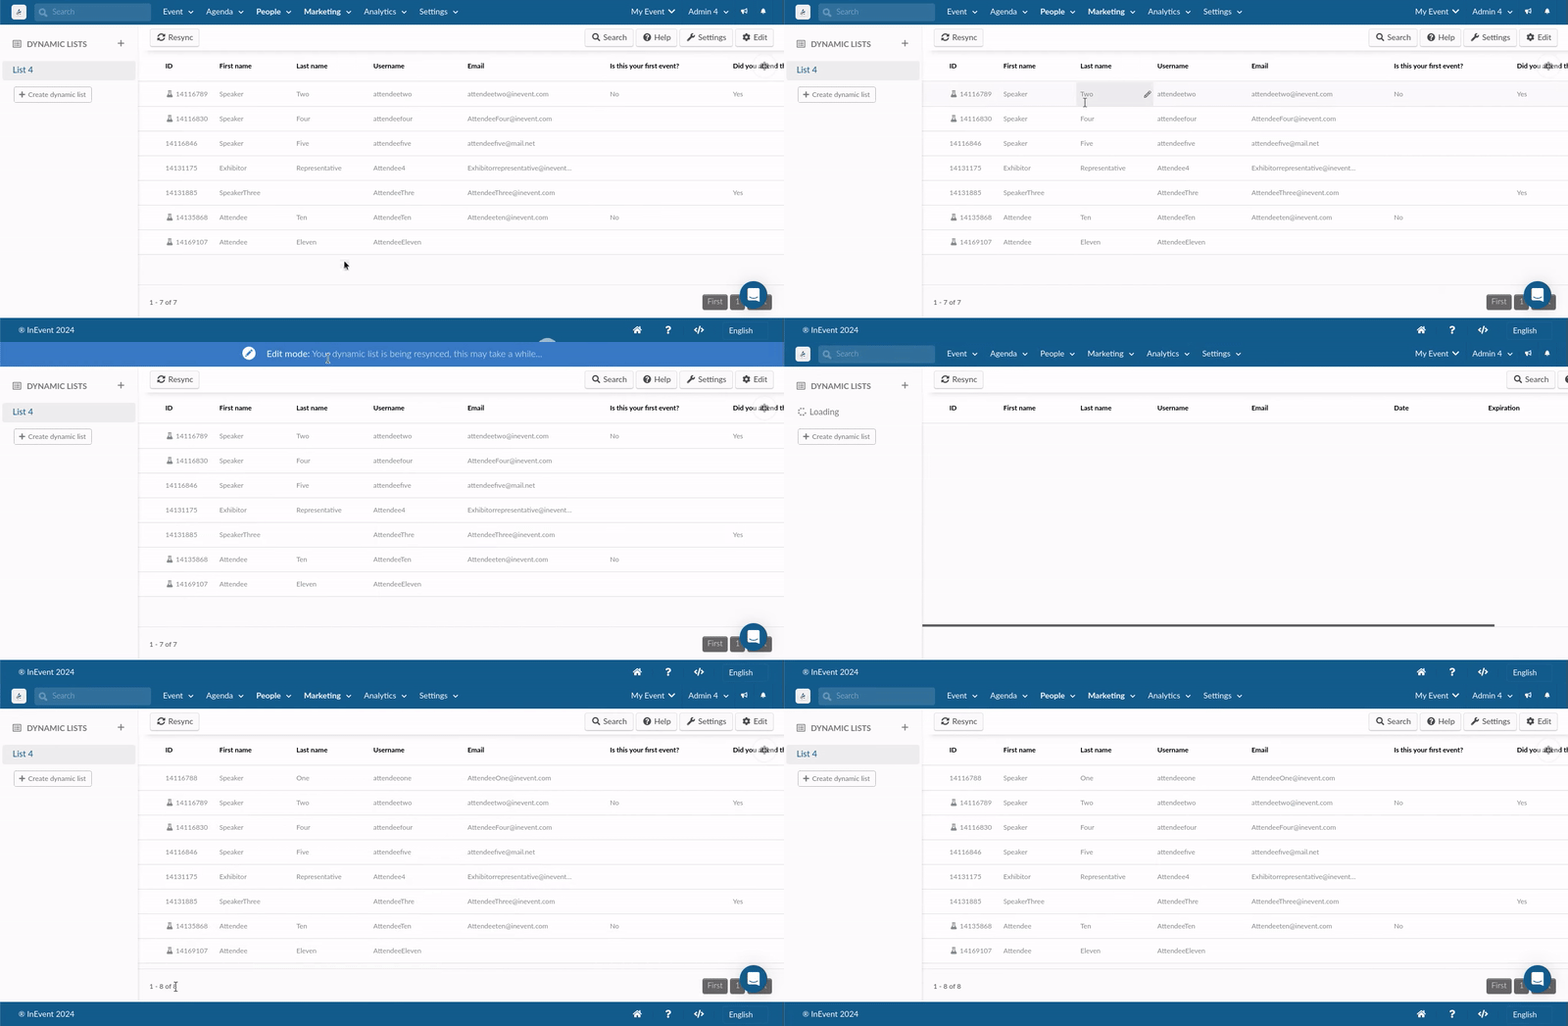
Configuring Dynamic lists
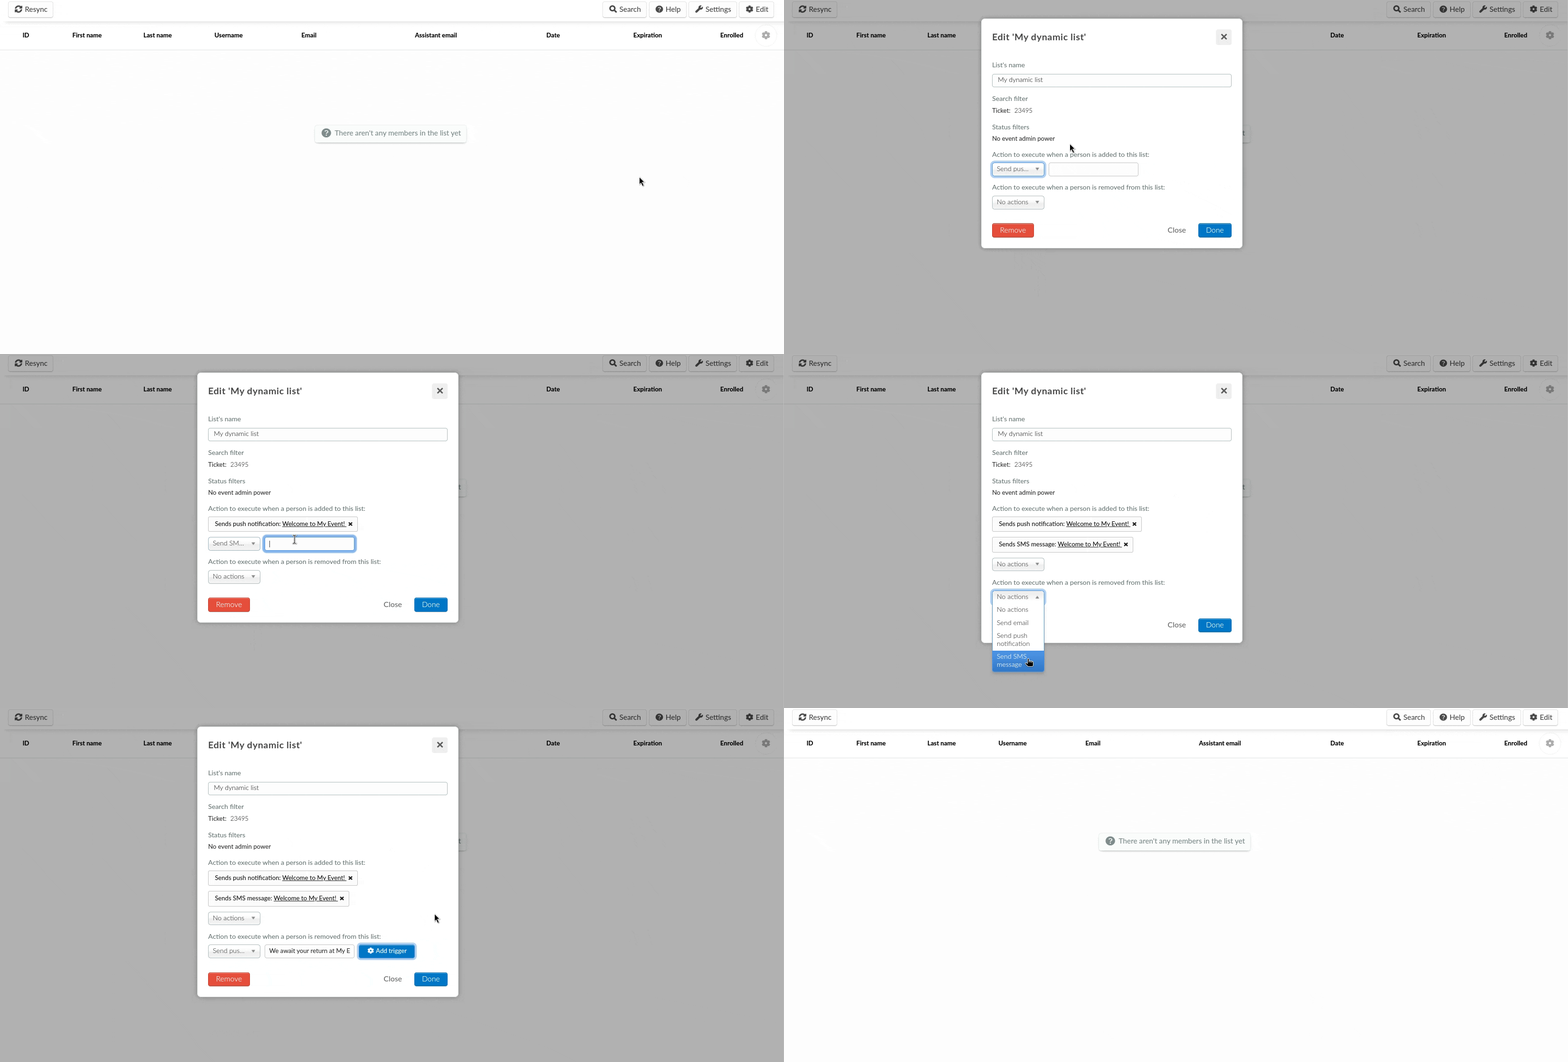
You can configure your dynamic list by selecting the desired list from the left-hand menu, then clicking on the Settings button at the top right corner.
From the Settings button, you can configure the following:
- List's name: You can edit the name of your dynamic list by typing the new name in the List's name field.
- Action to execute when a person is added to the list: You can select an action to be executed automatically when a person is added to the list. You can choose from the following options:
- Send email: Sends an existing custom email to be sent. For more information on creating custom emails, refer to our Email creator article.
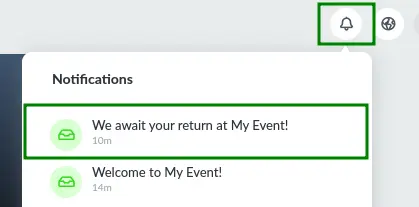
- Send push notification: Sends the defined push message to the attendee. The push message will be visible in the Virtual Lobby, as shown in an example below. It will also be shown under Notifications.

- Send SMS message: Sends the defined SMS message to the attendee.
- Action to execute when a person is removed from the list: You can select an action to be executed automatically when a person is added to the list. You can choose from the following options:
- Send email: Sends an existing custom email to be sent. For more information on creating custom emails, refer to our Email creator article.
- Send push notification: Sends the defined push message to the attendee. The push message will be visible in the Virtual Lobby, as well under Notifications, as shown in an example below.
- Send SMS message: Sends the defined SMS message to the attendee.
Click on Done when you have finished with your edits.
Running bulk operations
Attendees in your dynamic list can be bulk added to a List, to the Attendees page, and to the Invitees page.
To add users to any of these pages, follow these steps:
- Click on Edit from within the dynamic list you wish to copy from
- Select the users you want to move by ticking their checkbox(es). A new window will appear on the right side of the page.
- Select the destination list from +Add to list the drop-down menu on the right side window if you are moving to a list.
- If you are moving them to your Attendees or Invitees page, select the respective destination from the +Add to drop down menu, and click Run Bulk Operation.

Searching for attendees within your dynamic list
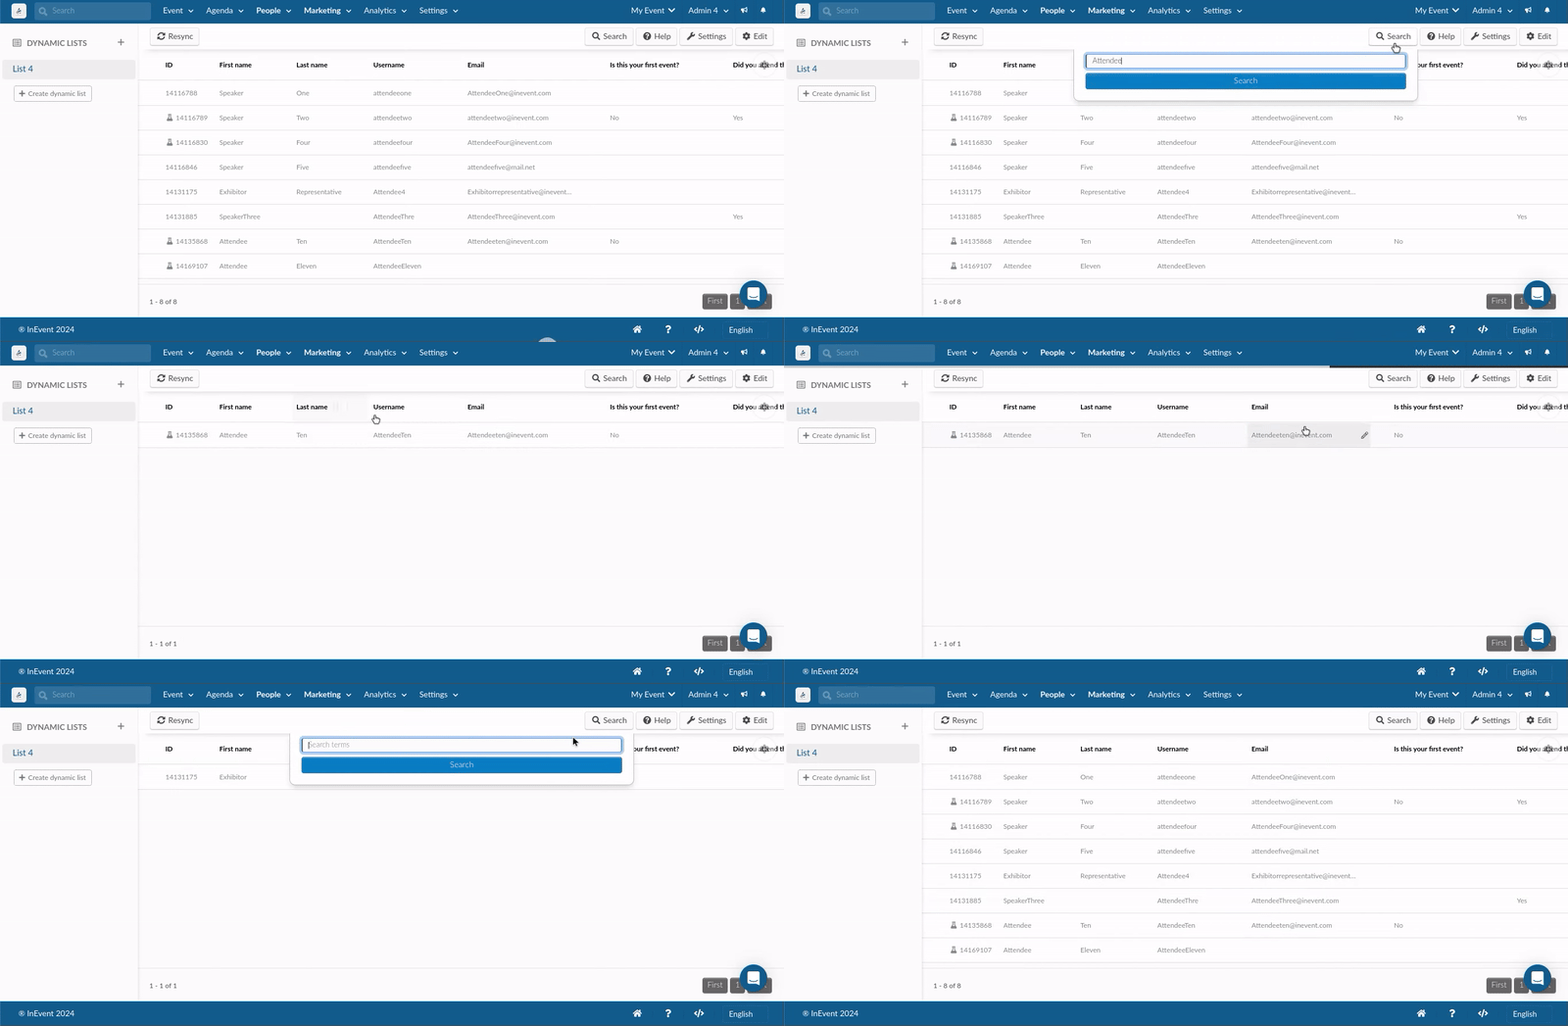
Within your dynamic list, you can use the Search button at the top right corner in searching for a person or persons. Simply click the Search button and enter the search term, then press Search. Attendees related to the search term will be displayed.
Attendee Filters for Dynamic Lists
The Dynamic List feature allows users to view and manage attendee lists based on the specific filters you select when creating the lists. Once a Dynamic List is created, the selected filters cannot be edited or changed.
InEvent offers a wide range of filters, enabling you to choose between status filters, search filters or a combination of both. You can apply as many filters as you like, according to your preferences.
Below is a list of Status filters:
Status | Status |
Complete event admin power | NFC not synced |
No event admin power | Badge printed |
Standard event attendees | Badge not printed |
Specific event power | RSVP accepted |
Presenter event power | RSVP declined |
Staff event power | RSVP waiting |
Translater event power | App downloaded |
Linked speakers | App not downloaded |
Custom list | Missing role, company or image |
Tags | Attendee present in-person |
Tickets This filter shows attendees who have purchased or have been assigned one or more Tickets. It brings out a second filter layer that allows you to specify the Ticket(s). | Attendee absent in-person |
| Attendee present online |
| Attendee absent online |
| Attendee present activity |
| Attendee absent activity (only registered). This filter allows you to view the list of registered attendees who are absent from an activity. |
Browser | Attendee present online right now |
Operational system | Attendee opened the Virtual Lobby |
E-mails sent | Attendee never opened the Virtual Lobby |
E-mails not sent | Attendee public for chats |
NFC synced | Attendee private for chats |
Deleting a dynamic list
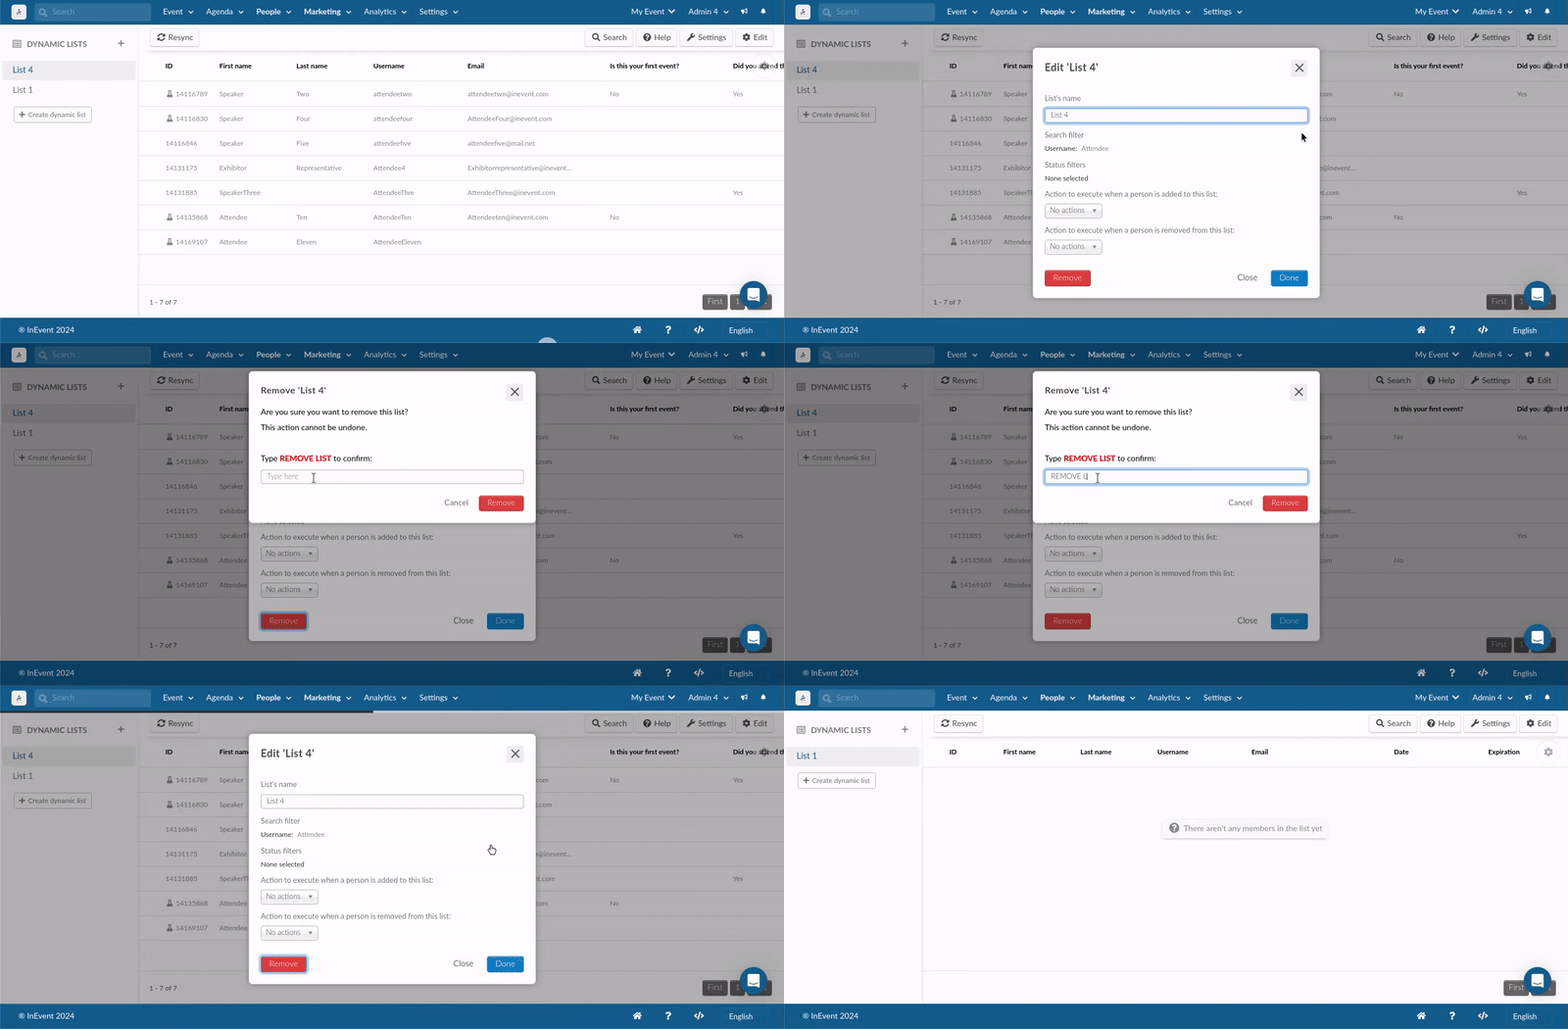
To delete a dynamic list, follow the steps below:
- Select the list from the left side of the page
- Click on Settings button at the top right corner of the page
- Click on Remove.
- Enter REMOVE LIST in the text box to confirm your action.
- Press Remove.
Removing an attendee from a dynamic list
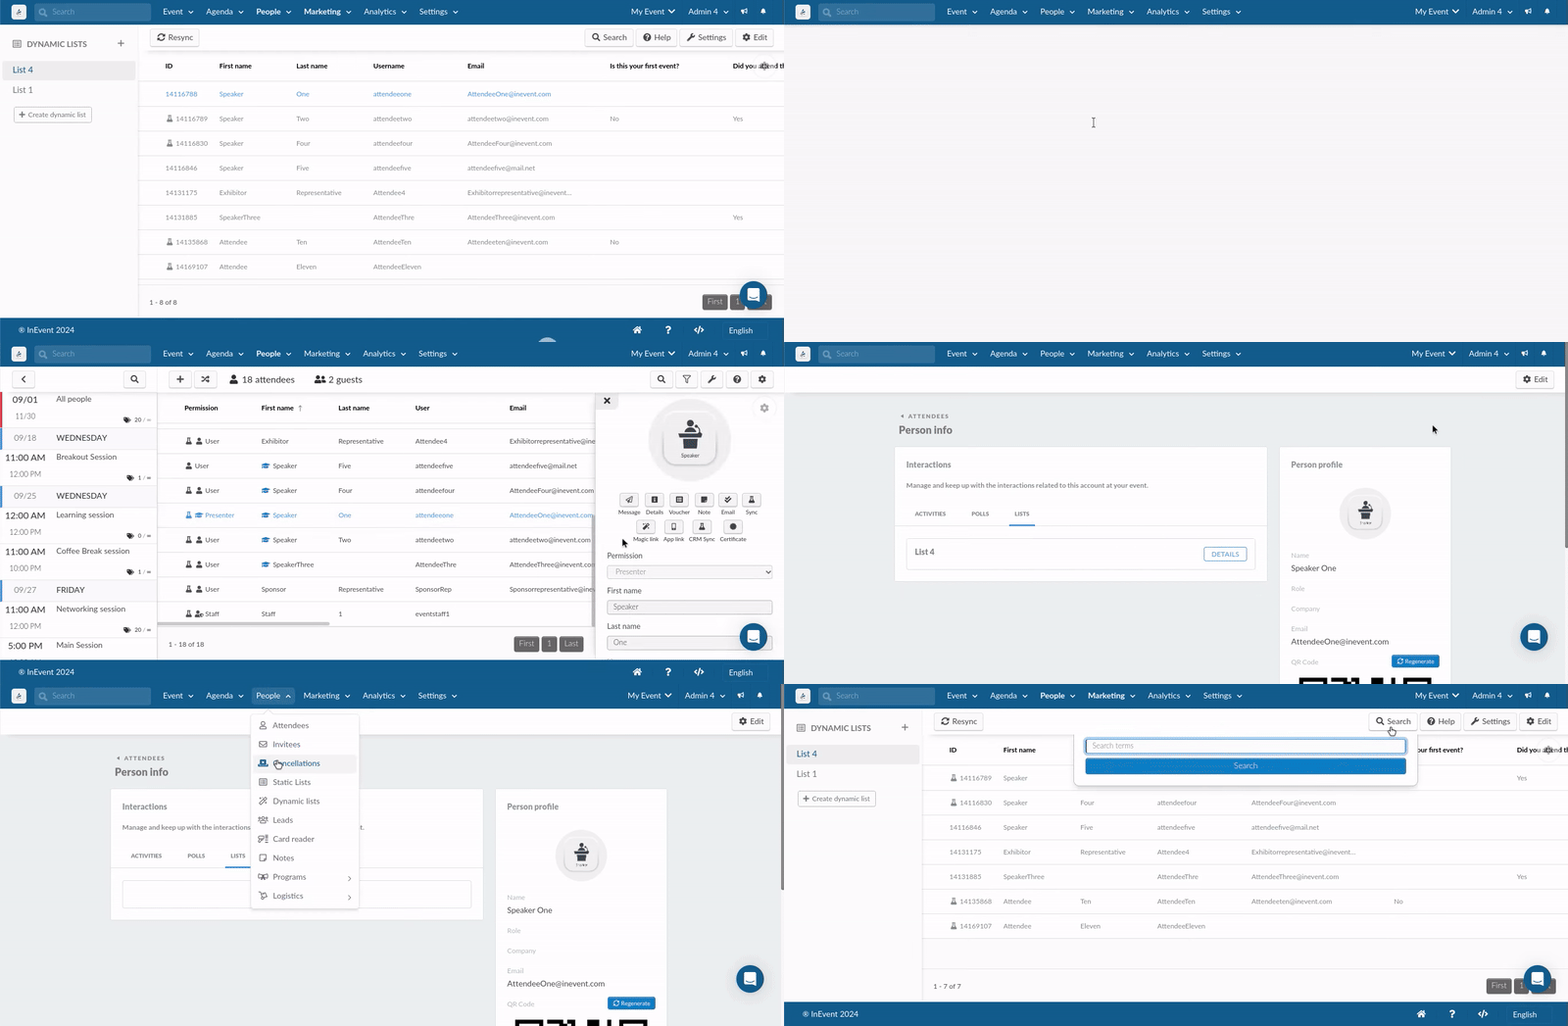
To remove an attendee from a dynamic list, follow the steps below:
- Navigate to People > Attendees.
- Find and select the user you want to remove from the list.
- In the pop-up window on the right, click on the Details button.
- You will be redirected to the details page. Select LISTS on the details page.
- Click on Edit and select Remove.
- Press End to finalize the removal of the person from the dynamic list
Extracting reports
To extract a spreadsheet report of your dynamic list, follow the steps below:
- Select the dynamic list from the left side of the page.
- Click on Edit > Export.
- Select Spreadsheet as data destination.
- A message will appear along the top of the screen letting you know that your excel sheet is being processed and will be sent to your email once completed.

The report will show information of the list and attendees within the list, such as: personID, username, listpersonID, listID, firstName, lastName, name, email, enrolled etc.

