Photo Gallery
 Updated 1 month ago
by
Caleb Kotey
Updated 1 month ago
by
Caleb Kotey
The photo gallery allows you add photos to your event that attendees can easily access and view through the Virtual Lobby and mobile app at any time.
How do I add photos to my event?
To add photos to your event, follow the steps below:
- Click on Event > Content > Photo Gallery.
- Click on the Add Photo button in the top left corner.
- Press the red folder button to choose the image you wish to upload.
- Click on Save in the image box (after making adjustments if needed).
Approval/Rejection of photos
Event organizers have more control over the photos uploaded to the event gallery. Each photo uploaded by an attendee can be approved or rejected at Event > Content > Photo gallery in order for it to be displayed in the Event Photos tab in the Virtual lobby. This applies when the tool Photos of Attendees is disabled at Settings > Tools.
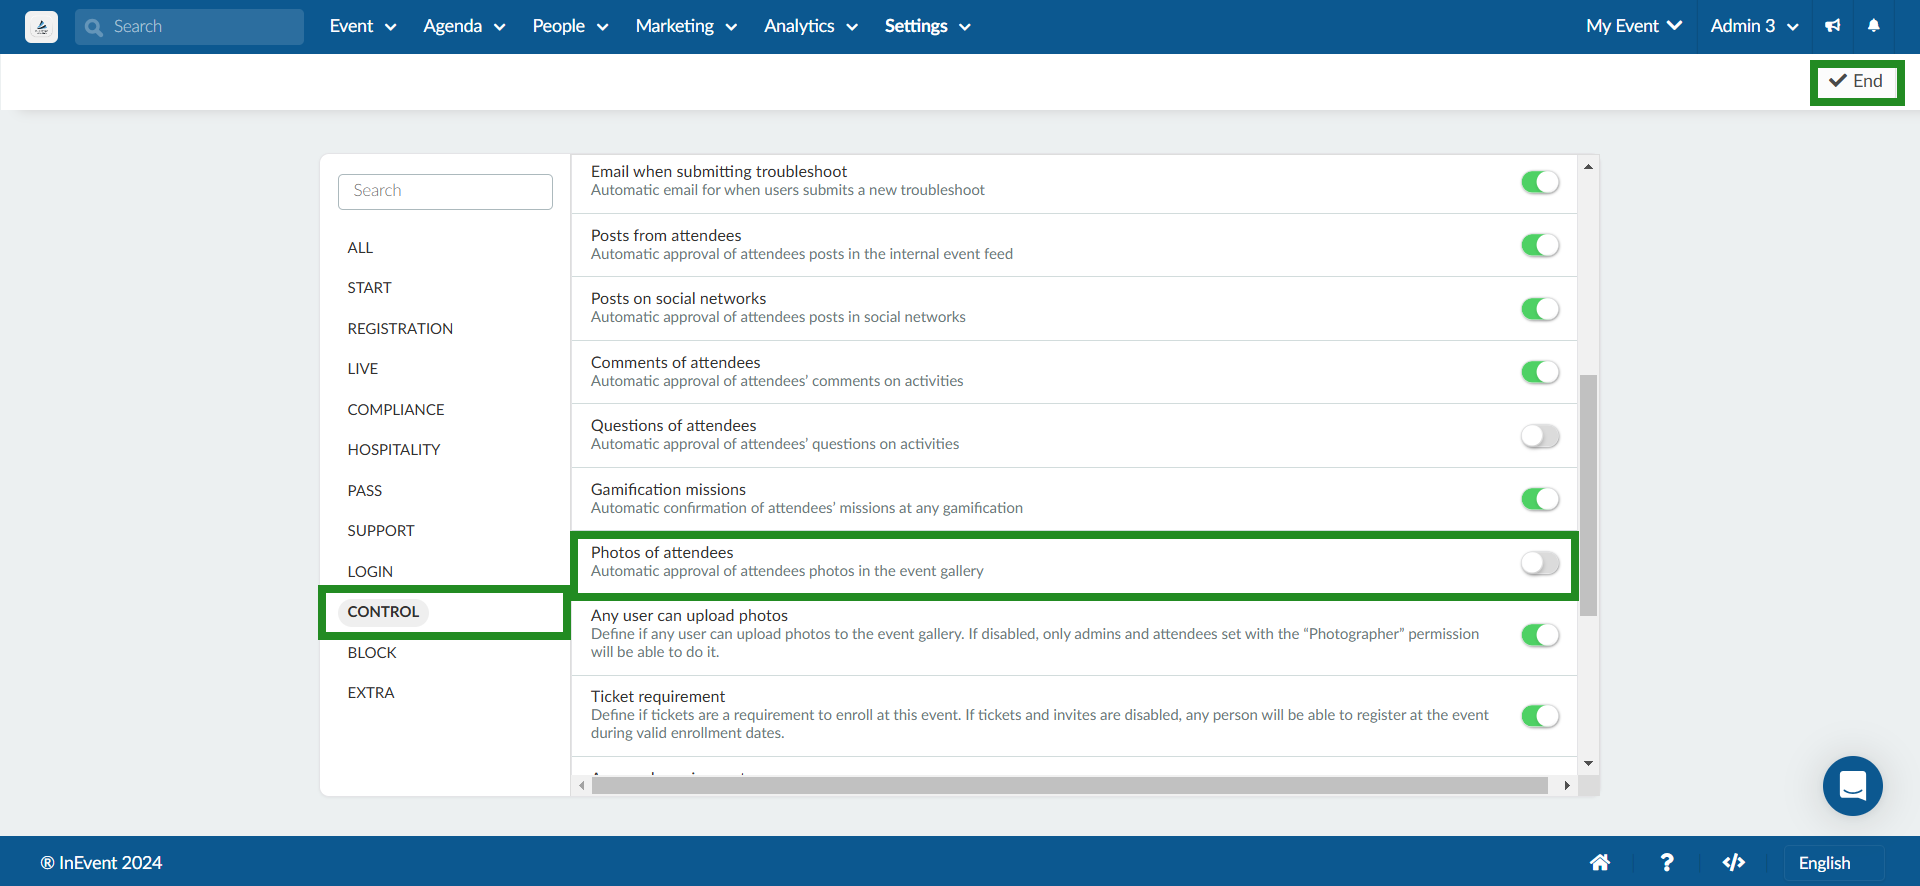
If the tool Photos of Attendees is disabled, each photo uploaded by an attendee must be approved or rejected by an admin, regardless of the attendees permission level. This means that even if the tool Any user can upload photo is enabled, photos uploaded by attendees with any permission level will still need to be approved or rejected by the admin before they can be displayed at Event Photos and My Photos pages of the Virtual Lobby. To know more about this, refer to this section.
After a photo has been uploaded by following the steps shown above, you will notice an Approved and Reject button beneath the photo that is uploaded. Here you can choose whether to approve or reject the photo from being displayed in the Event Photos tab of the Virtual lobby and in the mobile app.
Photo Approval/Rejection notifications in the Virtual Lobby
Attendees will receive a notification in the top right corner of the virtual lobby when their uploaded photos have been approved or rejected.
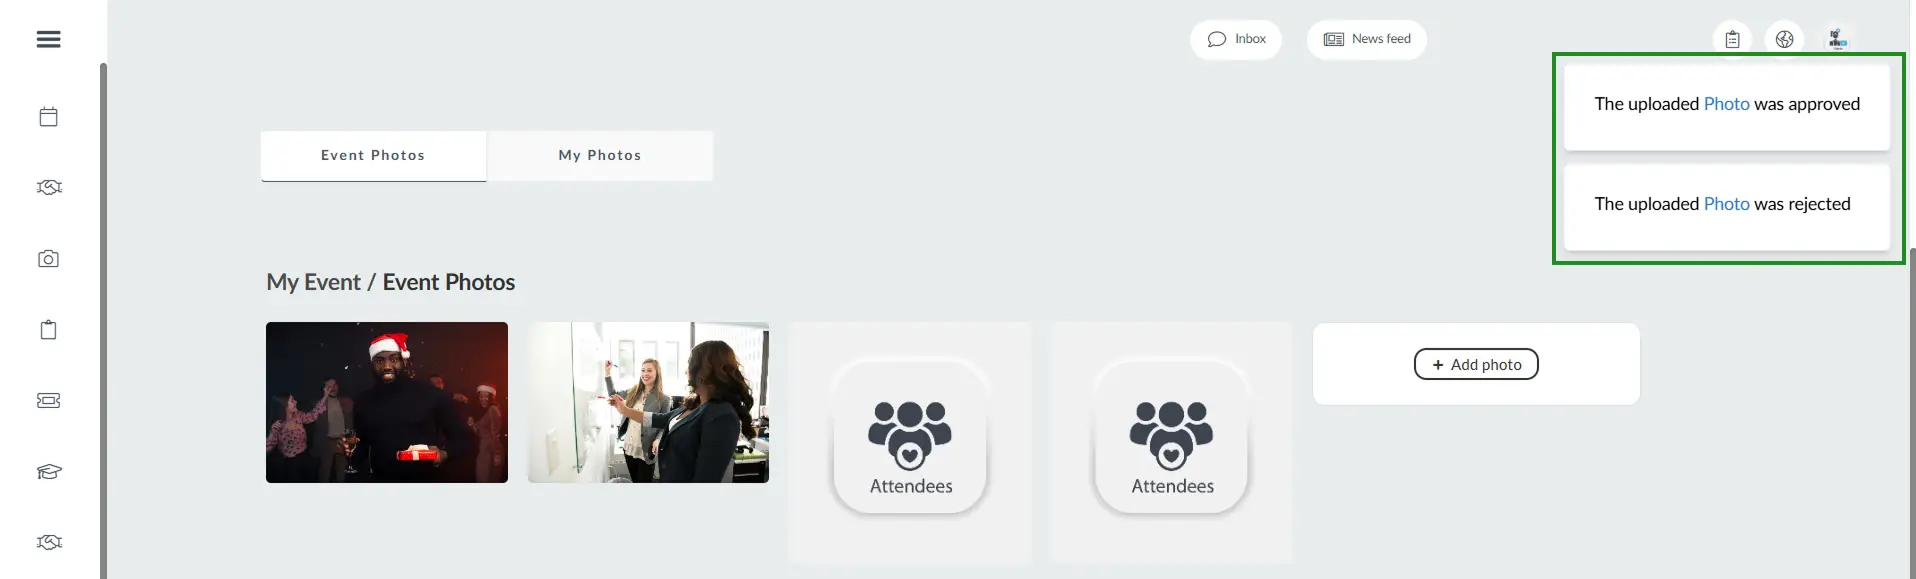
The notification will include a hyperlink labeled Photo, allowing attendees to directly view which photo was approved or rejected.
Creating an album
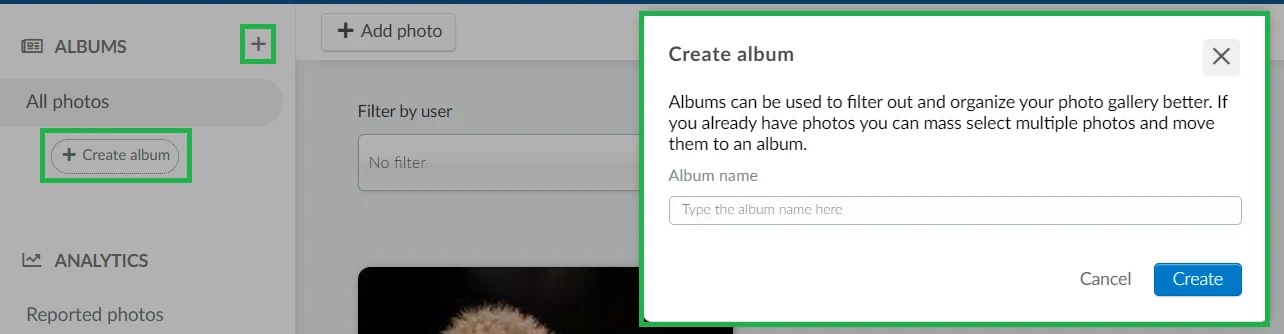
Creating albums lets you categorize and organize your photos, providing a streamlined display in the Event Photos tab of the Virtual Lobby. This feature allows attendees to easily browse through the photos using the created albums. To create an album, follow these steps:
- Click +Create album button or the + button.
- Enter the album name in the new window that appears.
- Click on Create.
Your new album will be displayed in the left-hand menu of the page and also under Settings > Tags > All tags.
Adding photos to an album
To add photos to an album, follow these steps:
- Click on the +Add photo button.
- Select the desired album using the dropdown under the Album (optional) field.
- Press the red folder button to choose the image you wish to upload.
- Click Save in the image box (after making adjustments if needed).
The added image will appear in the specified album and also in the All photos field.
Renaming an album
To rename an existing album, follow the steps below:
- Verify the album name you wish to edit.
- Navigate to Settings > Tags.
- Locate the current album name under All tags.
- Click on Edit on the top right corner.
- Click on the blue Open tag details button.
- Enter the desired album name in the Name field.
- Click on End to finish.
Once you have completed the steps above, your album will be renamed.
Can I move photos between albums?
Yes, you can easily move photos from one album to another. Follow the steps below:
- Select the album that contains the photos you want to move.
- Click on Edit.
- Select the photos you want to move by ticking their corresponding checkboxes.
- Click the Move button. A new window will appear.
- From the drop-down menu, select the album you want to move the photo(s) to.
- If you want to remove a photo from an album without moving it to another, select Unlink from album. The photo will then be moved to the All photos section.
- Press Move to finalize your action.
Deleting photos
To delete photos follow these steps:
- Click on the Edit button on the top right corner of the page.
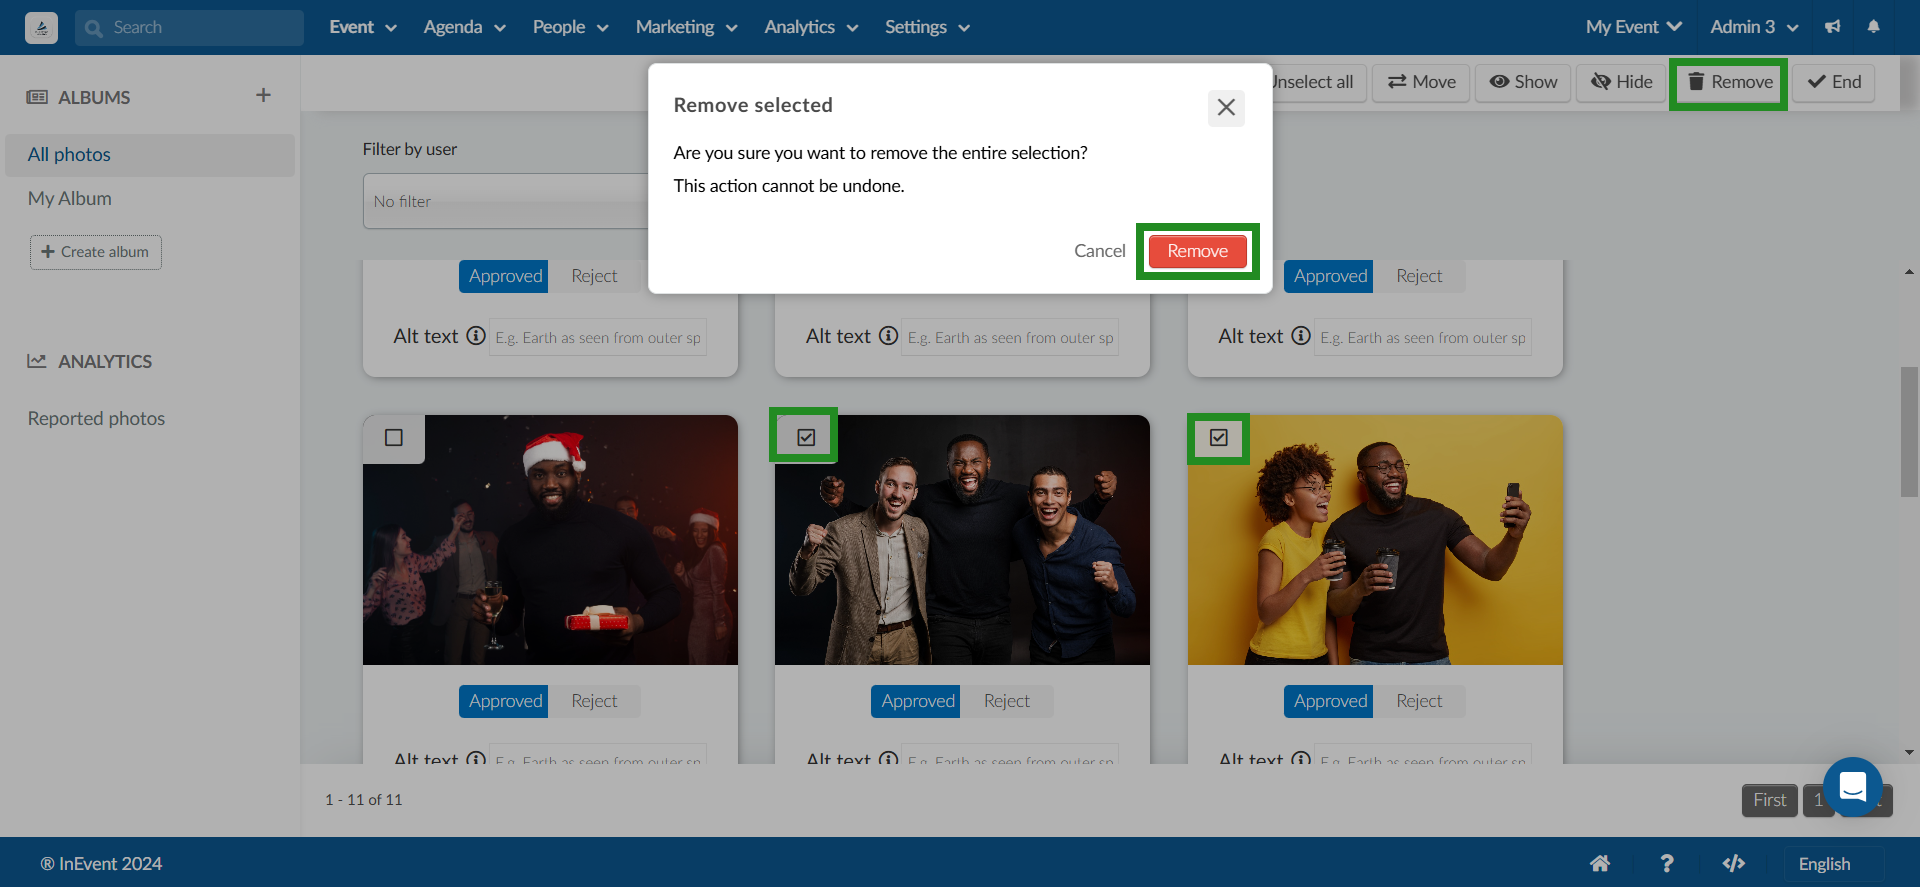
- Check the box(es) on the top left corner of the photo(s) you want to delete.
- Press the Remove button on the top right corner of the page. A confirmation box will be displayed.
- Click on the red Remove button to confirm the removal of the photo.
- Click on End.
Can I delete all photos in bulk?
Yes, you can delete photos in bulk, either from a specific album or from your entire gallery in the All photos tab. To delete all photos at once, follow these steps:
- Select the album you want to delete photos from, or choose the All photos tab to delete all the photos in your gallery.
- Click on Edit.
- Click the Select all button at the top right corner of the page.
- Press the Remove button. A confirmation box will appear.
- Click the red Remove button to confirm.
- Finally, press End to complete the process.
Deleting an album
To delete an existing album, follow the steps below:
- Delete all existing photos in the album.
- Locate the name of the album you wish to delete under All tags.
- Click on Edit on the top right corner.
- Check the box on the left side of the album name.
- Click on Remove on the top right corner of the page.
- Click on End to finish.
Once you have completed the steps above, the album will be deleted.
Hiding and showing albums
You can choose to hide an album by disabling the Show album tool, which is enabled by default. Once disabled, the switch will turn grey. After doing so, and the album as well as its images will not be displayed to users in the My Photos tab in the Virtual Lobby.
To display the album and its images again, re-enable the Show album tool.
Filtering photos
You have the ability to filter photos using the two options provided below: Filter by user and Filter by status. These options allow you to locate specific photos based on the user or their status.
Filtering photos by users
You can utilize the filter by user feature to specifically locate photos of your attendees where they are featured. Follow these steps:
- Click on the drop-down menu under the Filter by user field.
- Type the name of the user whose pictures you want to see.
To clear the filter, simply click on the drop-down again and select No filter.
Filtering photos by status
You can utilize the filter by status option to view photos based on status. To do so, follow the two steps below:
- Click on the drop-down menu under the Filter by status field.
- Select the status of the photos you wish to view. You can choose from the available statuses:
- Approved: Photos that have been reviewed and accepted.
- Denied: Photos that have been reviewed and rejected.
- Pending: Photos that are awaiting review.
After your selection, only the photos with the selected status will be displayed.
Reindex Photos
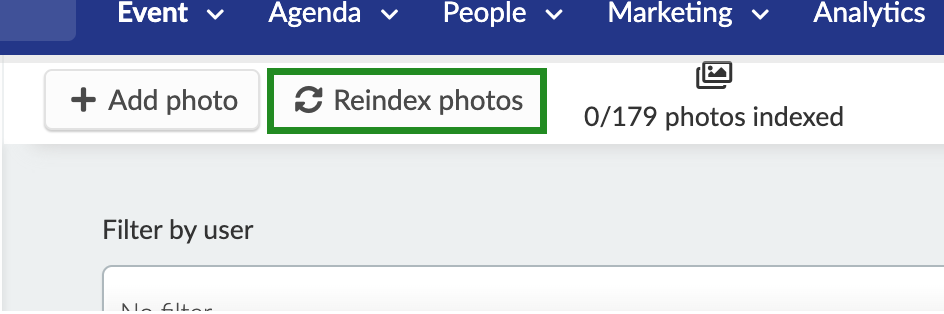
If photos have been uploaded to the photo gallery before enabling the Photo match AI tool, this may lead the Photo match AI tool to not recognize the person, even if the attendee has uploaded a profile photo. This is because face indexing, which is an integral function of the tool, did not take place. In this case, you will be able to see a Re-index button at Event > Content > Photo gallery as shown below:
In order to match and re-index the photos, follow the steps below:
- Click on the Re-index photos button.
- A new prompt message will be displayed. Confirm by clicking the blue Re-index button. Once the indexing is complete, a blue pop-up notification will appear.
- Progress of photos that are indexed will be displayed in front of the Re-Index button.

Once re-indexing is complete, attendees will be able to see photos they are featured in using the Photo match AI tool.
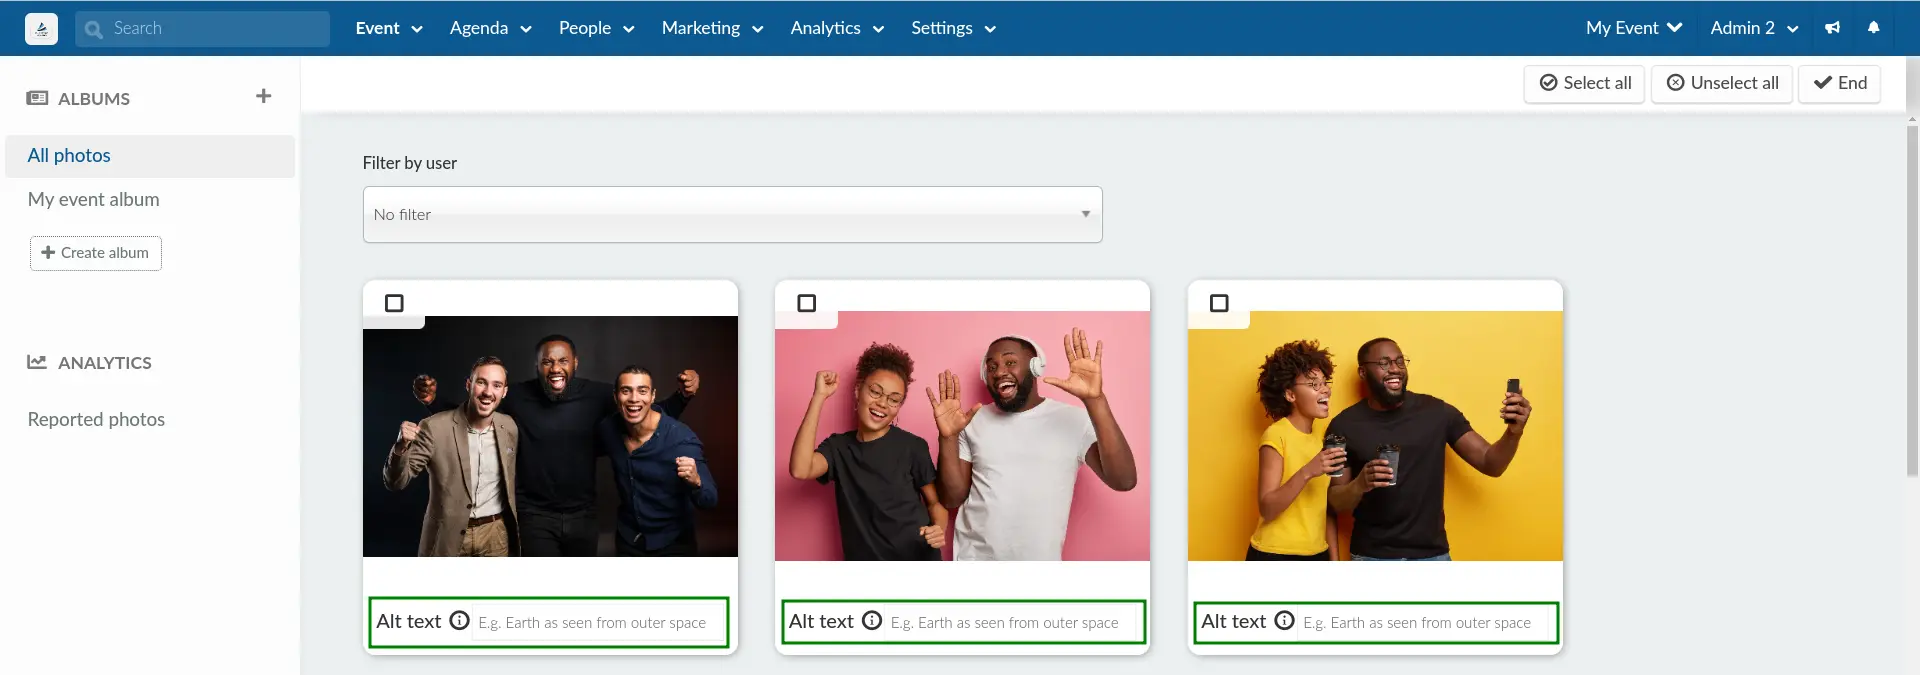
Adding alt text to your images
Alt text
To add an alt text to your uploaded image, simply click on Edit at the top right corner of the page, then write your description in the Alt text box of the selected image. Click on End to save your changes.
Can Alt Text Be Made Mandatory for Image Uploads?
Yes! Alt text can be made mandatory for image uploads. Making alt text a requirement benefits users by enhancing accessibility for individuals using screen readers and providing context for images in the absence of visuals. To make alt text mandatory, follow the steps below:
- Navigate to Settings > Tools.
- On the settings page locate the option Control.
- Look for the tool specifically named Alt Text Requirement.
- Click on the Edit.
- Toggle on the corresponding button to enable the alt text requirement.
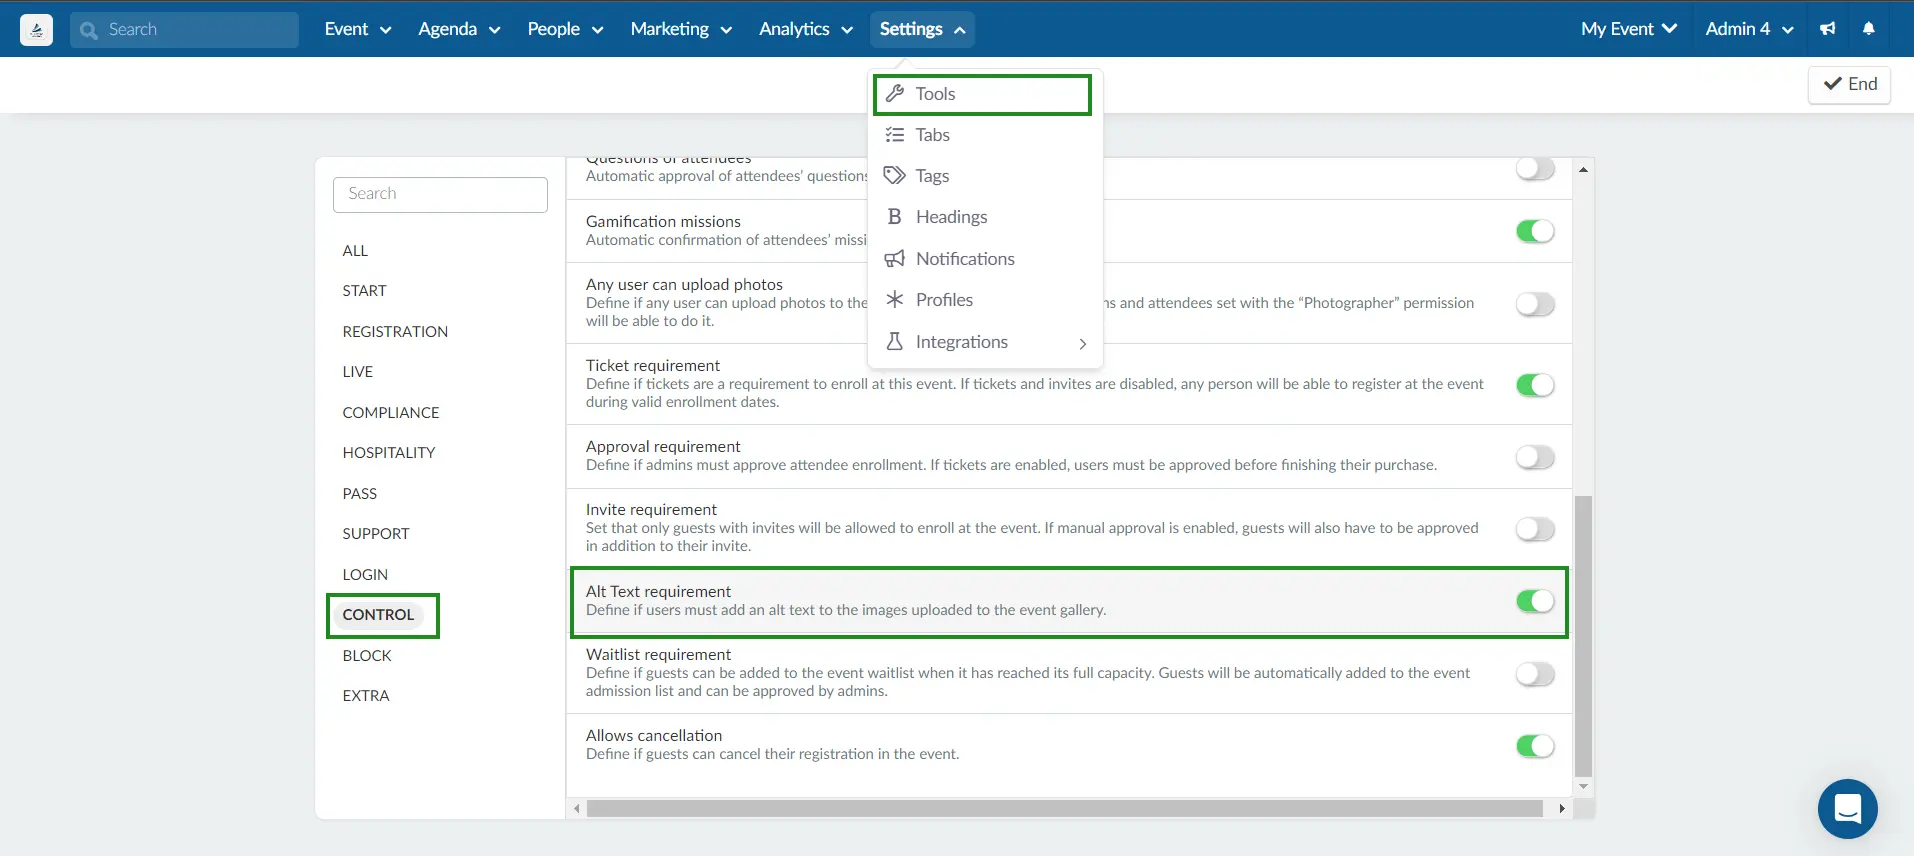
This action will make alt text a mandatory field during image uploads.
How do I transfer photos from the feed to the photo gallery?
To automatically transfer photos from the News Feed posts to the Photo Gallery, enable the Feed's pictures in photo gallery tool from Event tools.
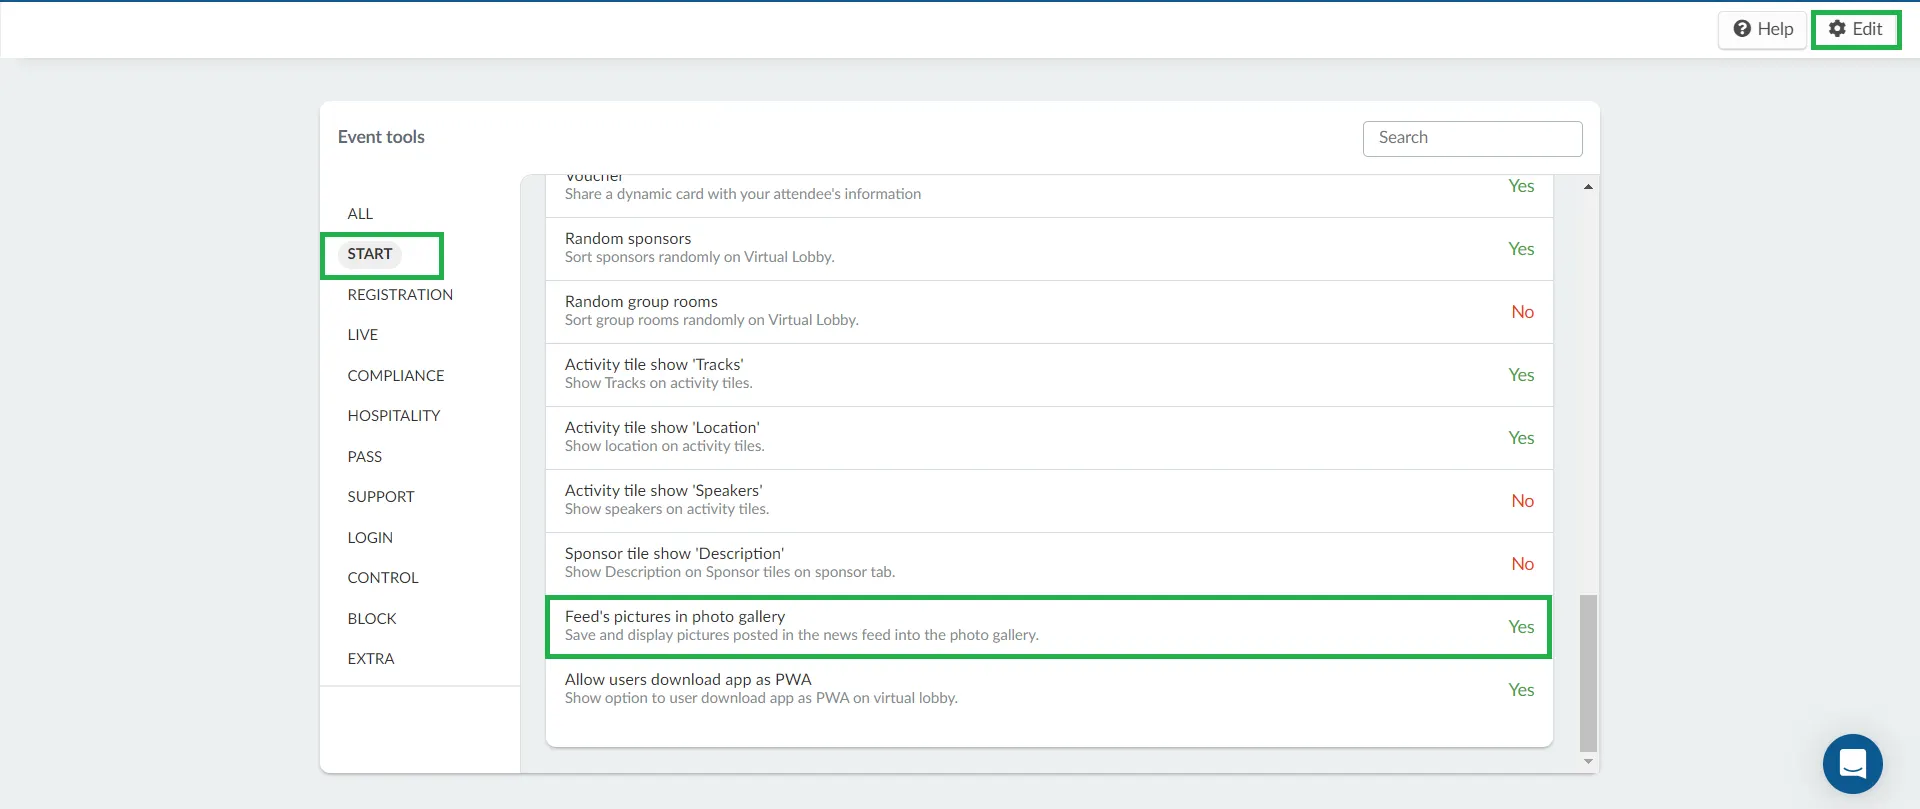
Once the tool is enabled, photos attached to posts in the News Feed will be automatically uploaded to the Photo Gallery.
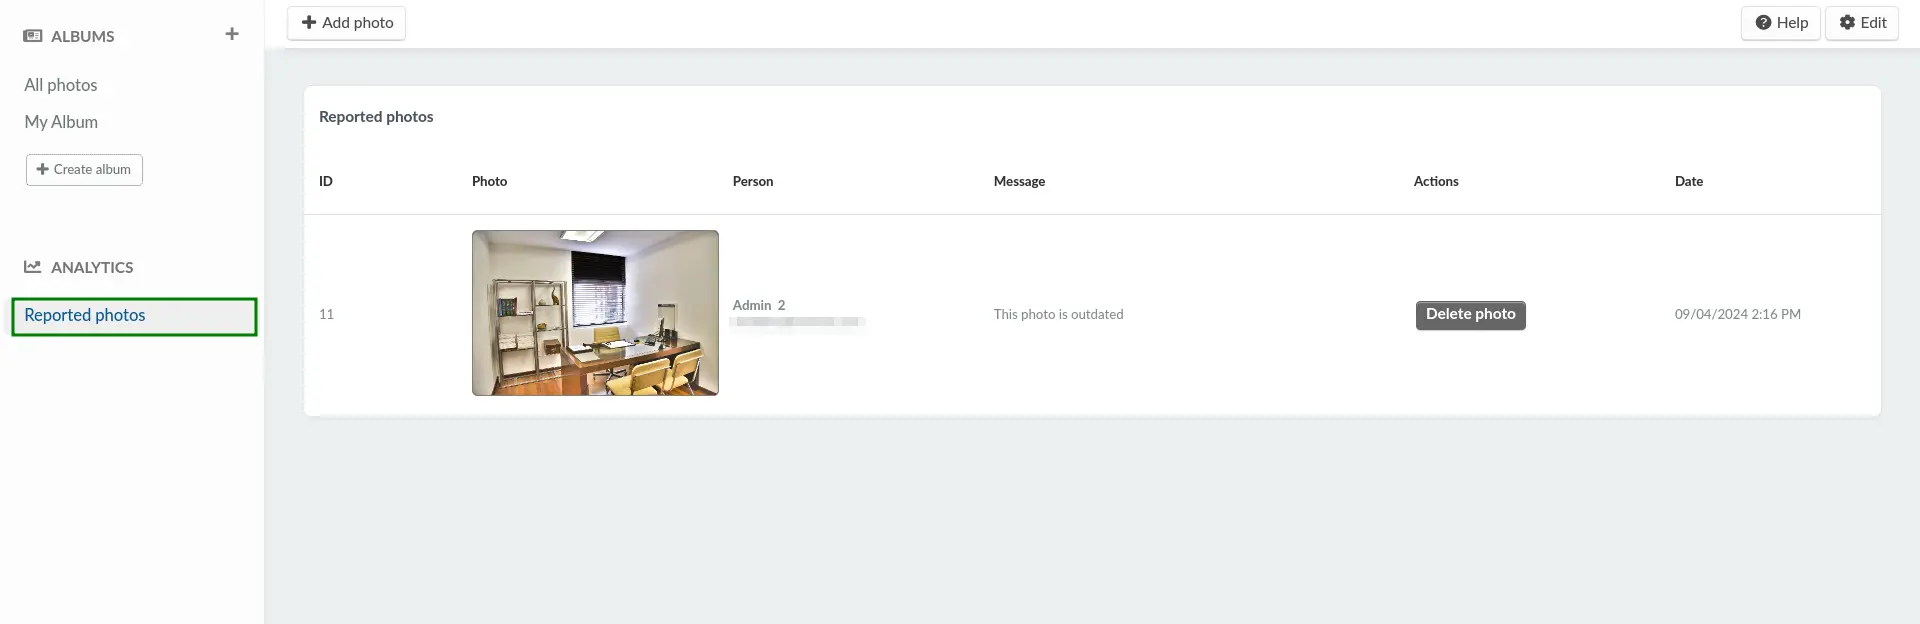
Analytics
In the Analytics field of the Photo gallery page, you can view the photos that have been reported by clicking on Reported photos. This page will show the list of photos that have been reported by attendees. The dashboard will contain the following information:
- ID: Identifies the photo with its unique ID.
- Photo: Displays the reported photo.
- Person: Displays the name and email address of the attendee who reported the photo.
- Message: Displays the report message submitted by the attendee.
- Actions: Includes the Delete photo button for administrators to take action on the reported photo
- Date: Indicates the date and time the photo was reported.
Deleting reported photos
To delete a reported photo, follow these steps:
- Click on Edit.
- Press the Delete photo button under the Actions column of the photo you wish to delete. A new window will appear for you to confirm your action.
- Optionally, tick the Send a notification to the reporter checkbox if you want the reporter to receive an email about the deleted photo,
- Press Delete and the photo will be permanently deleted from the gallery.

How can attendees add photos to the photo gallery in the Virtual Lobby?
You can add photos to the photo gallery of the event via the Virtual Lobby only if you have Admin or Photographer permissions. Attendees with Admin or Photographer permissions will be able to see a +Add photo button in the Event Photos and My Photos pages of the Virtual Lobby as shown below.
In order to upload photos to the event gallery through the Virtual lobby, follow these steps:
- Click on the Add photo button.
- If you have created albums, you will see an additional field, Albums (optional), Select an album form the drop-down menu where your photo will be uploaded.
- Click on the red file button to upload a photo.
- Finally press save to finish.
How can the attendee view the photo gallery of the event?
Attendees can view event photos from the Virtual Lobby and from the mobile app.
Virtual Lobby
Attendees can see event photos from the Event Photos tab in the Virtual Lobby. The Event Photos tab can be made visible by following the steps below.
- Navigate to Settings > Tabs.
- Click on the Web app button on the top left corner.
- Locate the Event photos tab on the list of tabs.
- Click on Edit on the top right corner.
- Check the box that corresponds to the Event Photos tab under the Visible column.
- Click on End to finalize.
After completing the steps above, your attendees can access the Event Photos tab in the Virtual Lobby to browse through your event's gallery. If you've created albums, attendees will see all the available albums listed under the Filter by album field. By selecting an album, only photos added to the chosen album will be displayed.
Additionally, if the Photo match AI tool is enabled, attendees can also browse through the photos they are featured in by accessing My Photos from Event Photos or by accessing the My Photos tab directly, if this has been enabled.
How can attendees report a photo?
To report a photo, simply click on the photo you wish to report and press the flag icon at the the top right corner. A new window will appear for you to write your report. Write your report and click on the blue Report button. After doing so, the event admins will be able to see the reported photo and take further actions.
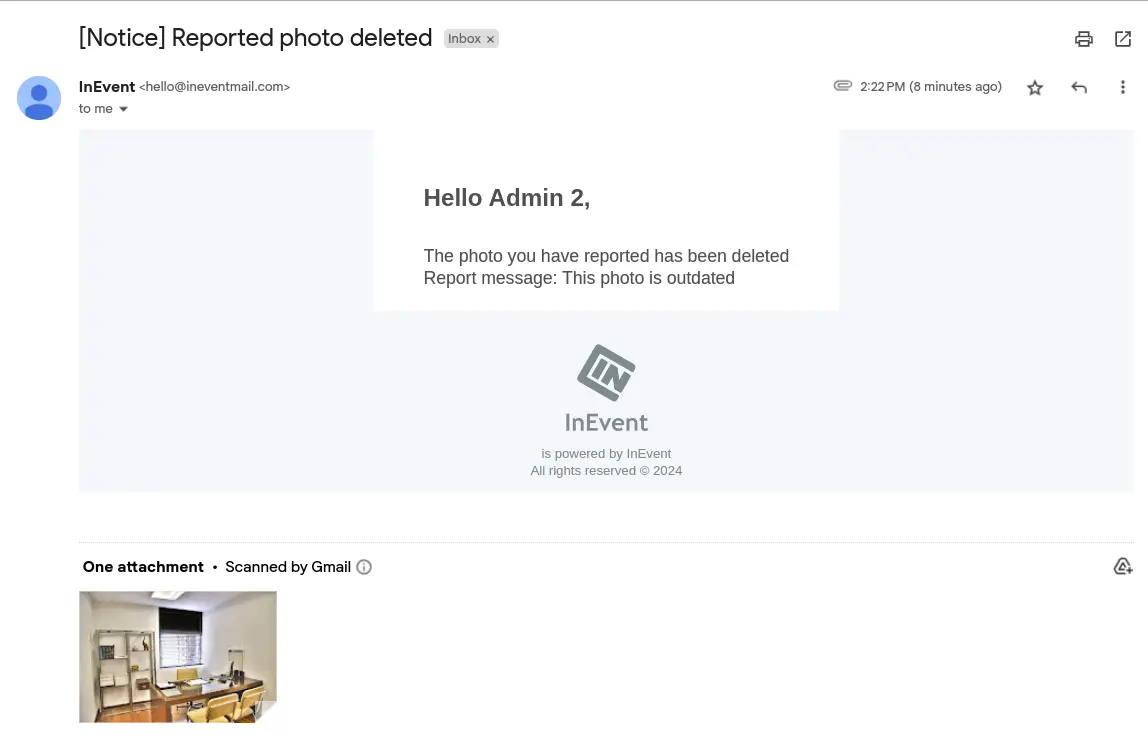
If the event admin has enabled the Send a notification to the reporter checkbox from the backend when deleting the reported photo, you will receive an email notifying you of the deleted photo:
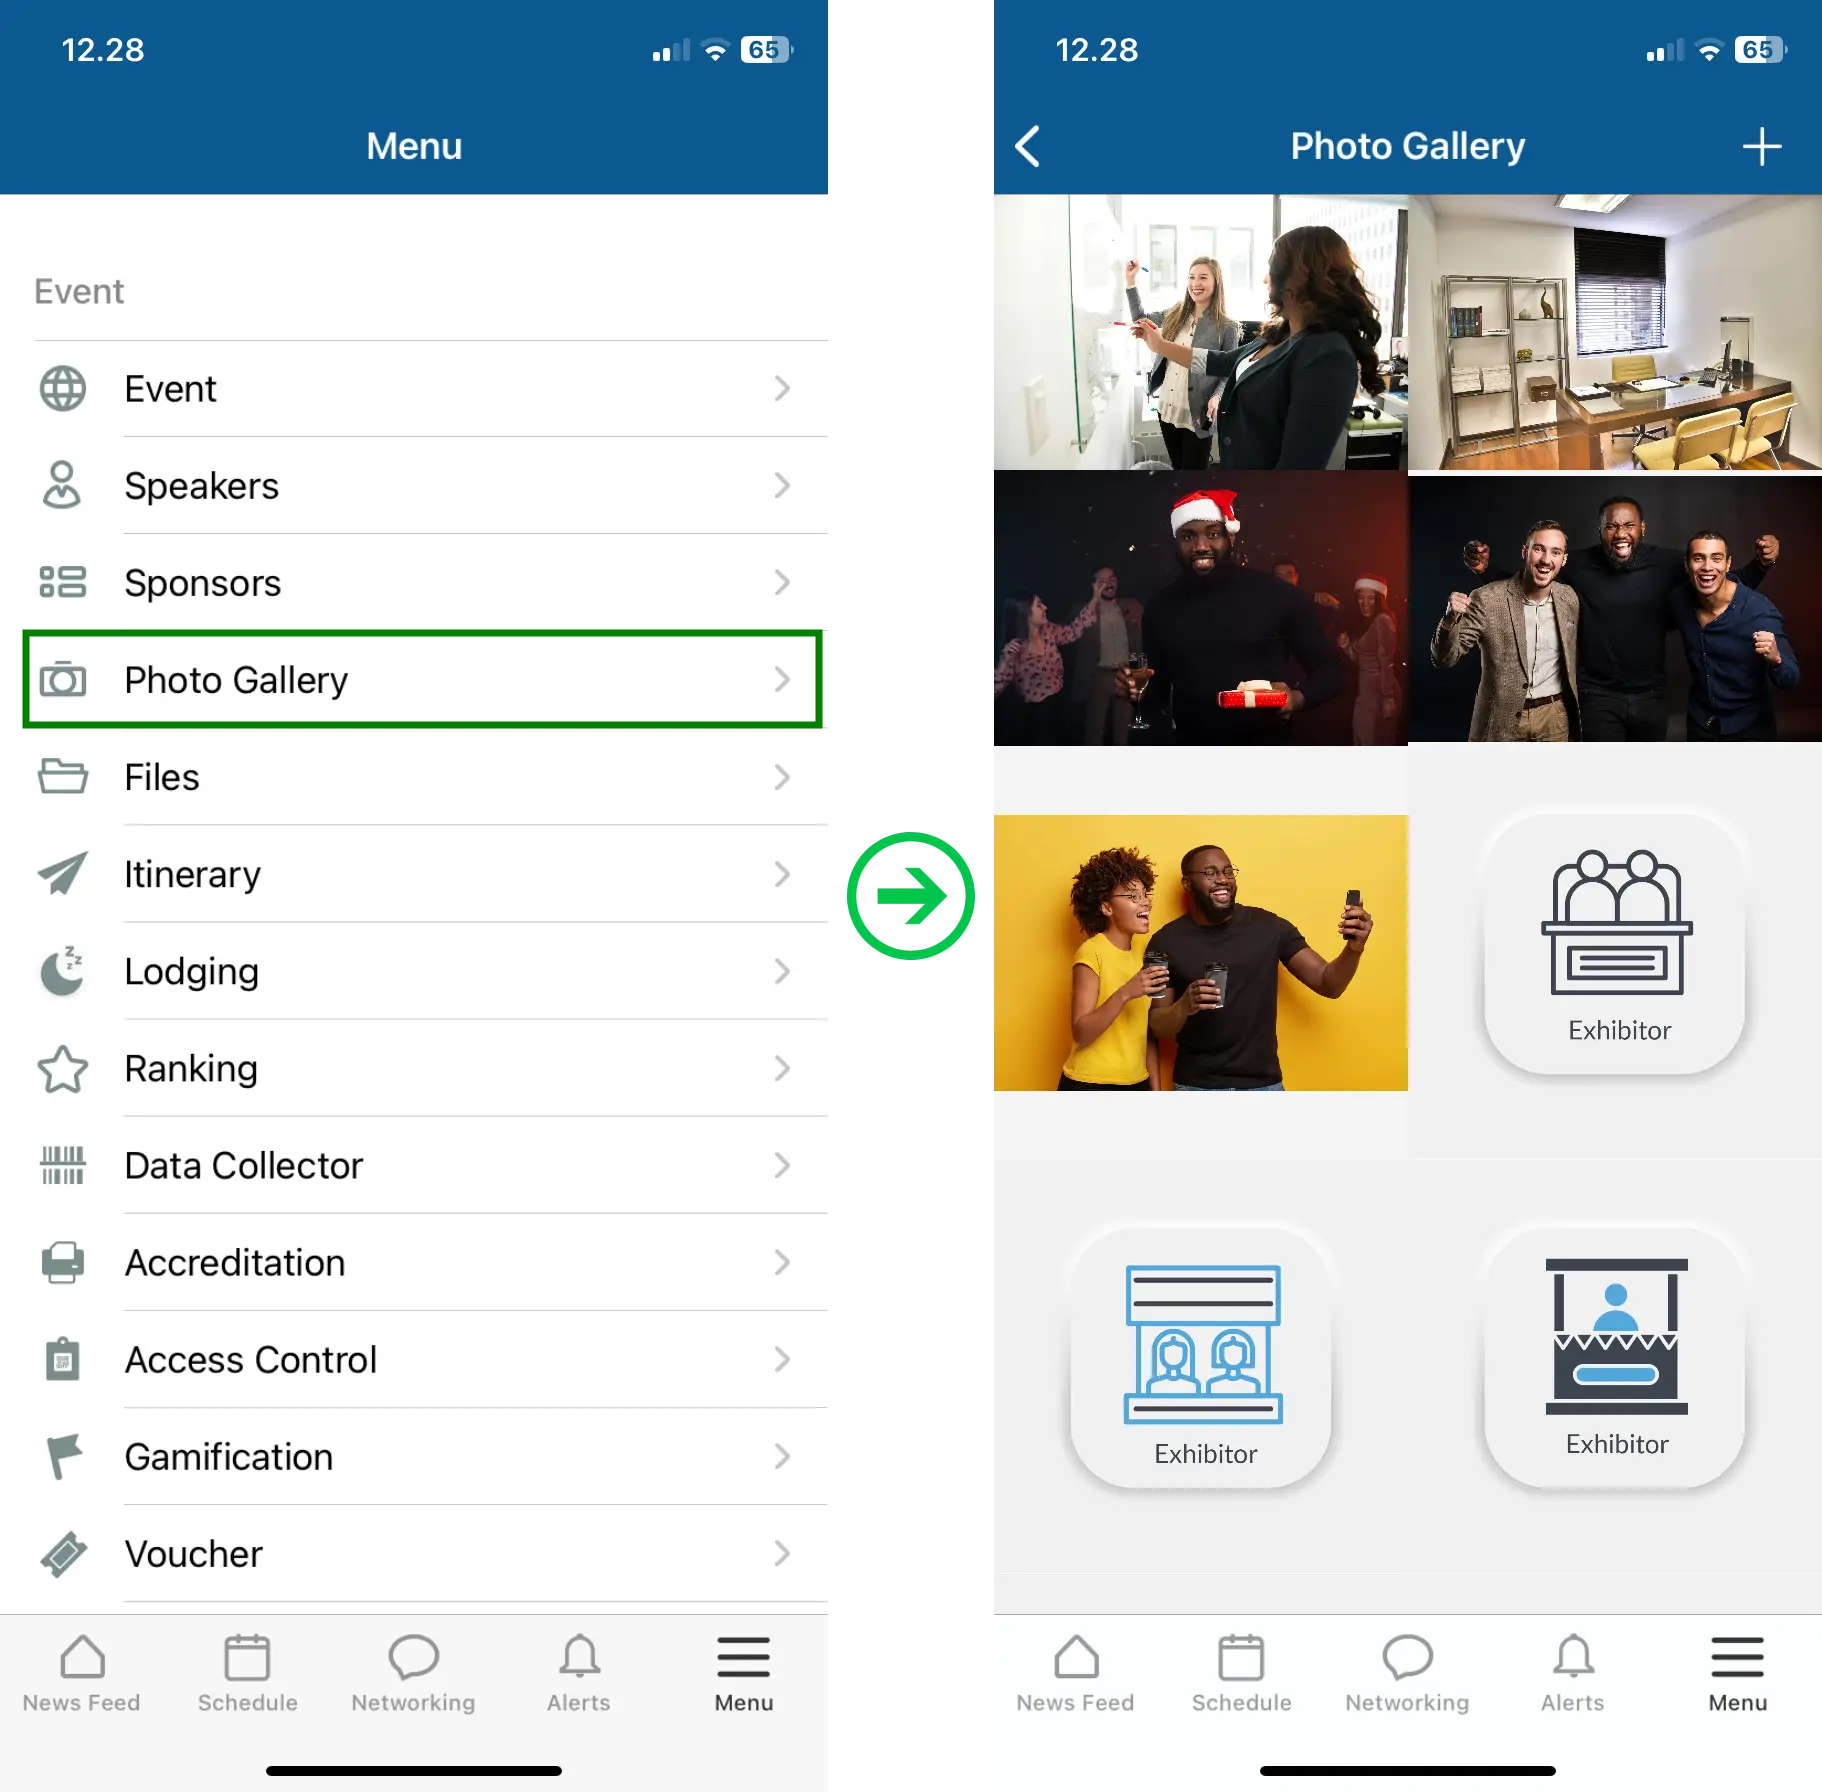
Mobile app
The photos of the event will be in the Photo Gallery tab of the app. Press Menu then press Photo Gallery inside the app to view the photos.
Adding the Event photos tab to the mobile app
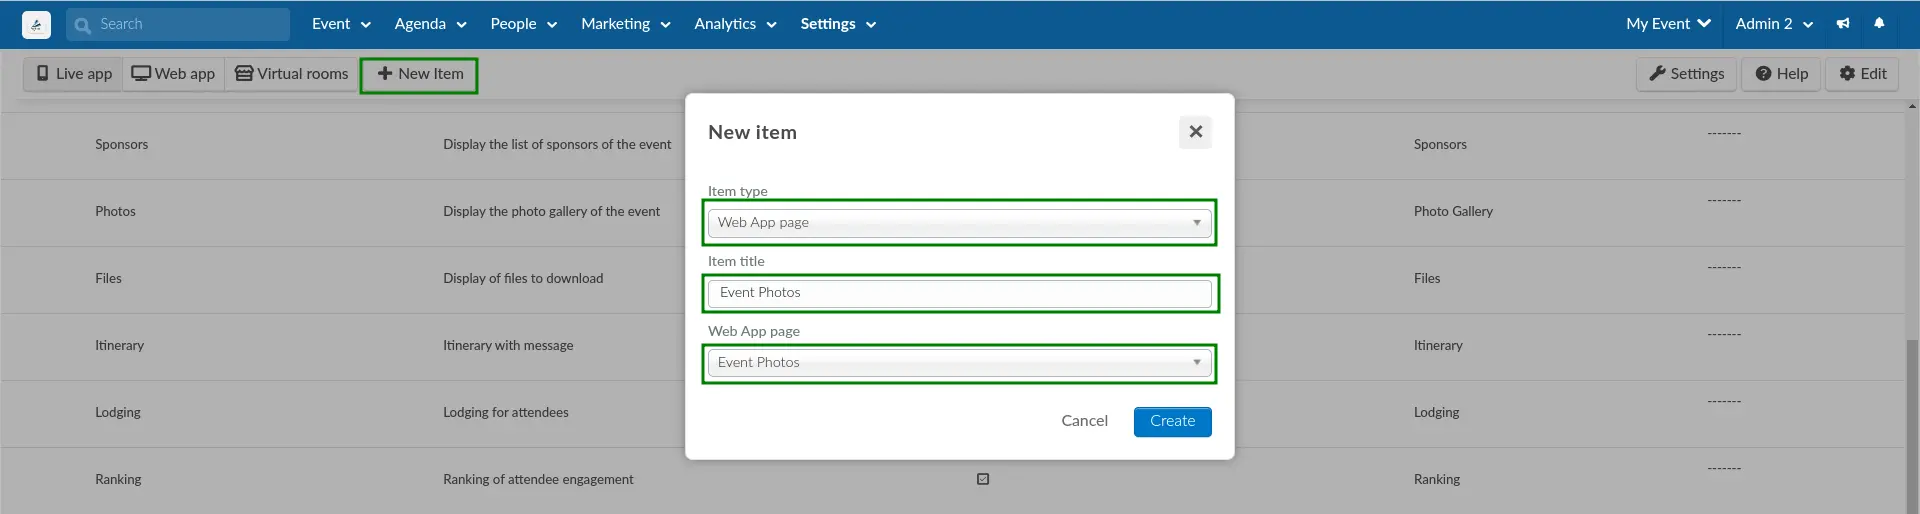
The Event photos tab can be added as a custom tab to the mobile app by following the steps below.
- Navigate to Settings > Tabs.
- Click on New Item.
- Select Web App page using the Item type drop-down box.
- Enter the desired tab name in the Item title field.
- Select Event Photos using the Web App page drop-down box.
- Click on Create.
Once this tab is created, attendees will be able to access it through the mobile app by navigating to Menu > Event photos (name given to the custom tab).
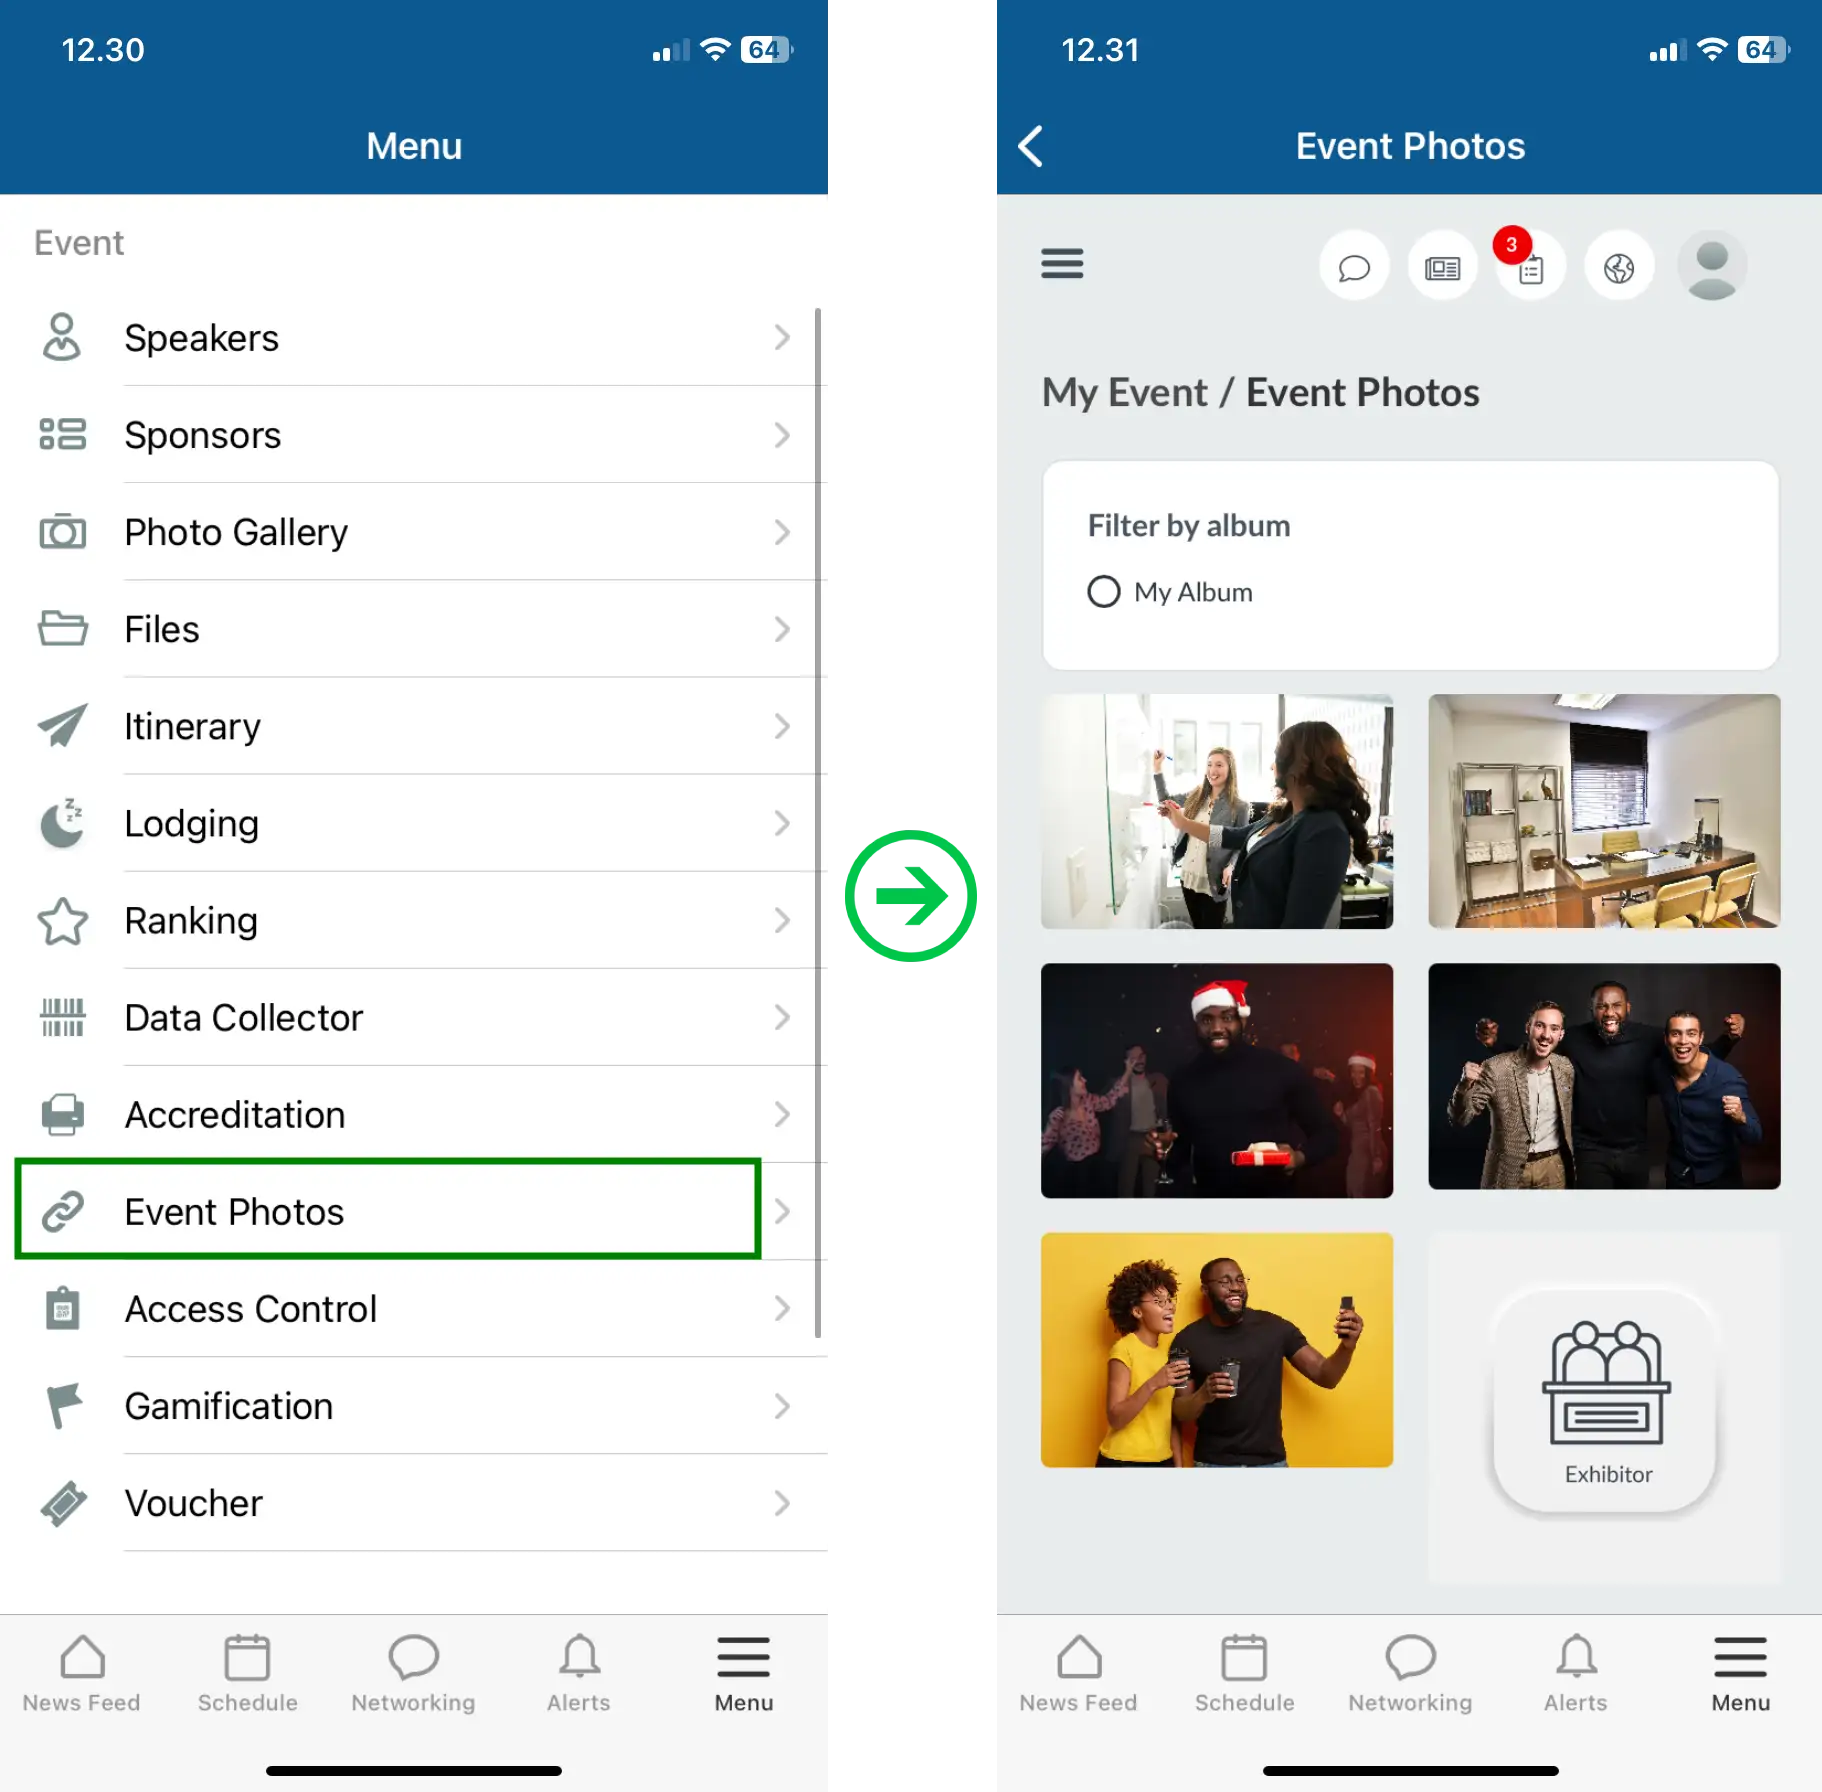
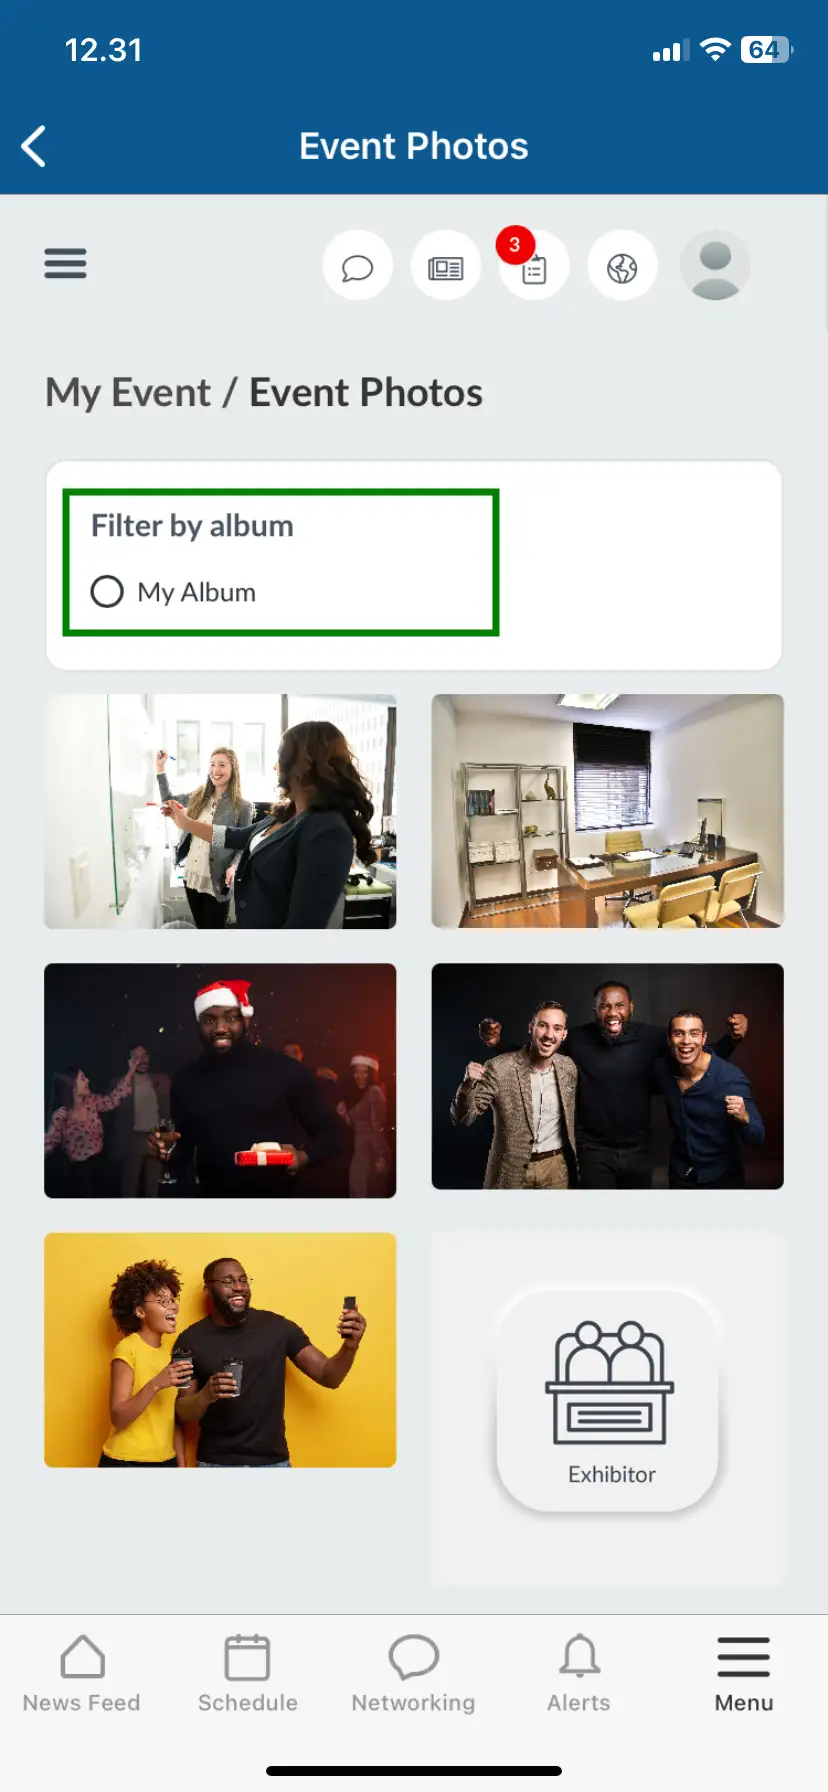
- Filter photos by album: If albums have been created, attendees can filter photos by albums as explained in this section.
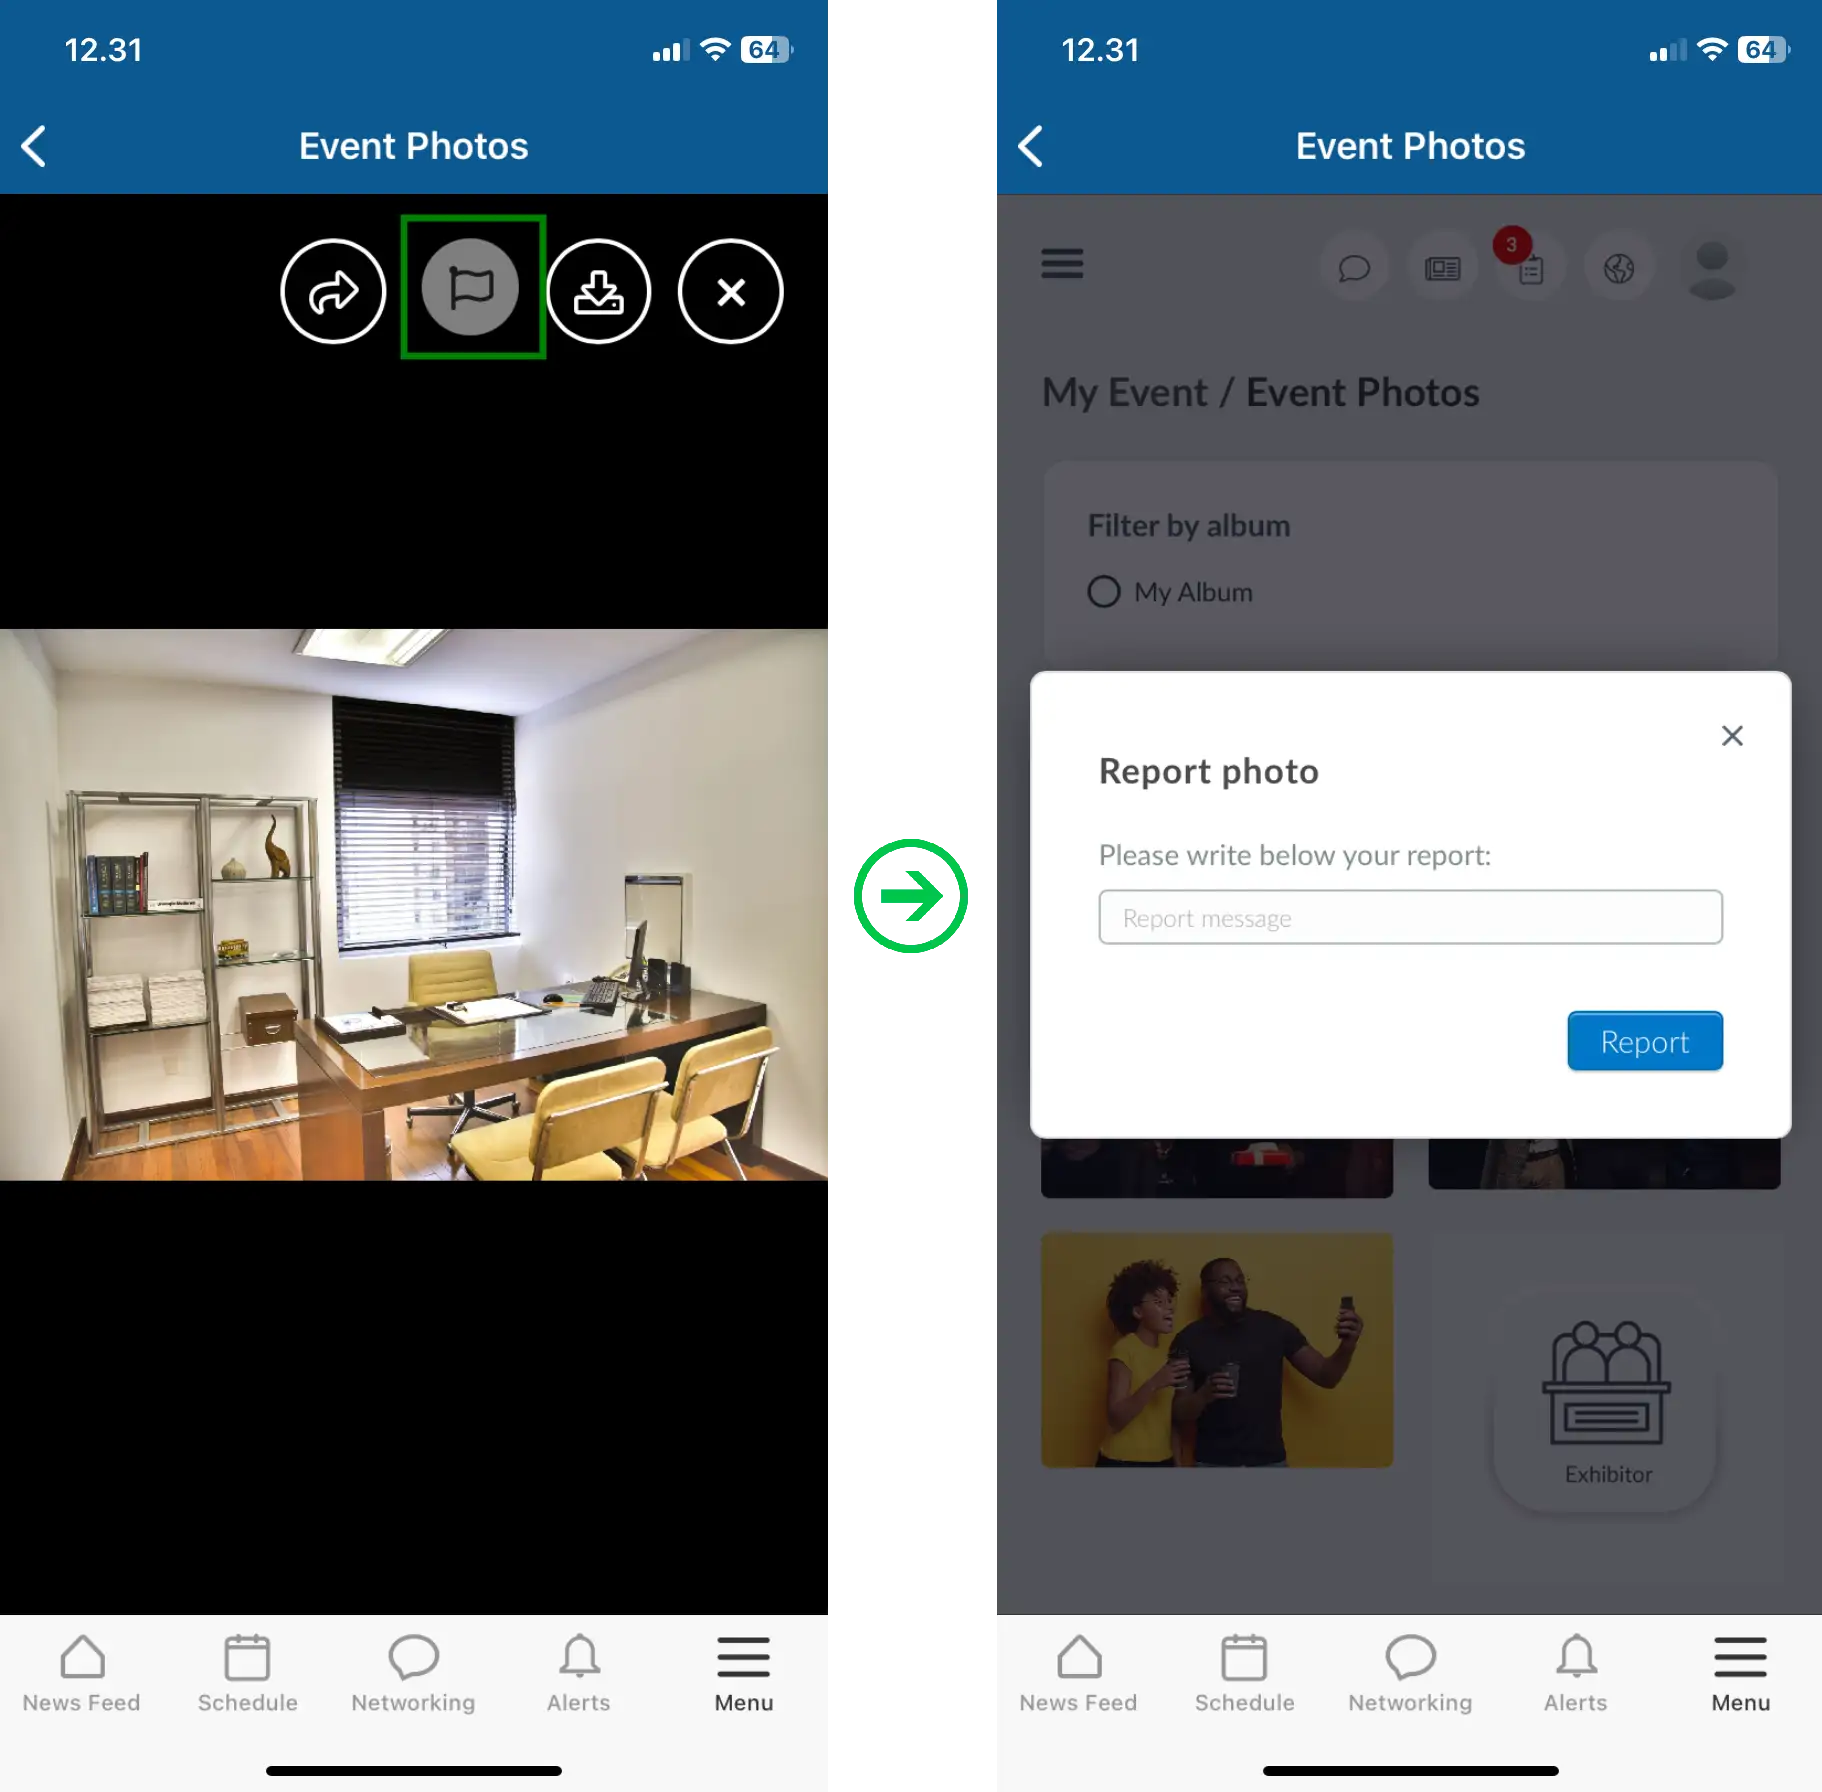
- Report a photo: Attendees can report a photo by clicking on the photo and pressing the flag icon at the top right corner. This will open a new window for them to write the report and submit it by clicking the blue Report button. Refer to this section to learn more.
Can I insert other media (GIFs or videos) in the gallery?
Our Photo Gallery accepts only image files. If you need to insert videos or GIFs, we suggest using posts in the Corporate Feed (Timeline).
The images can be inserted as downloadable materials in the Files folder or inserted as Customizable Tabs.