Integration with HubSpot
 Updated 6 months ago
by
Caleb Kotey
Updated 6 months ago
by
Caleb Kotey
It is possible to integrate InEvent with your HubSpot Marketing account. You can easily send your registrations to HubSpot and import details using bidirectionally workflows. Please, see the following details and actions to follow.
Integrating InEvent with Hubspot
You can integrate the InEvent platform with HubSpot through our native integration or by configuring it through Zapier.
Native integration
To integrate your HubSpot account with the InEvent platform, navigate to Integrations > HubSpot at the Company level.
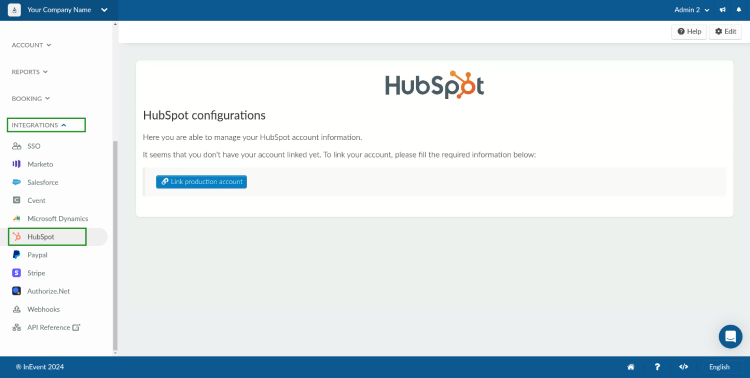
Now you are going to click on the Link production account button and get redirected to the HubSpot page.
Accessing your HubSpot account
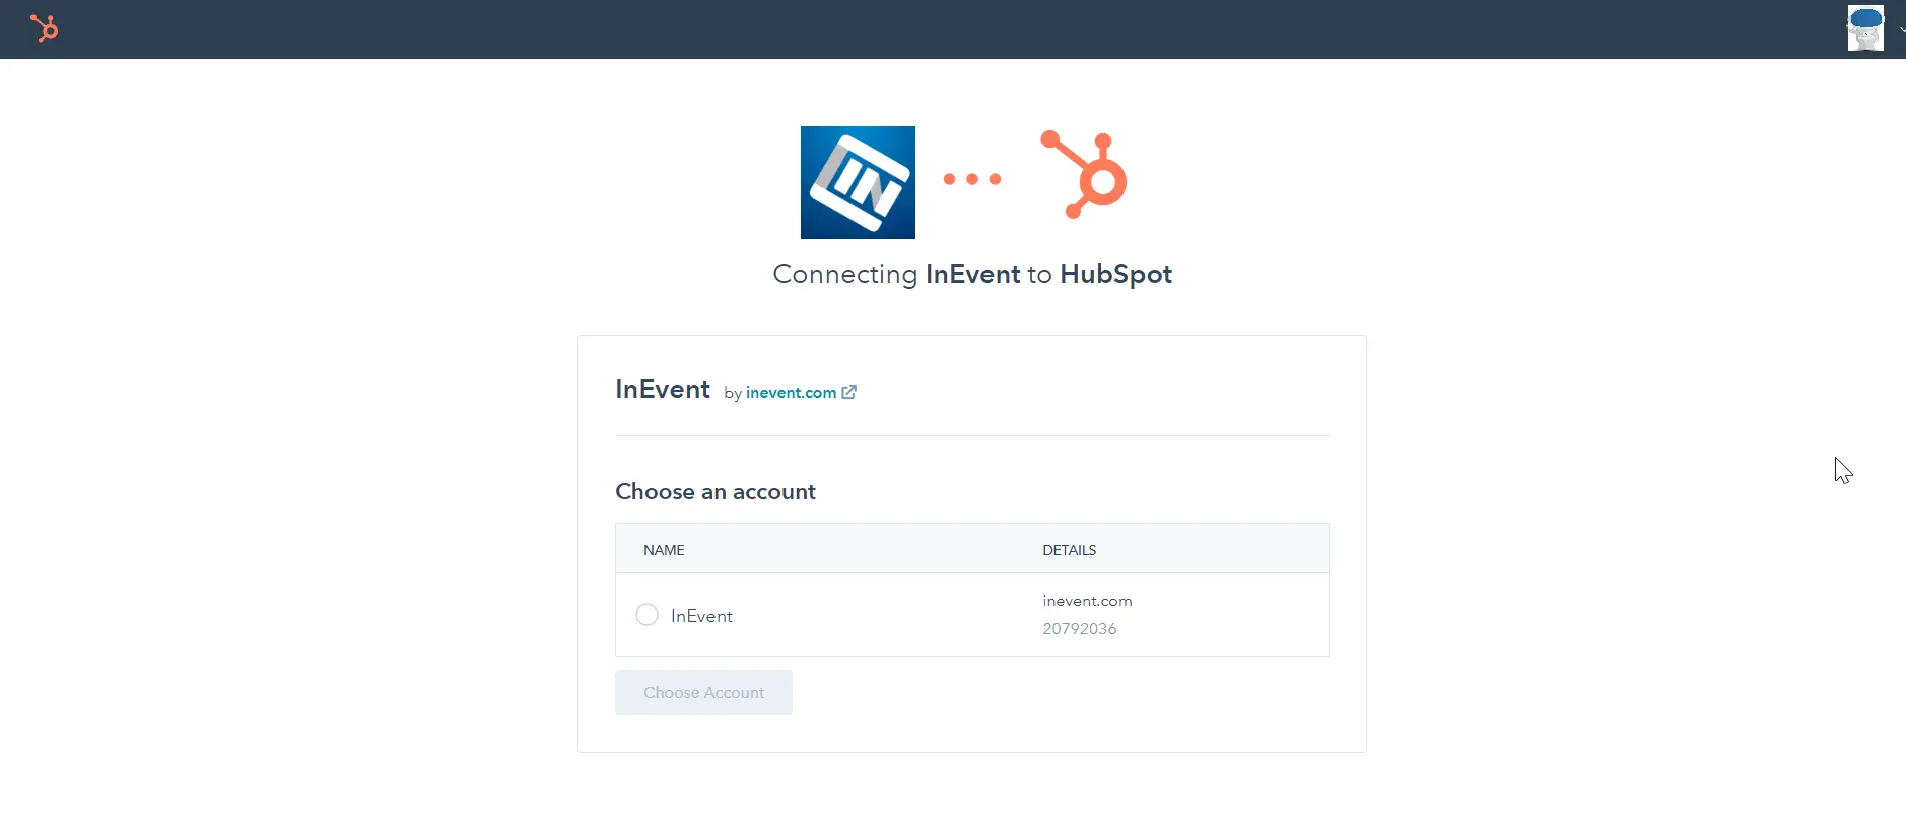
When you enter the HubSpot page, you have to log into your account. Once you are logged in, you can choose the InEvent account and then press Choose account. You will be redirected again to the InEvent and your event will be successfully linked to Hubspot.

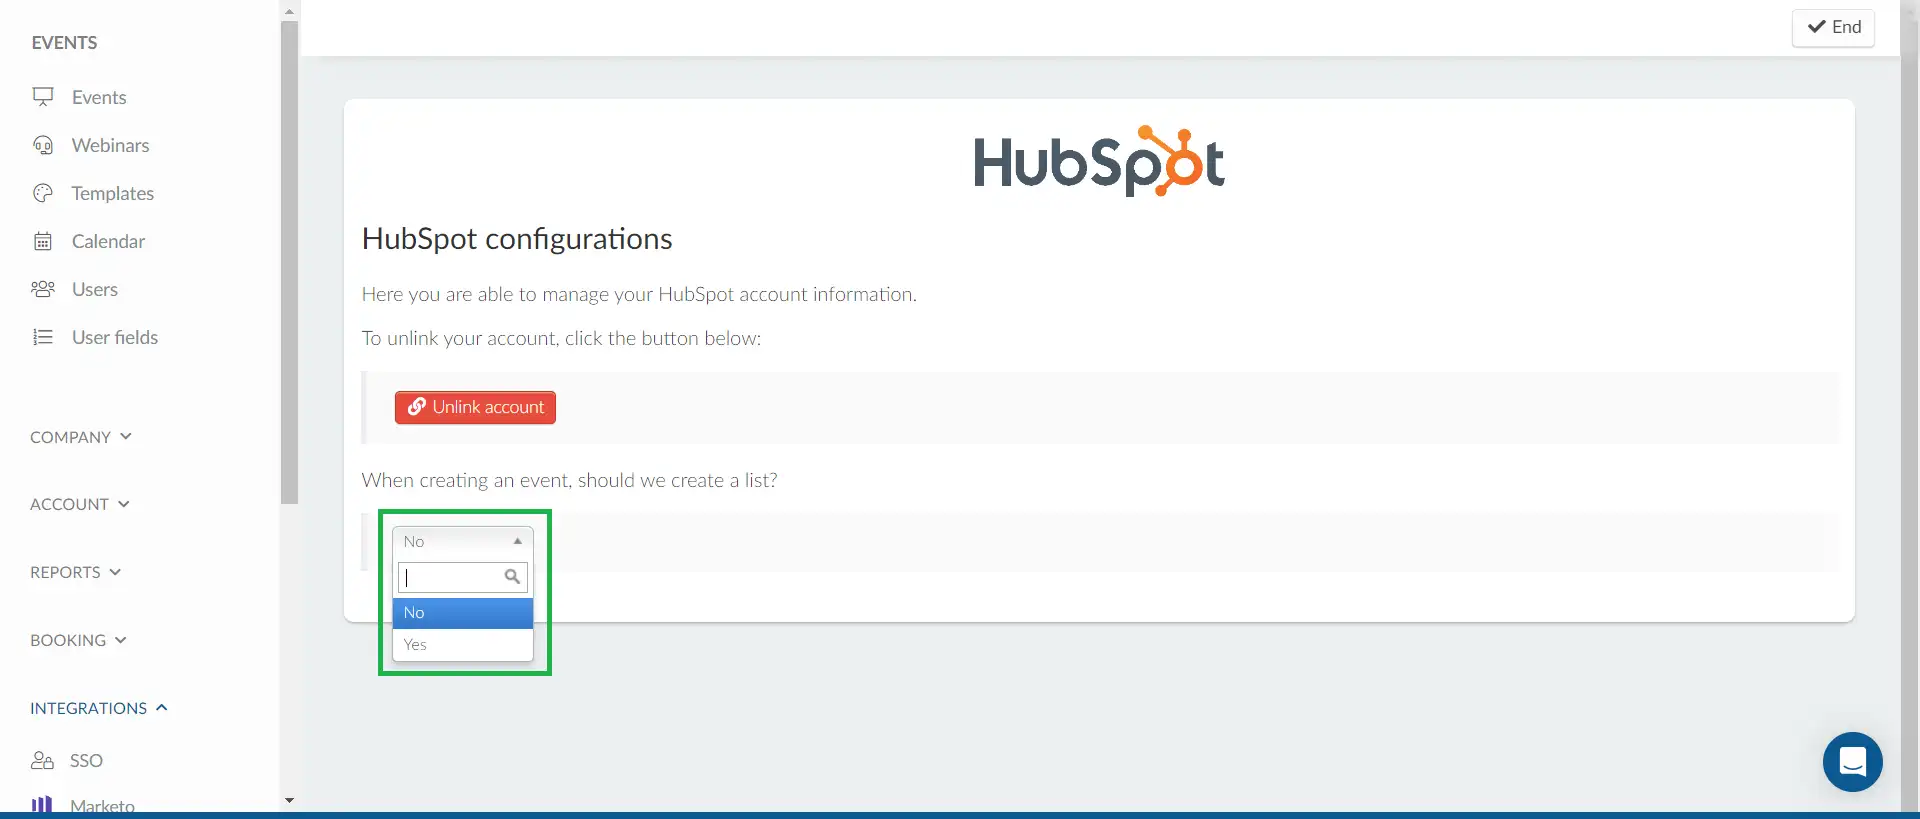
On the Integration page, you will also see the When creating an event, should we create a list? Click on Edit to select Yes or No from the drop-down. By default it is set to No.
- If you select Yes, this means that there will be an automatic list creation on HubSpot when you create an event.
- If you select No , this means that when you create an event, you have to manually create a list for that event on HubSpot, then come back to your event on InEvent to sync this list.
Linking data between HubSpot and InEvent
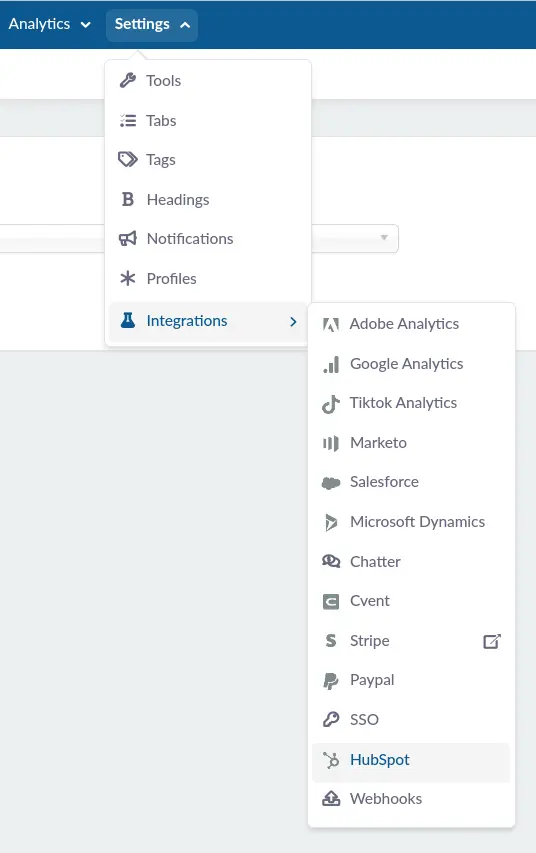
Once you have linked your HubSpot account with InEvent platform, you will be able to easily sync data between HubSpot and InEvent. To do this, navigate to Settings > Integrations > HubSpot from the Event level.
In the HubSpot integration page, you will find the following items:
- Lists: By using the HubSpot integration you are able to synchronize your event attendees with a static list on HubSpot automatically.
- Fields: Synchronize InEvent fields with various HubSpot fields.
- Write logs: View InEvent and HubSpot synchronization logs.
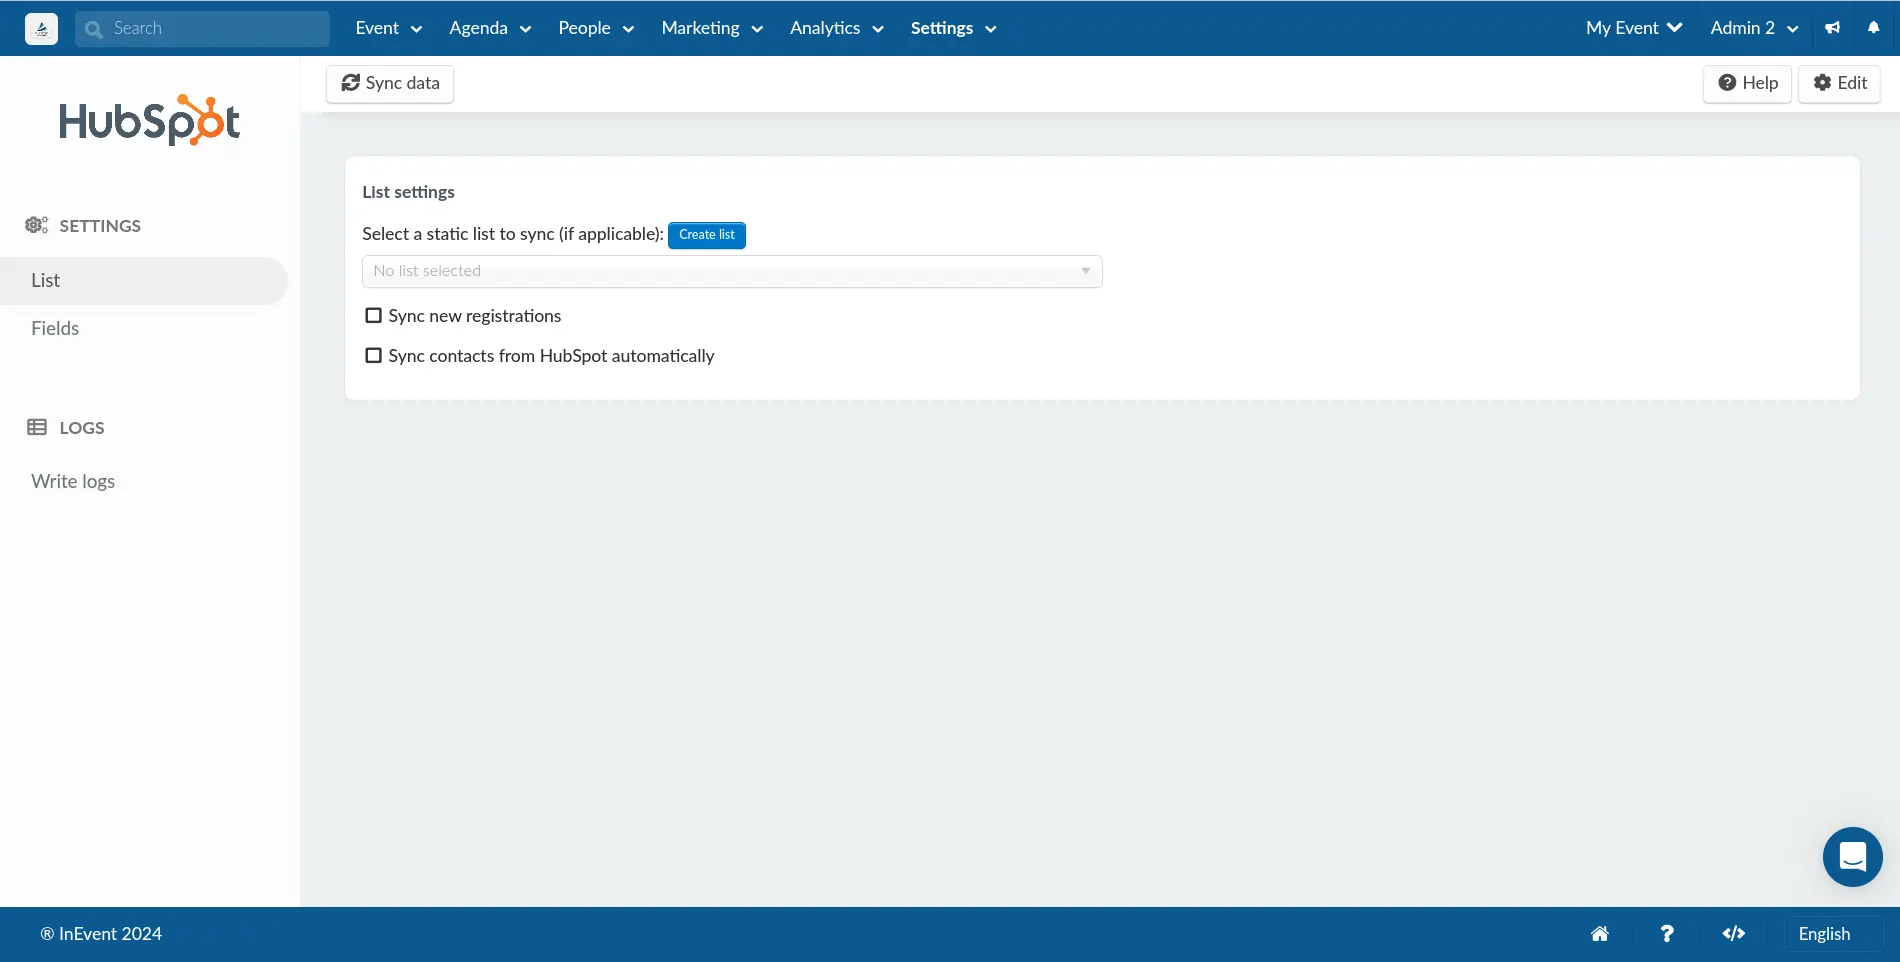
Lists
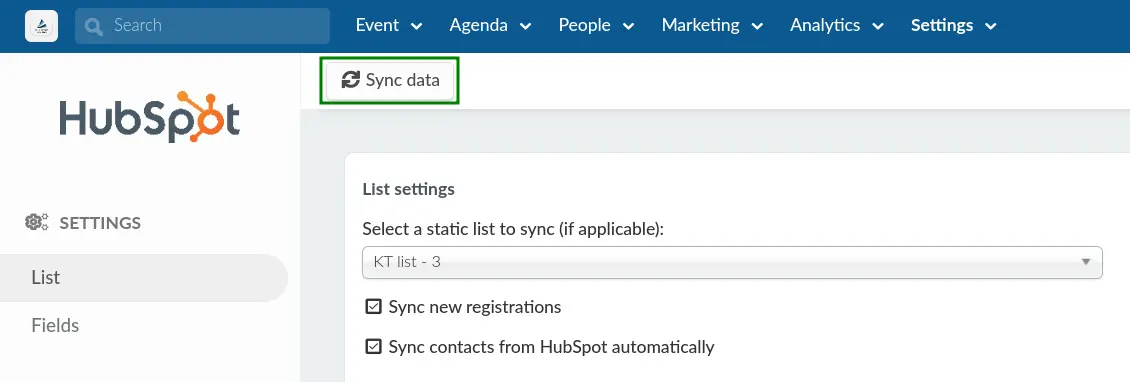
On this page, you can select a HubSpot static list to be synced with InEvent. Below are the available options:
- Select a static list to sync (if applicable): Using the drop-down box, select an existing HubSpot static list to be synced with your event.
- Sync new registrations: Using the checkbox, enable or disable automatic synchronization of new users from InEvent to HubSpot.
- Sync contact from HubSpot automatically: Using the checkbox, enable or disable automatic synchronization of contact from HubSpot to InEvent.
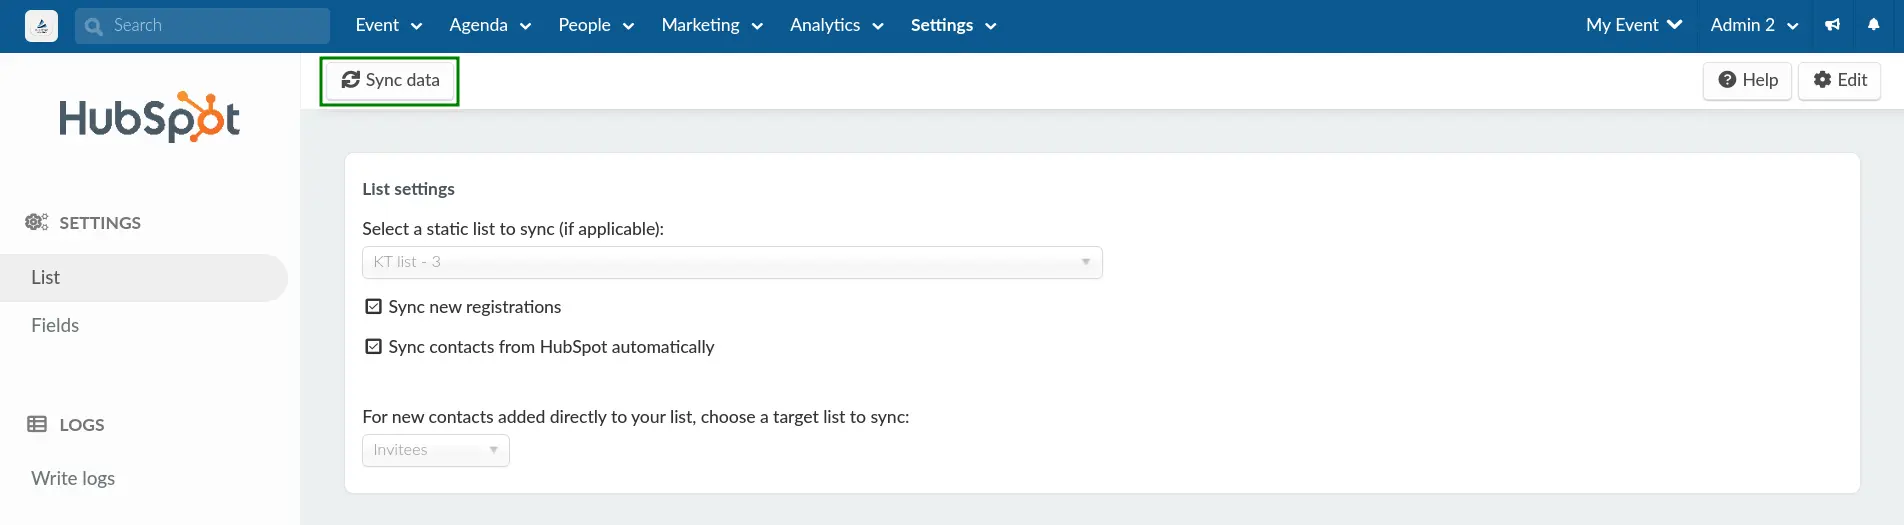
- For new contacts added directly to your list, choose a target list to sync: Using the drop-down, select the target list to sync in InEvent: Attendees or Invitees.
Once you have configured this page, click on the Sync data button at the top of the page, and your InEvent's attendee list will be synced with your HubSpot's static list (if linked). Data can be synced at intervals of 2 minutes from InEvent's platform.
To sync new registrants from InEvent to HubSpot, ensure to click on the Sync data button to have them reflect on HubSpot in about one minute.
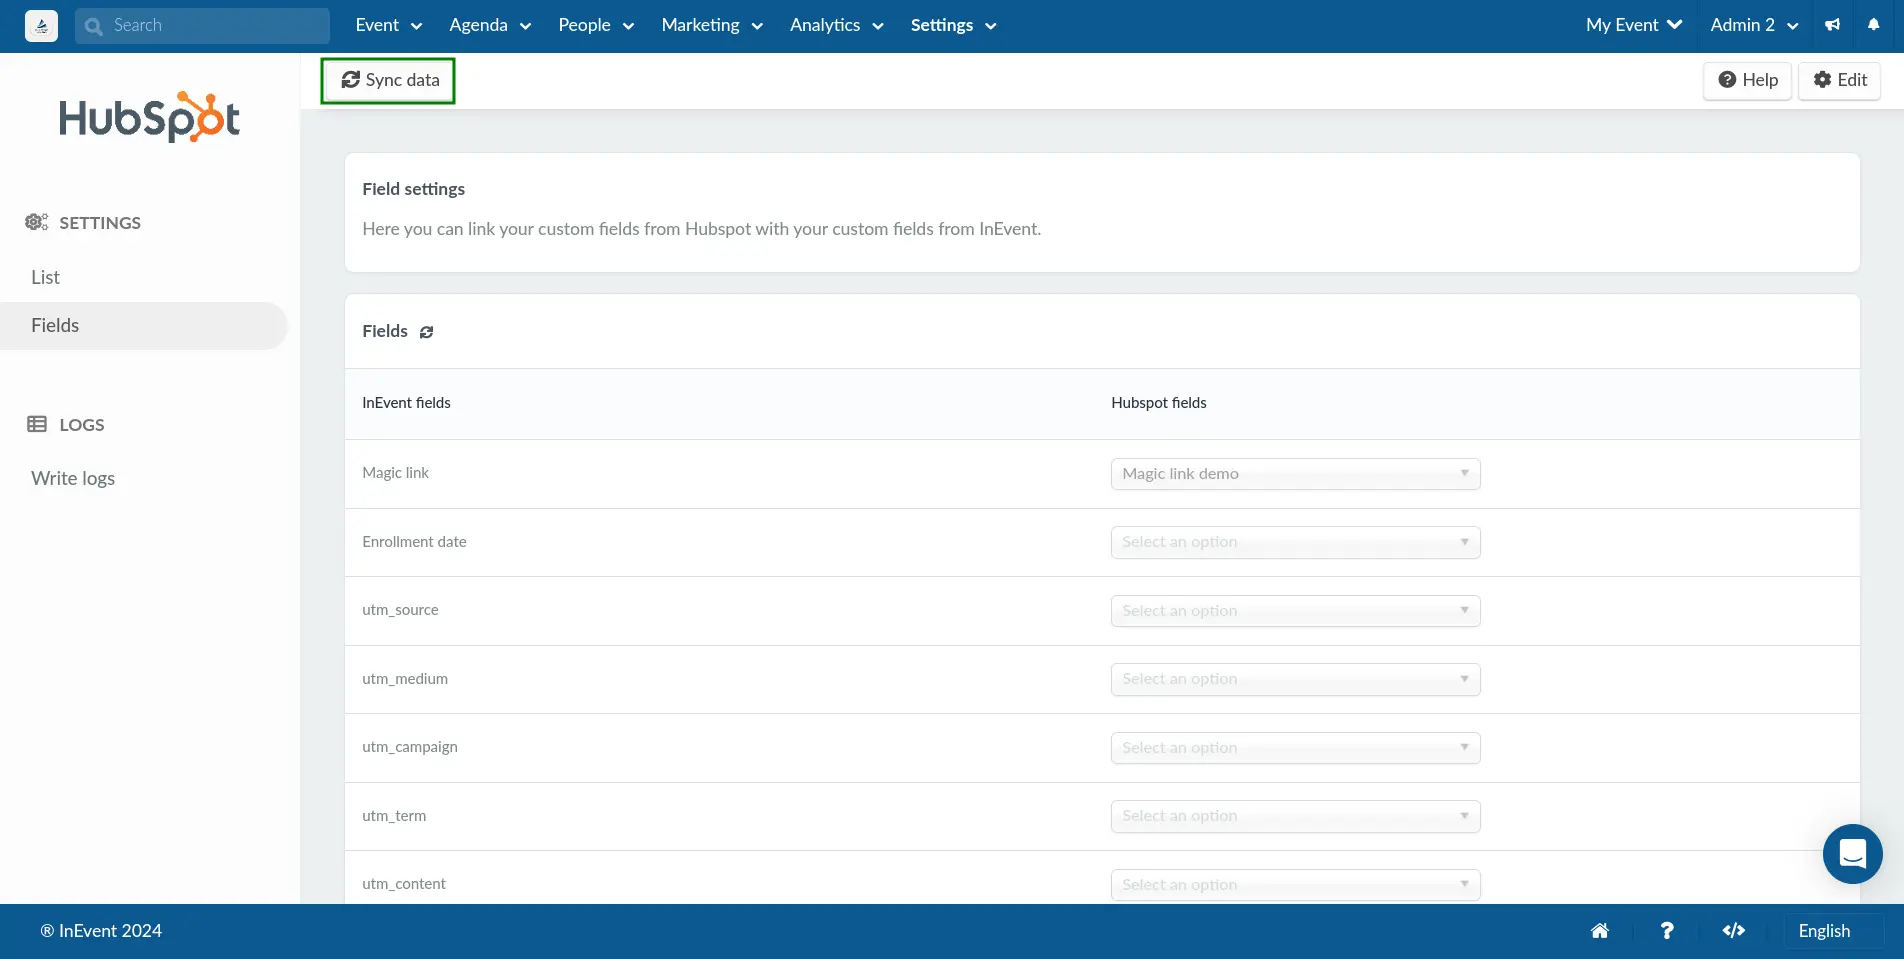
Fields
In this section, you can manage your Fields settings and map InEvent fields to HubSpot fields.
The InEvent fields you can link with HubSpot fields are listed below:
- Magic link
- Enrollment date
utm_source
utm_source field will export InEvent as the value.utm_mediumutm_campaign
utm_campaign field will export the name of the origin event or webinar as the value.utm_termutm_content- Present
- Total time spent
- Custom questions in your Registration form
Once you have mapped InEvent fields to HubSpot fields, click on Sync data at the top of the page.
Syncing attendee content consumption time to HubSpot
To gain deeper insights into attendee engagement, you can automatically sync the total content consumption time from your event into HubSpot. This allows you to track how long each contact has interacted with your event activities directly within your CRM.
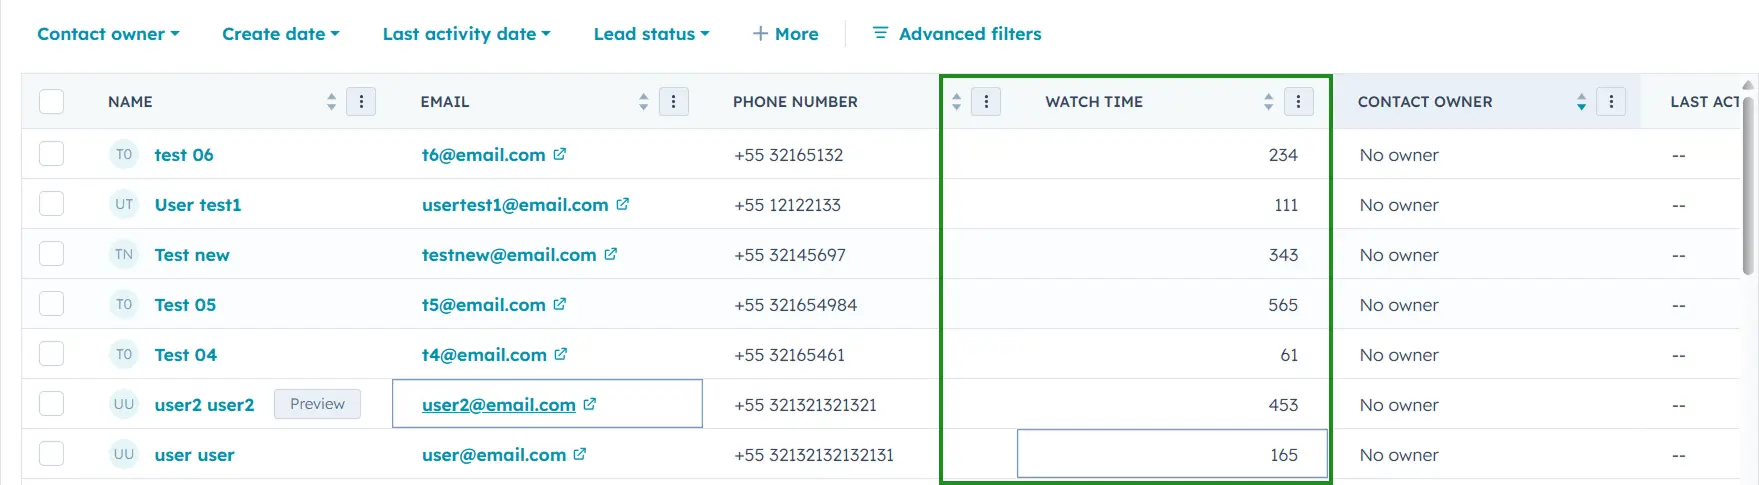
To map attendees’ total time spent from InEvent to HubSpot, you must first create a custom property in HubSpot (for example, Watch Time). For more information on how to create or add properties, refer to HubSpot’s Create and edit properties guide. Make sure this property is available for Contacts.
Once created, the property will appear in the InEvent dropdown for mapping.
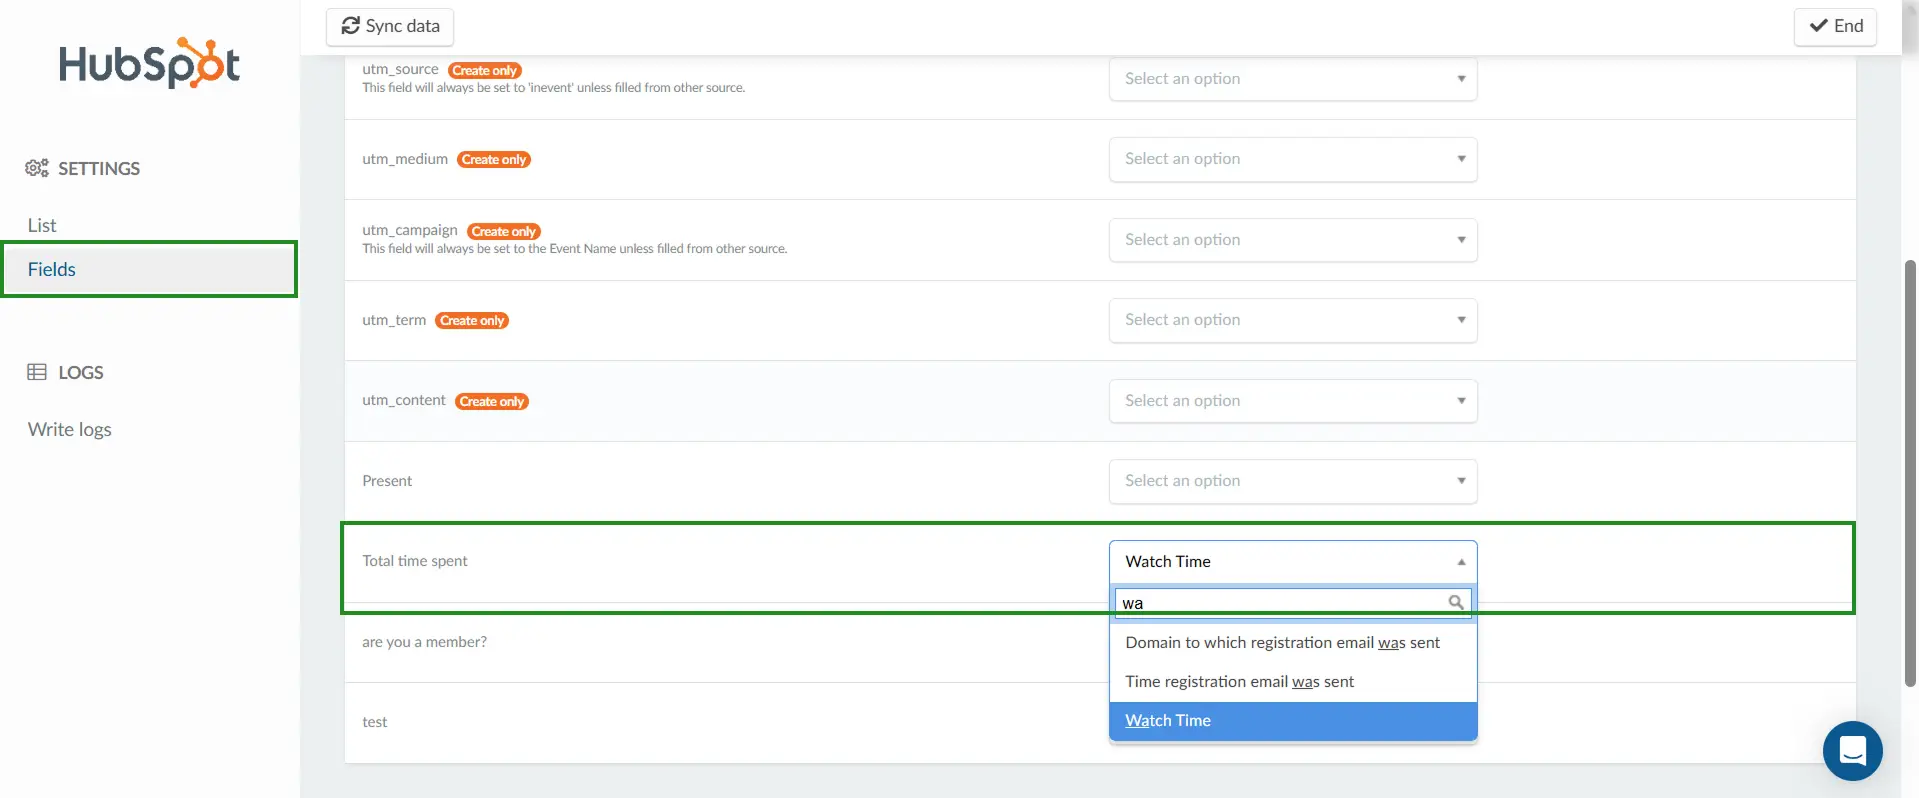
Once mapped, the attendee’s total time spent in activities will automatically sync and update in the corresponding HubSpot contact record.
Write logs
In this section, you can view the synchronization logs of the HubSpot integration. The logs contain the operation ID, attendee name and email, operation type and result, as well as the operation date and time in UTC.

Syncing data points to HubSpot contacts
InEvent enables you to sync data points directly to HubSpot contacts, providing you with greater flexibility. With this, you can export only selected attendees instead of syncing everyone, keep HubSpot contacts clean and targeted, and control exactly when data points are pushed.
To do this, follow the steps below:
- Navigate to People > Attendees.
- Click Edit.
- Select the attendees you want to export.
- From the Export to CRM drop-down, choose HubSpot.
- Click on Run bulk operation.
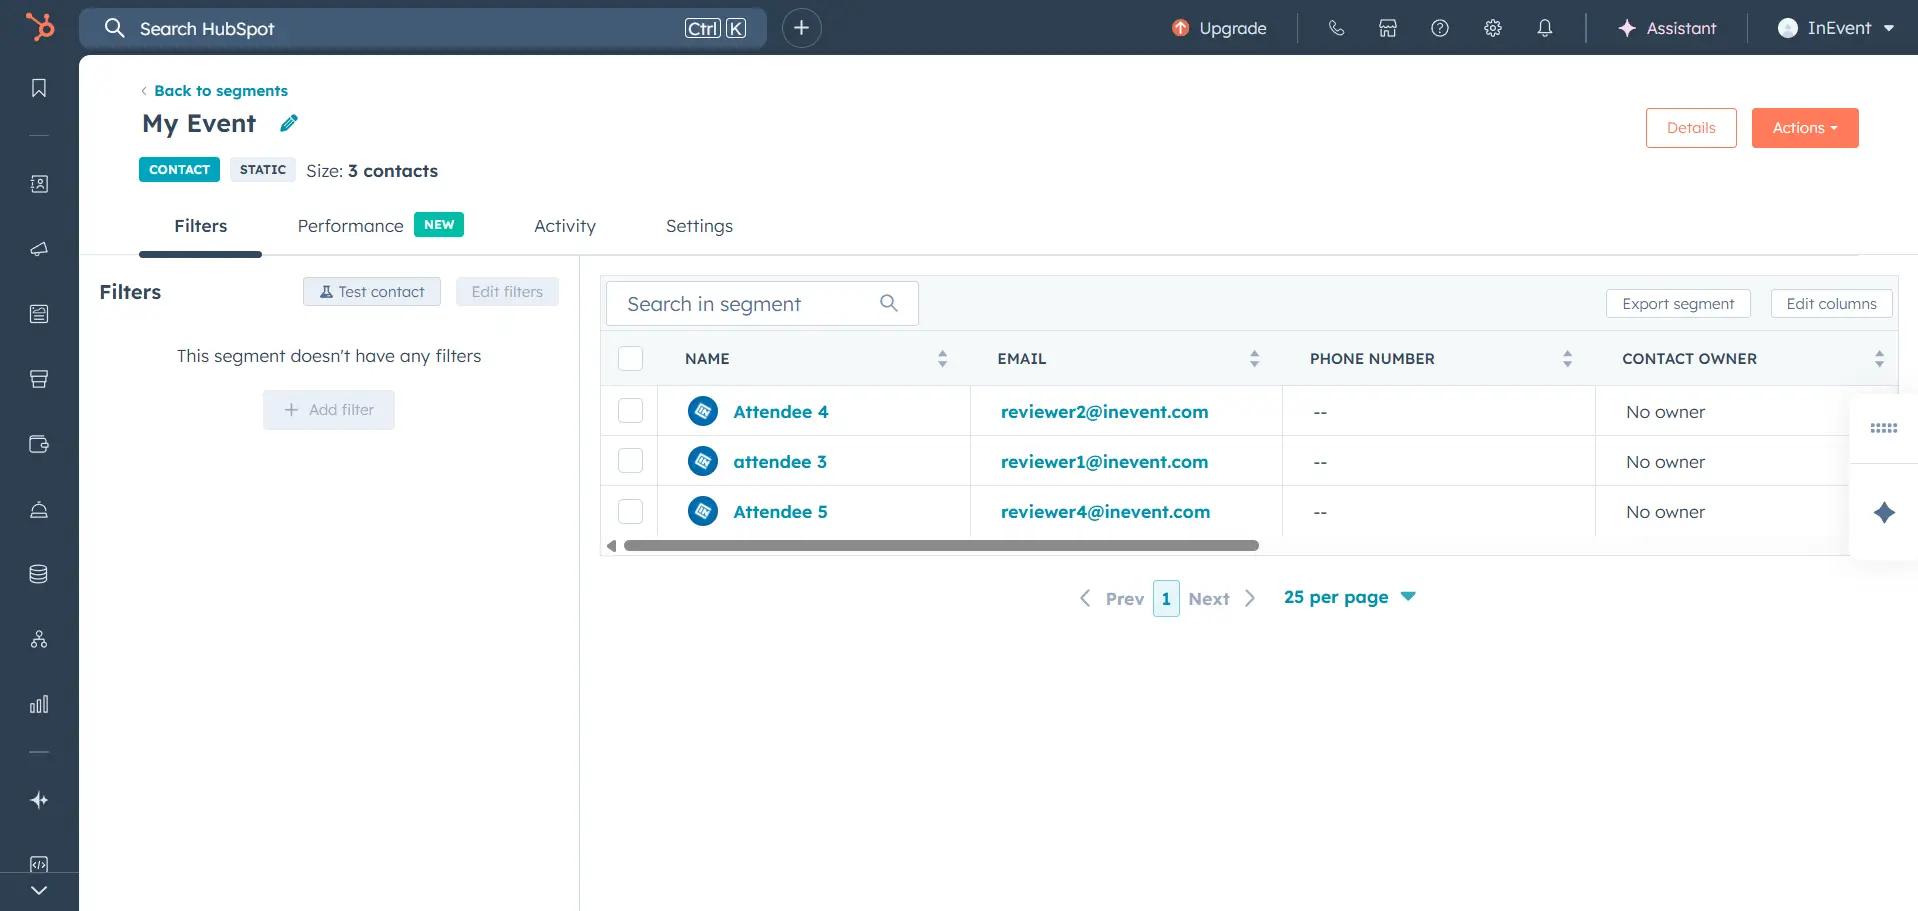
All selected and exported attendees will appear as contacts in HubSpot, not just in a static list.
Sending emails from HubSpot adding InEvent's magic link
If you wish to send out your confirmation email and other emails to your participants from HubSpot, you need to map InEvent's magic link field with a HubSpot custom field. You will need to first create this custom field on HubSpot to map with InEvent's magic link field.
Creating a custom field on HubSpot to map with InEvent's magic link field
To create a custom field, follow the steps below:
- Go to your HubSpot account and click on the Settings icon at the top right corner of the page.

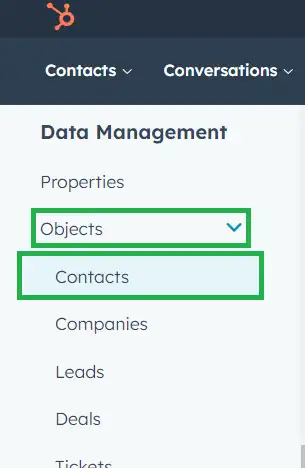
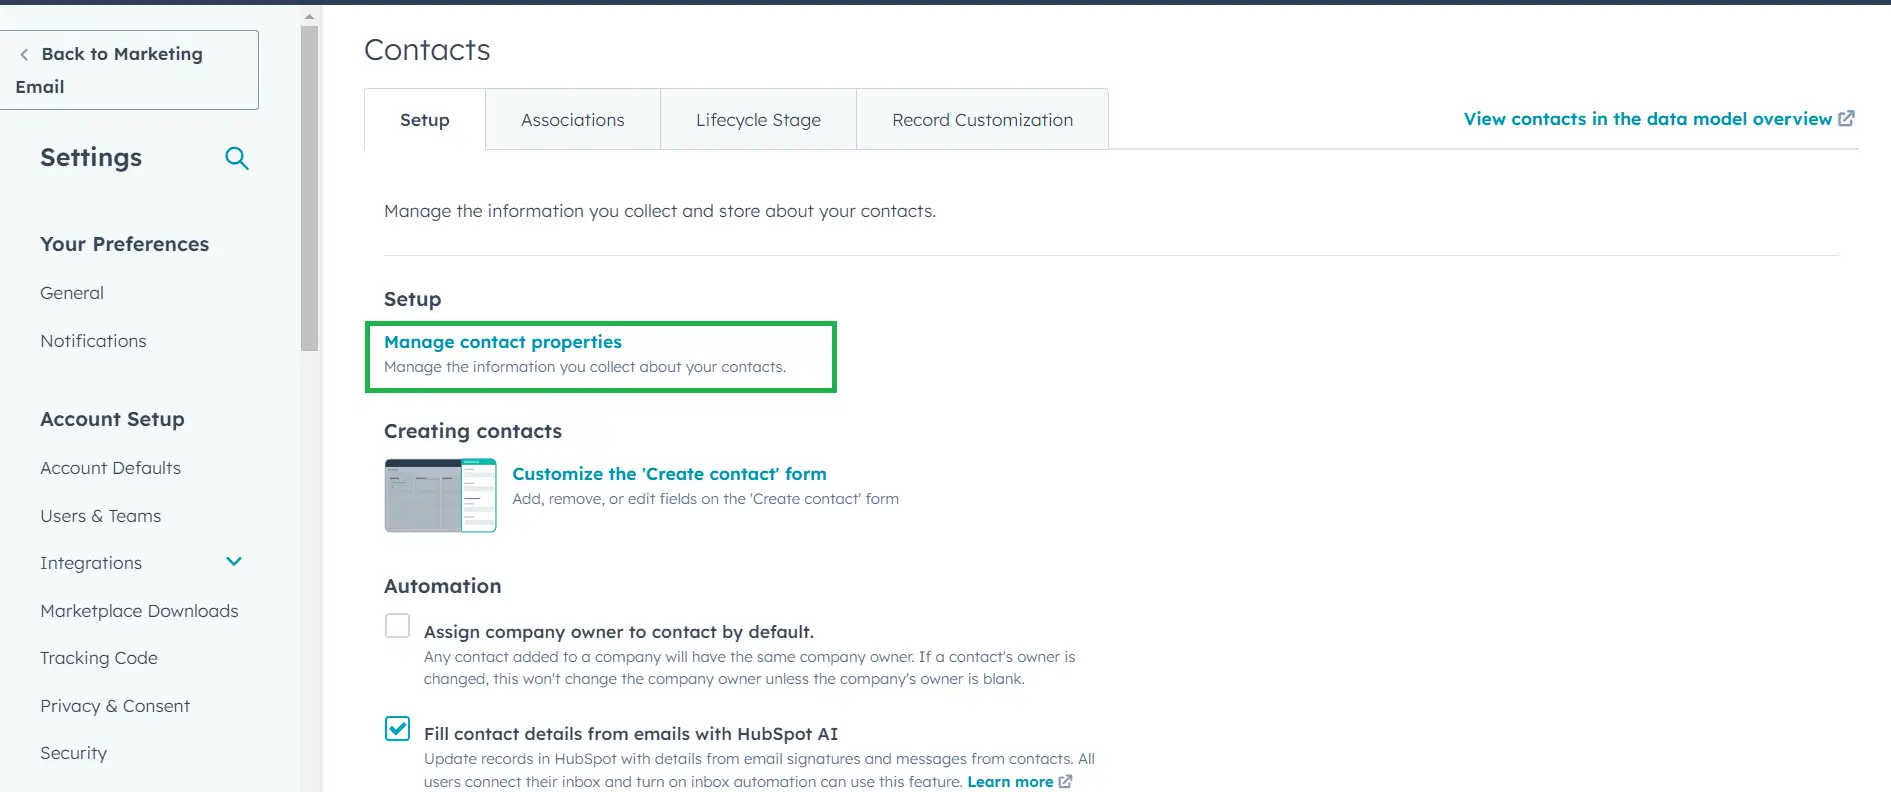
- Navigate to Objects > Contacts under the Data management menu from the left menu.
- Click on Manage contact property under Setup.
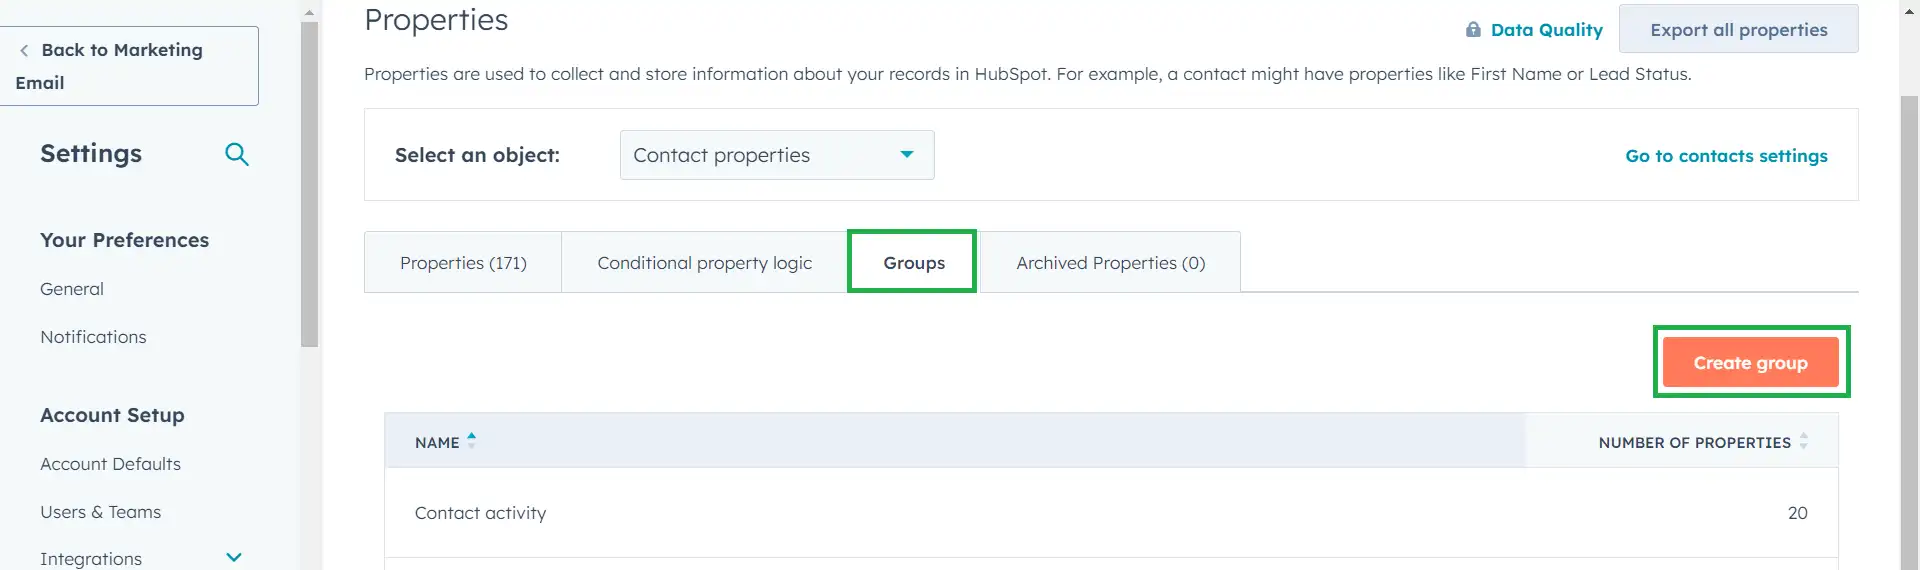
- Click on Groups > Create Group, to create a group where your property will be stored.
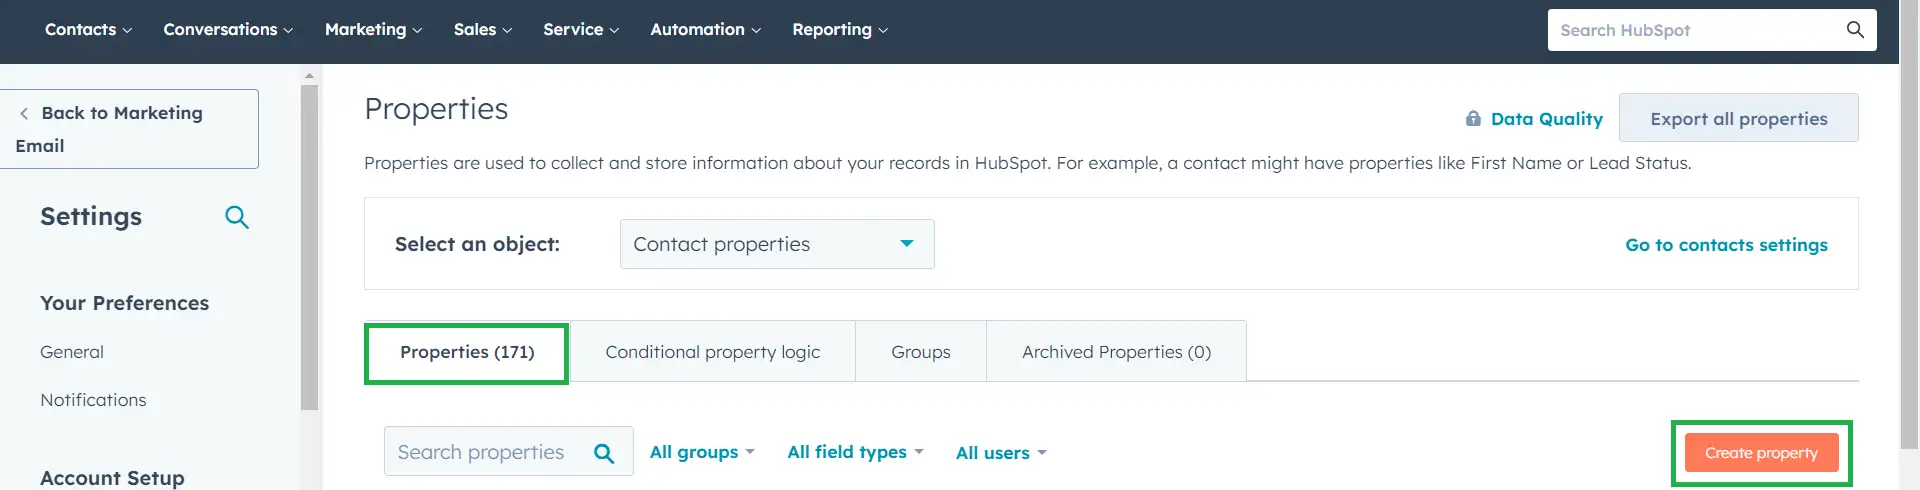
- Click on Properties > Create property to create a new property.
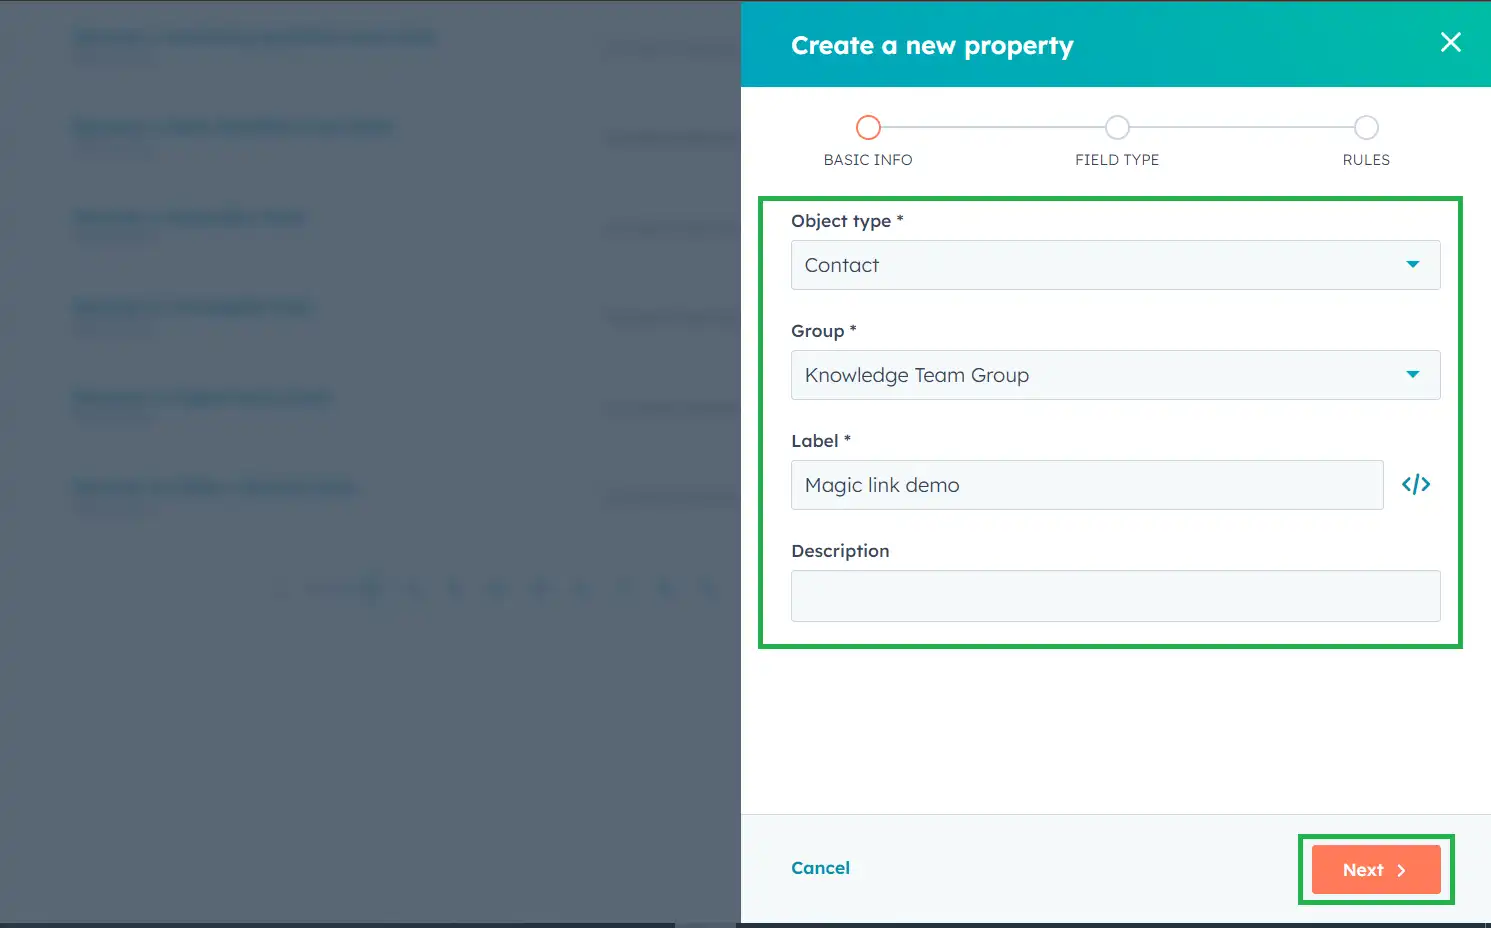
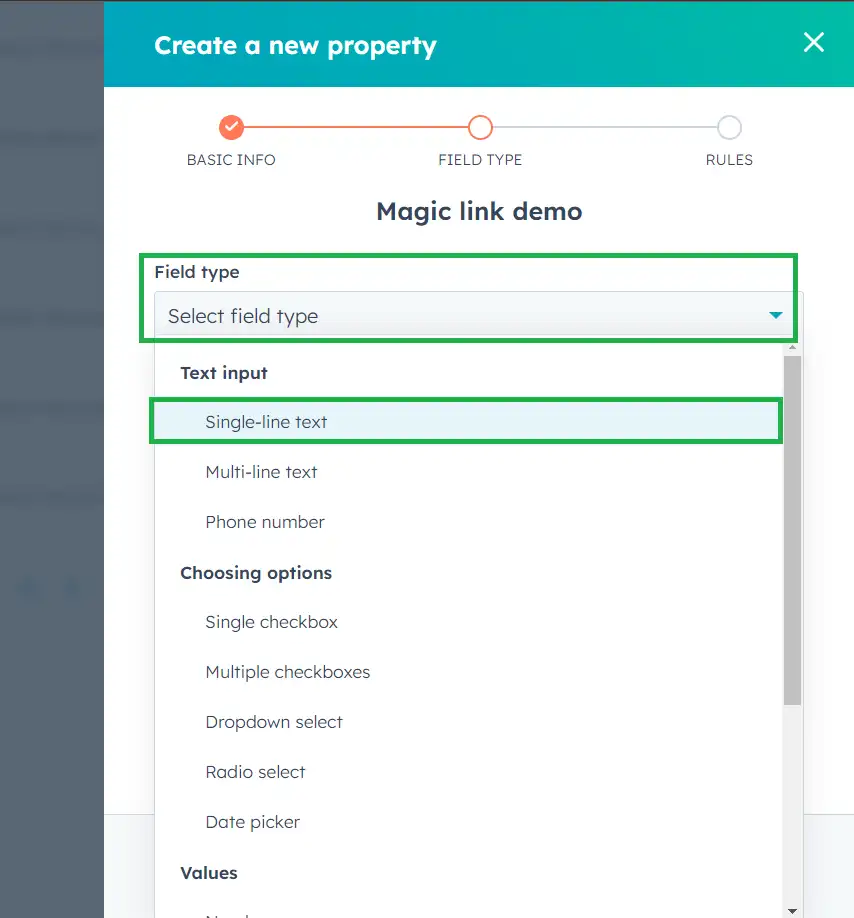
- A window will open at the right side of the screen to fill in the mandatory details of your property: enter a Label, and select a group that you have created from the Group drop-down and click on Next.
- Select single line text from the field type from the drop-down menu. Click on Next.
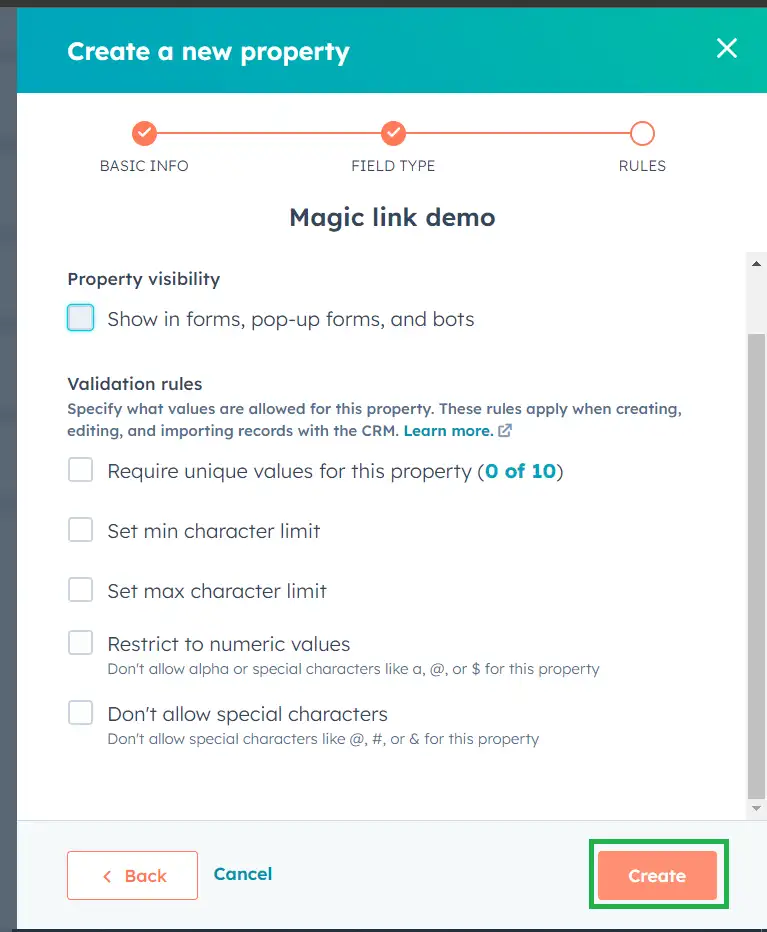
- Set your rules. You can untick the Property visibility if you don't want it to be accessible on forms, pop-up forms, bots, etc.
- Click on Create once you are done.
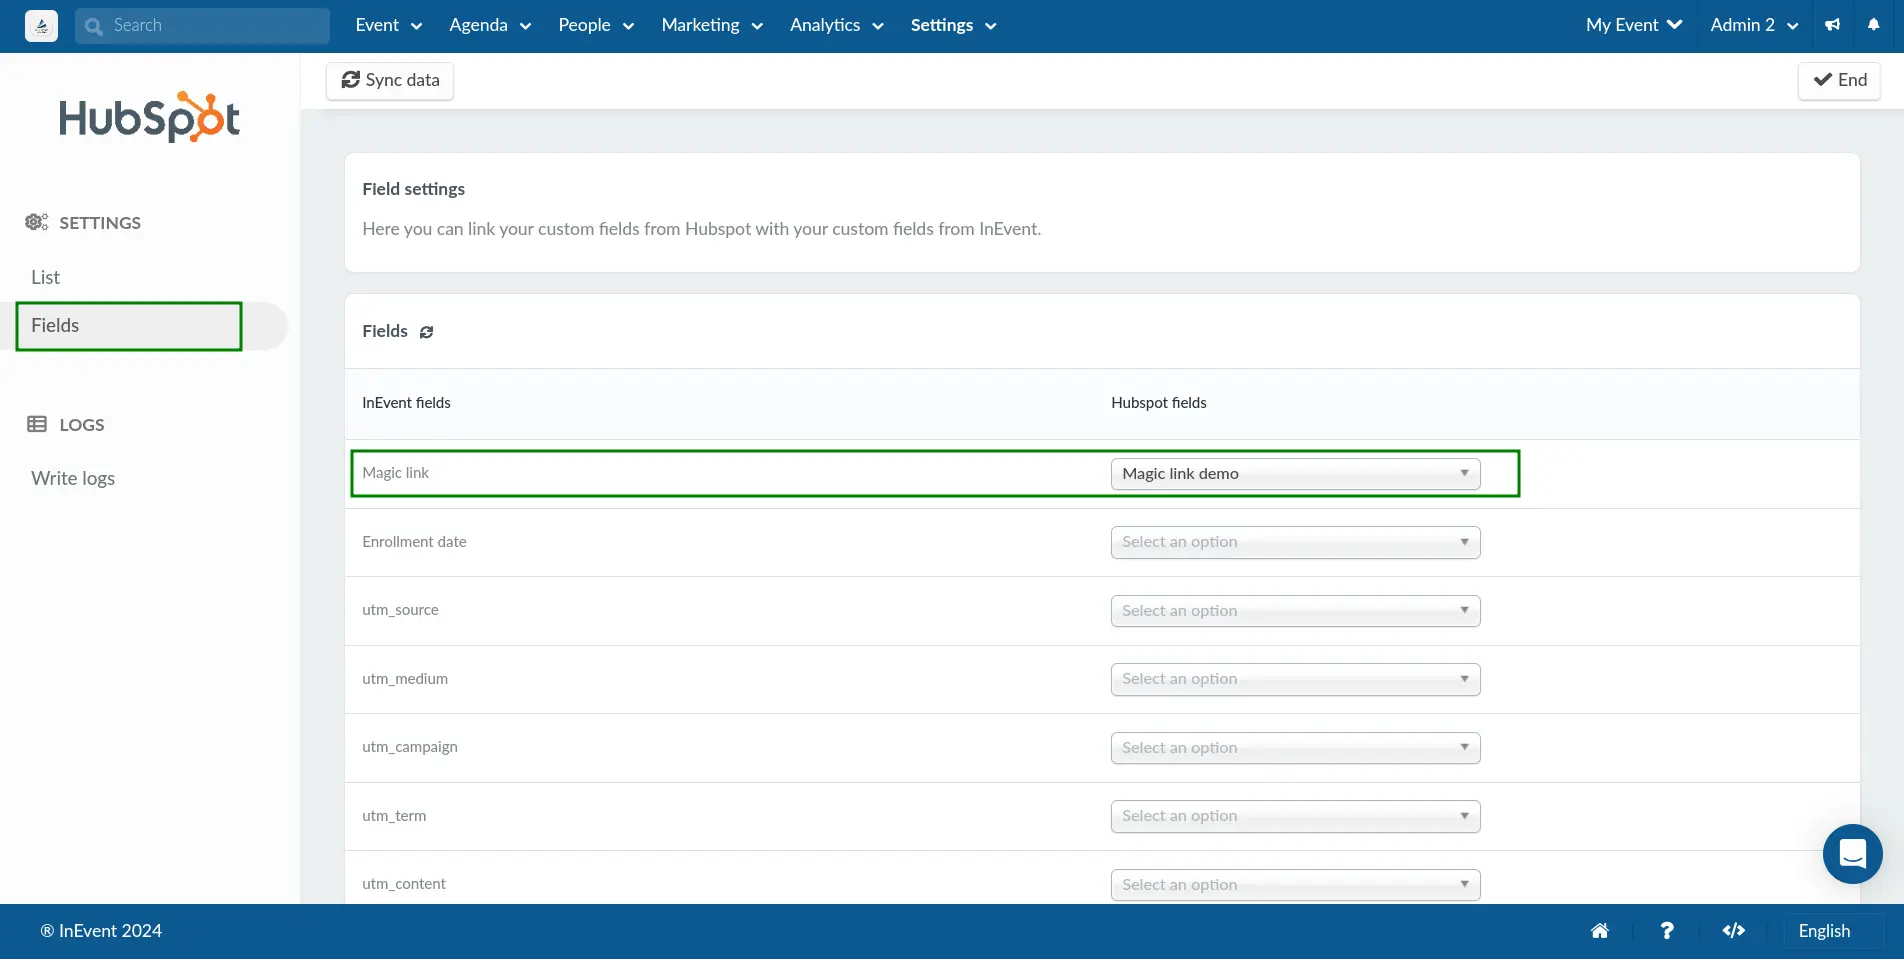
Once the HubSpot property has been created, you will able to sync InEvent's magic link field with the newly created HubSpot field. To do this, refresh your Integration page on InEvent's platform, then from the HubSpot fields drop-down, select the newly created field to match with InEvent's magic link field.
Syncing your contact's magic link to HubSpot
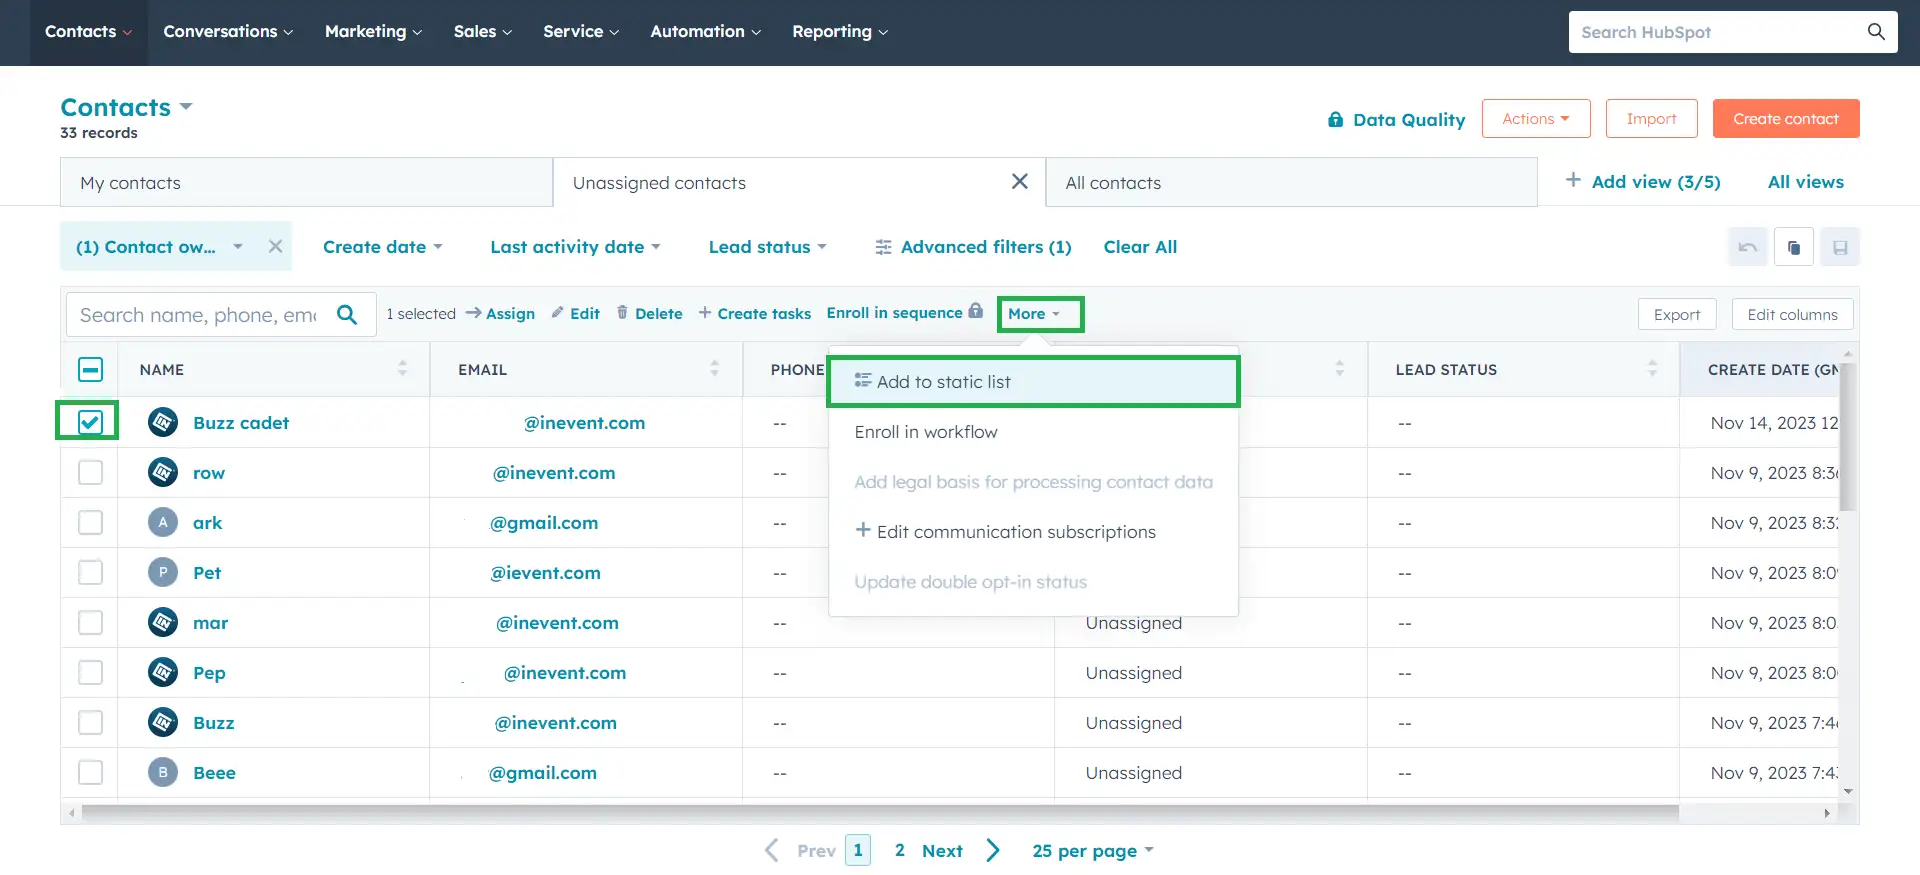
- On HubSpot's page, go to Contacts and add your contact(s) to the static list synced with InEvent.
- Go to InEvent's platform and press the sync data button. Navigate to the Invitees page to see the synced contact.
- On the Invitees page, click on Copy invite and register the user in an incognito browser.

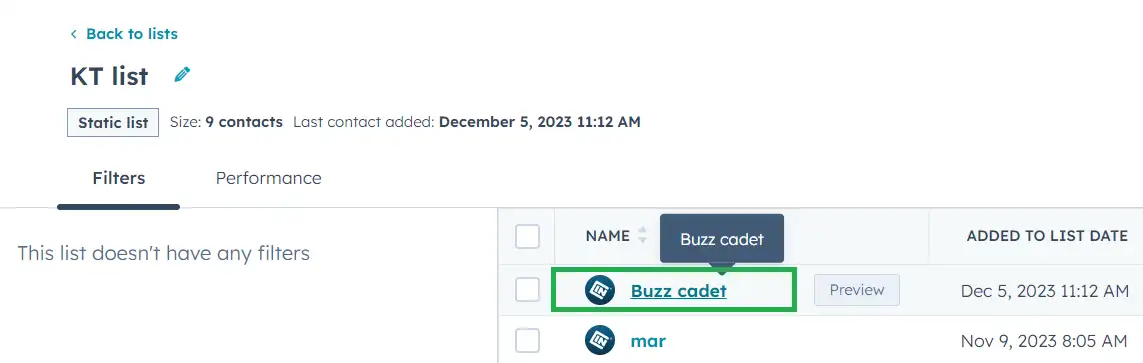
- On your HubSpot account, go to Contact > Lists, select your linked static list and click on the user's name.
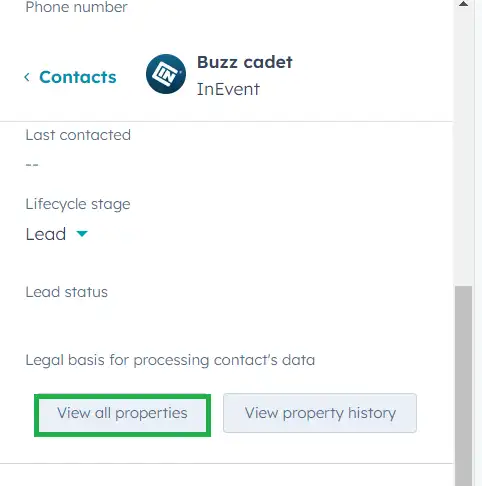
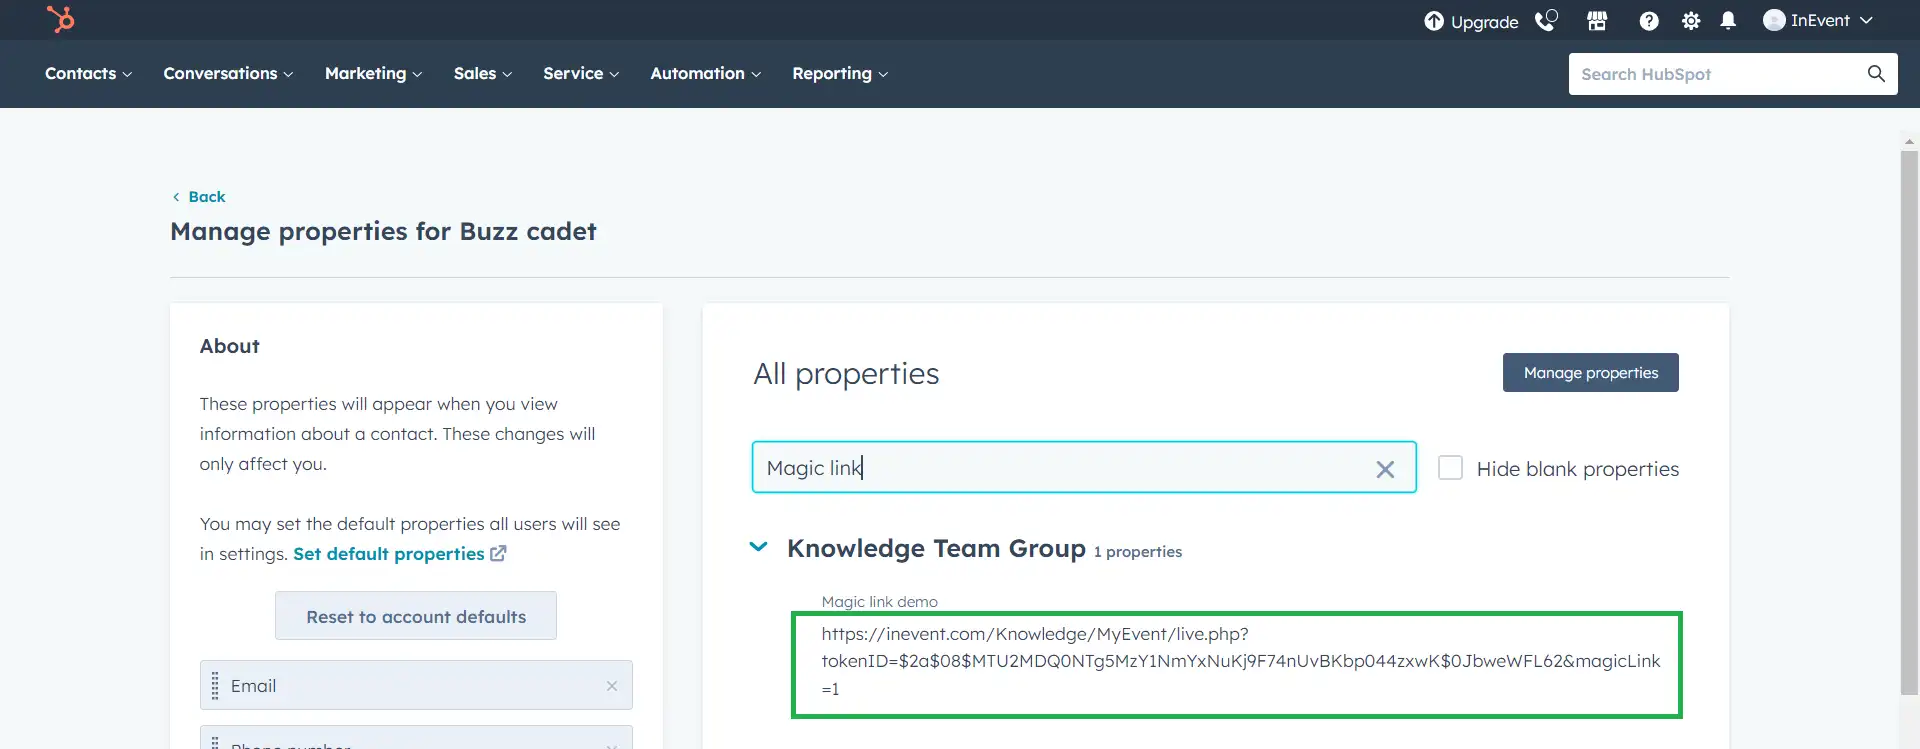
- Scroll down and click on View all properties from the left side menu.
- Type in the created property in the search box:
- If the user hasn't registered to the event yet, no magic link will appear.
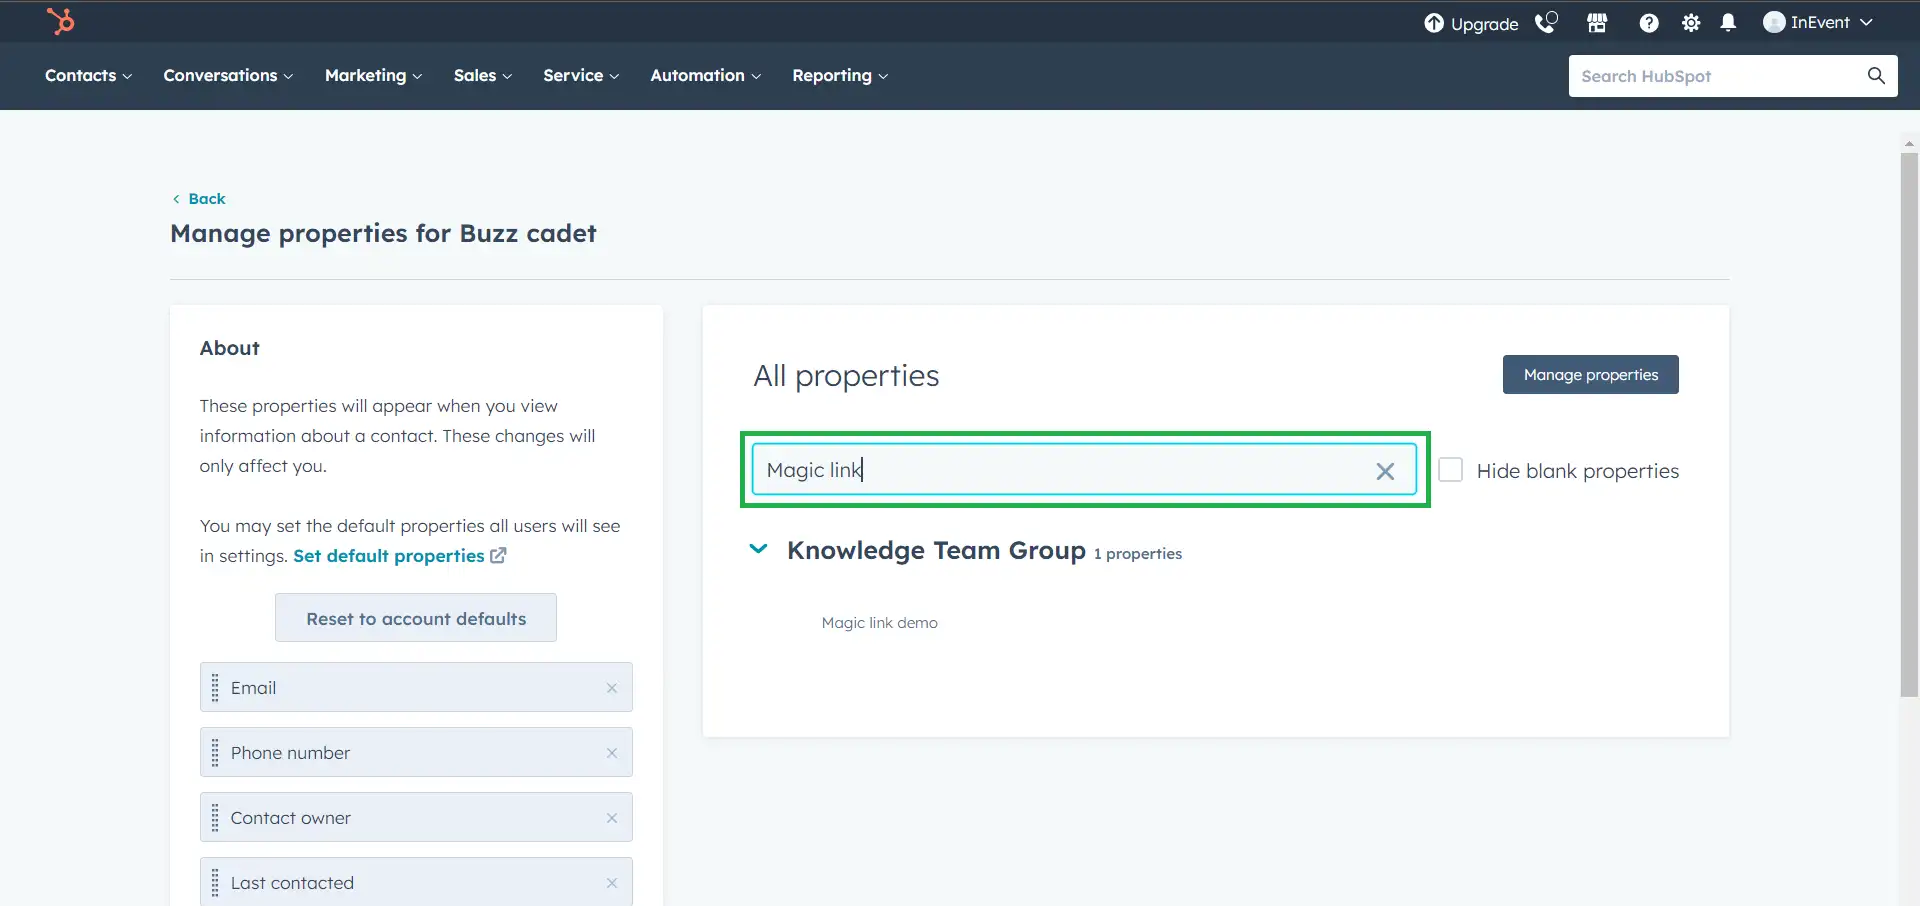
- Once the user has registered to the event, refresh the HubSpot page and the magic link will now be displayed showing that InEvent and HubSpot magic link custom fields were successfully mapped.
Sending emails from HubSpot with InEvent's magic link
Now that you have successfully created a property on HubSpot and mapped it with InEvent, you can send emails from HubSpot to your synced contacts registered to the event adding their magic links. To do this follow the steps below:
- Go to Marketing > Emails and click on Create email.
- Select the the email type. In this case Regular is selected.
- Choose a template.
- Type in your email you wish to send to your registered contacts.
- Click on Personalize in the top right corner of the page.
- Under Type, select Contact.
- Type in the name of your created custom field - the one created to match InEvent's magic link field.
- Tick the Use this property's global default value checkbox and click on Insert.
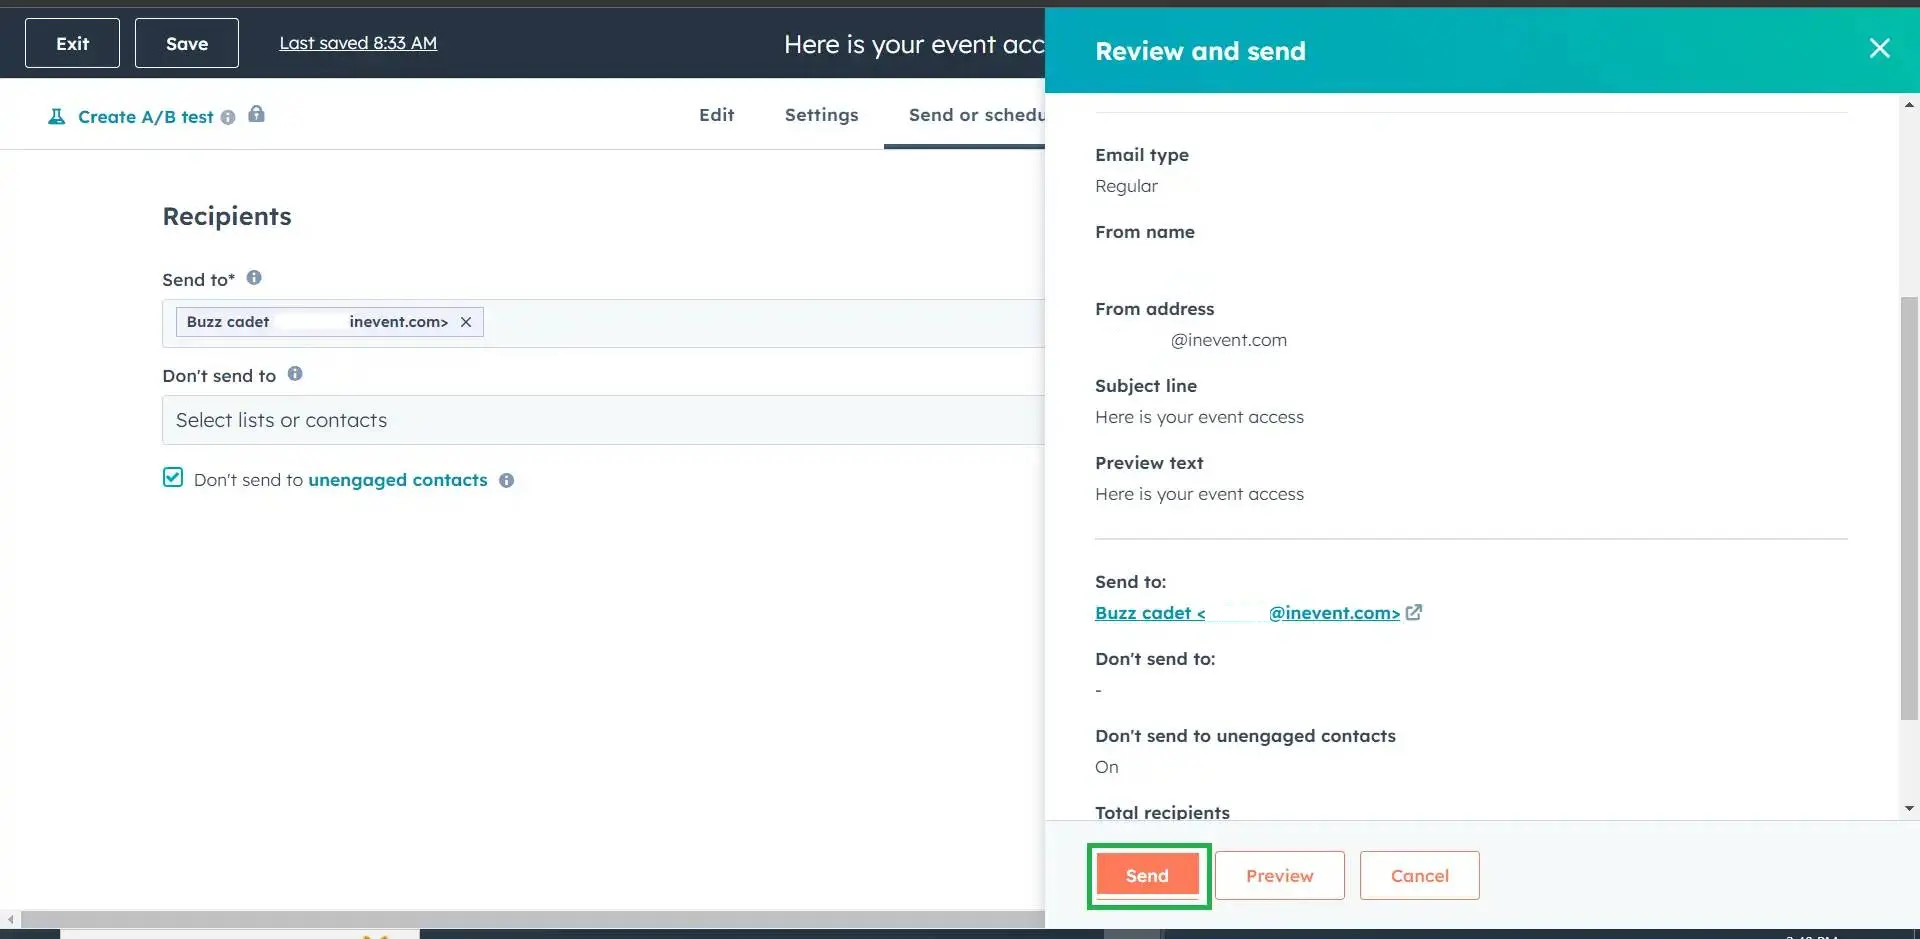
- Click on Review and Send, ensure that all required fields listed are filled before sending - selecting a recipient, adding a subject, filling company information, etc.
- Once all the fields have been filled, click the Send button.
Importing leads to your event
You can also use the Import from HubSpot option when adding attendees, and invitees to your events and also when adding people to lists.
Below, we will teach you how to import leads from HubSpot and add them as attendees to your event:
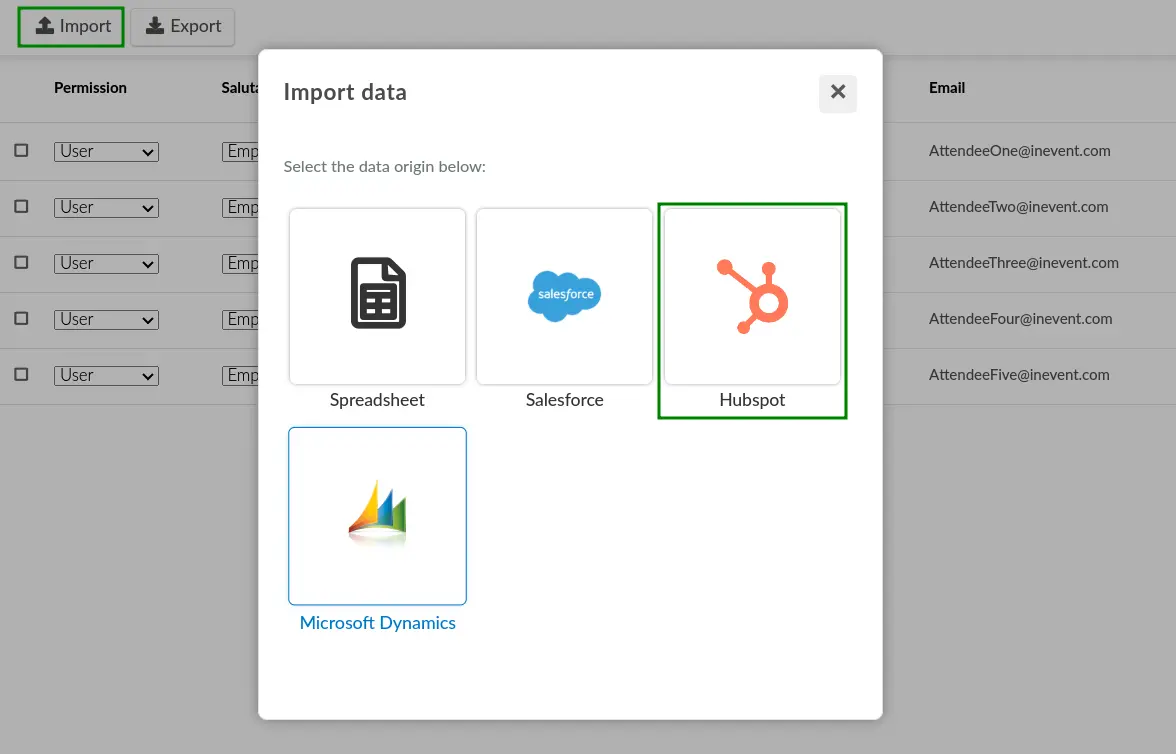
To import attendees, click on People > Attendees > Edit on the right upper corner. Then, click on the Import button and select HubSpot as your data origin.
By clicking on the Import from HubSpot button, a new window will open for you to search the names from your HubSpot account that you would like to import to your event. Once you have found the person you wish to import, click on the arrow corresponding to this lead on the right-hand side of the screen.
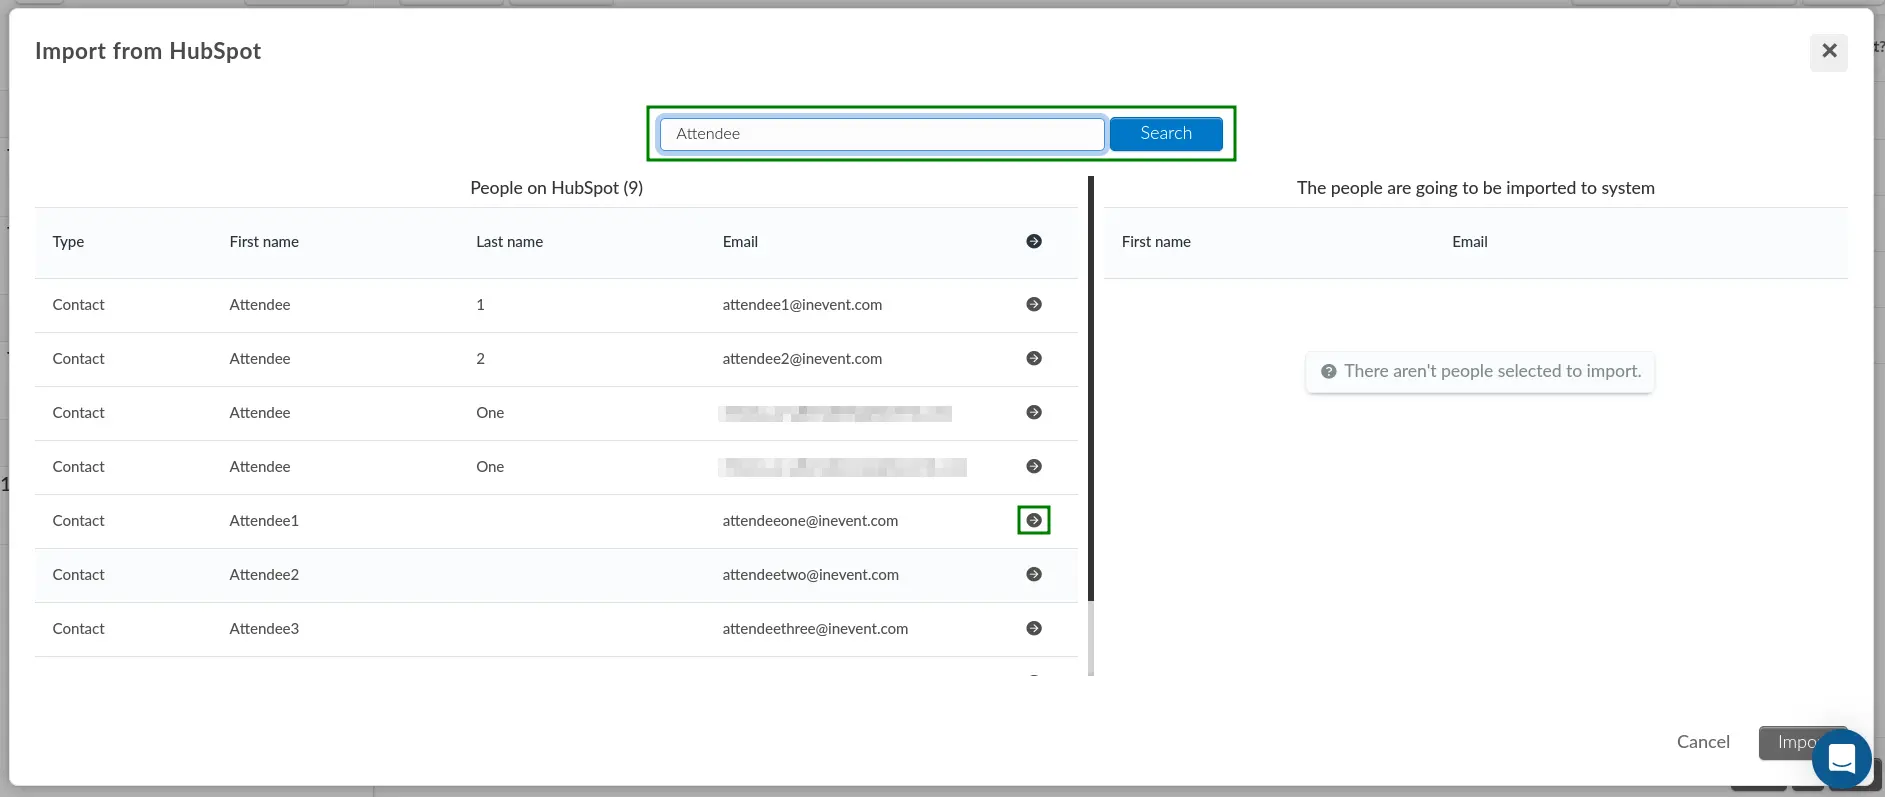
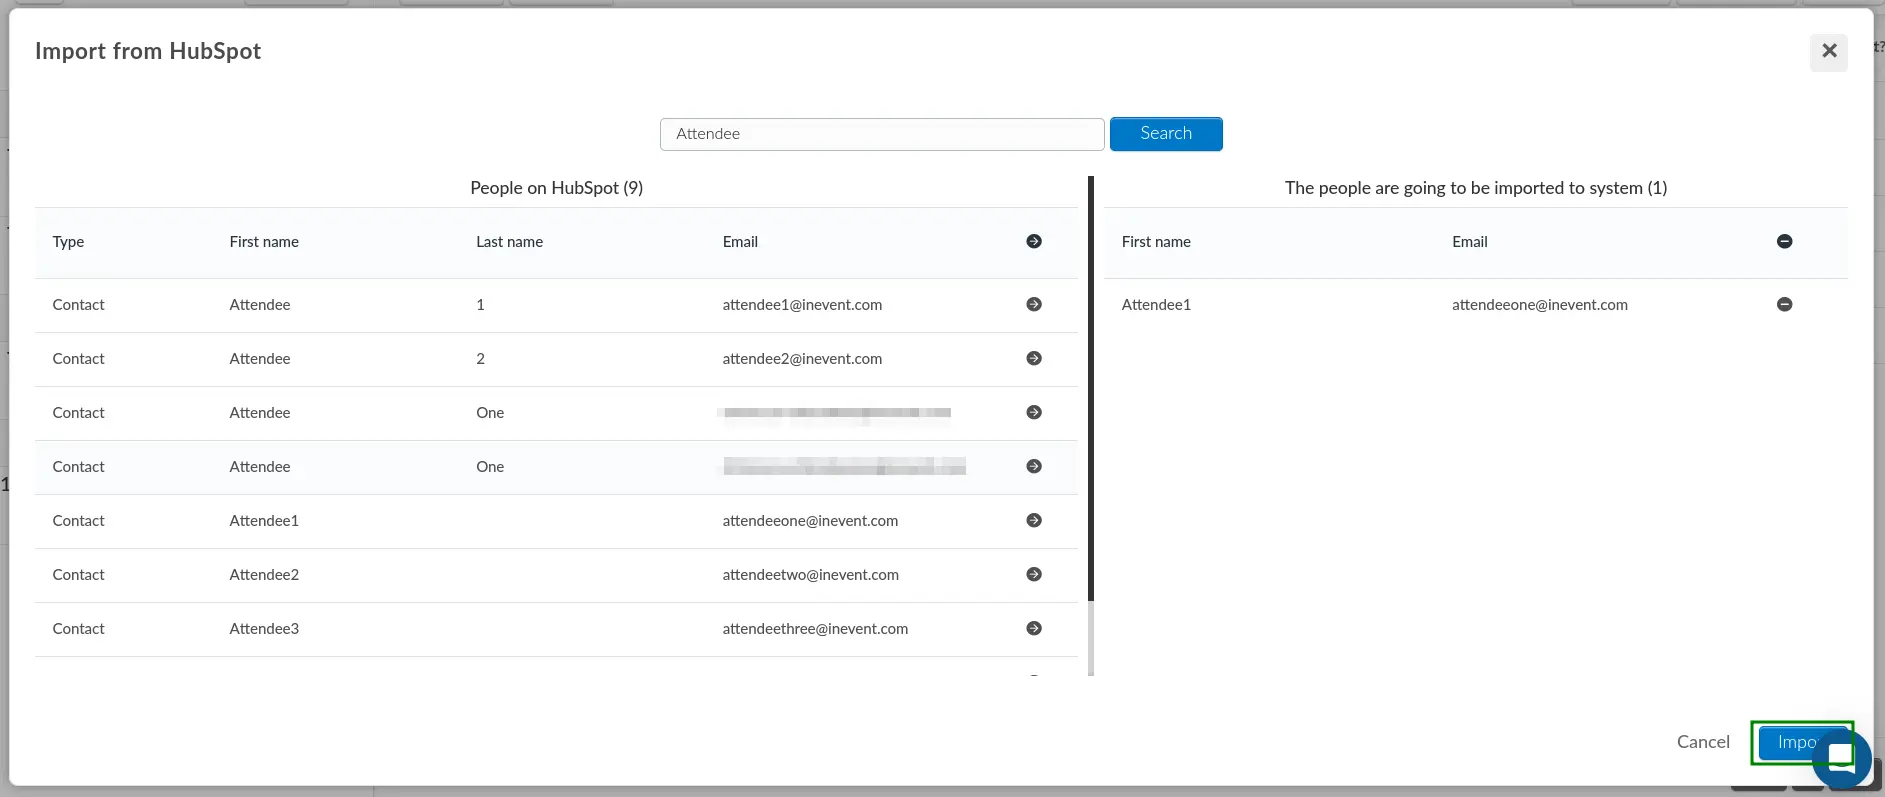
The selected contact(s) will be moved to the list on the right-hand side, indicating they are ready to be imported into the system. To confirm, press the blue Import button.
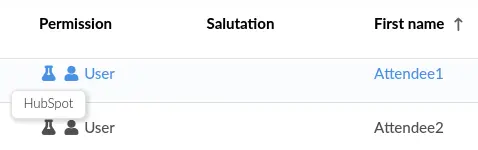
After clicking on the Import button, you will be able to see all the contacts that were imported on the attendee's list. To identify the attendees imported from HubSpot, you will see the HubSpot icon next to their names.
To import invitees (People > Invitees) or to add people to lists (People > Lists), you should follow the same process described above.
Exporting leads from your event
You can also export leads from InEvent to HubSpot, from the People > Attendees page. Simply choose an attendee by clicking on them. A window with this person’s details will appear. Click on Edit > CRM Sync. A new window will pop up and you should select HubSpot from the dropdown bar and press Export, as shown below:
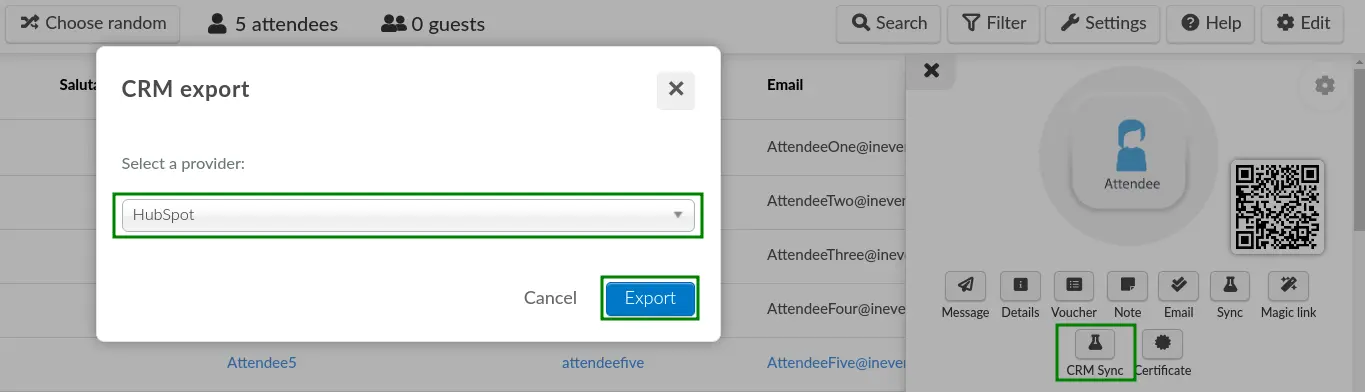
The user will be exported instantly to your Contacts on HubSpot and their associated company icon detected from their provided email will be displayed next to their name.

Attendee removal behavior
An attendee may be removed from an event, both at event administrators' discretion or by event participation cancellation. If the relevant attendee has been exported or synchronized as a HubSpot lead, their HubSpot lead profile will also be removed from the event's linked HubSpot list on the next sync.
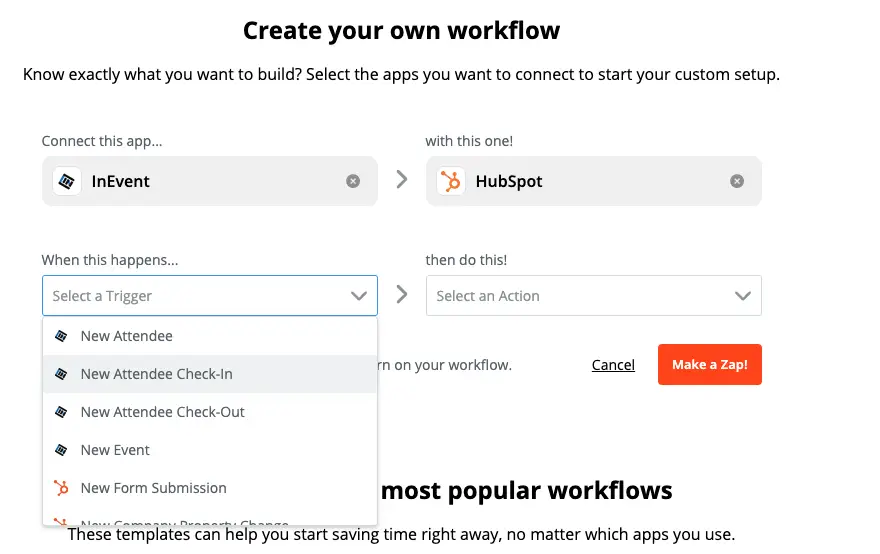
Zapier integration
Actions to take within Zapier for InEvent
- Create new attendee
- Create new event
- Update attendee
- Attendee check-in
- Attendee check-out
- Poll answers
- API request
Actions to take within Zapier for HubSpot
- Add Contact to List - Adds a contact to a specific static list.
- Create Form Submission - Creates a new submission for a selected form.
- Create or Update Contact - Creates a new contact or updates an existing contact based on email address
- Create Calendar Task - Creates a new calendar task.
- Create Engagement - Creates a new Engagement for a contact, in HubSpot.
- Create Social Media Message
- Creates and immediately publishes a message on a specified social media channel.
- Create Ticket - Creates a Ticket in HubSpot.
- Add Contact to Workflow - Adds a contact to a specific workflow.
- Create COS Blog Post - Creates a blog post in your HubSpot COS blog
- Create Enterprise Event - Creates a new custom enterprise event.
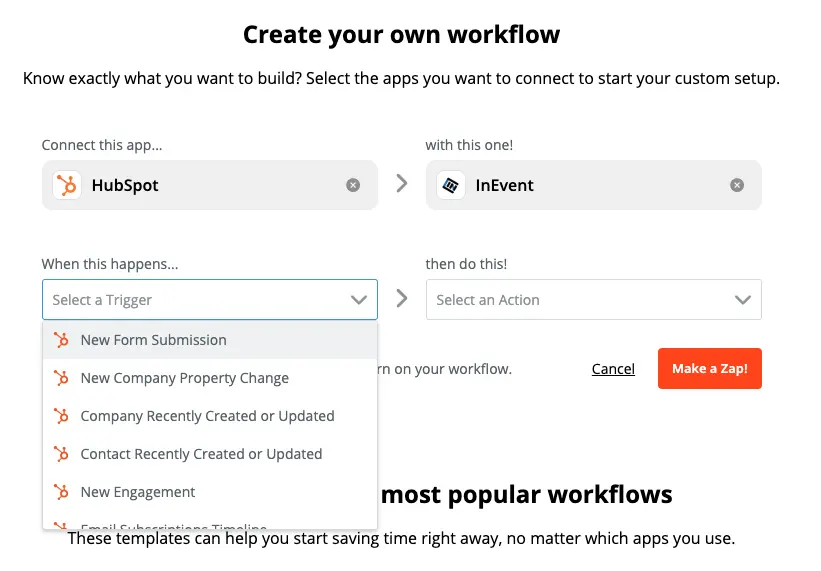
Once you have identified and mapped the action to the intended output, please follow the steps in the subsequent Zapier process flow.
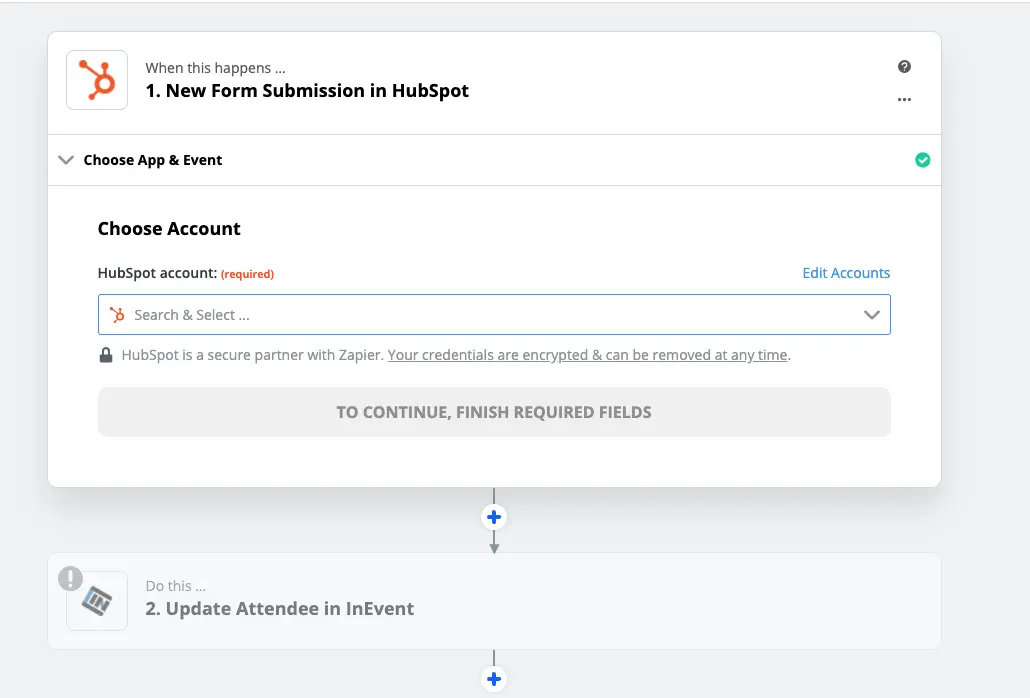
For a more detailed overview on how to use and create Zaps with Zapier, please check out their instructions here: Zapier Getting Started Guide