Live Studio - Streams
 Updated 1 week ago
by
Caleb Kotey
Updated 1 week ago
by
Caleb Kotey
When selecting Live Studio as the room video mode, the room host will be able to switch between two tabs: Streams and Settings. In this article you will learn about all the possibilities of the Streams tab.
Streams
At the Streams tab, the room host has a lot of features to manage. One of the main ones is to control which presenters are visible on stage and which ones are backstage. This can be done by switching the toggle button on each display on and off.
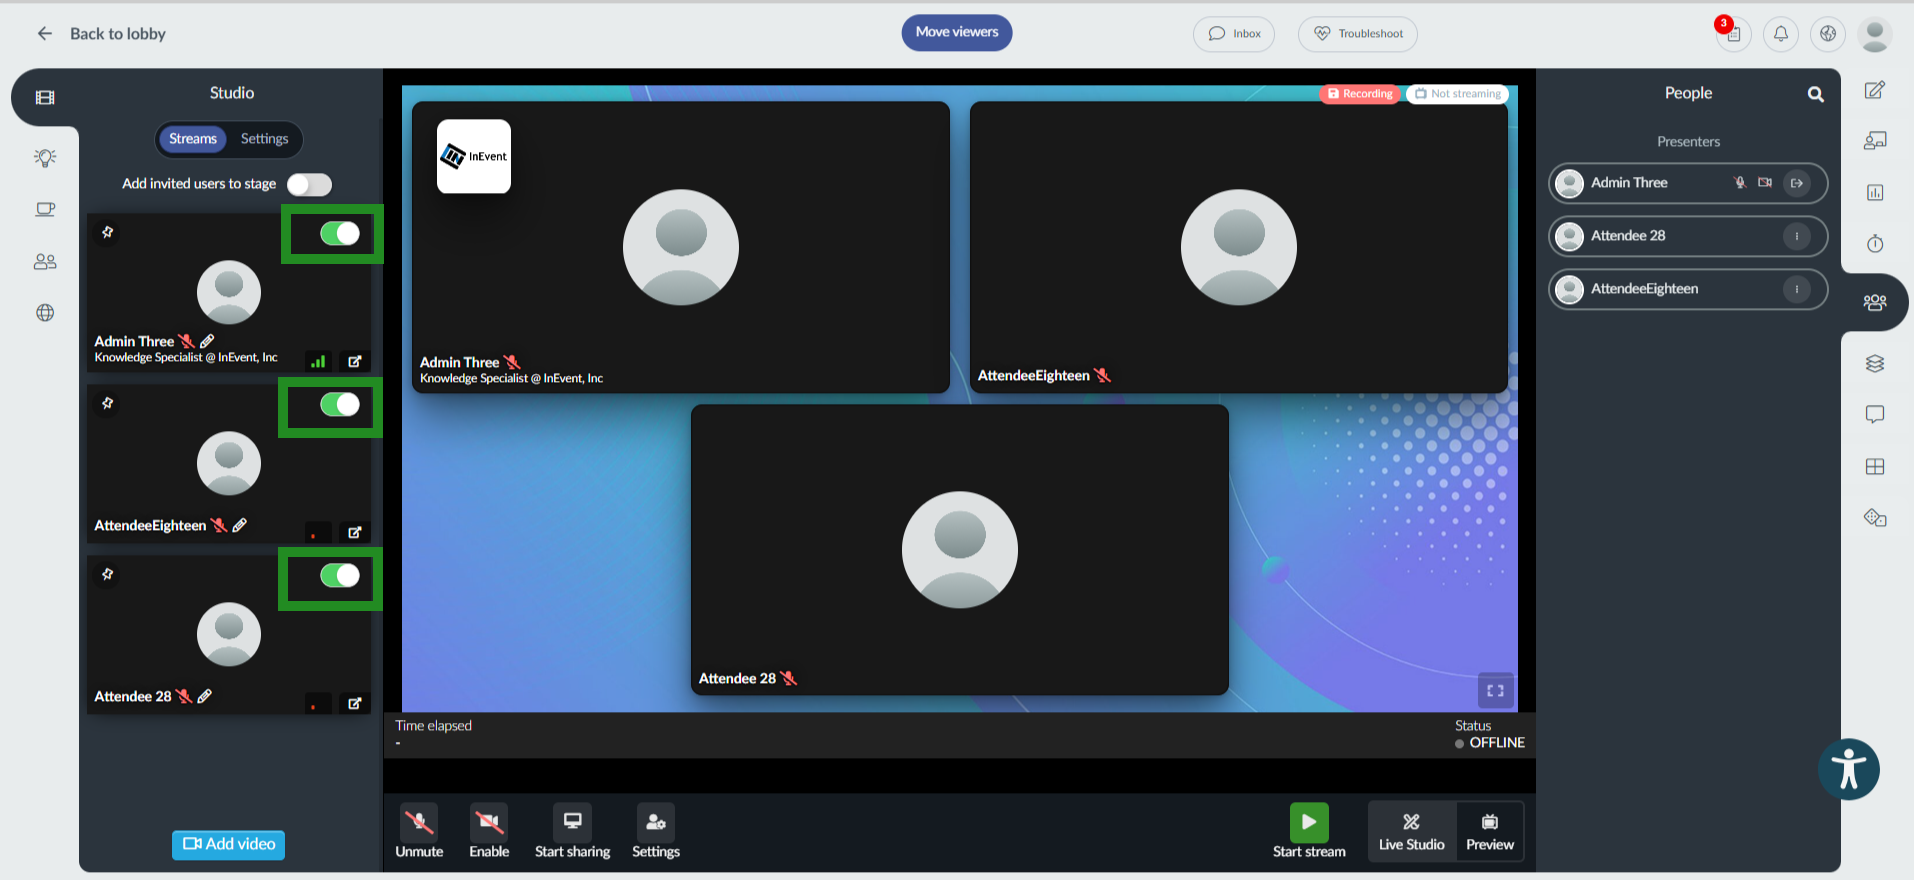
If a presenter is removed from the stage, the room host will be informed which speaker has been removed from the live stream, and the speaker's audio will automatically be muted.
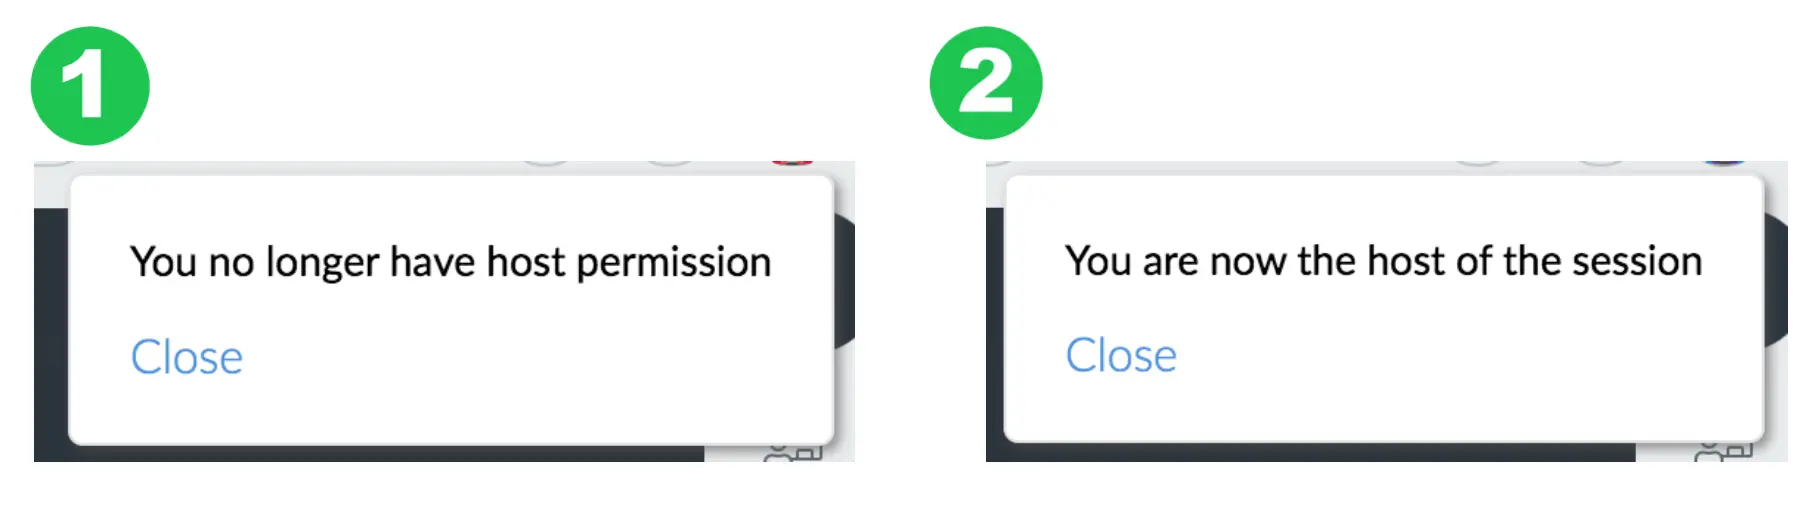
- The previous host will receive this notification: You no longer have host permission.
- The new host will receive this notification: You are now the host of the session.
Additionally, if a room co-host has been assigned to the activity, this user will be able to perform similar functions as the room host on the Streams tab, all except starting the Live stream - this is a unique function of the room host. Below is an image of what the room co-host's Streams tab will look like when inside the activity:
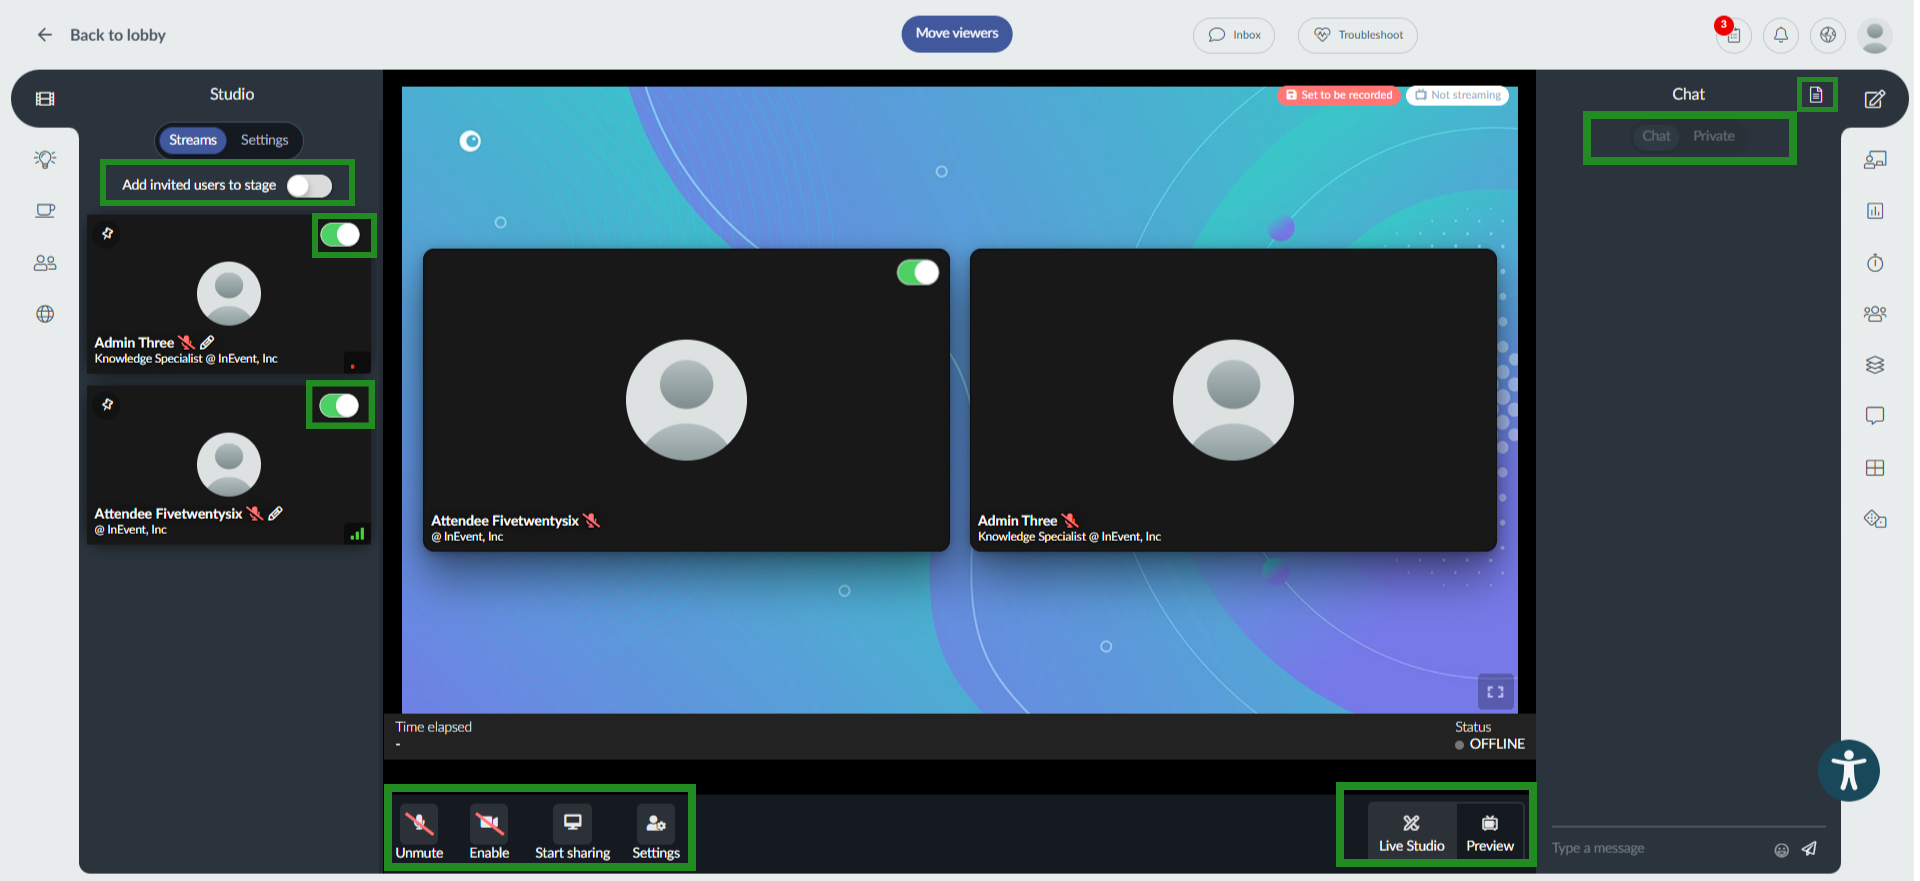
For more information on the co-host, refer to the Permission levels for attendees article.
Backstage
Please take into consideration that:
- If the stream has already started and speakers join the room, by default, they will automatically join backstage to avoid unexpected layout changes. Please, note that speakers are still able to share their screens with all participants without being visible on stage.
- If the host needs to refresh their page, speakers will not be affected and will continue being on stage.
- If the host leaves the room and joins again, they will join backstage but speakers on stage will not be sent backstage. Speakers will continue being on stage.
- Even if all presenters and screens are offstage, the live studio can still be displayed to the audience.
- If the host tries to leave the room, a prompt will ask them to confirm, and let them know that it will stop the stream.
Whisper
Even though those who are backstage will automatically have their audio muted, speakers can still communicate with each other by enabling the Whisper functionality. This will help the speakers and room host to rehearse before going live as well as to organize themselves while the streaming is happening.
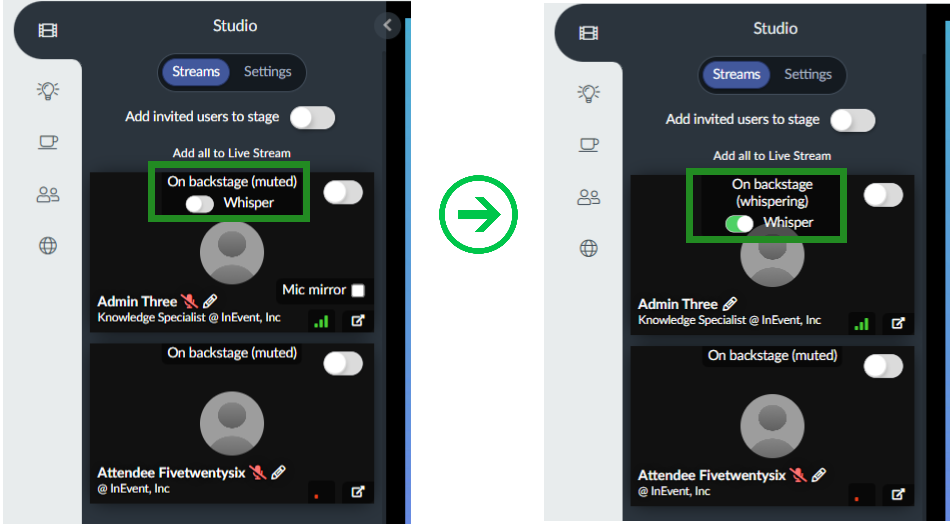
When speakers are whispering backstage, they will be heard by other speakers and by the room host who are on stage and/or backstage, but their audio will not go through the live stream, which means that the audience won't be able to hear the whispers.
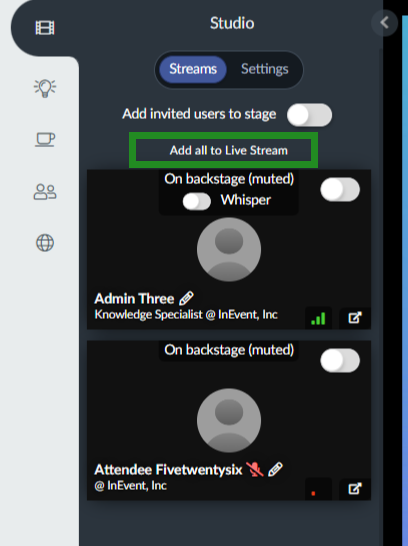
Add all to Live Stream
It is easy and practical to move all the presenters on the backstage to the Live Stream in one single click, the host needs to click on the button Add all to Live Stream, and it will automatically move everyone on stage (including the screen sharing content).
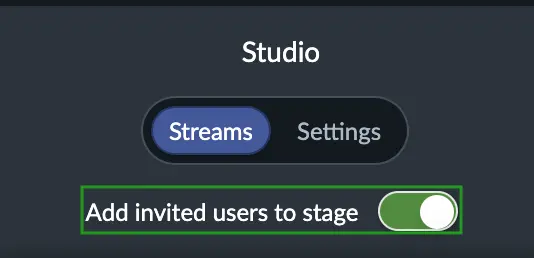
Add invited users to stage
It is also easy to add all invited users to the Live Stream through the click of a button than having to add them manually. This way, the invited users automatically go to the Live Stream without going backstage. To do so, simply click on Add invited users to stage.
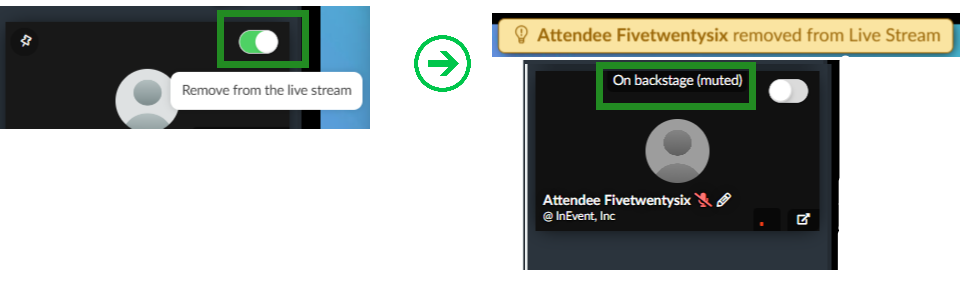
Remove a user from stage
You can remove a user from the stage directly by clicking on the toggle button (Remove from the live stream) that appears when you hover your mouse over their video. Once you click on the button, you will be notified that the user has been removed from the Live Stream. The user will go backstage.
Add video
Uploading a video in the Live studio allows admins to use and display the video during a live session, it will not be available for participants to download. Also, if you upload videos as Files, they will not be available within the Live Studio Library.
To upload a video, follow these steps:
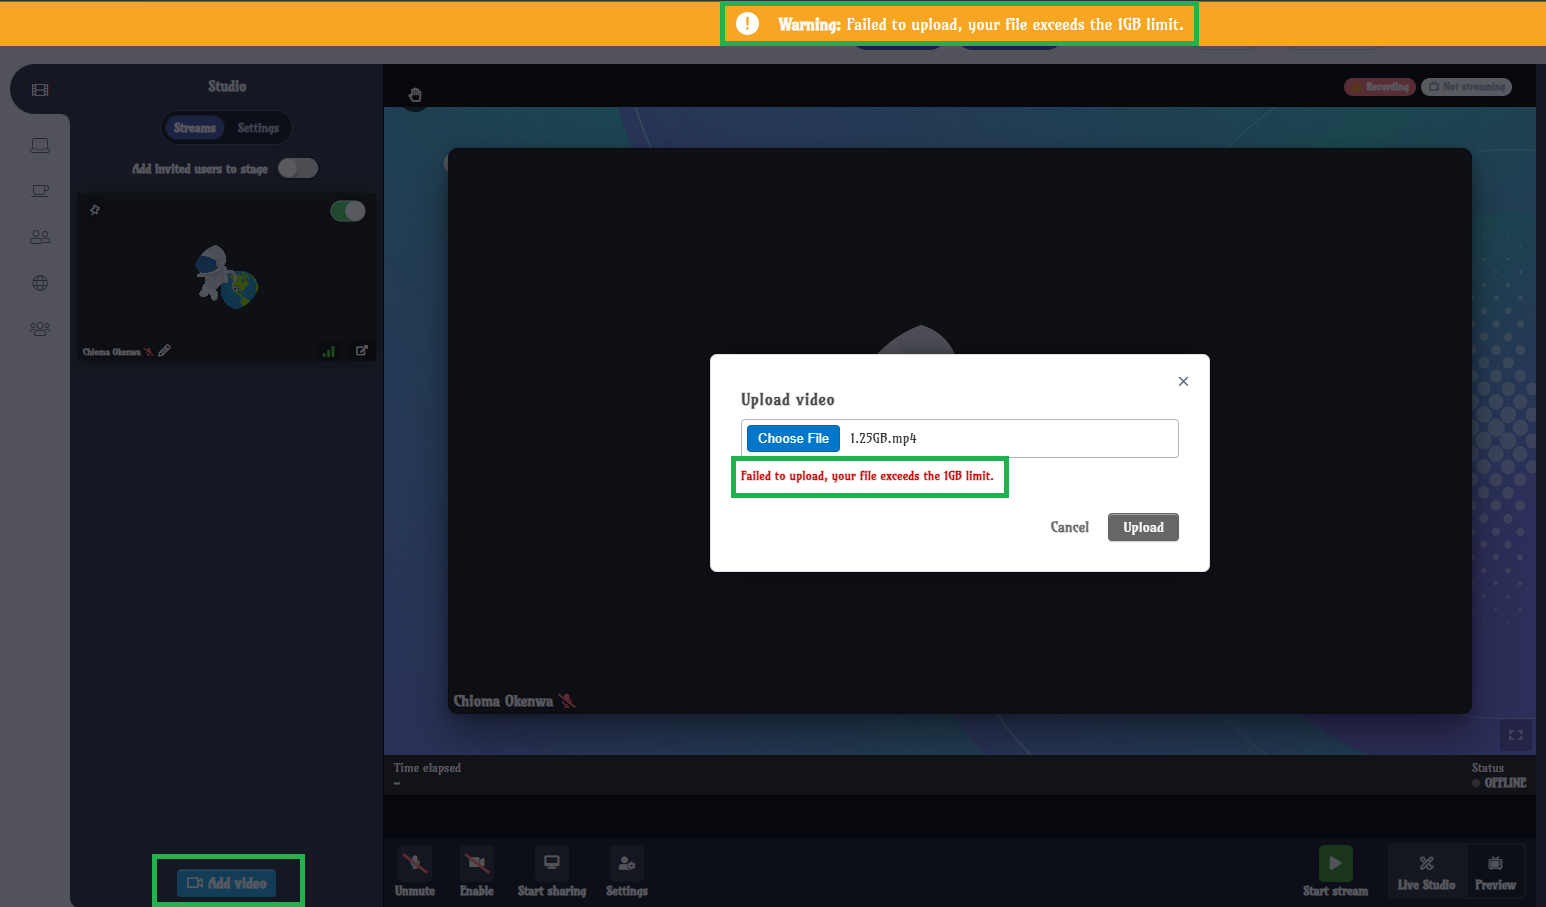
- Click on Add video
- Upload > Choose file > select the file from your computer
- From the Library select the video and press Done.
- Click on the 'Add to the Live Stream' toggle button.
- Click on the Play button on top of the video.
You can upload videos up to 1GB in size. If you attempt to upload a video over 1GB, you'll see the error message depicted below:
This option provides several great advantages:
- This allows you to pre-upload the videos for later usage, as it will be stored in the Live Studio Library.
- The video playback is native and runs at the InEvent servers, which dismisses the need for high end computers.
- The possibility to add and play multiple videos at the same time.
- A video that ends goes to backstage automatically, so it’s perfect for a countdown timer before the session starts;
- FPS drops or glitches when sharing a video are non-existant.
- The possibility of 12 hours of an ongoing stream!
Video Trim Mode
The Video Trim tool allows you to trim your videos when uploading them within the Live Studio or as On-Demand content. The feature provides an interactive UI to select your video's best start and end times.
Follow these steps to use the tool within a Live Studio session:
- Go to the Streams tab and click on Add video (at the bottom left of your screen).
- Click on the Upload button.
- Toggle the button under your video preview to activate the Trim mode.
- Move the markers to set the start and end times. You can manually insert your Start and End times using the time boxes below the marker.
- Click the Upload button to upload your trimmed video.
Once your video is successfully uploaded, you will receive a notification confirming you can play your video.
Remove video
- From the Backstage
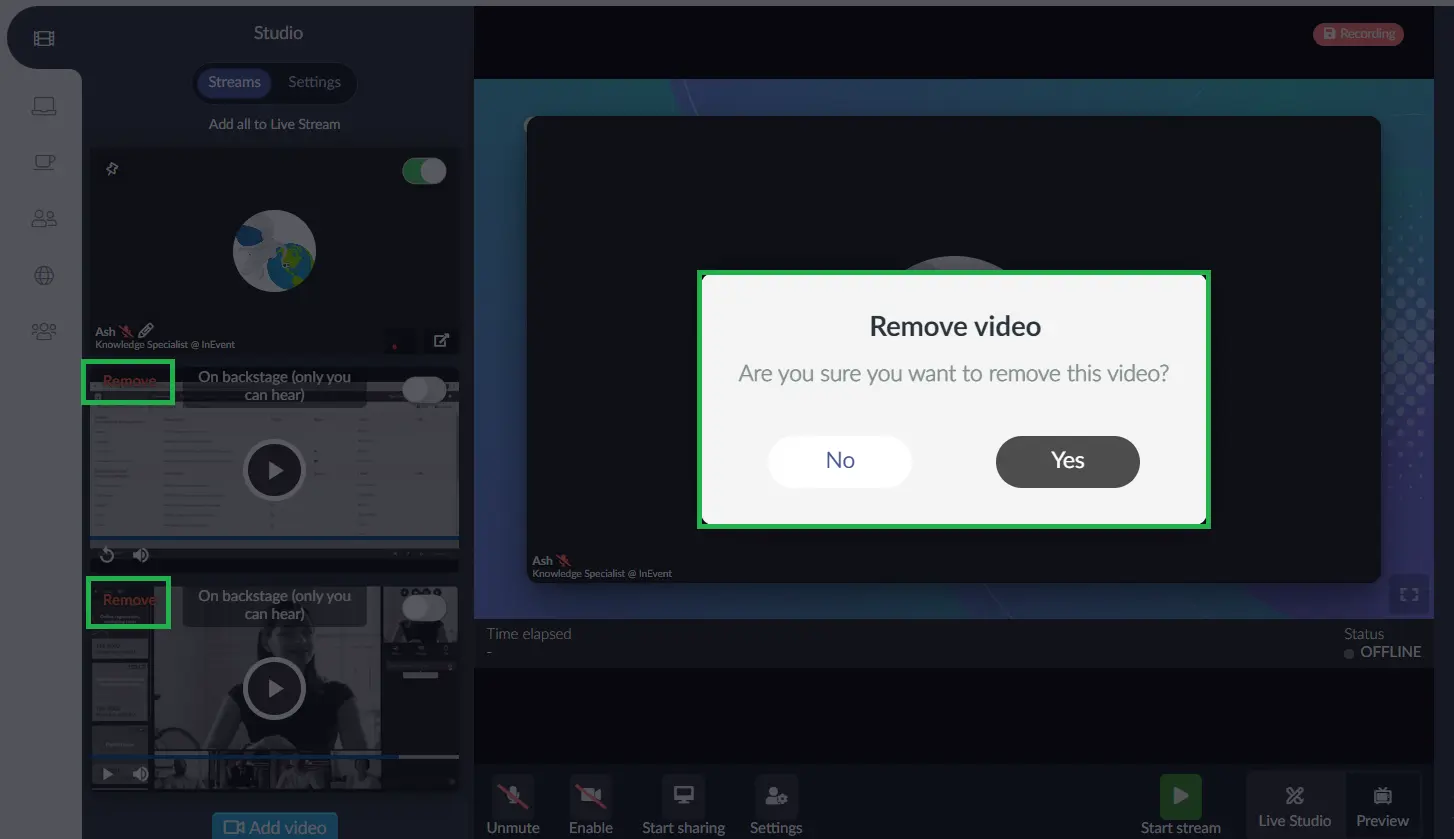
To remove the video from the Streams tab, click on the Remove button. A pop-up will appear for you to confirm the removal.
- From the Library
To remove the video permanently from the Library and not only from Backstage, hover over with the mouse on the desired video and click on the trash icon. To confirm the action press Yes when the pop-up appears as demonstrated below:

Camera switcher
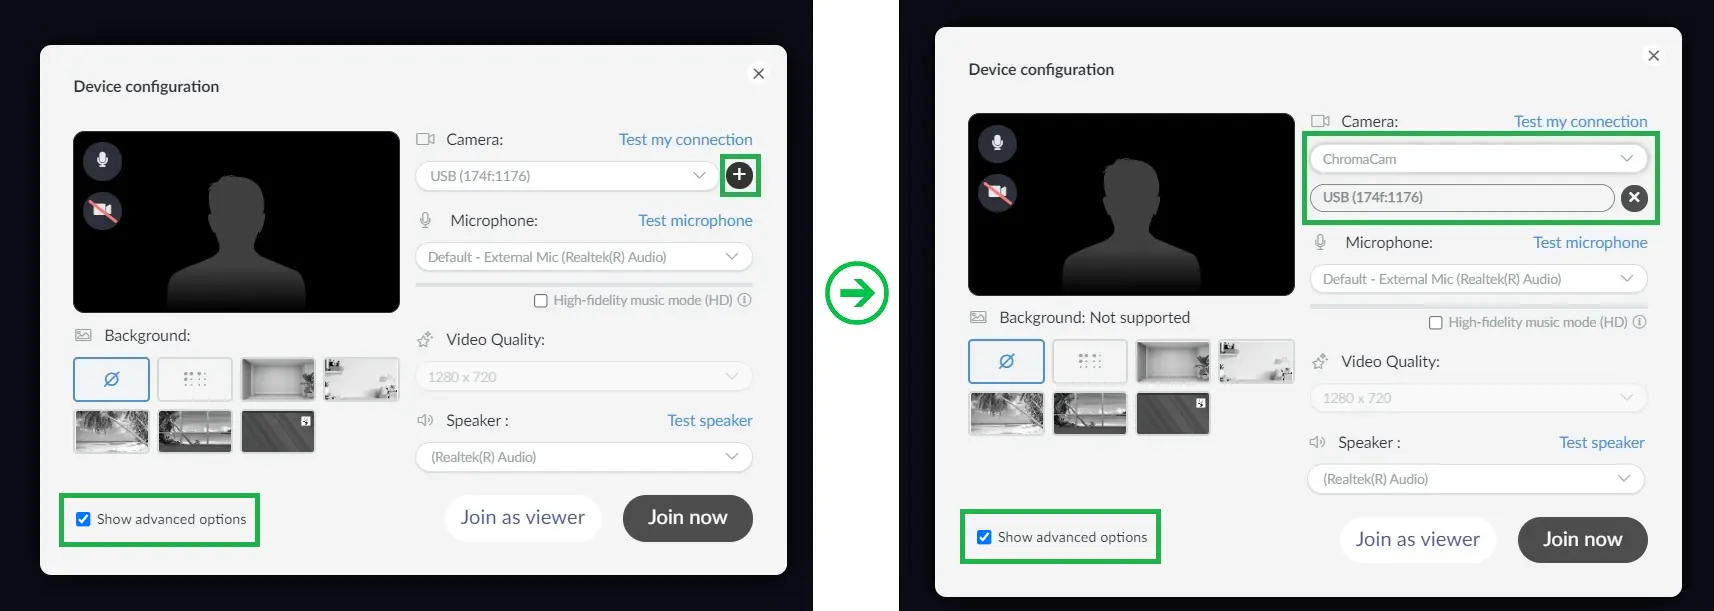
You can connect multiple cameras to your live stream and switch them throughout the sessions. To do so, when going through the device configuration step right after entering a room as a presenter or room host, you should:
- Select the Show advanced options checkbox
- Click on the + button to add multiple video sources.
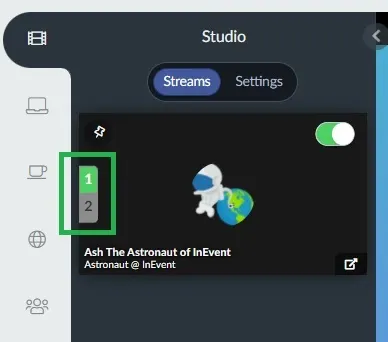
Inside the room, the room host and speakers can control their video sources using the Camera switcher on the left-hand side, as shown below:
Quality indicator
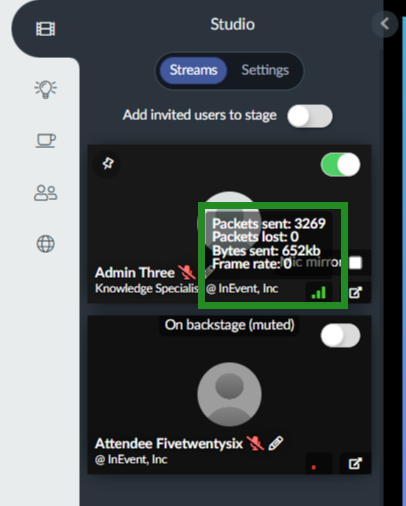
The presenters can also click on the quality indicator button to see the info for streams on Live Studio backstage. This presents the information regarding the Packets sent, Packets lost, Bytes sent and Frame rate.
This can be very useful in the case that a speaker displays a packet lost other than 0, so the team involved does what is necessary to continue a smooth presentation and perhaps notify the audience if needed.
Packet
Clean video feed
Clean video feed
When using the Live Studio, the room host will see an option to open a clean video feed under the Streams tab, as shown in the image below:
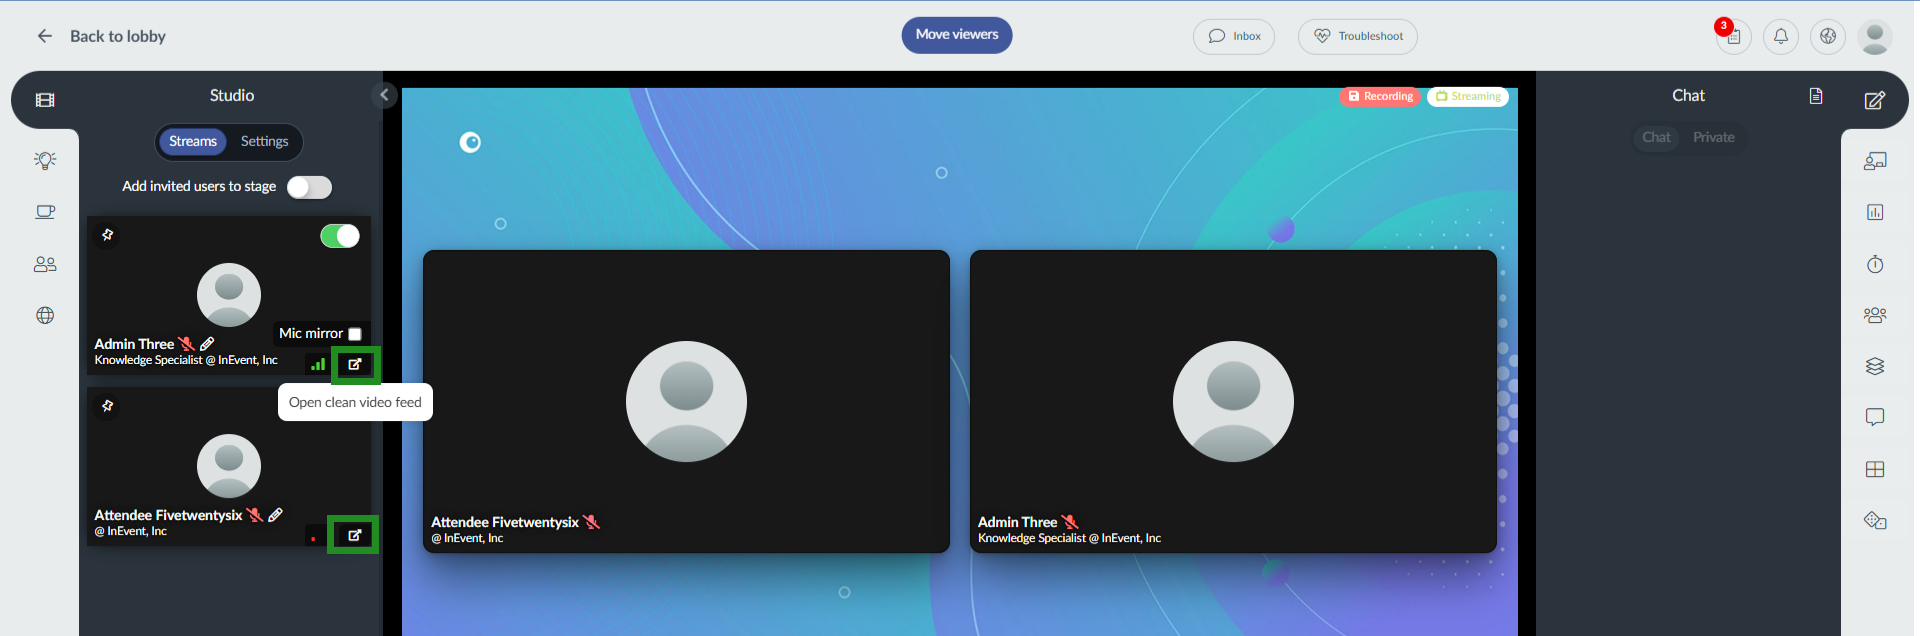
With a clean feed, you can extract individual speakers' videos from the InEvent video player and utilize them in your own third-party software or mixer.
In the new window, you will see a pop-up message with the option to toggle off Audio and Video. Once you set it according to your needs, press the Start button to start a clean video feed.
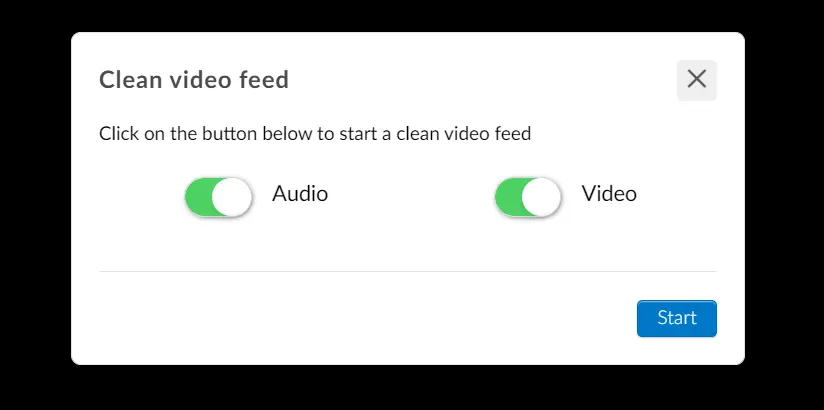
After pressing Start, a clean video and audio output of that specific stream will start in full-screen mode.
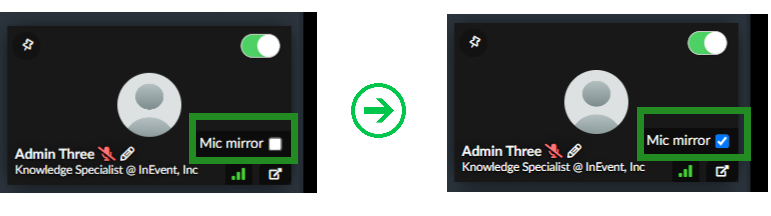
Microphone Mirror
By using the microphone mirror function, you can hear your own microphone. This function is useful for testing your microphone before the stream.
To enable this feature follow the instruction below:
- At the Device configuration tick the Show advanced options checkbox, either from the pop-up when joining the room or from the Settings button at the bottom menu to reveal the microphone mirror function in the Streams tab.
- Click on the checkbox to activate.
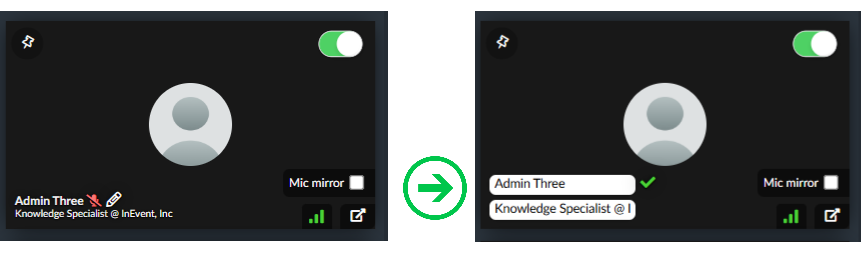
Editing the Stream label
By clicking on the pencil icon the host can edit the Stream label for both Name and Headline:
Share control
When sharing a PDF file in a Live Studio session, the person who is sharing the file can allow other participants to:
- Share the navigation control of the PDF file. To allow this, the person who is sharing the PDF file needs to check the Share controls box on top of the PDF box on the Live Studio menu. Once this is done, other participants will be able to control the navigation of the PDF file by clicking on the previous and next buttons, by pressing the up and down on their keyboard, or by using an external presentation controller.
- Share the the current page number out of total pages of the PDF file. To do this, the Share PDF pages box needs to be checked on the Live Studio menu. Once this is done, other participants will be able to see the current page number and the total number of pages that consists in the PDF file.