Interacting with attendees during your virtual activities
 Updated 1 hour ago
by
Amalia
Updated 1 hour ago
by
Amalia
Inside your activities, there are many ways that you can interact with those attending your event.
Each activity has up to seven tabs within the right-side panel: Chat, Questions, Polls, Quiz, People, Files and Discussion rooms.
Each of these interactive tools can be controlled and will assist you in increasing engagement with and from your attendees.
Activity Settings
Attendee interaction within activities can be configured in the Settings tab of your activity. In this tab, you will find General settings and Tab visibility.
General settings
By using the checkboxes, you can enable or disable the following attendee interactions:
Attendee interaction | Effect when enabled |
Automatic enrollment | All attendees from the event will be automatically enrolled in the activity. |
Highlighted position | The room cover will appear bigger in the Virtual Lobby. |
Interaction notifications | Notifications (questions, polling, feedback) from this activity will appear under Alerts. |
Activity visible to attendees | The activity will be visible to the attendees. When disabled, the activity will only be visible to administrators, and an Invisible tag will be displayed to indicate that the activity is not visible to attendees. |
Enrollment lock | The enrollment operations will be locked and attendees will not be able to register in this activity anymore. |
Raise hands | The Raise hands icon will be clickable during this session. When this interaction is enabled, Robert's Rule of Order can be configured. To enable Raise hands within Discussion rooms, refer to this article. |
Robert's Rule of Order | Raised hands will be sorted according to the rules listed in this article. To configure this feature, Raise hands must be enabled. |
Tab visibility
By using the checkboxes, you can configure the visibility of Tabs in your activity.
Left menu
In this section, you can configure the visibility of the following Tabs:
- Hide activities (only attendees)
- Hide sponsors
- Hide exhibitors
- Hide meetings
- Hide group rooms
- Hide networking
Right menu
In this section, you can configure the visibility of the following Tabs:
- Hide chat (only attendees)
- Hide questions
- Hide poll
- Hide quiz
- Hide people (only attendees)
- Hide files
- Hide discussion rooms
- Hide Speed Networking
Chat
In the Chat tab, participants will be able to chat during the session. The chat can be viewed by all participants in the room. To learn more about Chat, refer to the Comments: live chat article.
Questions
The Questions tab can be used to collect your attendees' questions in a separate location from comments, making it easy for your attendees and speakers to see what questions are being asked, and which questions are most popular.
To learn more about the questions, refer to the Questions article.
Polls
The Polls tab is where all attendees can interact with surveys or optioned questions, to learn more about polling, and how to create them in the backend or Virtual Lobby, refer to the Polling article.
Quiz
A Quiz could be used separately or as a complement to Polling. The main difference between them is that here you can select the correct answer, add info, and set a timer.
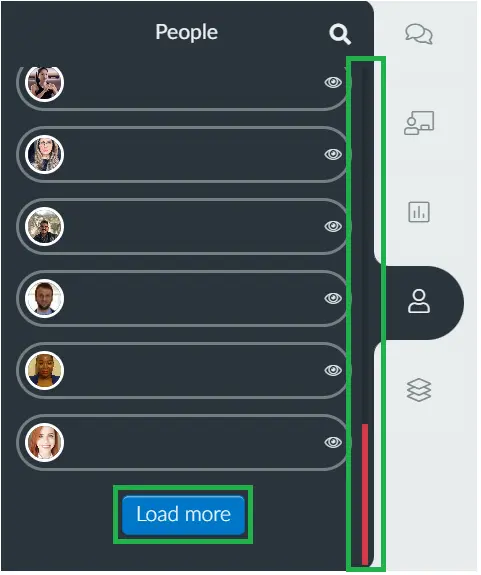
People
The People's tab displays who is in attendance, presenters and viewers. You can also use the side-bar to see all the participants present in that specific activity and click on the Load more button.
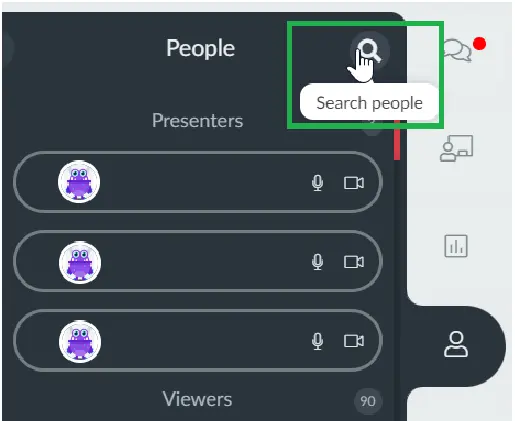
At the Neo layout you can also search for the participant's name:
Raise hands
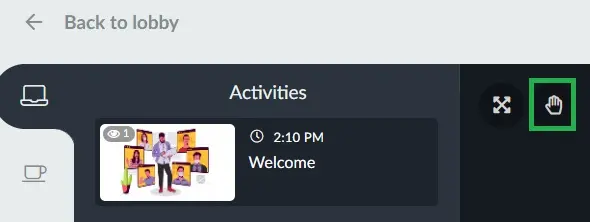
Attendees can raise their hands if they want to notify the speakers and/or want to be invited on stage.
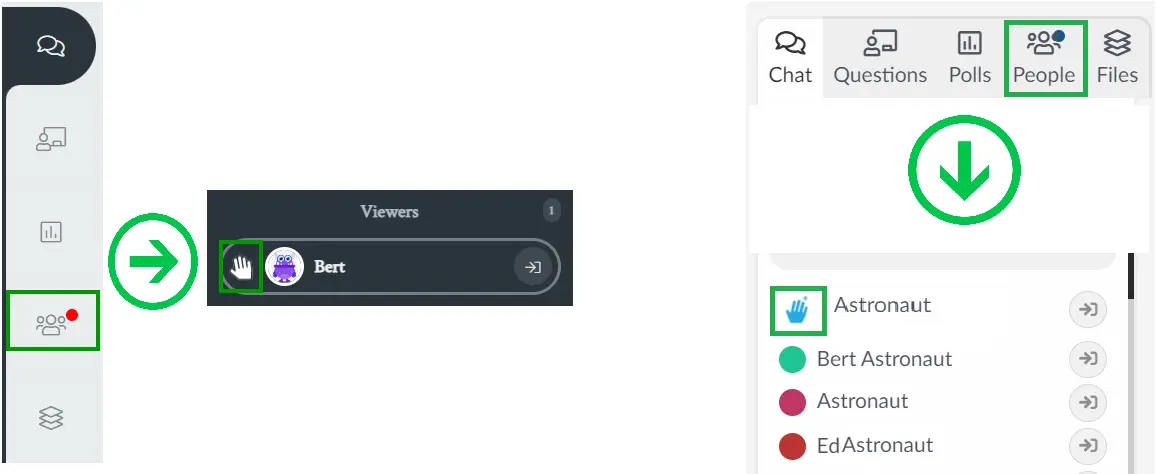
To raise their hand, attendees can simply click on the little hand icon in the top left of the room.
If the speakers/hosts have a different tab opened inside the session, they will see a notification (red or blue dot) on the people tab. Once this tab is opened, they will find a little hand icon waving next to the attendee's name.
Below you can see what it looks like from a speaker's perspective in both layouts:
- On the left image is what it looks like in the Neo layout
- On the right image in the Classic layout.
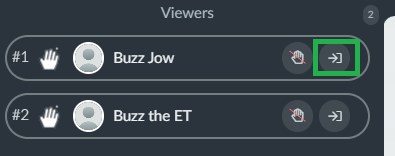
Once the meeting host, co-host, admin or staff notices that the attendee has raised their hand, they can click the icon on the right-hand side to invite this attendee to speak.
After being invited to speak, the attendee should receive a video call request. If they accept it, they will become presenters and will be able to speak and have their cameras on.
Check device when raising hands
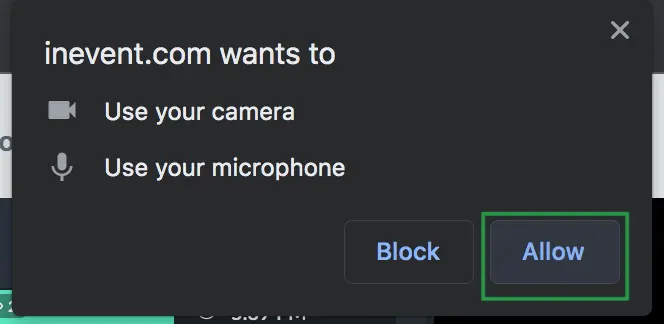
Additionally, you can configure a pop-up to appear once attendees click on the raise hands icon, which asks them to grant InEvent camera and microphone access.
By clicking Allow, permission will be granted. This way, when the host invites the user to talk, attendees will have direct media access.
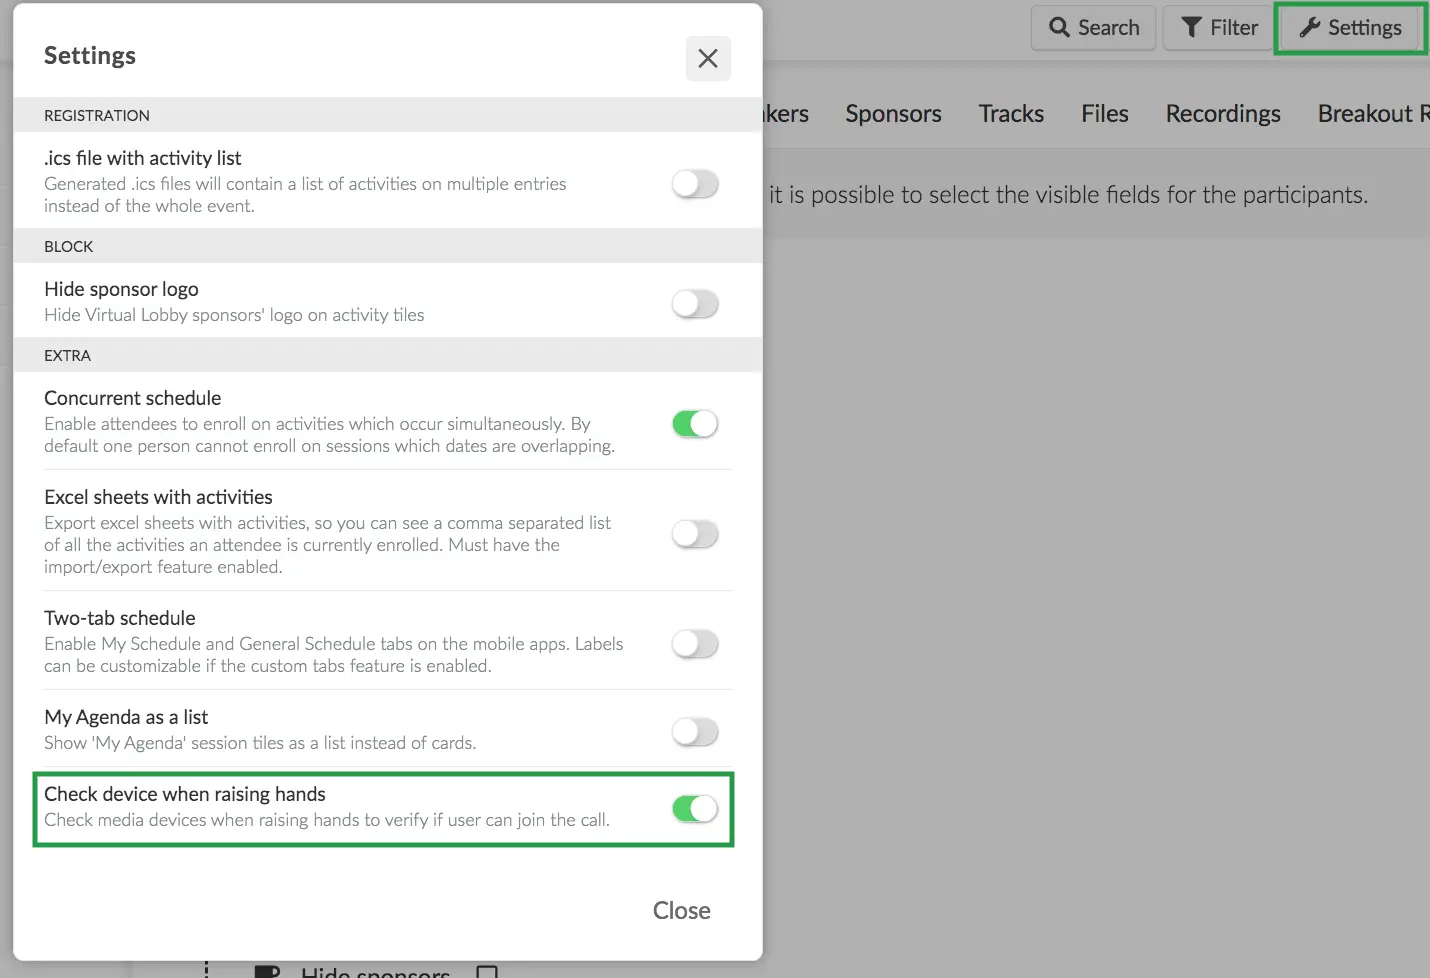
For the pop-up to appear instantaneously when raising hands, event admins have to enable the Check device when raising hands tool from the backend.
To enable the tool, follow this two-step process:
- Go to Agenda > Activities
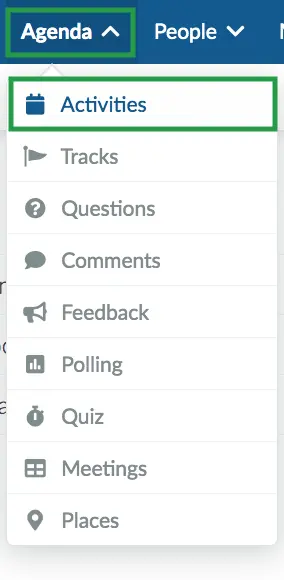
- Click on the Settings button in the upper right corner and switch on the button next to Check device when raising hands.
Raise hands order
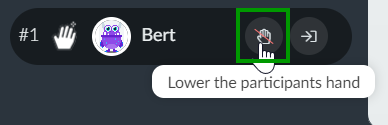
On the People tab, you will see the order of people who have raised their hands:
Once the participant's question has been answered, the room host, co-host, admins, staff, presenters or linked speakers can also click on the blocked hand icon to lower their hands:
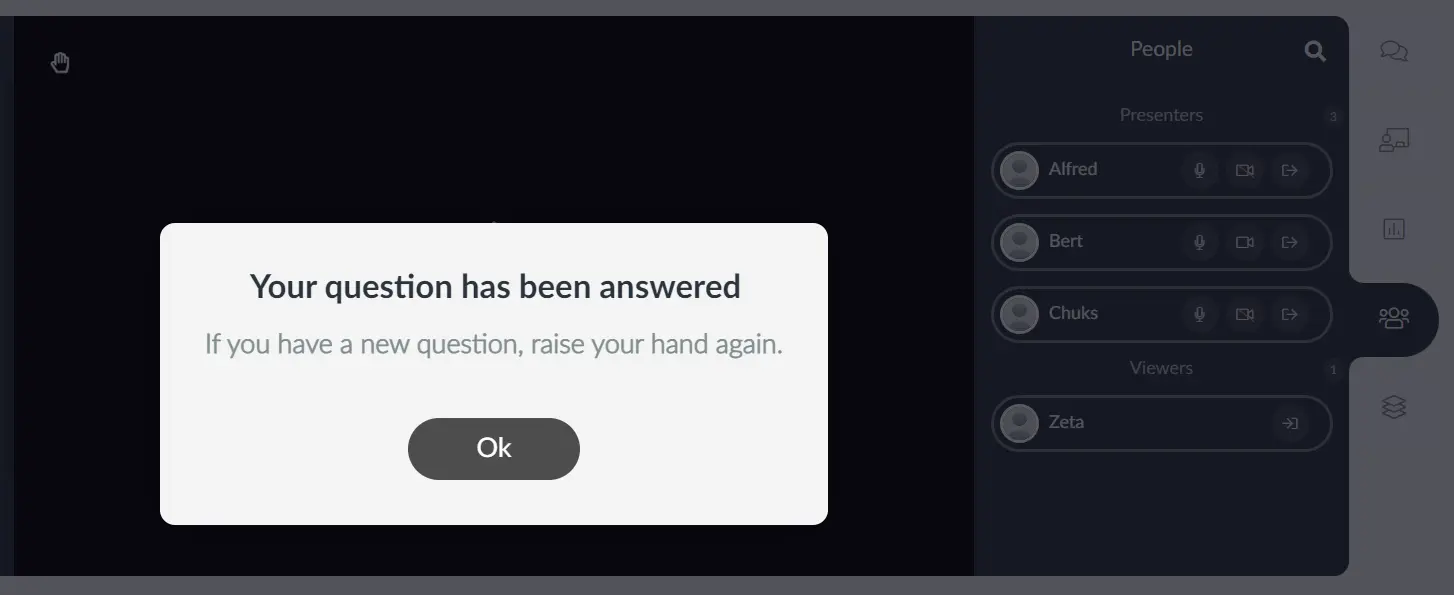
And the participant will receive this message pop-up:
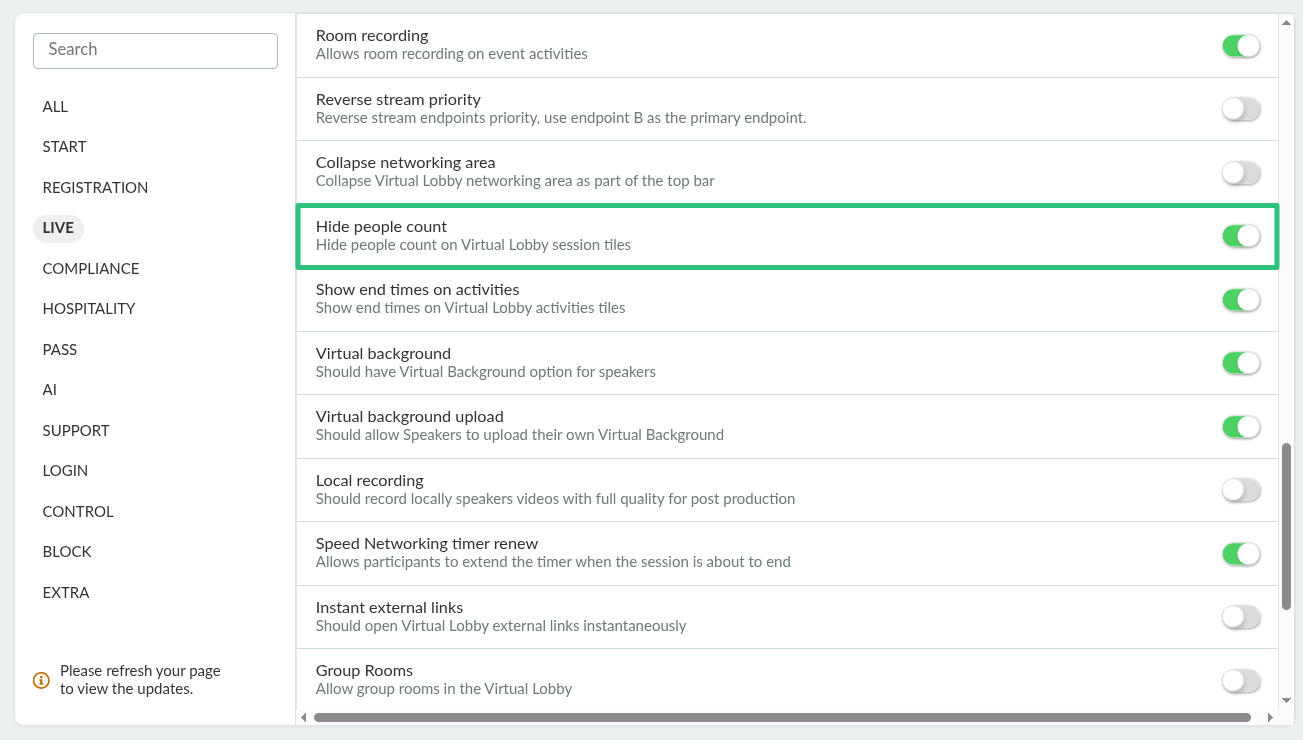
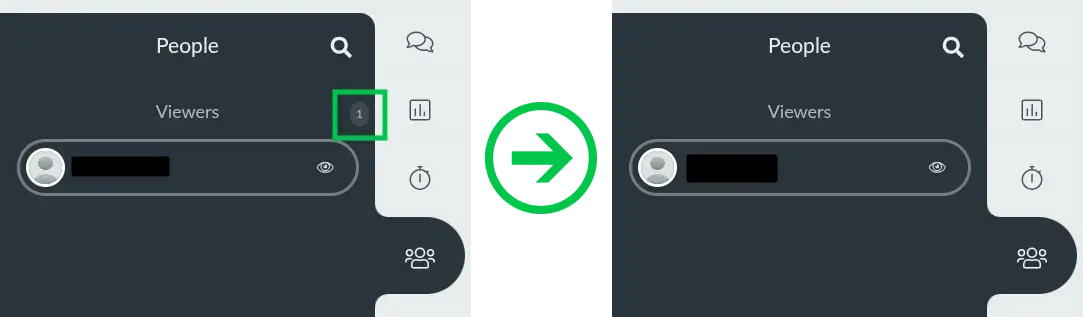
Hide people count
Besides hiding the People tab (only for attendees, admins and speakers will still be able to see the tab), you can also hide the people count on Virtual Lobby session tiles. To do so, simply enable Hide people count within Event tools.
Below is a comparison of session tiles without and with Hide people count enabled.

Below is a comparison of the People tab within session rooms without and with Hide people count enabled.
Files
The Files' tab is where additional material can be added for your attendees while your session is happening. To learn more about the files and documents, refer to the Files and documents article.
Discussion rooms
The discussion rooms can be a perfect solution if your attendees need to discuss particular ideas and topics in several groups simultaneously. It can be created within the activity so that once the discussion is over, all attendees can go back to the activity in one simple click. To learn more about this feature, refer to the Discussion Rooms article.
Renaming the tabs
As an admin, you can rename any of these tabs by navigating to Settings > Tabs > Virtual rooms.
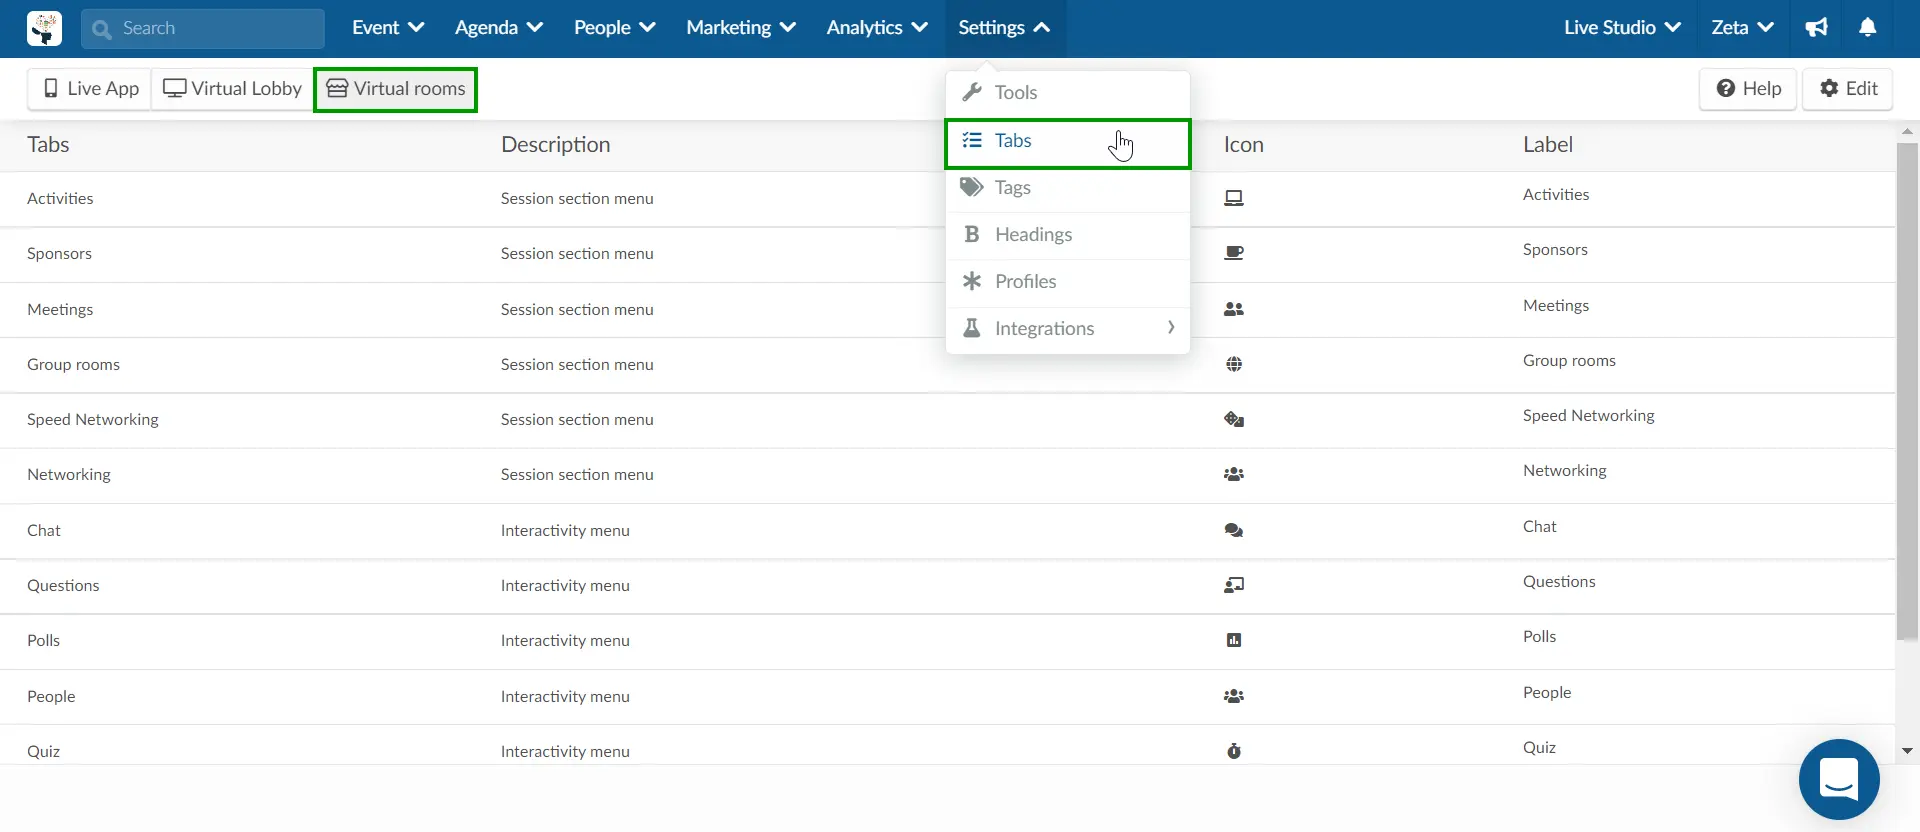
Simply select the label you wish to change, and press Edit. A new window will appear on the right and you can choose a diferent label and icon. Press End to save the changes.
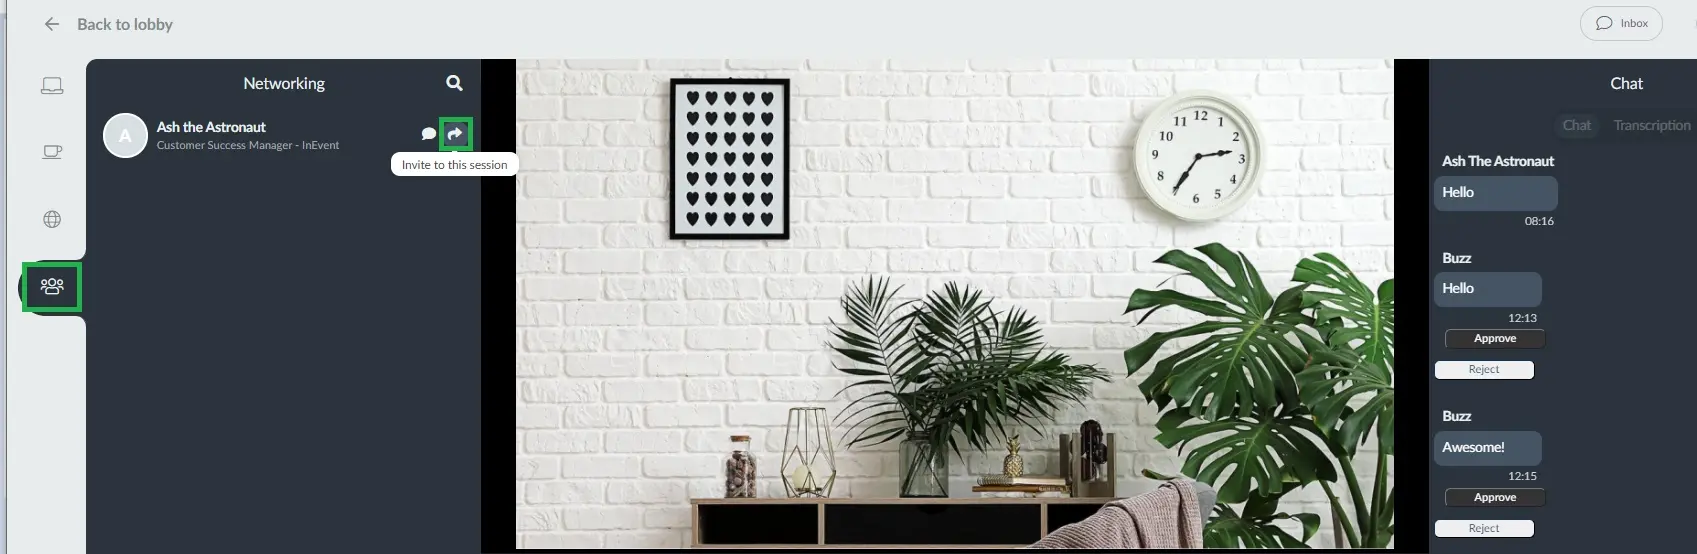
Inviting someone to join the same session you're in
If you are in a session and you'd like to invite another participant to join the room, just click on the Networking tab on the left, look for the attendee you would like to invite, and click on the button with a forward icon to invite this person to this session.
Embedding a whiteboard into the Virtual Lobby
You can embed a whiteboard into the Virtual Lobby and collaborate with the participants and speakers of the event while the session is happening. You can set any level of access to the board and allow people to view, comment, or edit the embedded boards. Refer to the Embedding a whiteboard into the Virtual Lobby article for further information.