Leads
You can manage and segment your event's leads on the Leads page. You will be able to create different databases for your attendees, invitees, guests, and everyone else who is participating in your event. Besides that, intelligent automation is available for segmented list databases used on ticket sales, item purchases, registrations, private sessions, or additional add-ons.
How do I manage the leads of my event?
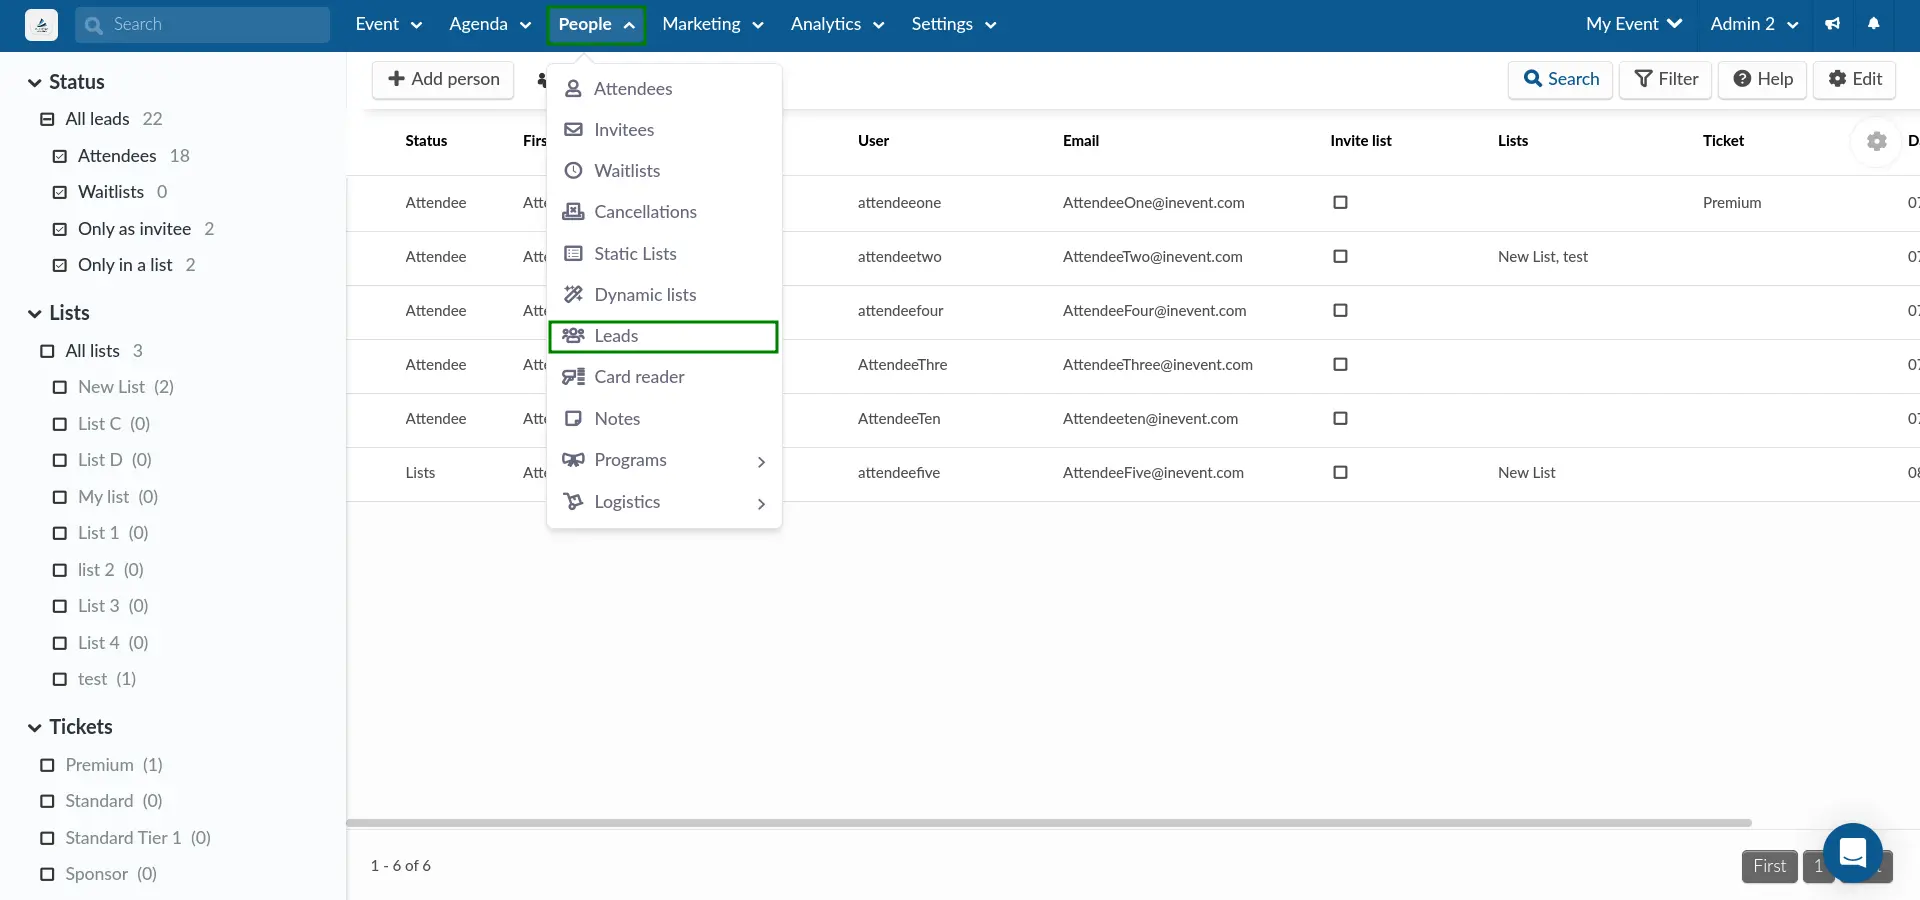
To see all your lead's data, go to People > Leads.
Which status can leads have?
The leads status will inform you at which stage of the application the lead is in:
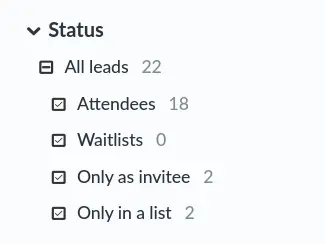
- Attendees: The lead has been added as a confirmed attendee;
- Waitlists: The attendee is waiting for your approval at the event (Waitlists must be enabled);
- Only as invitee: Still needs to confirm attendance (Invitations must be enabled);
- Only in a list: The lead has been added to a custom list (Lists must be enabled);
Can I approve or reject users from the Leads page?
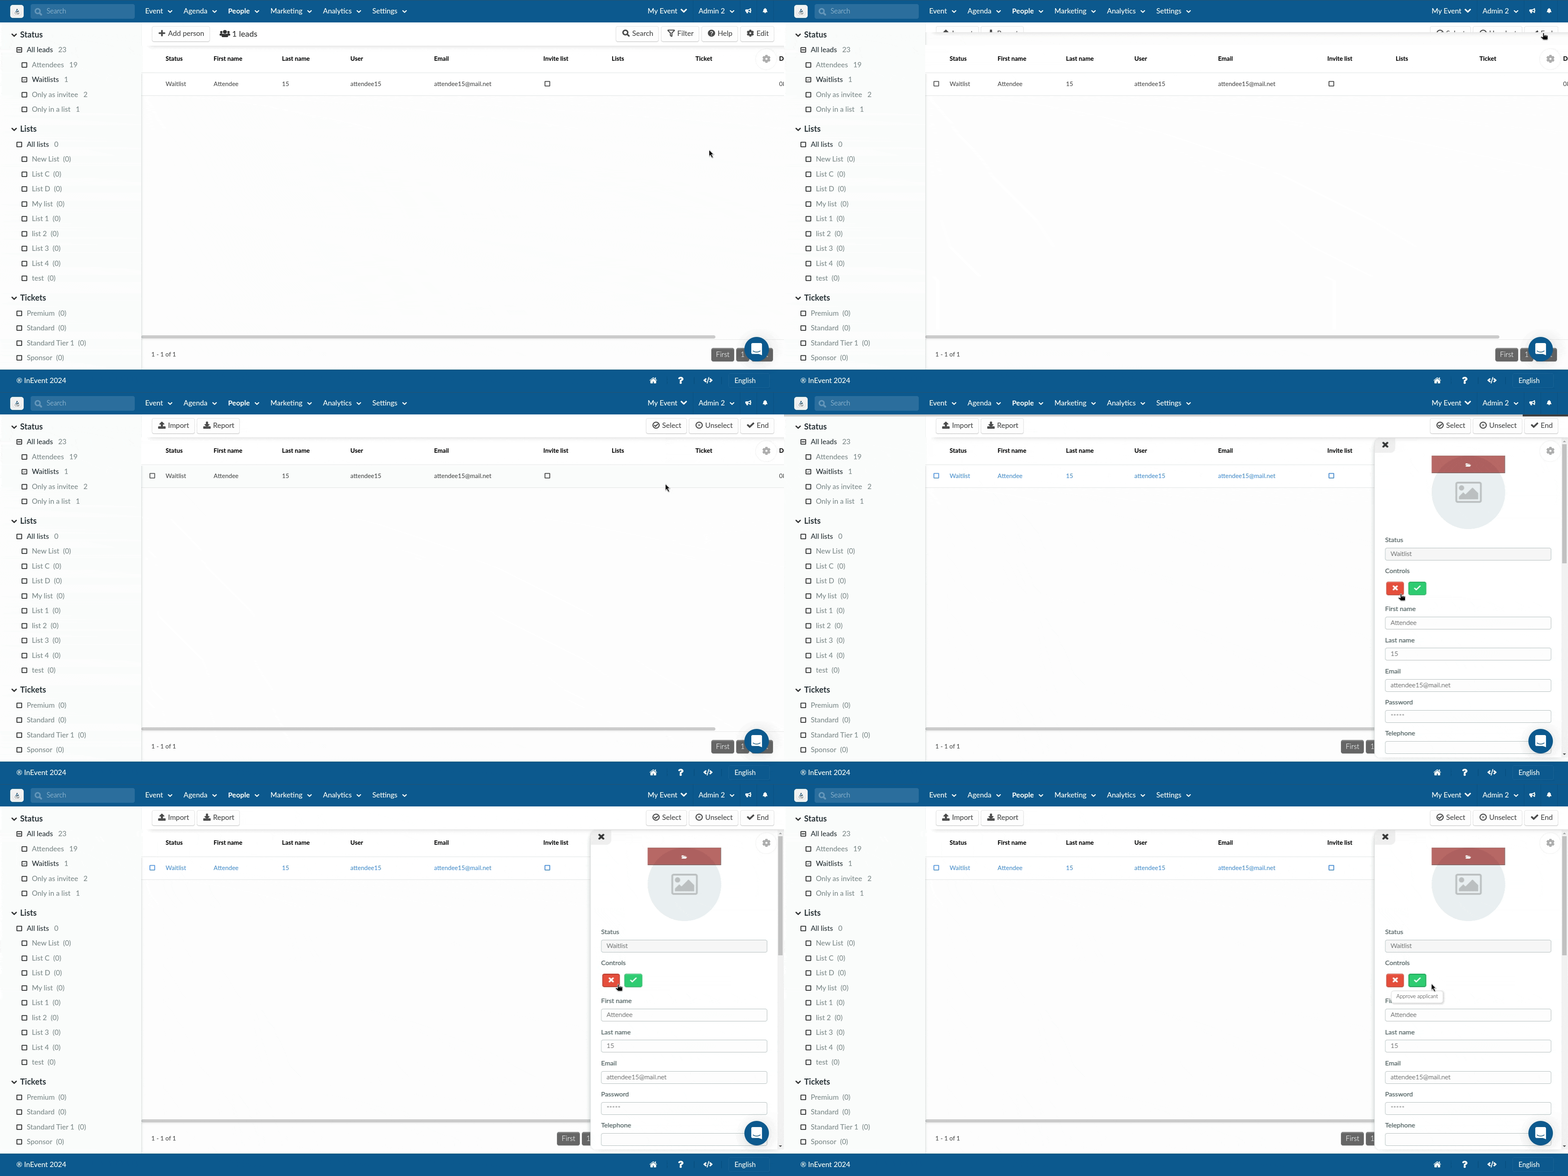
You can control the admission of users on the Waitlist and Approvals page when the Waitlist requirement tool or Approval requirement tool is enabled. To do so:
- Click on Waitlists.
- Select the user and a window will appear on the right.
- Click Edit at the top right corner of the page.
- Scroll to the Controls section and click X to Reject applicant and the green checkbox to Approve applicant.
- A confirmation box will appear for you to confirm your actions. Click on Approve if you are approving the applicant or Reject if you are rejecting the applicant.
Approved applicants will be automatically added to the Attendee list and have access to the event.
Adding new leads
You can manually add leads or you can do it using a spreadsheet.
Manually
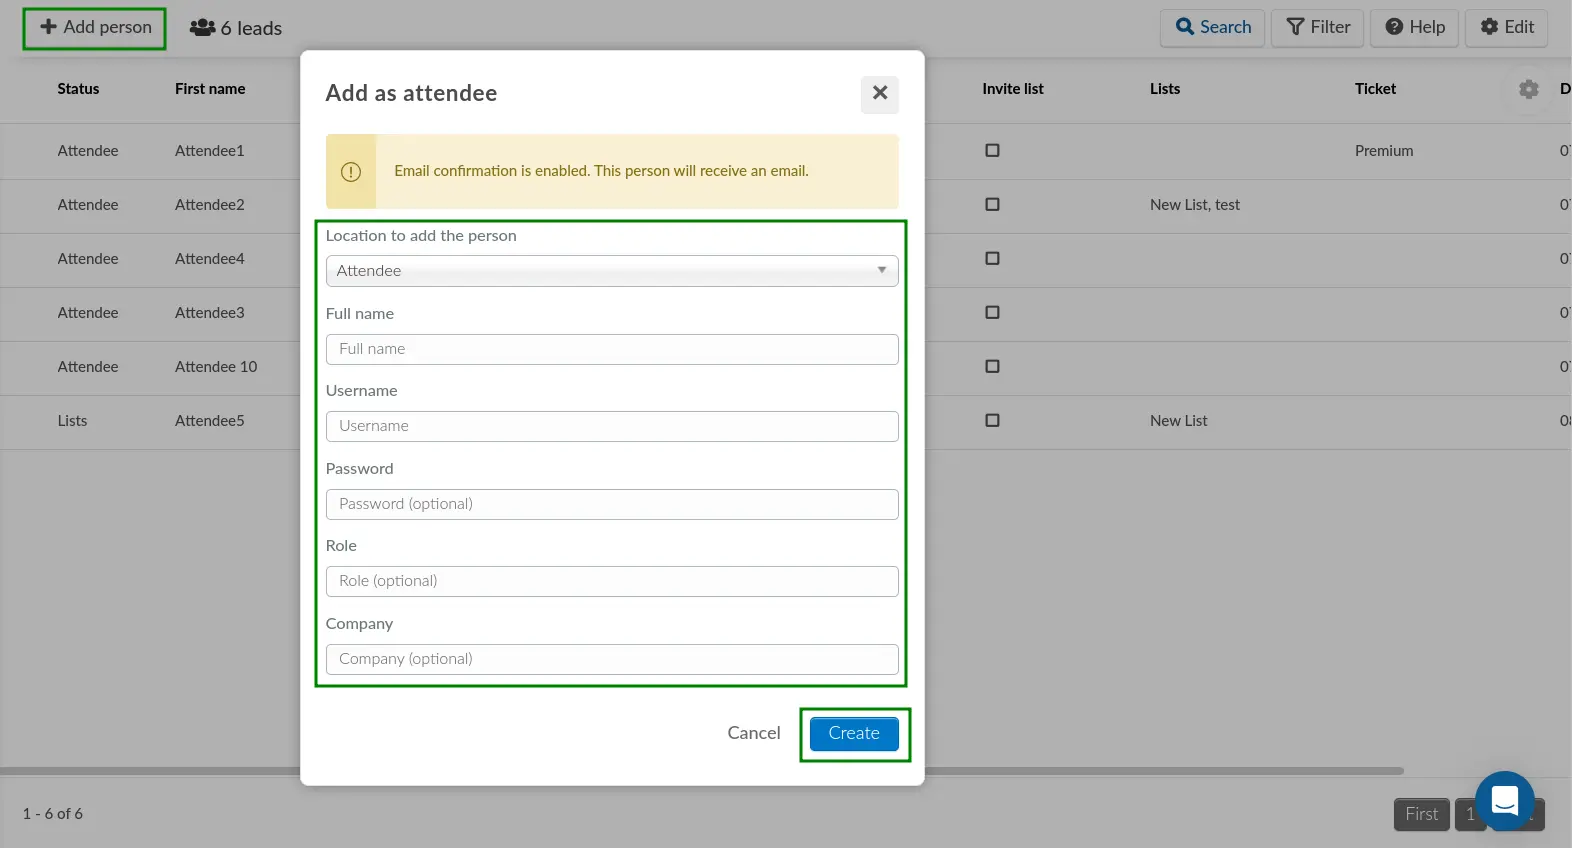
To manually add leads to your event, follow the instructions below.
- Click on the Add person button.
- Define the status of the lead using the drop-down menu. You can choose between Attendee, Invitee, Waitlist, and Lists.
- Enter the lead's information, such as their username and password.
- Click on Create to finish adding the lead.
Once you have completed the steps above, the lead will be added to your event in accordance to the defined status.
Using a spreadsheet
You can also upload the data of attendees using the Import feature. This feature will allow you to add a large amount of data of people onto the platform at once. To do so, follow the steps below.
- Click on Edit > Import.
- Define the desired status for the imported leads using the drop-down menu. You can choose between Attendee, Invitee, Waitlist, and Lists.
- Click on the Download our demo file link to start downloading the spreadsheet demo file. After the file is populated, you can proceed to upload it.
- Upload your spreadsheet of leads by by dragging & dropping the file into the box. You can also click on Click to upload to select the target file
- Click on Preview and review the imported data.
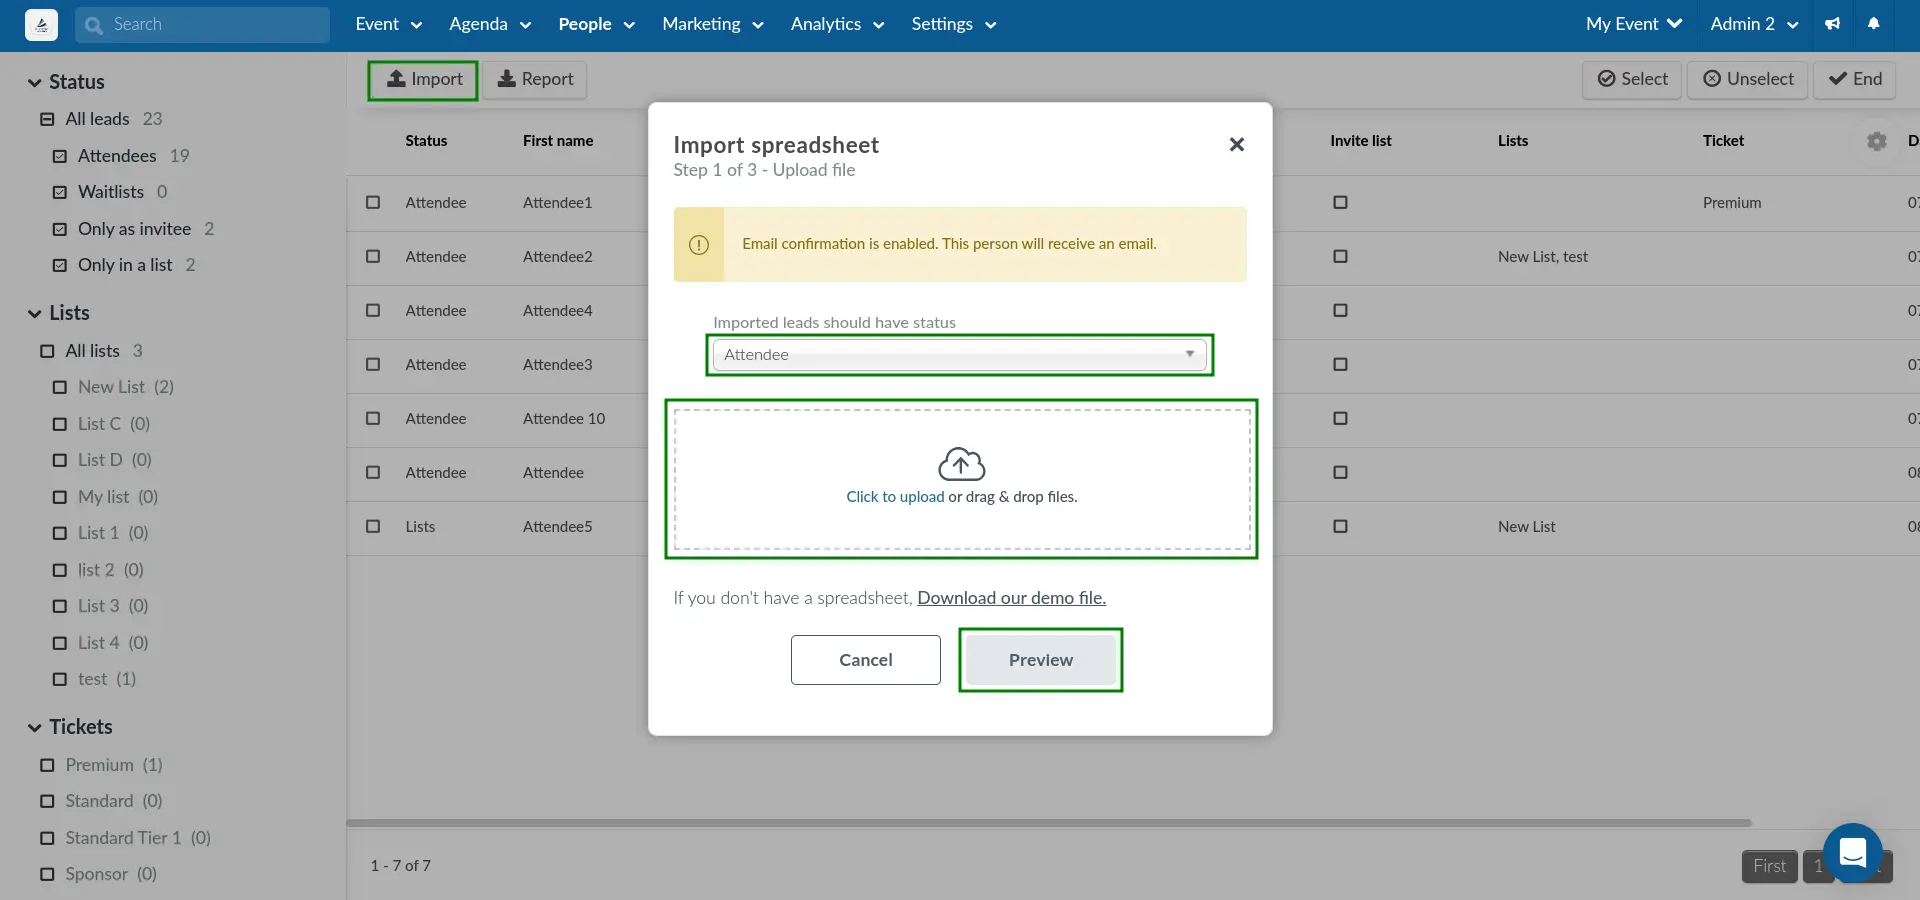
Once you have completed the steps above, the lead will be added to your event in accordance to the defined status.
invitee@mail.com email address for three invitees whose usernames are Invitee1, Invitee2, and Invitee3. If all three invitees register, they will also be able to share the same email, as long as their usernames remain separate.How do I edit leads' information?
You can change leads' data by clicking Edit and then modifying the person information fields that will be listed on the right-hand side of the screen. Press End to save the changes.

How do I run a bulk operation on my Leads?
You can run a bulk operation on one or more of your Leads. To do so, click on Edit then tick the checkbox(es) corresponding to the Leads(s) you wish to perform the operation(s) on. A window will appear on the right side from which you can make changes. Select an option from the drop down menus of the following operations:
- Add to list: You can add leads to a custom list which you have already created.
- Change status to: You can change their status to Attendee, invite or waitlist.
- Update field: You can edit their fields: First Name, Last Name, Role, Company, Telephone, Email, Assistant Email.
Once you have selected from the drop down menu of one or more the above operations, click the blue button Run bulk operation and then press End to save your changes.

Which filters can be used?
You can choose to display the Leads based on Status, Lists or Tickets using the checkbox at the left hand side of the page.
- Status: Filter leads that are on the attendees' list, invitee's list, on a waitlist, and the ones added to custom lists.
- Lists: Filter per list and see who has been added to each list.
- Tickets: Filter per ticket and see who has purchased each ticket.

You can also use the Filter button in the upper right corner of the page. To do so, click on Filter > select the parameters that will be used to segment your leads' list > click on Add Filter.

You can also use the Search button to search for specific leads.

How do I extract a report?
To download a spreadsheet report of all Leads, click on Edit > Report. A blue notification banner will be displayed at the top of the page. Once the spreadsheet is processed, it will be sent to your e-mail.
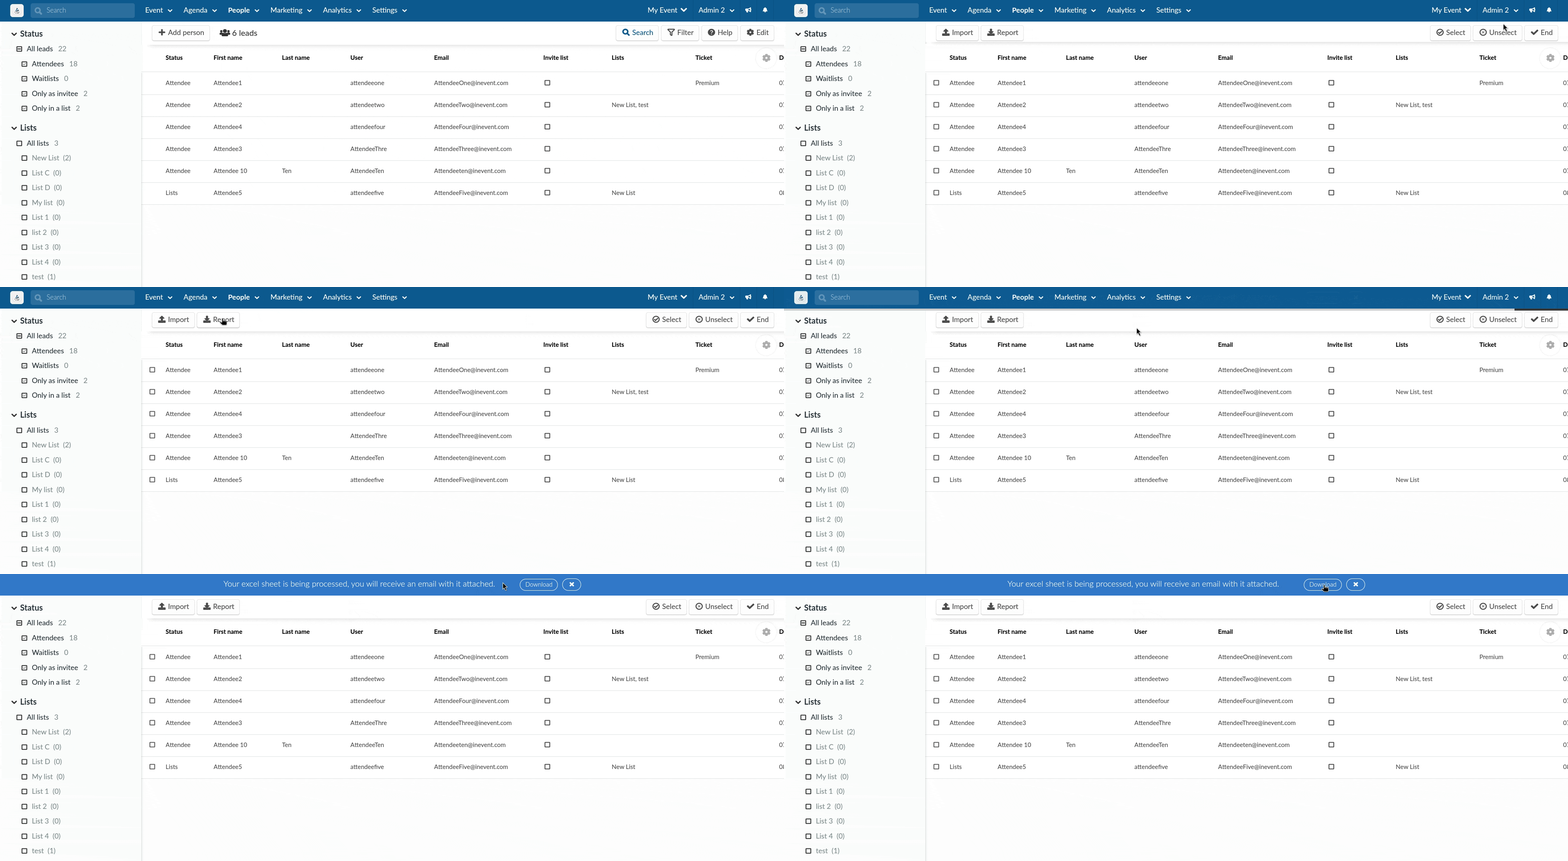
In the report spreadsheet, you will find the information related to your Leads, including their status, personal details, presence at your event, as well as answers to your custom questions and Lists they belong to (if applicable; the List column will display Yes if the lead belongs to the list, otherwise it will display No).


