Room recording
 Updated 9 months ago
by
Faisal Durrani
Updated 9 months ago
by
Faisal Durrani
InEvent allows you to download any type of live broadcasting from the Live Studio and Video Conferencing, RTMP rooms you created and use it to promote your virtual and hybrid events. Recorded videos are great for building hybrid and virtual events case studies on virtual live conferences, virtual meetings, virtual networking, virtual exhibitions, offsite meetings, offsite events, and any other live stream broadcast for events.
Enabling room recording
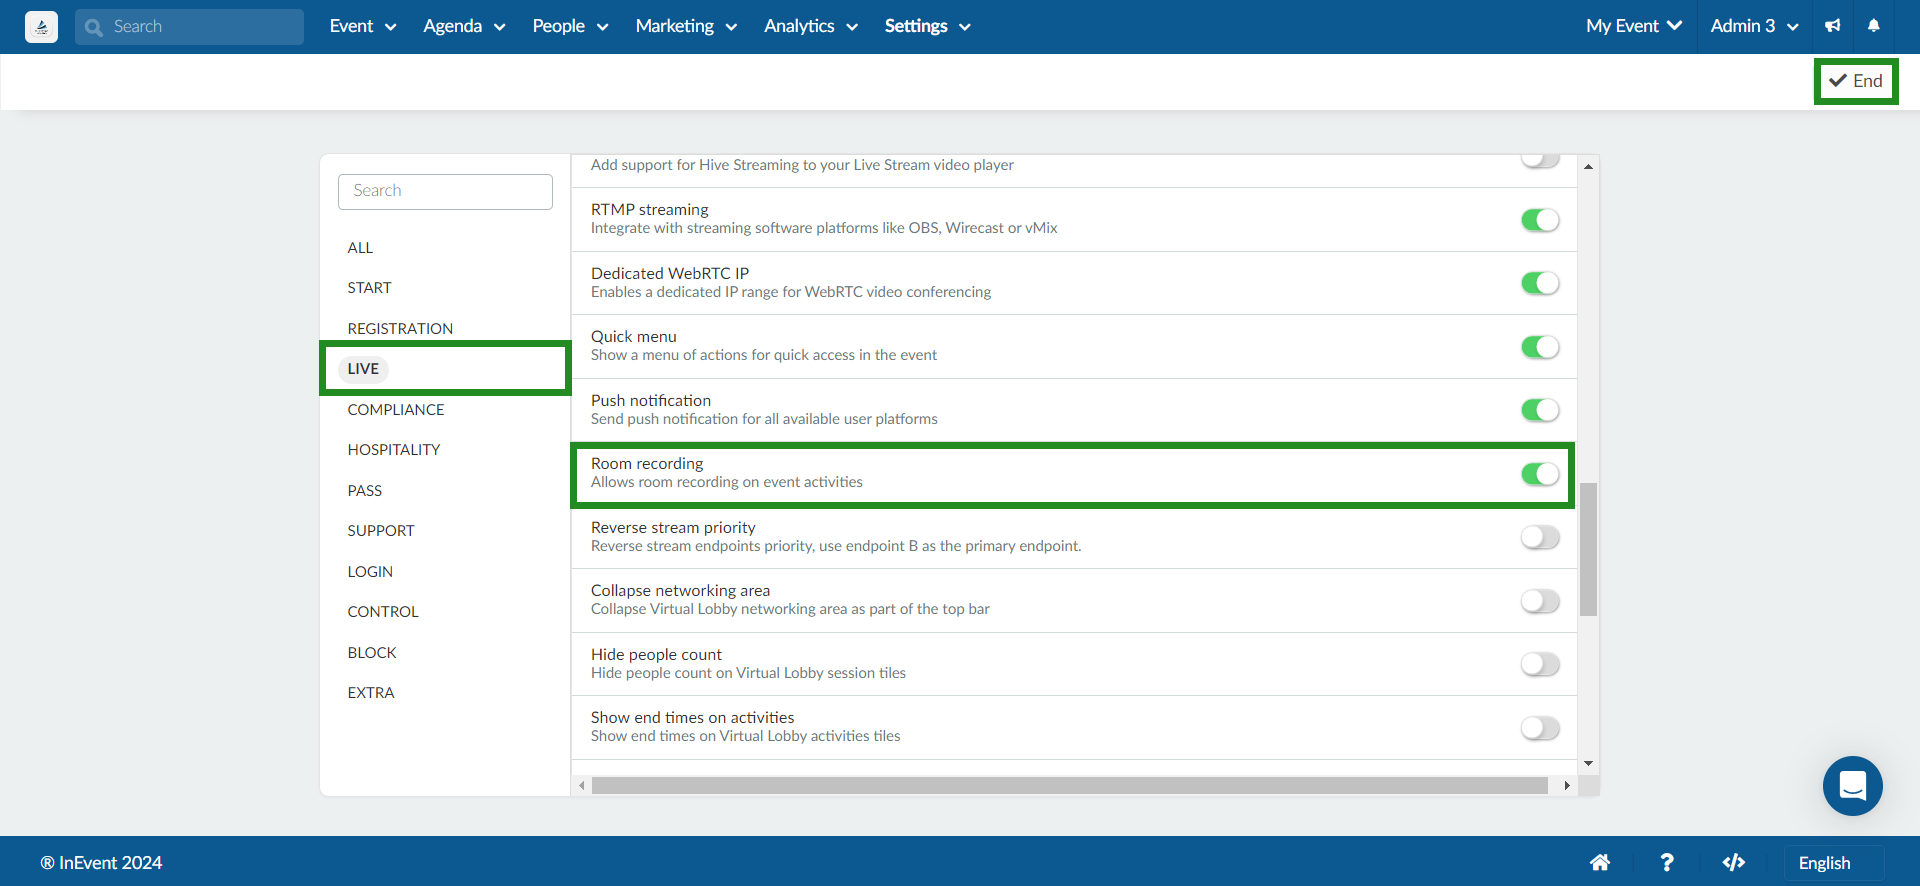
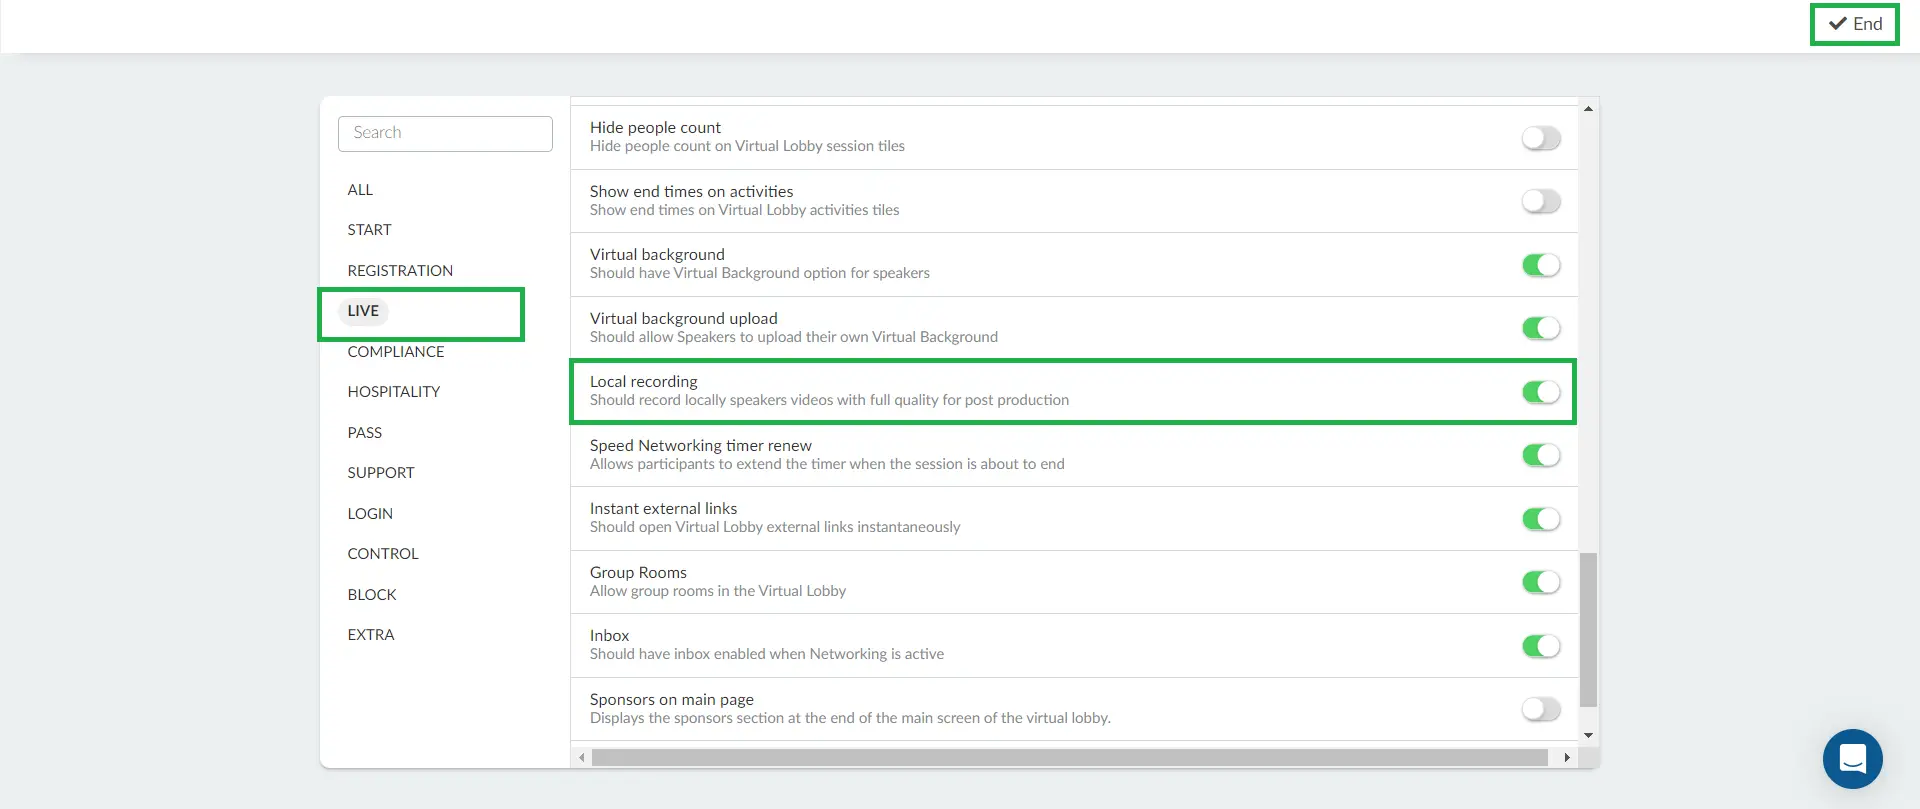
To enable room recording, click on Settings > Tools > Live section. Press Edit, and scroll down until you see the Room recording tool and toggle its corresponding button. Press End to save the changes.
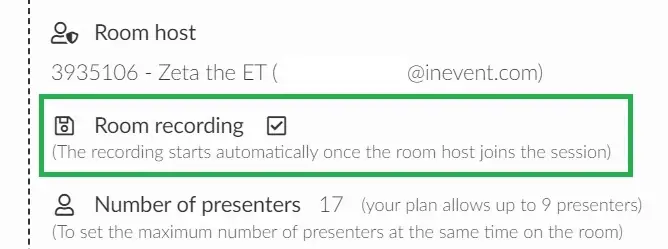
Then, navigate to Agenda > Activities, and select the activity you wish to enable this on. In the Details tab, scroll until you see Room recording. Click on Edit and tick the checkbox to enable this functionality.
How does the recording appear in the Live Studio session ?
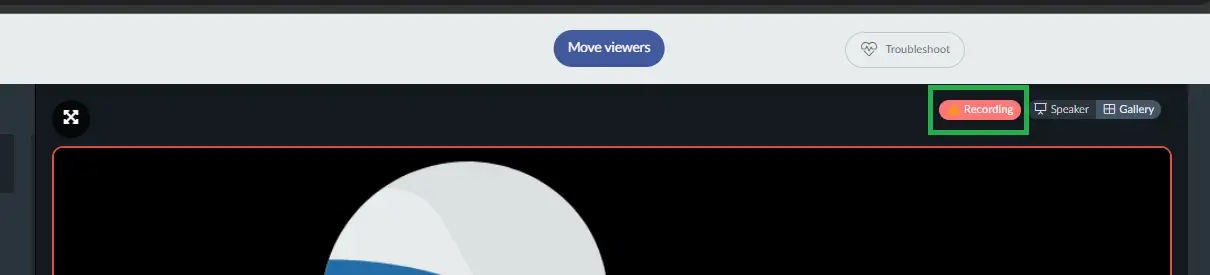
The Recording button appears as a red button on the top right corner once the host joins the Live studio room as shown below:

How does the recording appear in a Video conferencing session?
To ensure the activity is recorded you need to also select a Room host. With this set up, the recording will start once the first presenter joins the room regardless of the presence of the room host. However, the room host will be the only one to see the Recording label at the top of the screen.
How do I enable Breakout room recording?
You can enable recording for breakout rooms while creating them, to enable breakout rooms follow these steps:
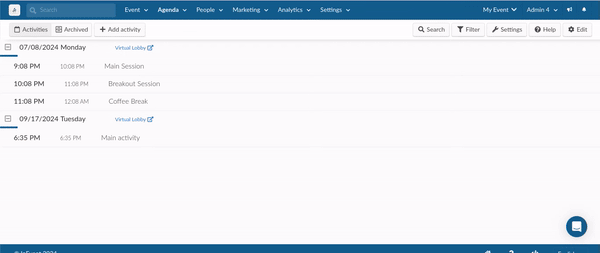
- Navigate to Agenda > Activities.
- Select the activity to which you want to add a breakout room.
- Click on Breakout Room and press Edit.
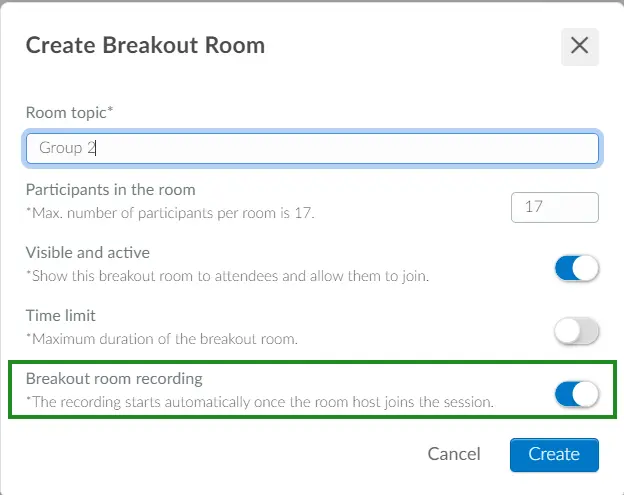
- Press +Create breakout room.
- In the Create Breakout Room pop-up, add the room topic.
- Toggle on the button for Breakout room recording to enable recording for the breakout room.
- Adjust the other settings according to your needs, press Create.
- Click on End to save the changes.
This way, you can ensure that the recording is enabled when you create the breakout room. Refer to the Breakout Rooms article for more information on breakout room.
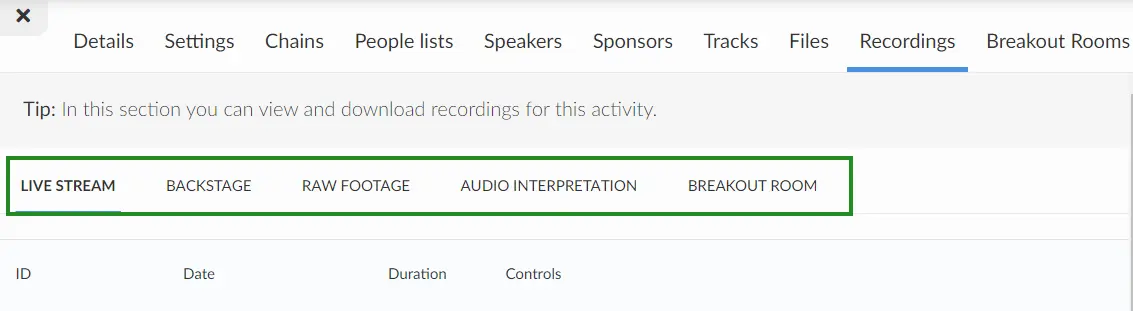
How do I download the recording?
Once the session ends the recording is automatically available in the Recordings tab, to be played, downloaded as video, downloaded as audio, set as pre-recorded, or deleted.
Downloading as video
Follow the steps below to download your recording after your session has ended:
- Navigate to Agenda > Activities.
- Select the session to download its recording.
- Click on the Recordings tab.
- Select the recording type by clicking on the tab.

Your session recordings will be displayed, sorted by date in descending order (newest to oldest).
- Click on the blue button Download ready next to your desired recording. A pop-up window will be displayed.
- Select the video quality of your recording. The available options are Low, Medium, or High.
- Click on the blue button Download ready next to your desired recording. A pop-up window will be displayed.
- Select the Download option by clicking on the three dots menu icon on the bottom right corner. The file will be downloaded to your computer in an MP4 format.
Downloading as audio
Follow the steps below to download your recording as audio after your session has ended:
- Click on the blue button Prepare audio download. This will open a pop up window with the message 'Your recording is starting'.
- Click the Download audio ready button once you get the message: Your recording is ready to download.

Recording types
There are five types of recordings that will be indicated on the left-hand side of each file:
- Live Stream: recording of the live stream.
- Backstage: recordings of the moments before the live stream starts and after it ends.
- Raw footage: If the Local recording feature is enabled, it shows the raw footage of speakers' videos.
- Audio Interpretation: recordings of audio interpretation channels.
- Breakout room: recording of the breakout rooms.
Local Recording
This records the raw footage of speakers' videos with full HD quality for post-production purposes. By default, this tool is disabled. To have it enabled, go to Settings > Tools > Live section. Press Edit and scroll down to the Local recording tool. Toggle its corresponding button.
The raw footage of people with camera and microphone access: the host, admin, staff and presenter and users invited to speak on stage will be available separately at the backend to play, download, or set as pre-recorded under Raw footage in the Recordings tab under Agenda > Activities.
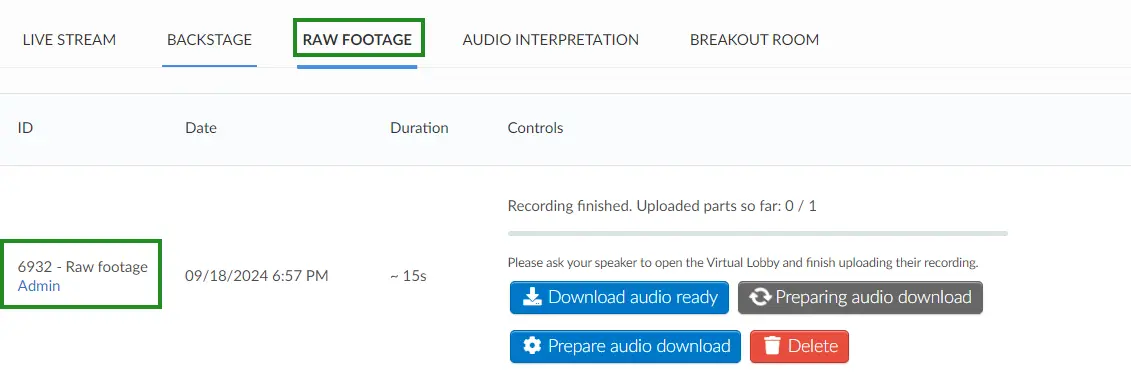
To have the complete recording uploaded on the platform, speakers are to remain in the Virtual Lobby while it uploads. Once the speaker leaves the Virtual Lobby, the upload stops, and only the parts while they were in the Virtual Lobby will be completed.
The number of parts uploaded and the message 'Please ask your speaker to open the Virtual Lobby and finish uploading their recording' will be shown beside the speaker's footage.

Setting the recording as pre-recorded content
To set it as pre-recorded content for this room, click on the orange option Set as pre-recorded. This video will automatically be set as your pre-recorded video for this session.

Click here for further information on the pre-recorded room video mode.
How do I delete a recording?
To delete a recording, press the red button Delete. A window will pop up asking you to confirm if you should like to delete the recording.
Type DELETE RECORDING to confirm and press Delete.

Room recordings and other room video modes
The way the recording works will depend on the selected room video mode:
- Pre-recorded: The session will not be recorded since it already consists of a recorded file.
- RTMP Streaming: The recording starts the second you start the streaming on the third-party software. The session will be available on the platform as a Live stream recording under the Recordings tab of the activity to play, set as pre-recorded or download in mp4 format.
- External Link: Since this session happens outside of the InEvent platform, we are not responsible for its recording.