Invitation List - Webinar
The InEvent platform offers an invitation list feature, which allows event organizers to directly invite potential attendees to their event. Inviting potential attendees by adding them to the invitation will not cost any Registration credit. The registration credit will only be used once an invitee confirms their attendance to your event.
In this article, event organizers will find the information on how to add invitees to webinars, manage invitee information, and send invitations to attendees, both individually and in bulk.
This article intends to guide you on adding invitees to your event, editing their information, sending out the invites individually or as a group.
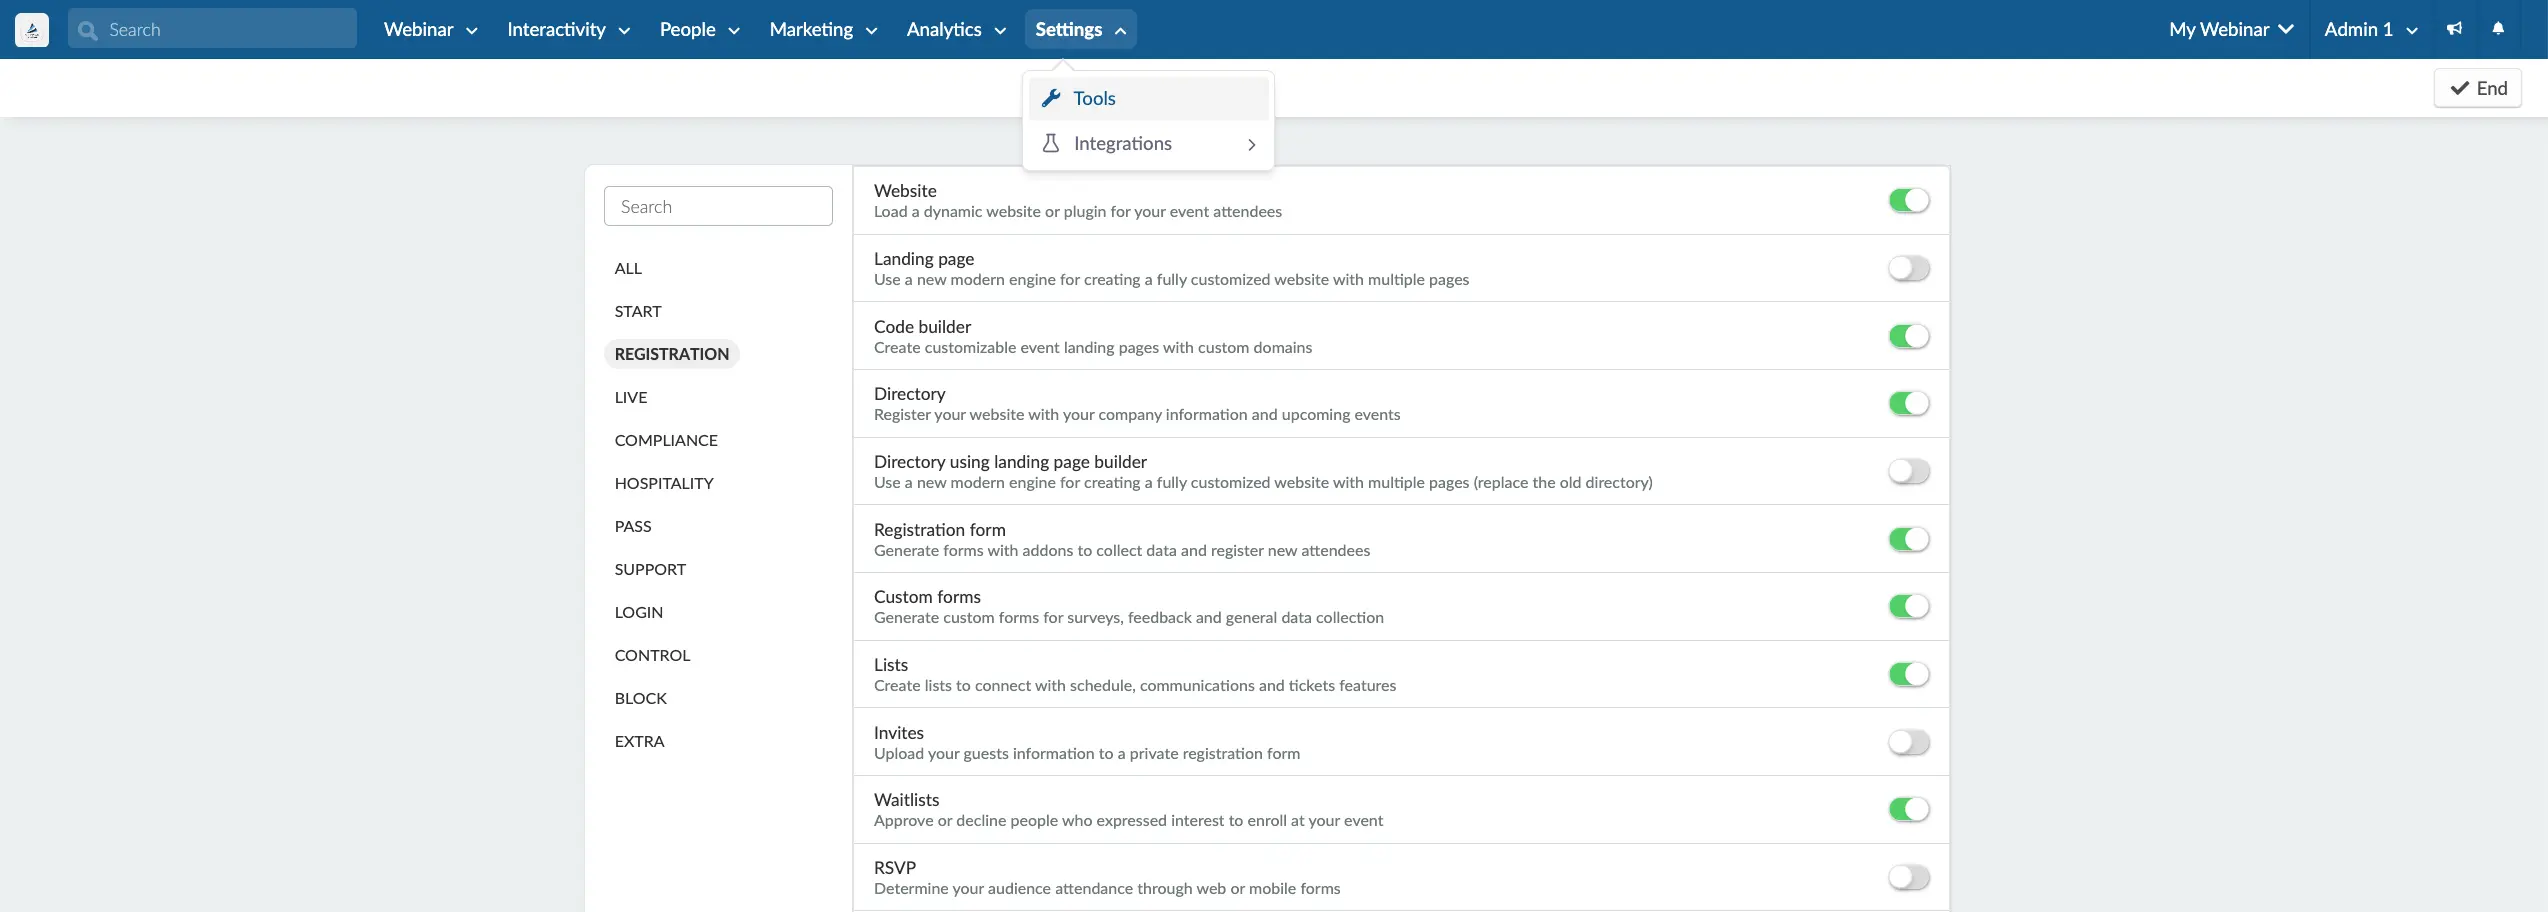
Enabling the Invites tool
Before adding invitees to a webinar, ensure that the Invites tool is enabled for the webinar. If it is not enabled, you can enable it by following the steps below.
- Navigate to Settings > Tools at the Event level.
- Click on the Edit button.
- Enable the Invites tool using the corresponding toggle.
- Click on End to save your changes.
After completing the steps above, you can start adding invitees to your event.
The Invitees page can be accessed by navigating to People > Invitees.

Invite requirement
Event organizers may want to organize an exclusive event which requires invitations for registration and attendance. To achieve this, the Invite requirement tool must be enabled.
The Invite requirement tool can be enabled by clicking on the Settings button and clicking the Invite requirement toggle, which is disabled by default.
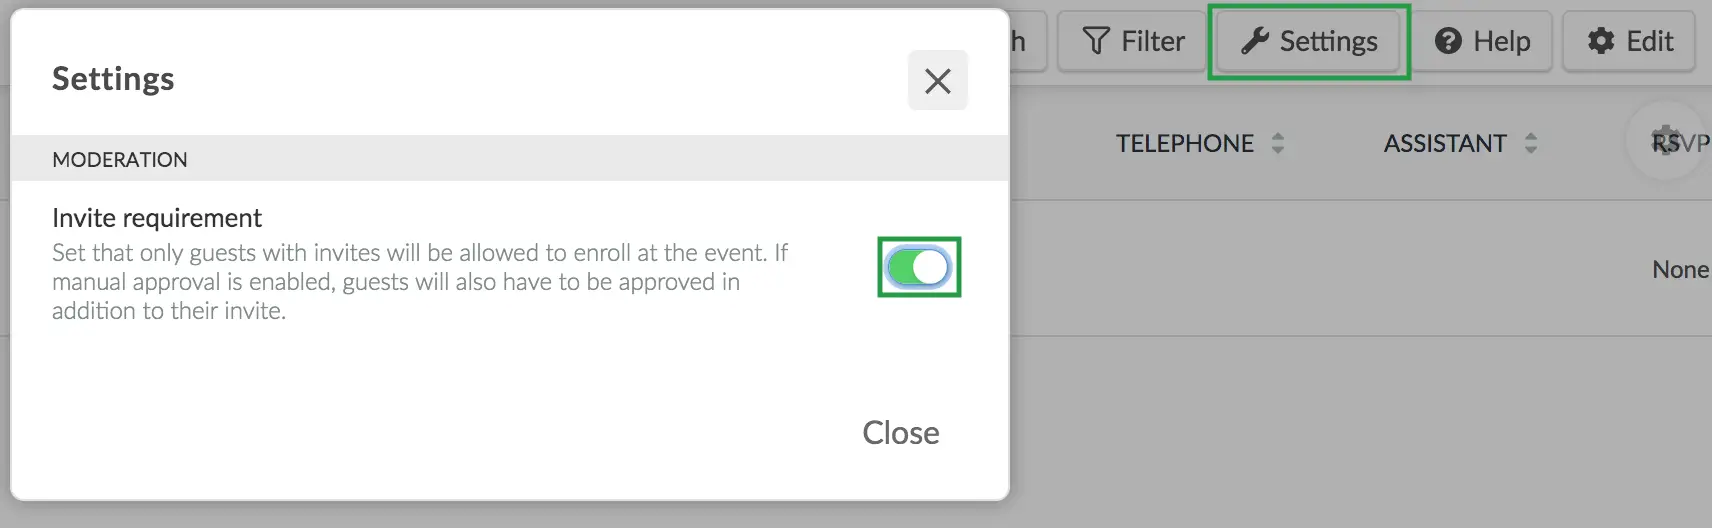
You can also enable Invite requirement from the following pages on the platform
Once Invite requirement is enabled, only users who have received invitations will be able to register to the event.
Adding invitees
You can add invitees in two ways: manually, by entering them one at a time, or by using a spreadsheet to automate the process.
Manually
To add an Invitee manually, navigate to People > Invitees and then click on + Add invitation.
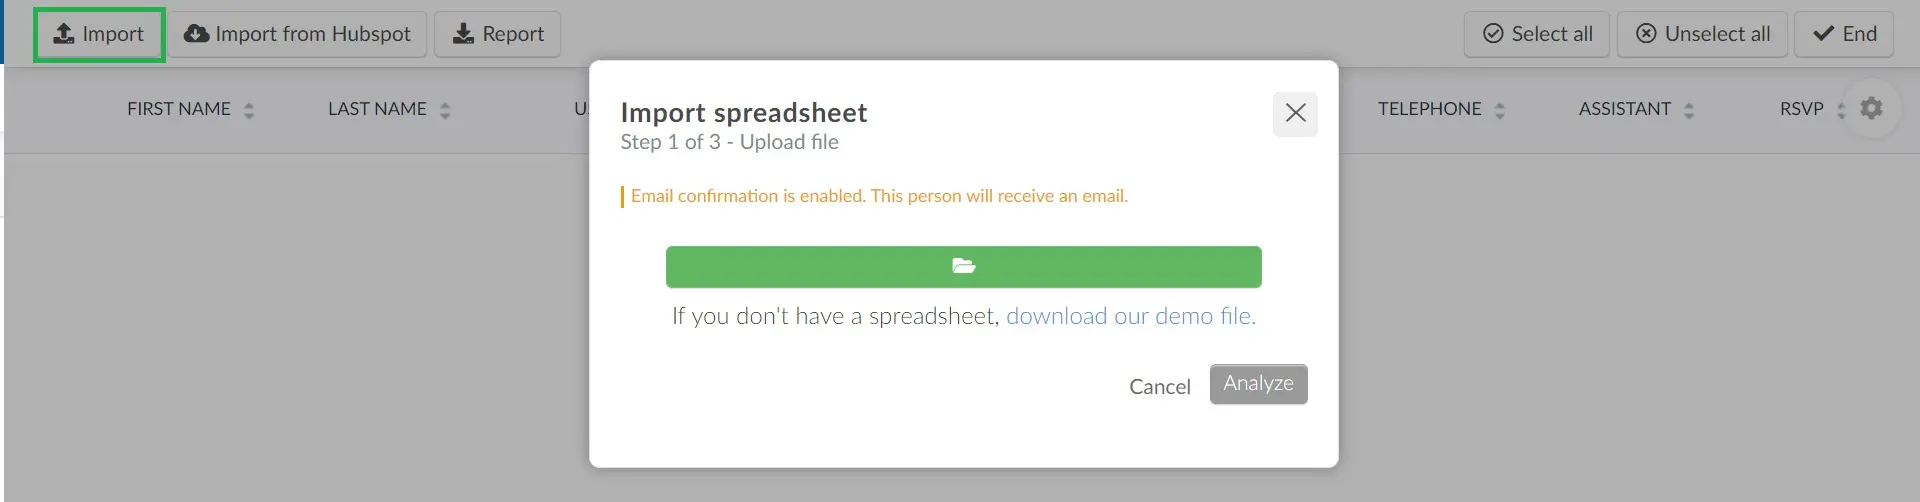
Using a spreadsheet
To bulk import invitees using a spreadsheet, click on Edit > Import. Next, you can choose from two options:
- Use the demo file provided by InEvent, by downloading it, filling it in and then uploading it.
- Use your own spreadsheet to insert your invitees' information and then uploading it. To learn more about this process, Refer to the article Importing and exporting spreadsheets.
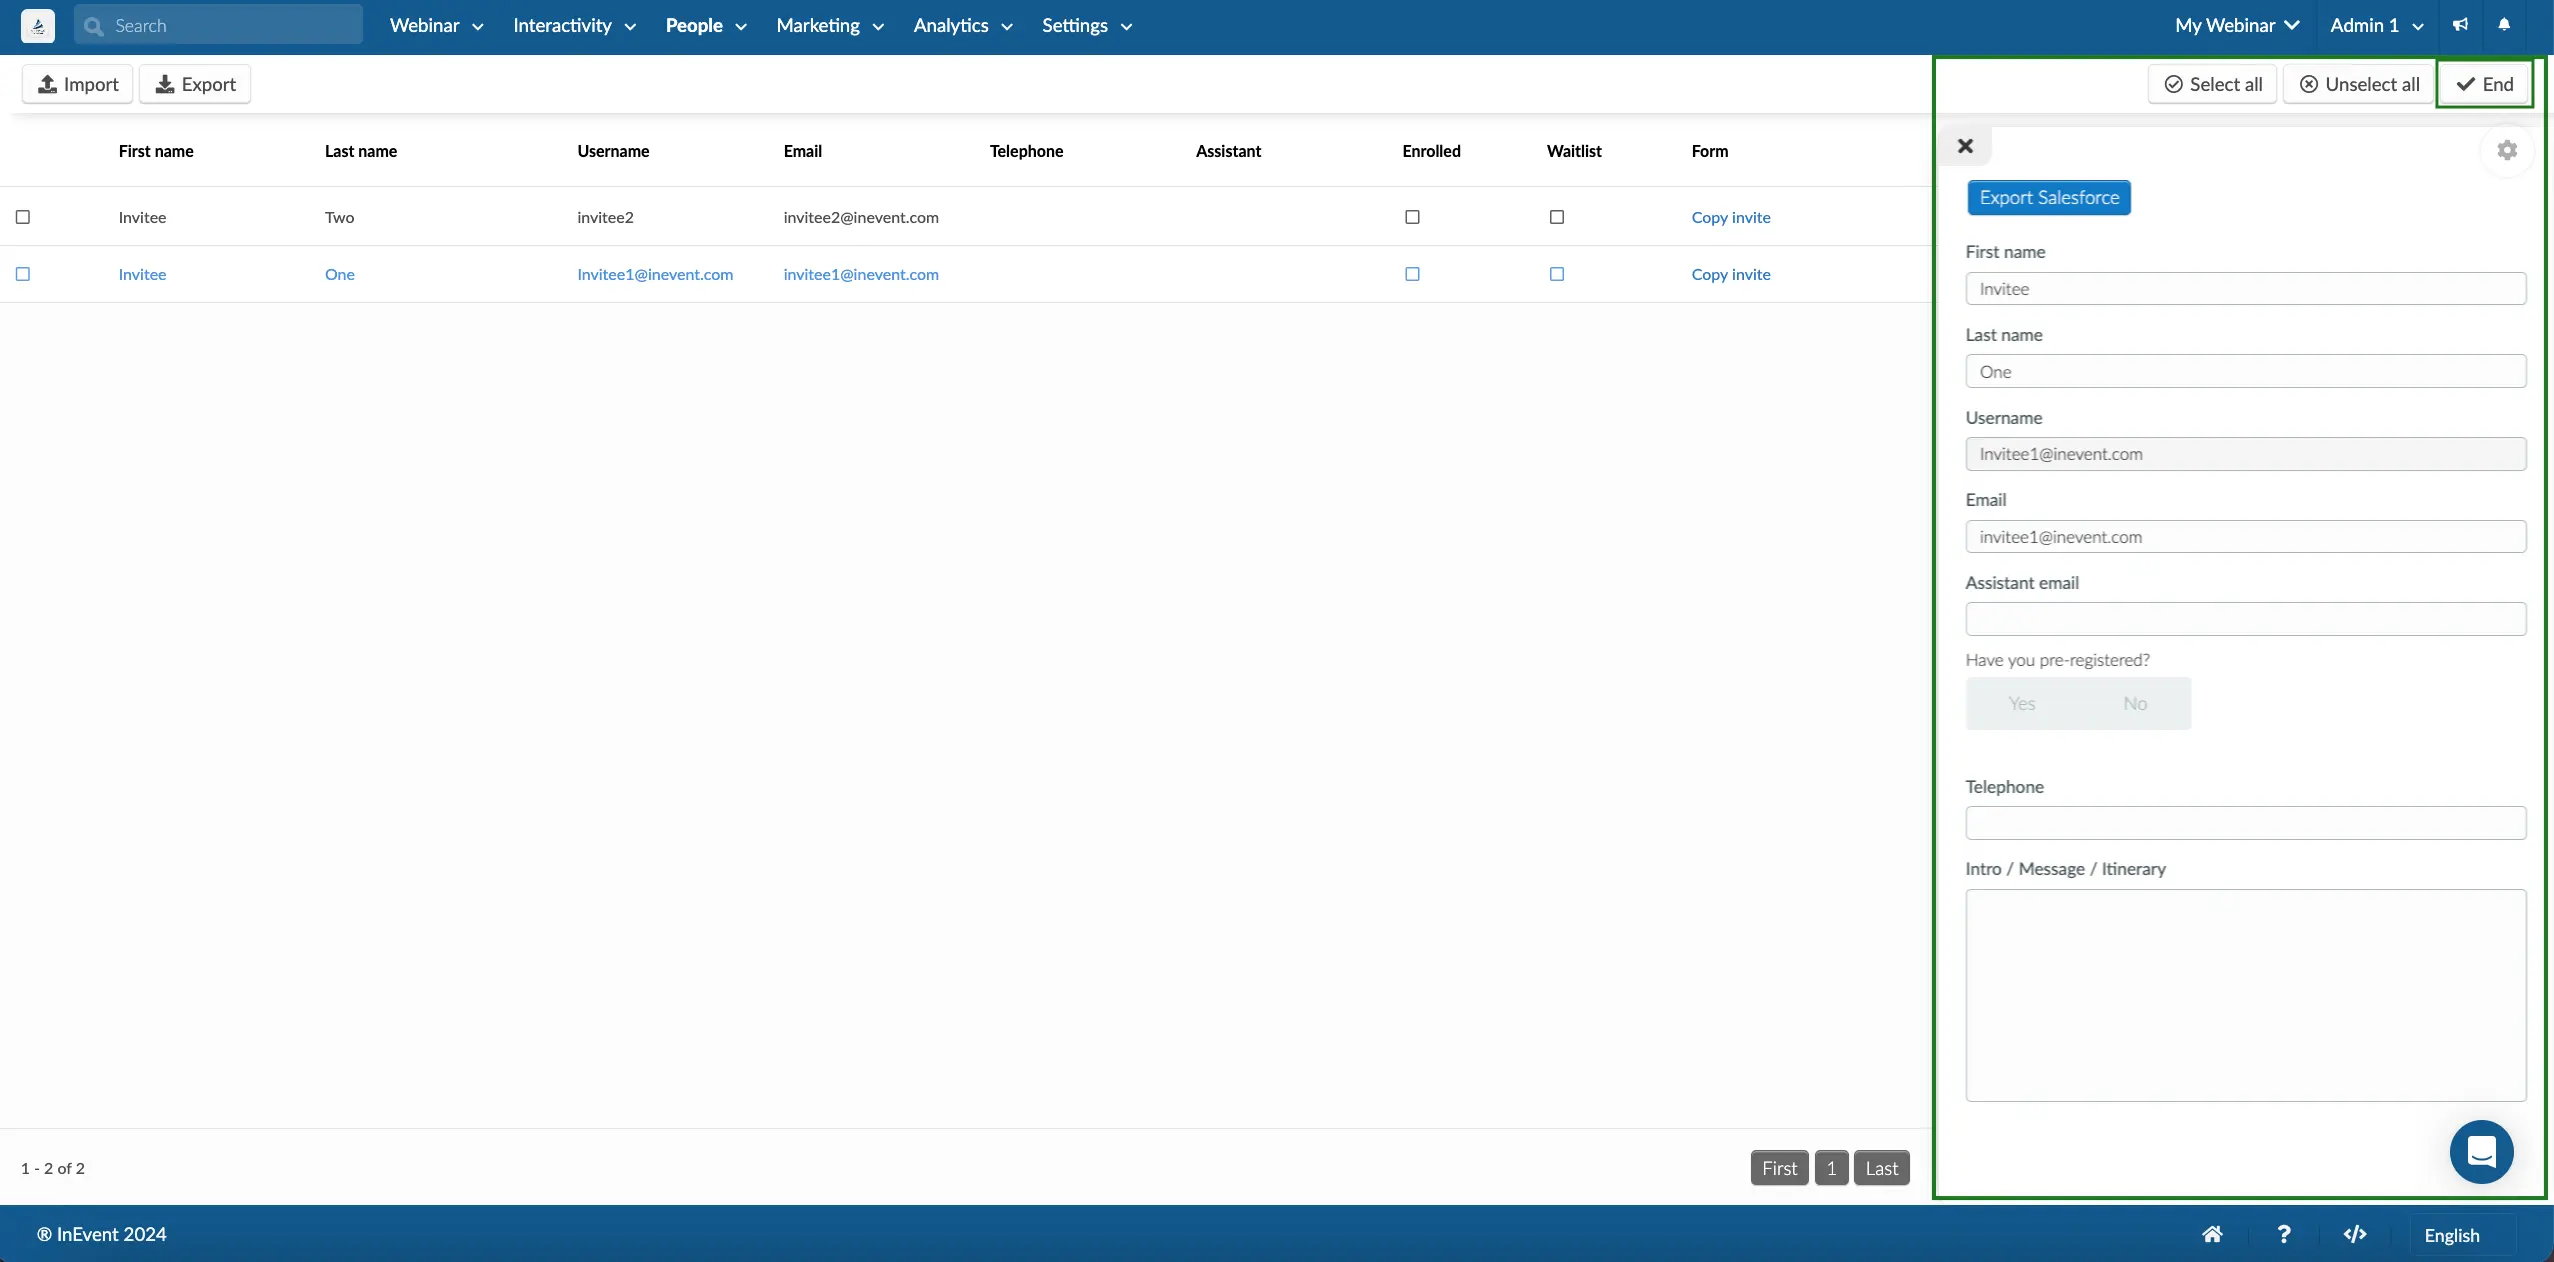
Editing invitees' information
To edit an invitee's information, click on the Edit button on the top right corner, then select the desired invitee from the list. This will trigger a window to open on the right where you can modify the invitee's details. Press the End button after you are done with the modification to save the information .
Filtering and searching for invitees
By clicking the Filters button, you can filter out the different invitee groups:
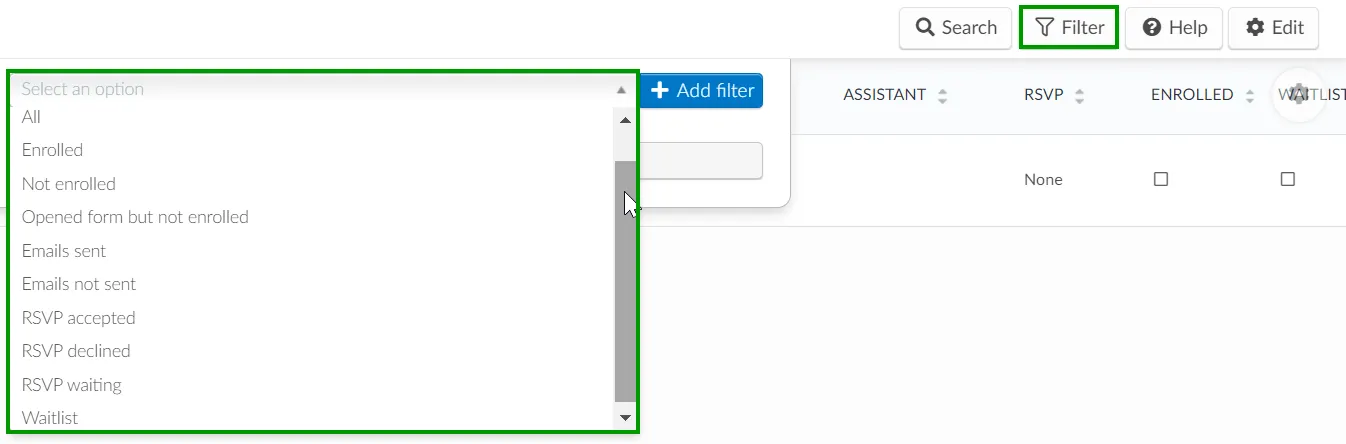
The available filters:
- All: It will display everyone listed as an Invitee;
- Enrolled: It shows which invitee is already enrolled, therefore they will also be listed as Attendees;
- Not enrolled: It indicates if the Invitee is not yet enrolled in the event;
- Opened form but not enrolled: If the Waitlist and Approval requirement tools are enabled, even if the invitee has answered the form it still needs to be approved by the admin.
- Emails sent: It indicates which Invitee has received an automatic email.
- Emails not sent: It will filter whoever did not receive an automatic email from the platform.
- RSVP accepted: When RSVP is enabled, it will display whoever clicked on Yes.
- RSVP not accepted: When RSVP is enabled, it will display whoever clicked on No.
- RSVP waiting: If RSVP is disabled, even if the invitee enrolls it can still display RSVP waiting until the admin confirms manually.
- Waitlist: It displays whoever is part of the Waitlist regardless the status (approved or rejected)
By clicking on the Search button you can search terms or a specific invitee.

Moving invitees to the attendee’s list
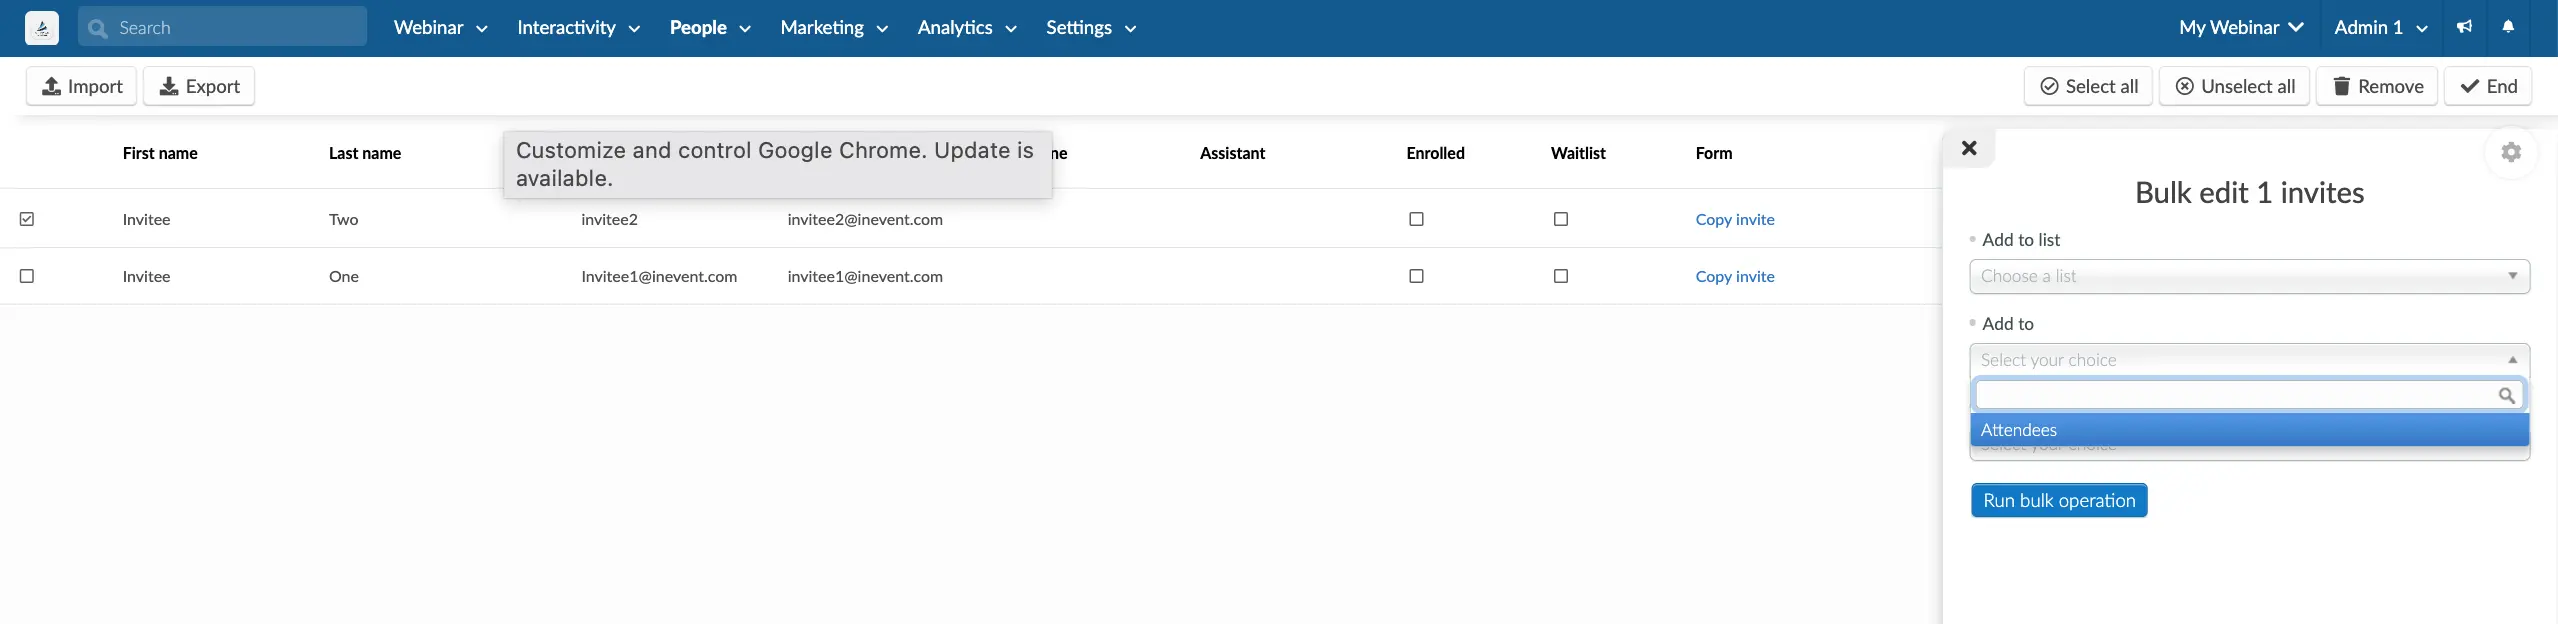
To register a guest as a confirmed attendee at the event, click on Edit and choose the invitee(s) you desire.
Next, a window will appear on the right side. In the Add to field, select Attendees. Then press Run bulk operation. You can also move the invitees to custom lists, using the field Add to list.
Deleting invitees
You can remove an invitee or several invitees from the platform simultaneously. To do so, press the Edit button, select the invitee(s) you wish to delete by ticking the check box next to their name. Then, press the Remove button in the top right corner.
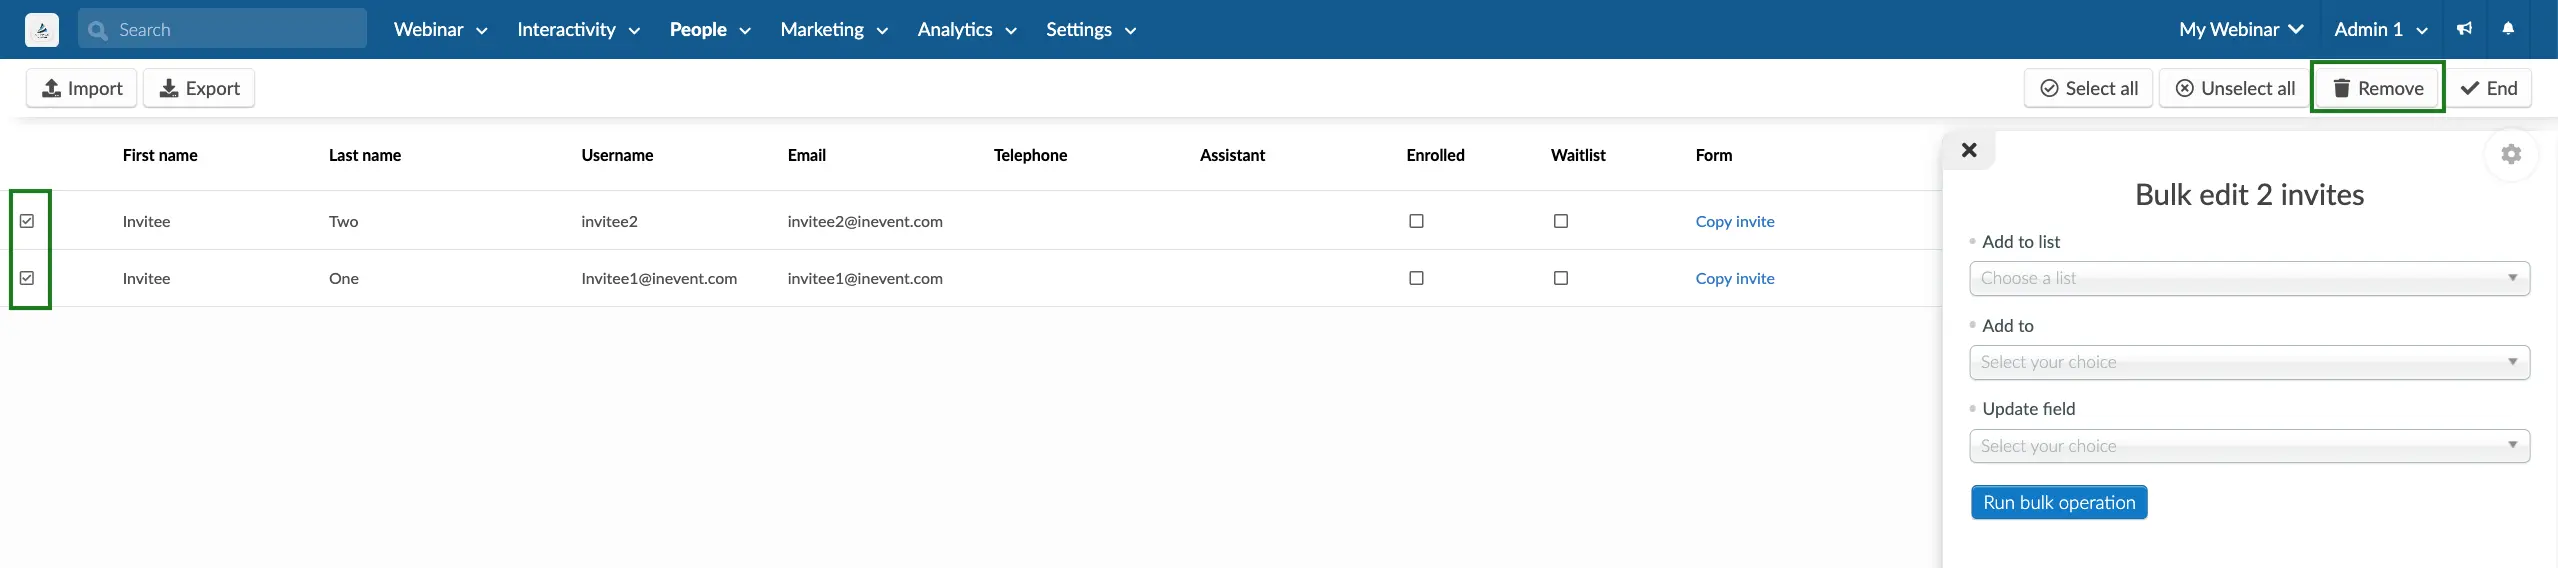
Click on the End button once you have finished editing.
Sending event invitations to invitees
Refer to the article Sending Invites to learn about the process of sending out invites both individually and in bulk.
Extracting reports of the invitation list
To extract a report of the invitation list, click on Edit > Report, a banner notification with a download button. Click on download to be directed to the report center where you can download the file. You will also receive a notification when the file is ready to be exported.
