How do I access the Virtual Lobby?
 Updated 10 months ago
by
yasmine haj sassi
Updated 10 months ago
by
yasmine haj sassi
There are various ways for the participants of your event to access the Virtual Lobby. They can access it by filling out the registration form directly, they can use either the unique link or the login information sent by the event organizer.
Below are the options to access the Virtual Lobby:
Via registration form
If your event has a registration form, the attendees will be able to access the Virtual Lobby after completing the registration. You can enable the form on the website or you can attach it by email.
Once the registration is done, the attendee will be able to click on the button Go to event! to access the Virtual Lobby.
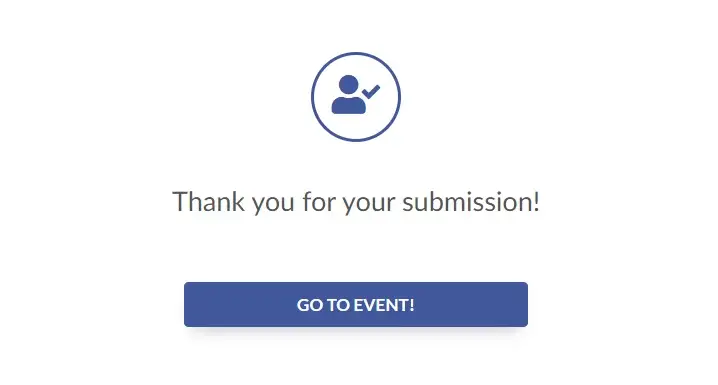
If the person who is accessing the registration form is already registered in the event, he will be informed that is already registered and will see the button Go to event! to access the Lobby.
Registering through the website
Why not use the website to encourage the public to register for the event straight away! To do that, go to Marketing > Landing pages > Website.
Press edit and tick the Enable registration checkbox.
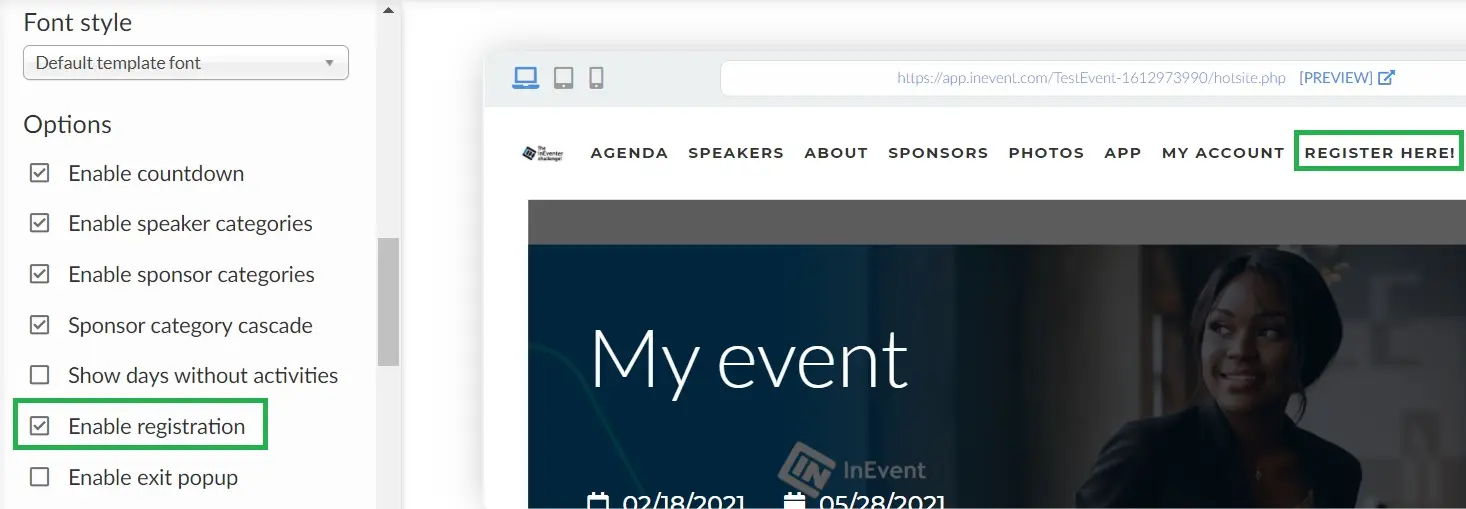
By enabling the Registration via the website the participants will fill out a form you have set up previously. For more information about the Registration form settings click here.
Registering through the email
If your event will target a specific public and you have the list of emails beforehand, go to Marketing > Communication > Email creator.
Next, click on +New email, add the Subject and choose a Template. Now you can edit the email inviting your public to register for your event.
To learn more about the dynamic links you can use for the email configuration check this article.
Via Magic link
Magic links are a form of passwordless login. Instead of the user entering any login credentials to sign in, they are sent a URL with an embedded token. It's imperative to remember that those links are unique and non-transferable. If the link is shared and someone else accesses the event, the first access will be disconnected!
Confirmation Email
By default, when people are added to the event and become Attendees, they will receive an automatic email from the platform with the magic link. To add or edit any information, go to Marketing > Communication > Automatic Emails.
Click on the blue button for the confirmation email. The dynamic content called {{event-address}} will automatically become the exclusive, non-transferable magic link.
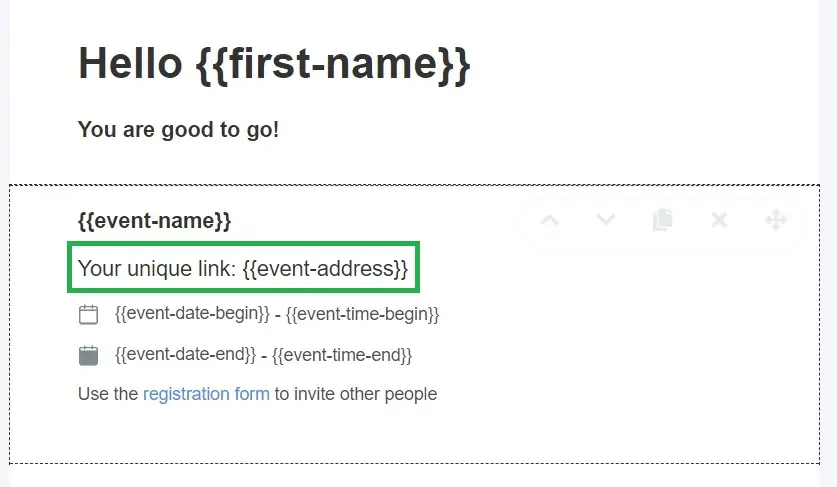
This dynamic content will pull information from the platform, so you don't need to configure it. You should only configure the rest of the content that will be sent to your event participants.
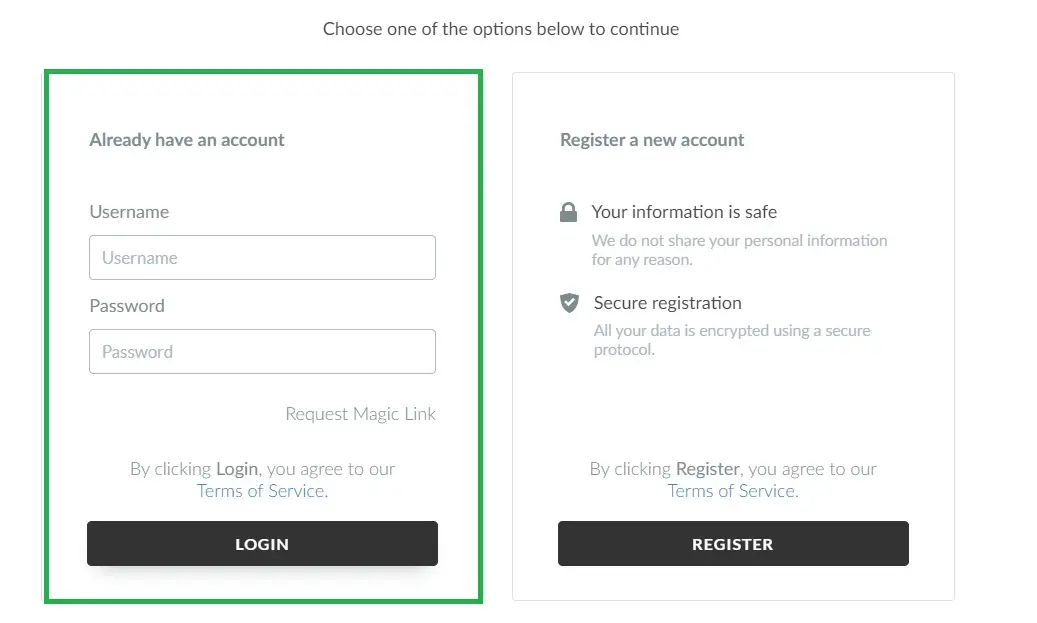
Via login and password
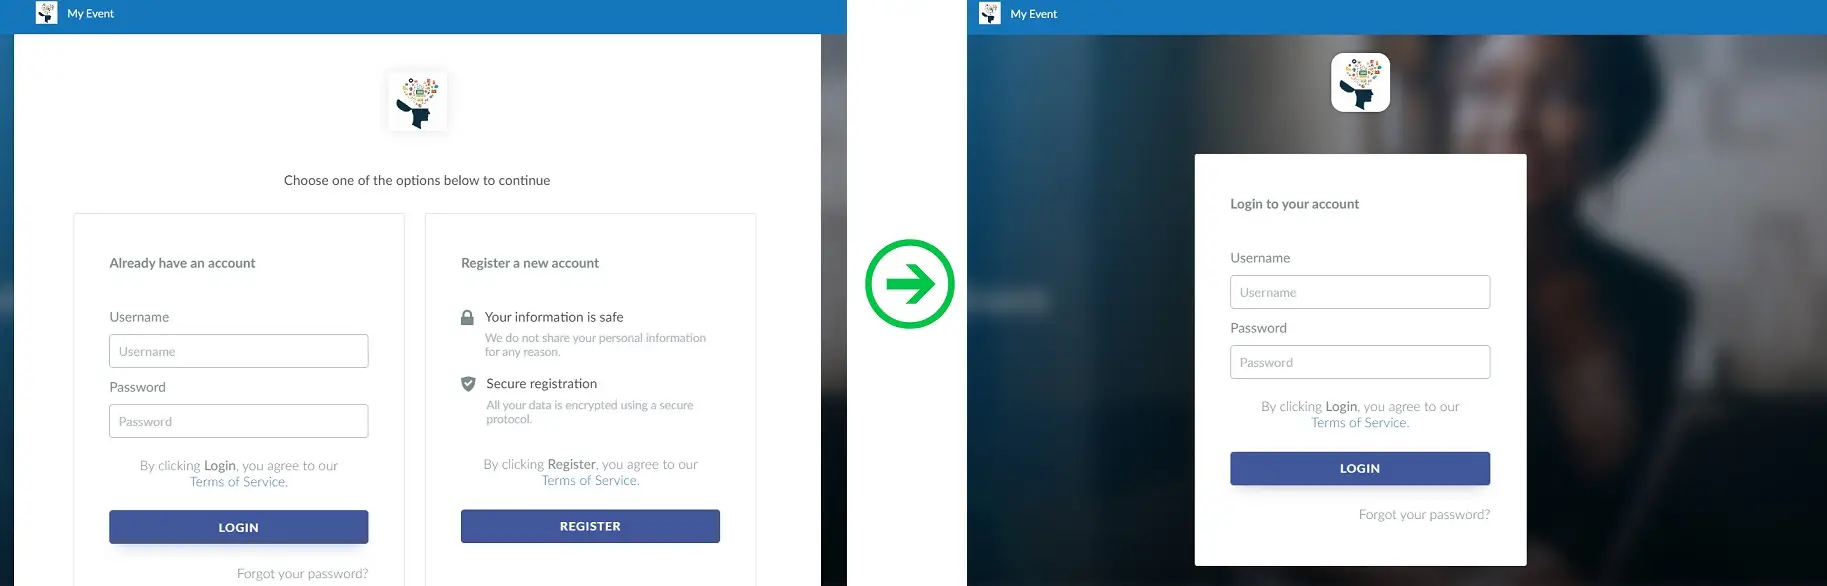
If you prefer to disable the magic link, your attendees can log in using their username and password. You can send the Virtual Lobby link to your participants via email. When they try to access the event using the Virtual Lobby link, they will be redirected to the login page as displayed below to enter their username and password. Once the information is entered they need to press Login.
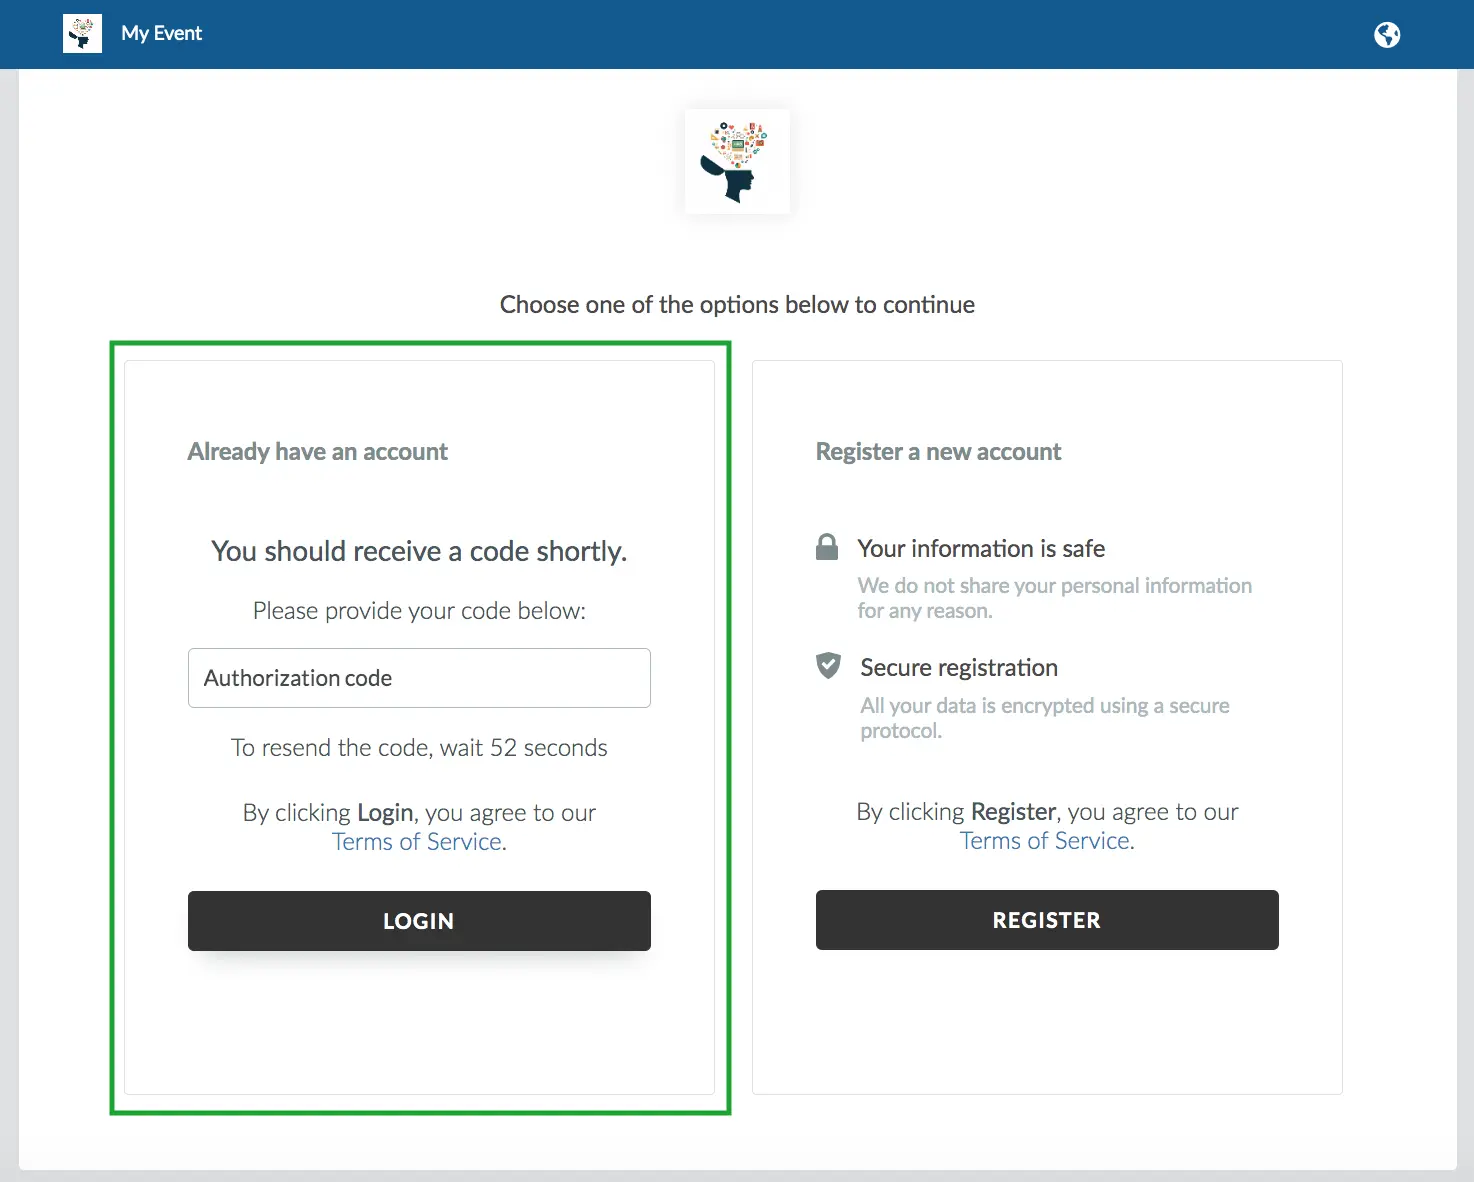
After logging in, they will receive an email with an authentication code, which they will be asked to insert in order to complete the login process and be directed to the Virtual Lobby:
E-mail reminder
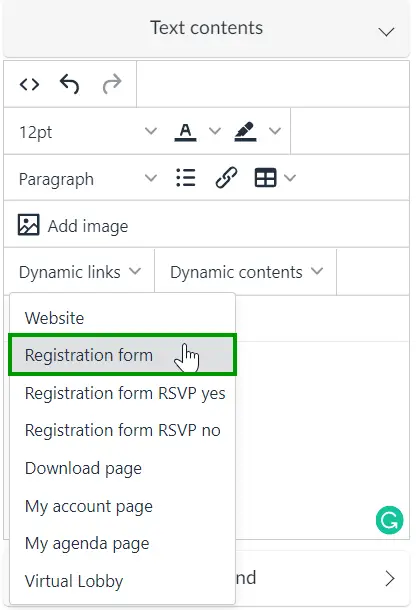
We recommend that you set up and schedule email marketing as a reminder a few minutes before the event starts. To add the Virtual Lobby link, click on Dynamic Links and select Virtual Lobby, as shown in the example below:
My Account
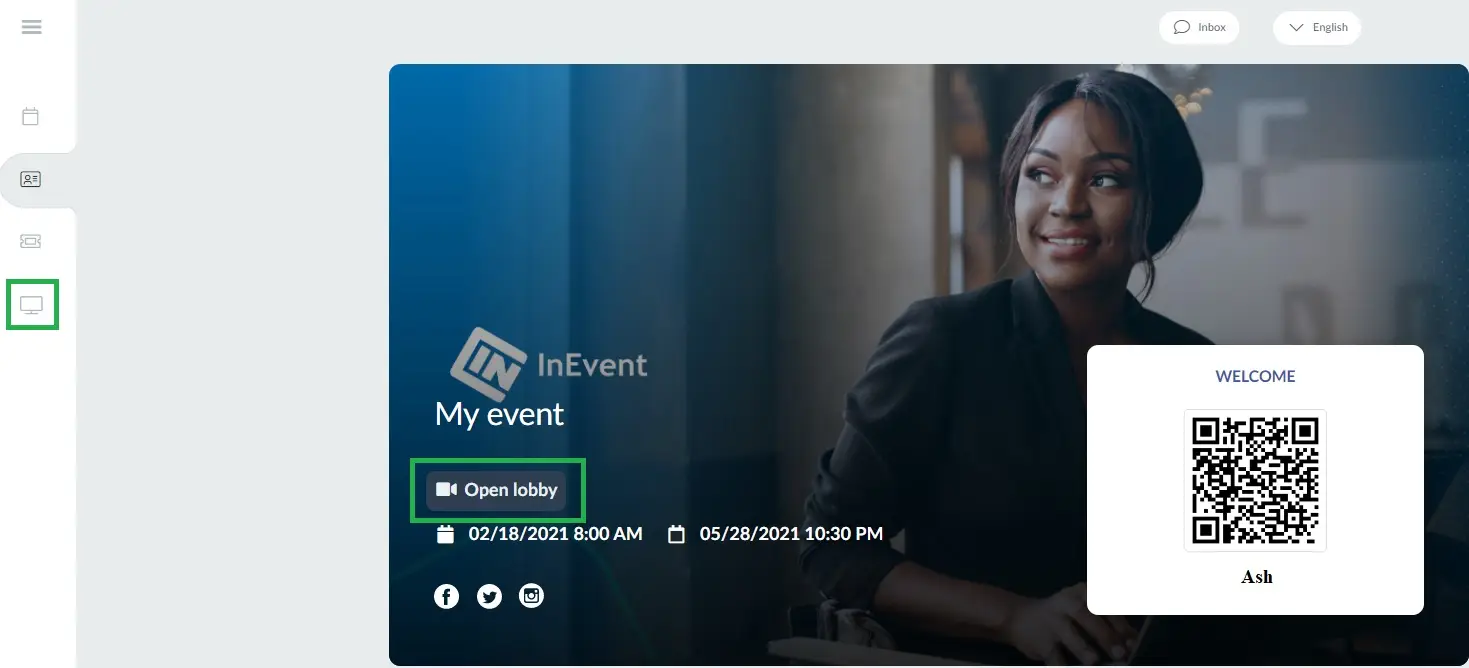
Another option is adding the My Account section to your website. When accessing the My Account option through the event website, the participant will be redirected to the login page.
Once they entered their information and get access to the My Account, they can click on Virtual Lobby button on the event banner, or Open Lobby in the menu on the left-hand side.
Customizing the login page
When unauthenticated users try accessing the Virtual Lobby, they will be redirected to the login page. On this page, they can either log in to the Virtual Lobby using their credentials or register a new account. If you wish, you can disable one of these options.
Disabling the login option
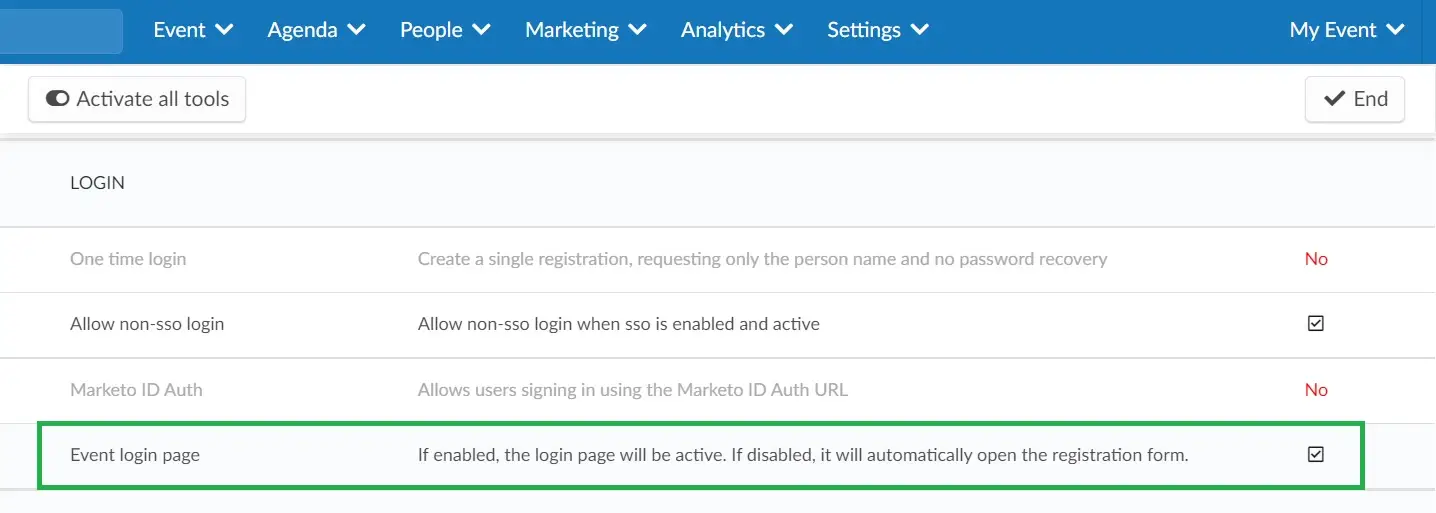
If you don't want unauthenticated users to see the Login option when trying to access the Virtual Lobby, go to Settings > Tools > press Edit > and scroll down until the Login section. Then, disable the Event login page by unticking the correspondent checkbox and pressing End to save the changes.
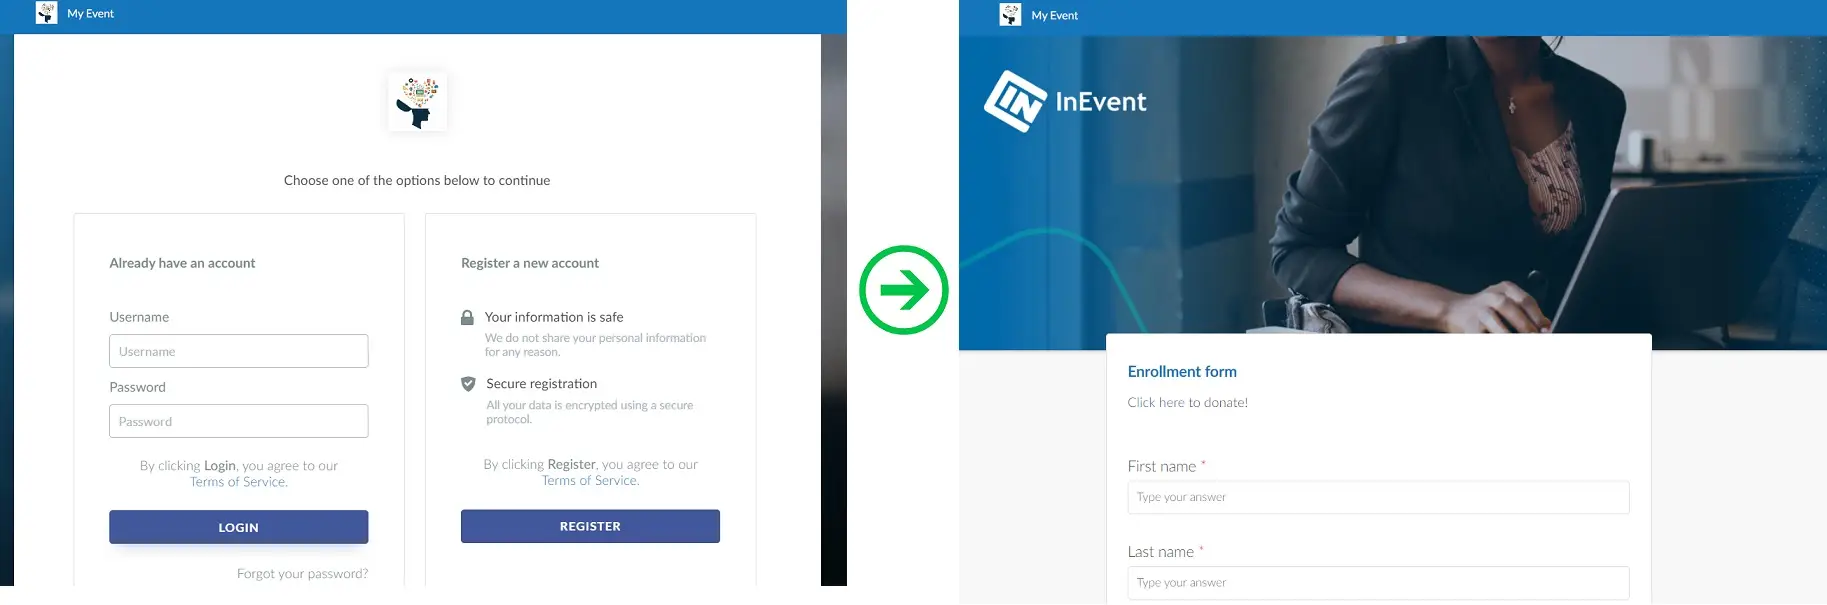
If you disable the Event login page, unauthenticated users that try accessing the Virtual Lobby will be redirected to the registration form, as shown in the example below.
Disabling the register option
If you don't want unauthenticated users to see the Register option when trying to access the Virtual Lobby, go to Settings > Tools > press Edit > and scroll down until the Registration section. Then, disable the registration form by unticking the corresponding checkbox and pressing End to save the changes.
When the registration form is disabled on the event tools, the Register a new account option on the right-hand side will be hidden from the event login page, as shown in the example below.