Invitees
 Updated 3 months ago
by
Caleb Kotey
Updated 3 months ago
by
Caleb Kotey
The InEvent platform offers an invitation list feature, which allows event organizers to directly invite potential attendees to their event. Inviting potential attendees by adding them to the invitation will not cost any Registration credit. The registration credit will only be used once an invitee confirms their attendance to your event.
In this article, event organizers will find the information on how to add invitees to events, manage invitee information, and send invitations to attendees, both individually and in bulk.
This article intends to show you how to add invitees to your event, edit their information, send out the invites individually or as a group.
Enabling the Invites tool
Before starting to add invitees to an event, ensure that the Invites tool is enabled for the event. If it is not enabled, you can enable it by following the steps below.
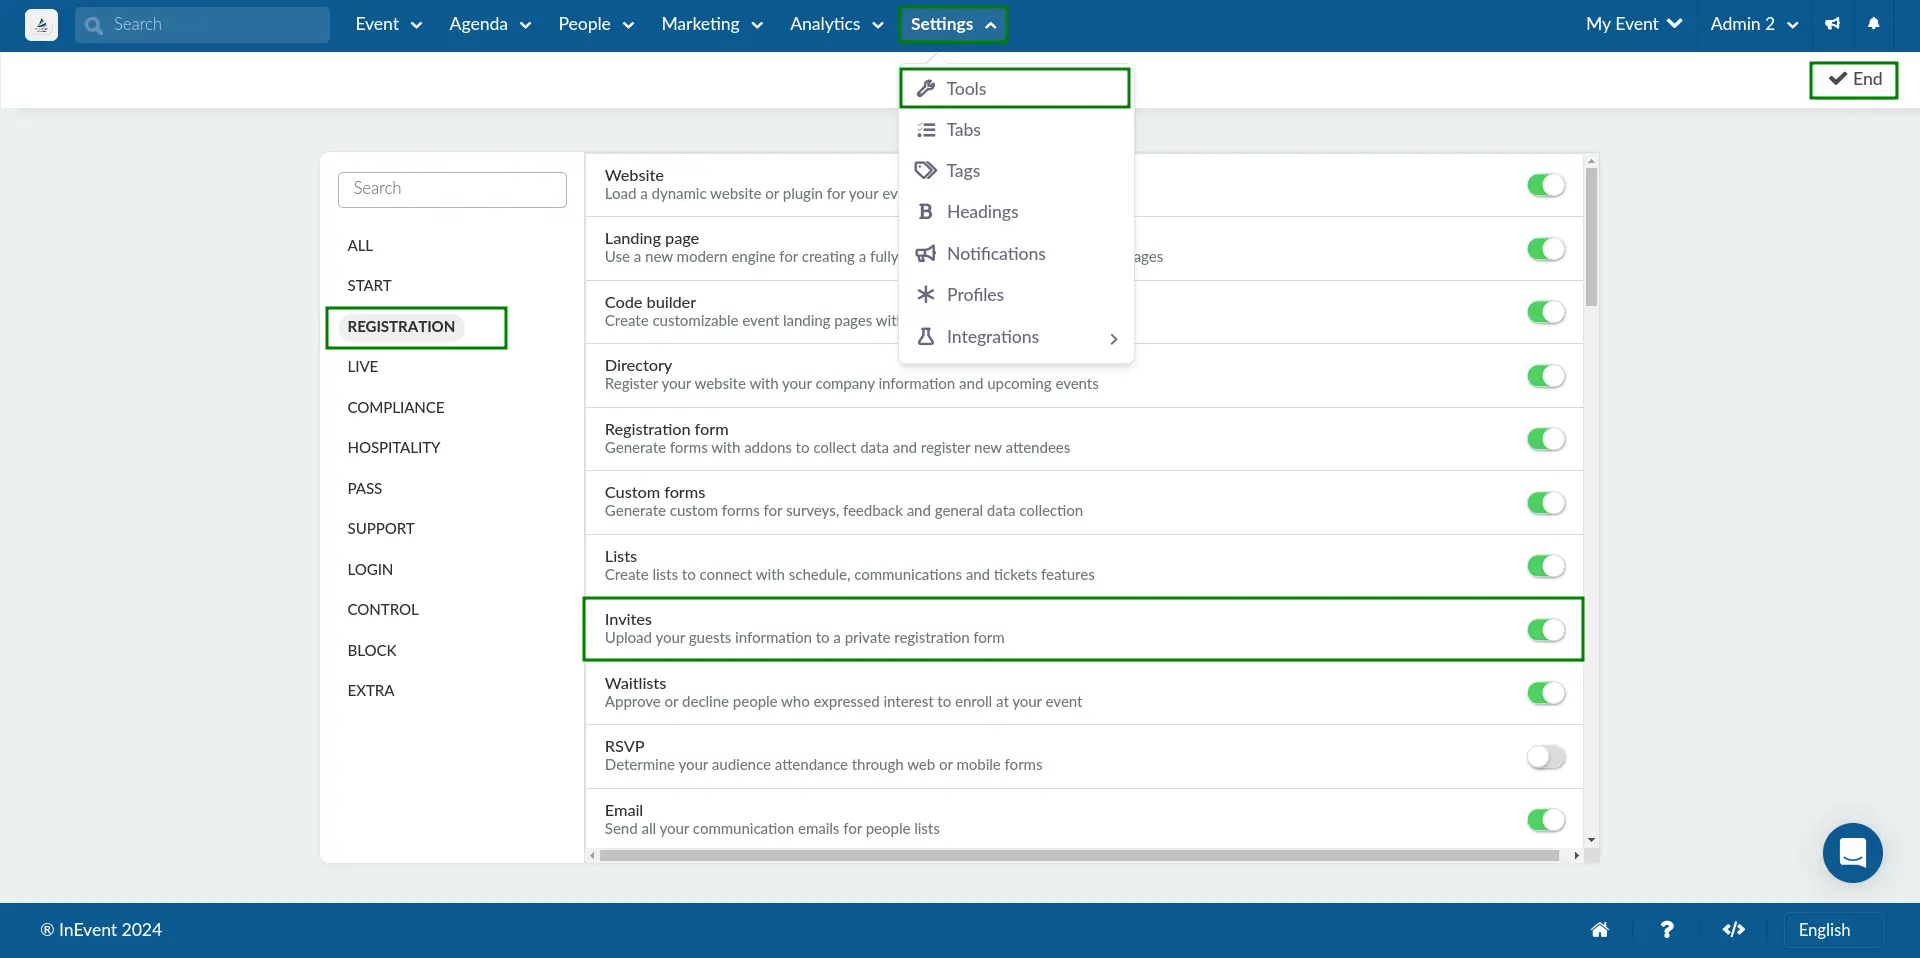
- Navigate to Settings > Tools at the Event level.
- Click on the Edit button.
- Enable the Invites tool using the corresponding toggle.
- Click on End to save your changes.
After completing the steps above, you can start adding invitees to your event.
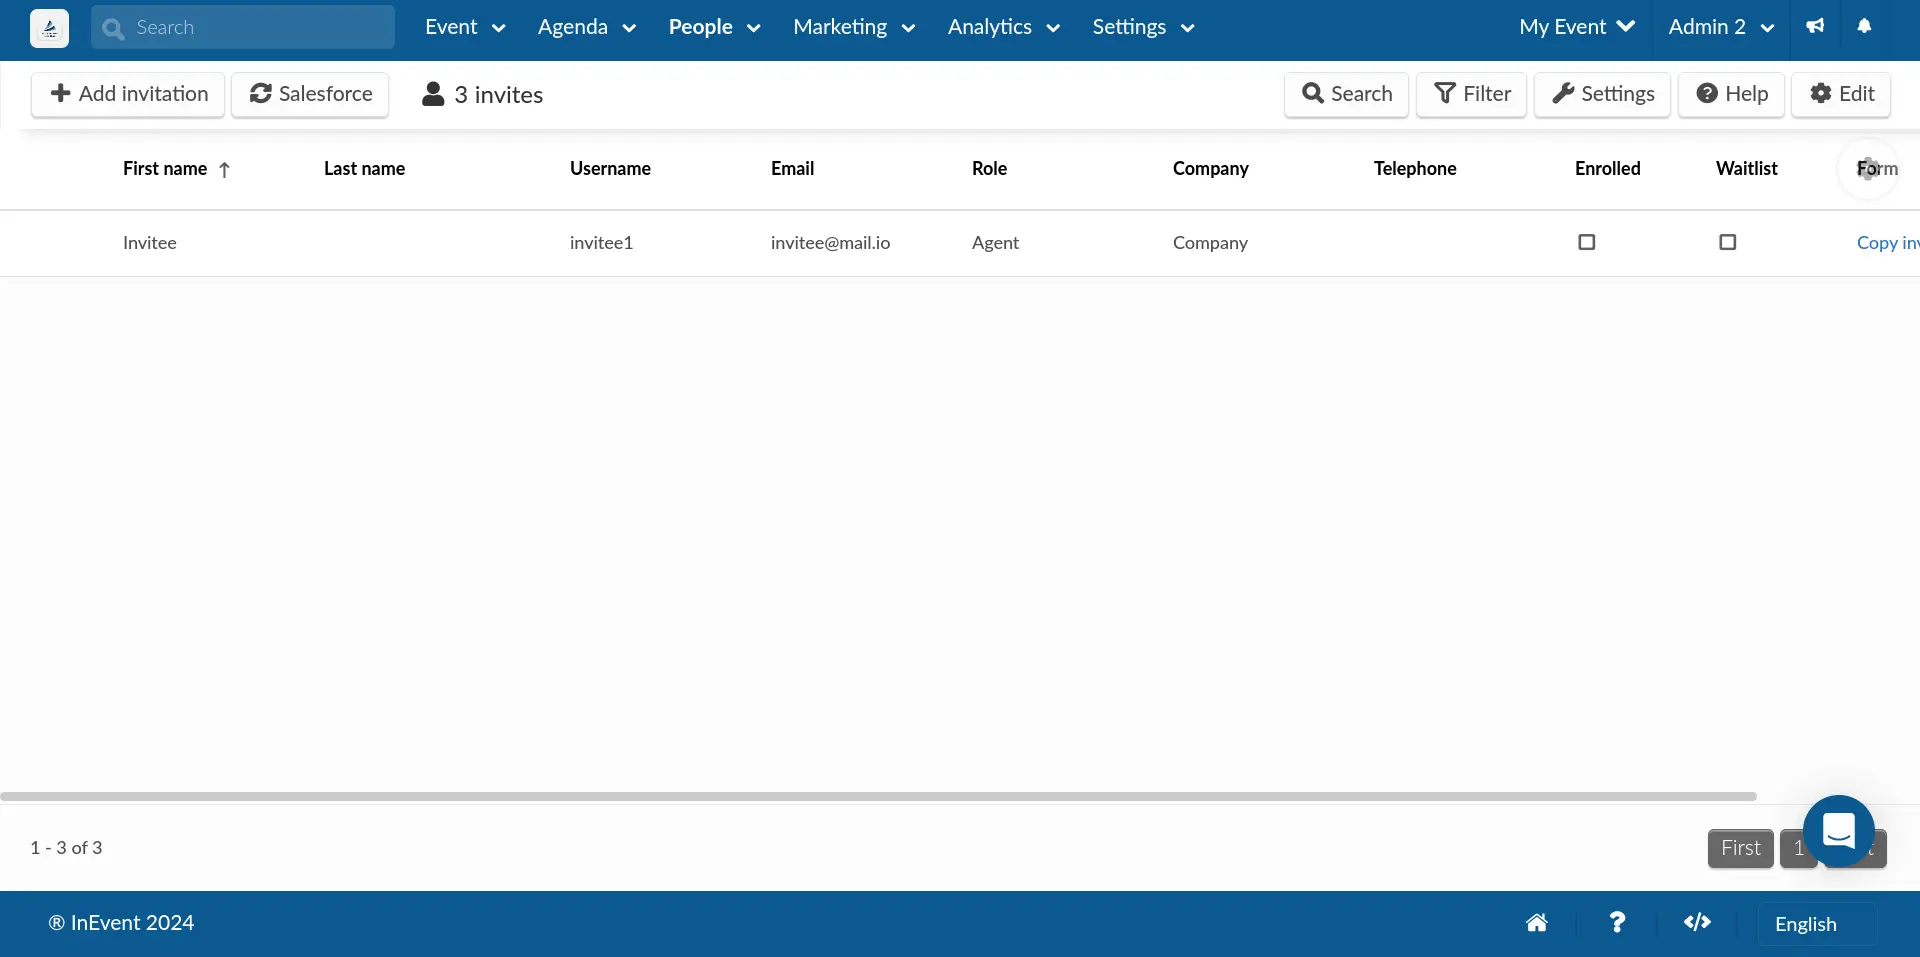
The Invitees page can be accessed by navigating to People > Invitees.
Invite requirement
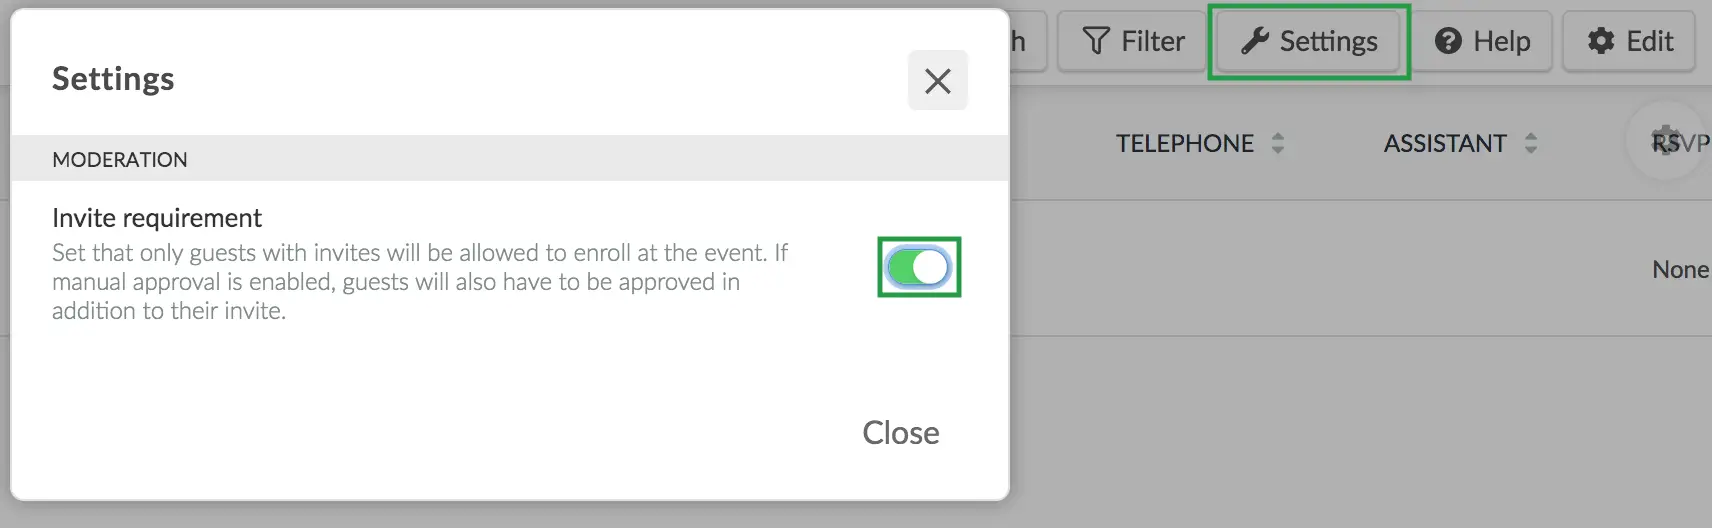
Event organizers may want to organize an exclusive event which requires invitations for registration and attendance. To achieve this, the Invite requirement tool must be enabled.
The Invite requirement tool can be enabled by clicking on the Settings button and clicking the Invite requirement toggle, which is disabled by default.
You can also enable Invite requirement from the following pages on the platform
Once Invite requirement is enabled, only users who have received invitations will be able to register to the event.
Adding invitees to your event
Event organizers can manually add individual invitees on the InEvent platform or automatically add invitees in bulk by importing a spreadsheet containing invitee details.
Adding individual invitees
Individual invitees can be added by following the steps provided below.
- Navigate to People > Invitees.
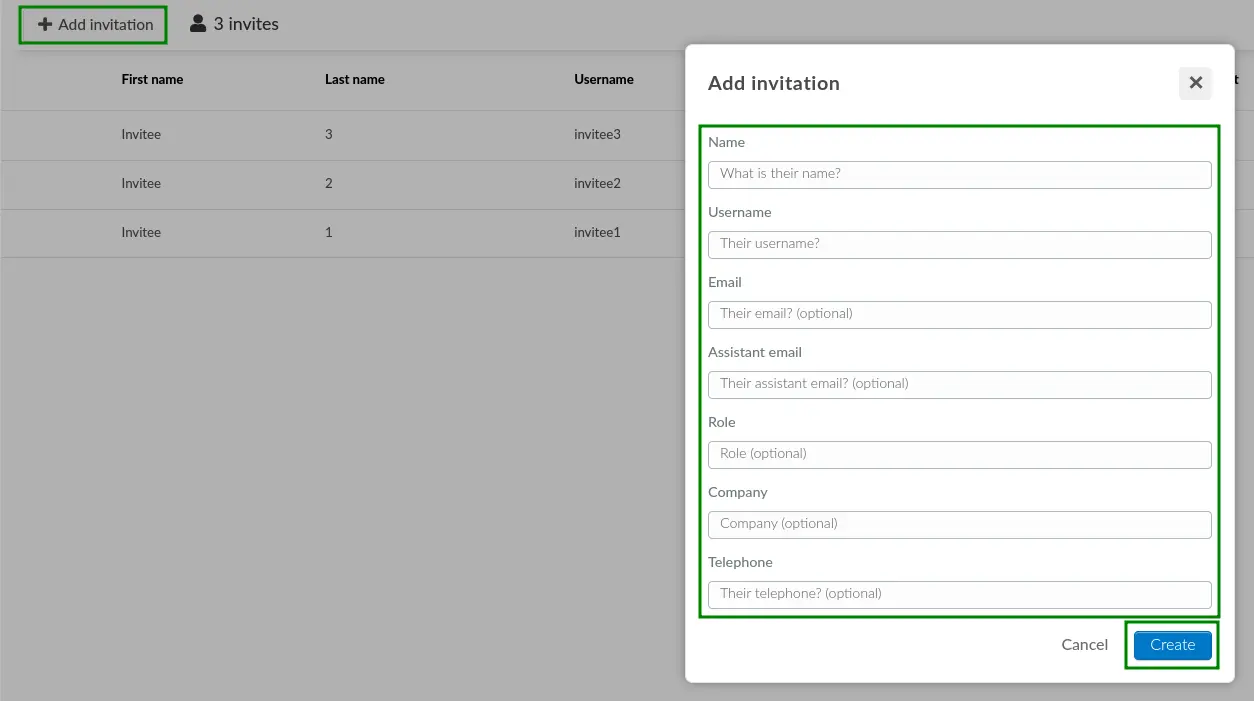
- Click on + Add invitation. The Add invitees pop-up window will be displayed.
- Enter the appropriate invitee details in the available fields.
- Click on Create.
After following the steps above, the invitee will be successfully added to your event.
Adding invitees in bulk
Invitees can be added in bulk using a spreadsheet which contains invitee details. To do so, follow the steps provided below.
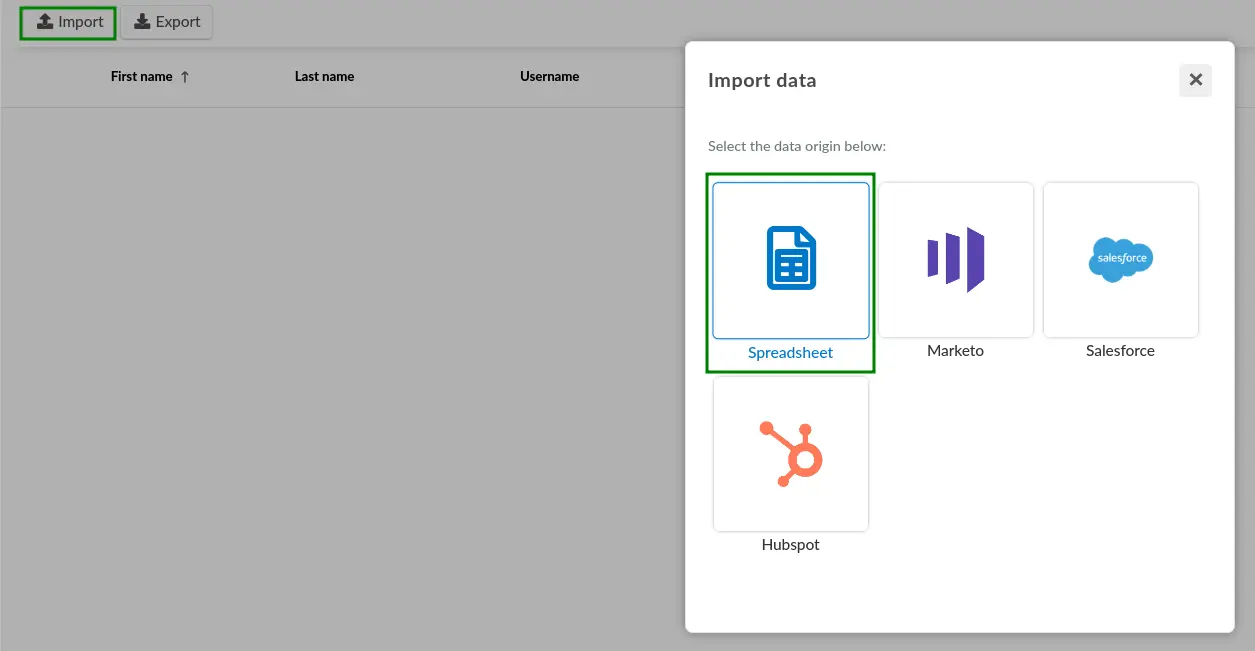
- Click on Edit > Import from within the Invitees page. The Import data pop-up window will be displayed.
- Select Spreadsheet as your data origin. The Import spreadsheet pop-up window will be displayed.
- Click on Download our demo file to download the demo spreadsheet file provided by InEvent. The file will then be downloaded to your computer, ready for editing. Doing so is highly recommended to ensure data compatibility.
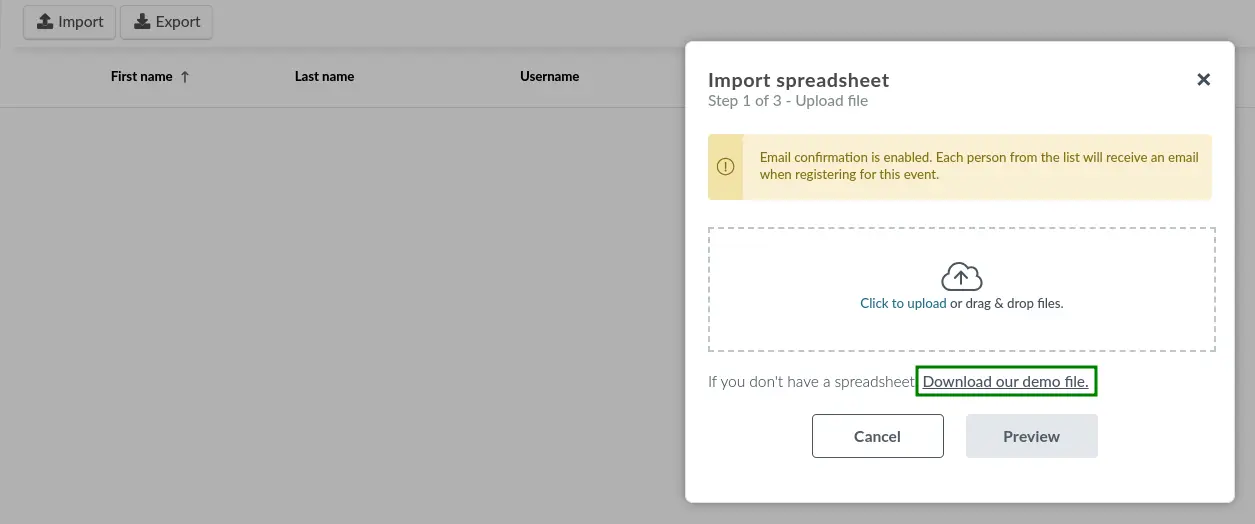
The demo file for invitees contains columns for invitees' details, such as their name, e-mail address, username, role details, as well as tags, exclusive message, and Custom field entries.

- Click on Click to upload within the Import spreadsheet pop-up window, or drag and drop your modified spreadsheet file into the appropriate area.
- Click on Preview.
- Ensure that the column names or header lines contained in the spreadsheet is appropriately mapped by the platform. You can also manually change the field mapping using the drop-down menu, or map new fields by clicking on + Add new information.
- Click on Import to start the import process.
Once the import process is finished, the invitees will be added to your event.
Automatically generating usernames
If you prefer not to manually enter usernames when adding invitees, you can have the system automatically generate unique usernames or identifiers for each invitee. To enable this feature, go to Settings > Tools, scroll to the Registration section, and toggle on the Temporary username tool.

Once enabled, the platform will auto-generate usernames whenever the Username field is left blank, whether you’re adding invitees manually or via spreadsheet import.
Editing invitee details
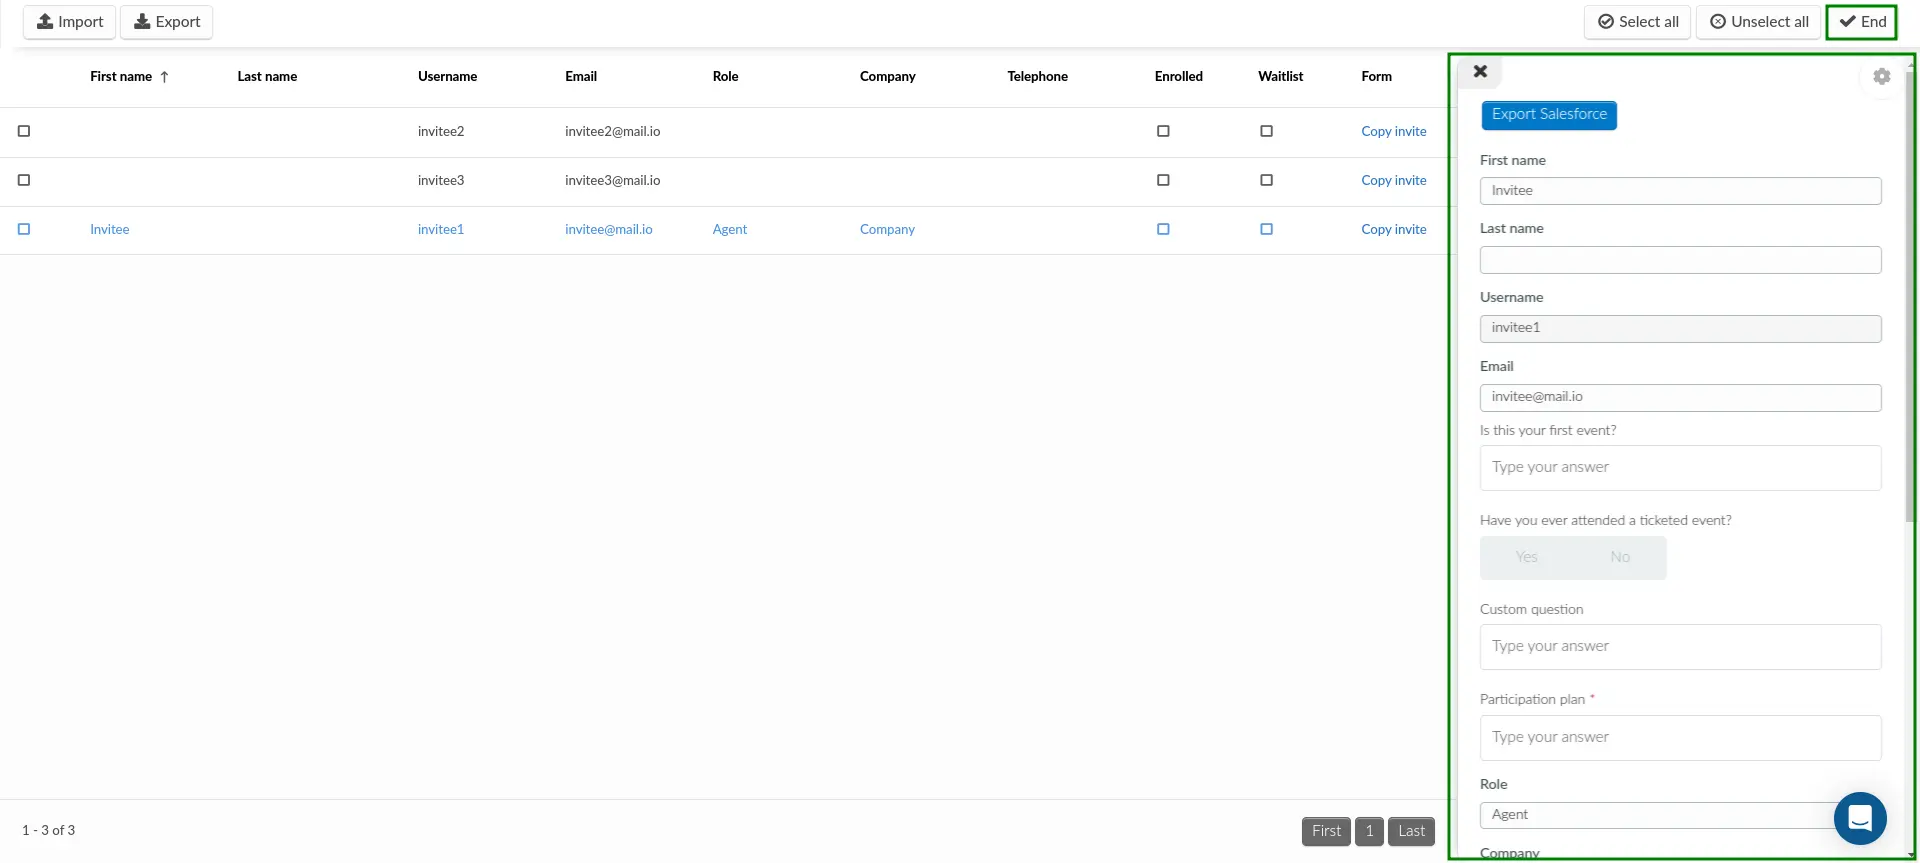
Invitee details can be edited by clicking on Edit within the Invitees page and clicking on the entry of the invitee whose details you want to modify. The invitee details window will appear on the right side, in which you can make the necessary modifications. Once you are finished, click on End to save the changes.
Removing invitees
Event organizers can remove invitees directly from the Invitees page. To do so, click on Edit and check the boxes next to the target invitees. Then, click on Remove. In the Remove selected confirmation pop-up window, click on Remove.

Bulk invitee operation
Event organizers can run bulk operations to efficiently and quickly manage more than one invitees. To do so, click on Edit, and check the boxes corresponding to the target attendees. Then, the Bulk edit window will appear on the right side, which contains the following actions.
- Add to list: You can add the invitees to an existing List that you have created. Click on the drop-down menu to select the List into which the invitees will be added. A pop-up window will be displayed to confirm that you have moved your invitees to the selected list.
- Add to: You can move invitees into the event's attendee list. Click on the drop-down menu to select Attendees. A popup will appear to confirm that you have moved your invitees to the attendee list.
- Update field: You can bulk update any of the invitee fields: First Name, Last name, Role, Company, Telephone, Email, and Assistant email, as well as any existing custom field.
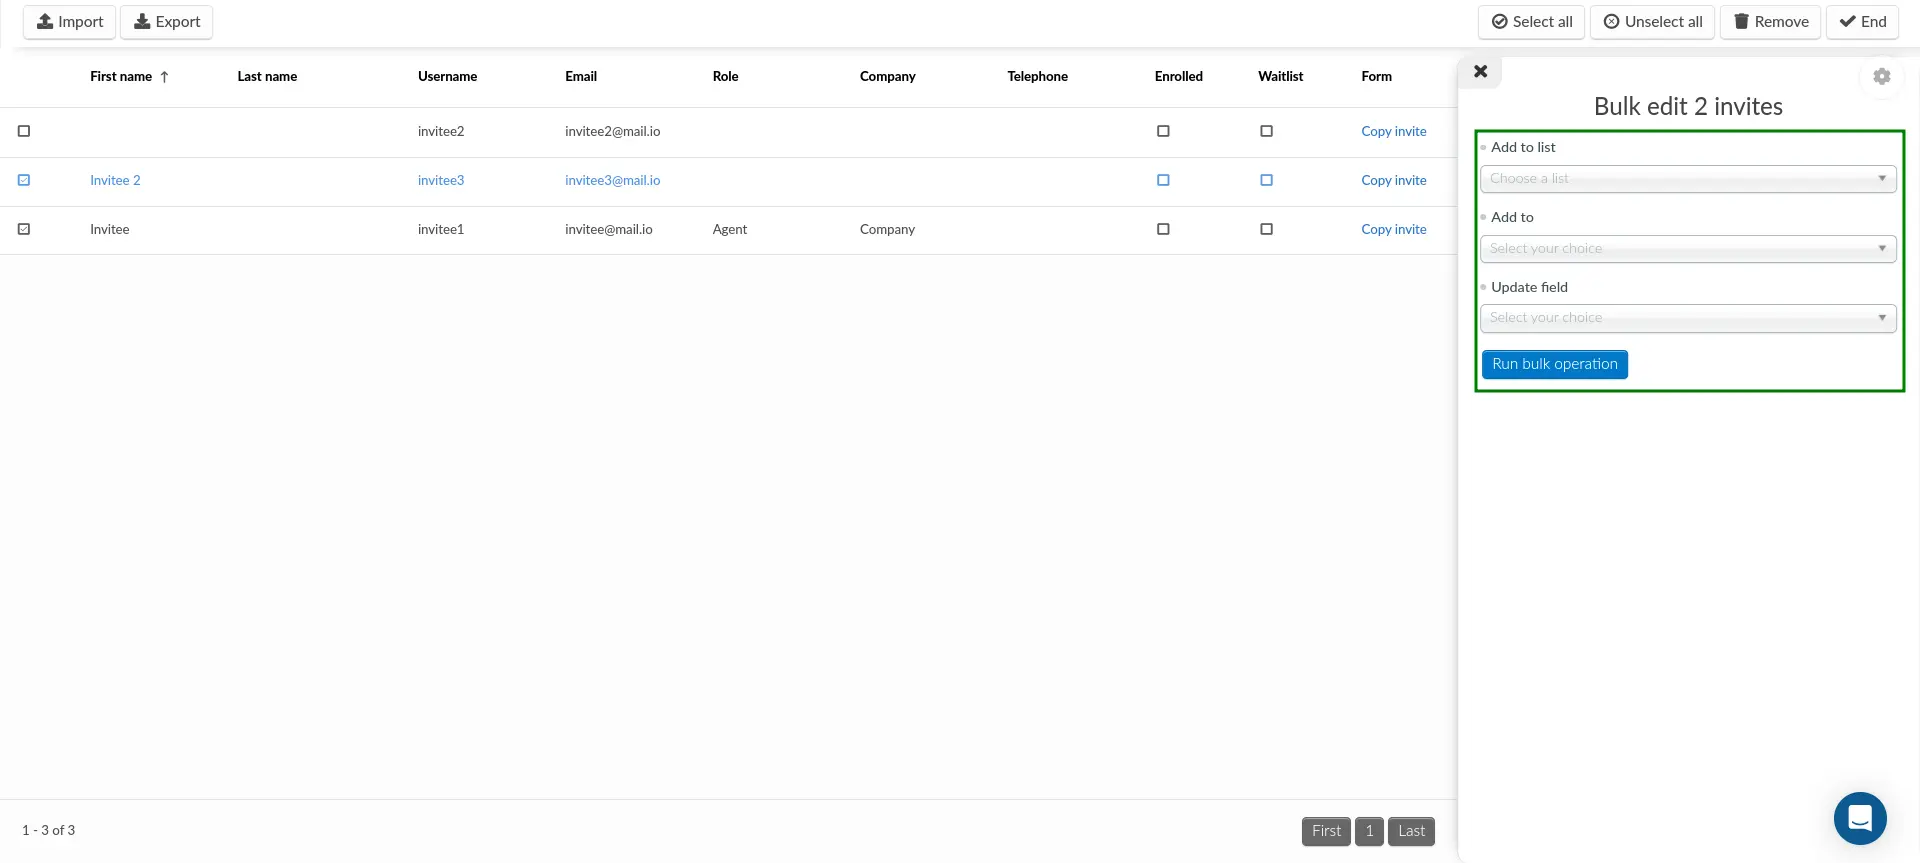
After selecting one or more of the above operations, click on the Run bulk operation button. Click on End to finish editing.
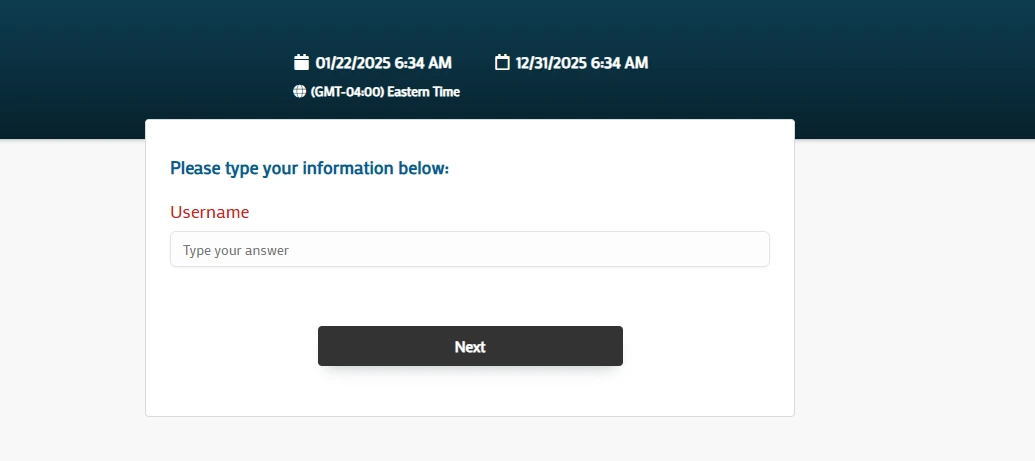
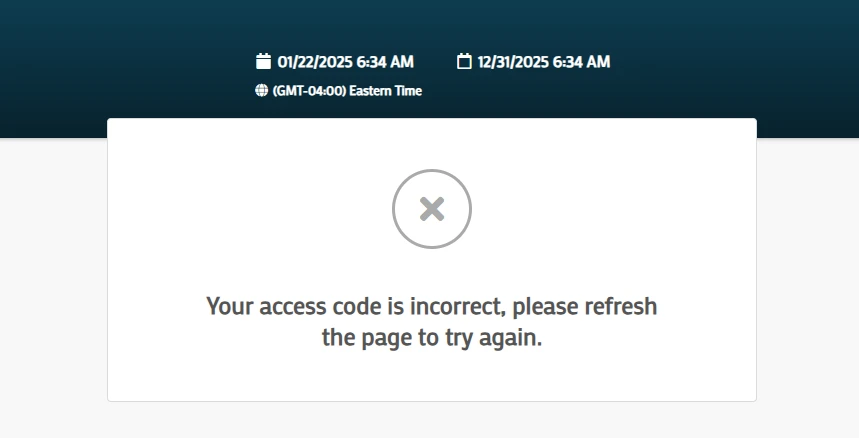
Filling the Invite form
To access the Invite form, users must enter the same username that was used to register them on the Invitees page.
Once the correct username is entered, the Registration form will open for them to complete their registration.
Filtering and searching for invitees
Event organizers can conveniently filter for invitees using the available filters listed below.
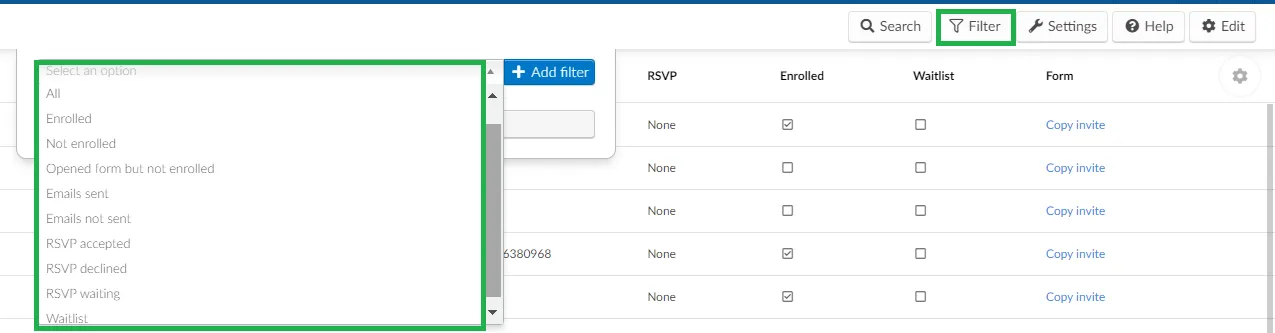
The options for the filter are:
- All: It will display everyone listed as an Invitee;
- Enrolled: It shows which invitee is already enrolled, therefore they will also be listed as Attendees;
- Not enrolled: It indicates if the Invitee is not yet enrolled in the event;
- Opened form but not enrolled: If the Waitlist and Approval requirements are enabled, even if the Invitee has answered the form it still needs to be approved by the admin.
- Emails sent: It indicates which Invitee has received an automatic email.
- Emails not sent: It will filter whoever did not receive an automatic email from the platform.
- RSVP accepted: When RSVP is enabled, it will display whoever clicked on Yes.
- RSVP declined: When RSVP is enabled, it will display whoever clicked on No.
- RSVP waiting: If RSVP is disabled, even if the invitee enrolls it can still display RSVP waiting until the admin confirms manually.
- Waitlist: It displays whoever is part of the Waitlist regardless the status (approved or rejected)
In addition, event organizers can also click on the Search button and enter the desired search terms, such as name, to locate specific attendees. Click on the blue Search button to run the search.

Sending event invitations to invitees
For more information on sending out event invitations to invitees, refer to our article on sending invitations.
Extracting invitee report
Event organizers can extract an event's invitee reports directly from the Invitees page by clicking on Edit > Export and selecting Spreadsheet as the data destination.
You can choose or combine from the available Automated report options or create a Custom report with your desired information. Additionally, you can also set up recurring reports to automatically receive updated reports in your e-mail inbox.
Automated report
Automated reports are reports that have been tailored by InEvent and contains invitee information based on the available categories, in addition to general invitee information, such as personal details, social media details, user tags, and status at the event. To extract an Automated report, follow the steps below:
Event organizers can extract their event's attendee report by following the steps described below.
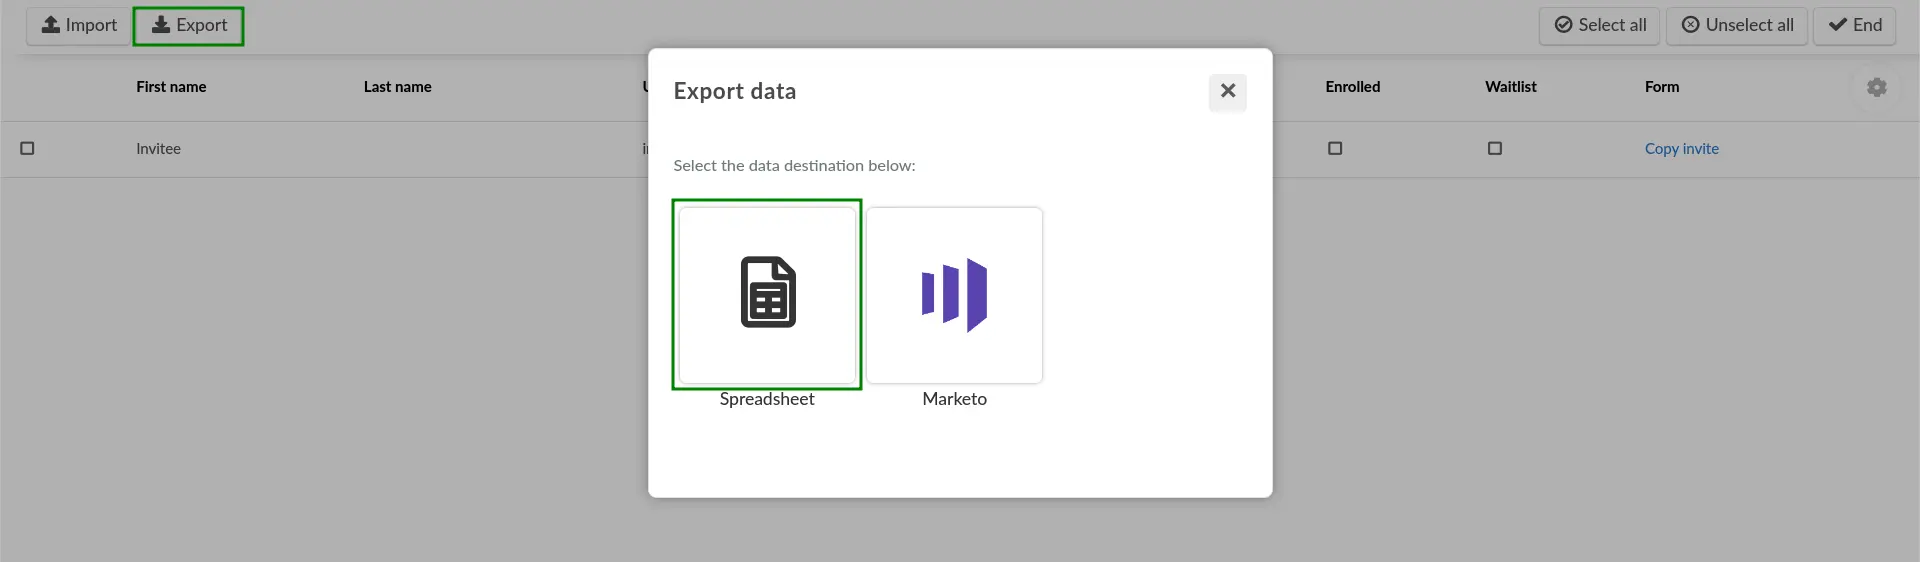
- Click Edit > Export on the Invitees page. The Export data pop-up box will be displayed.
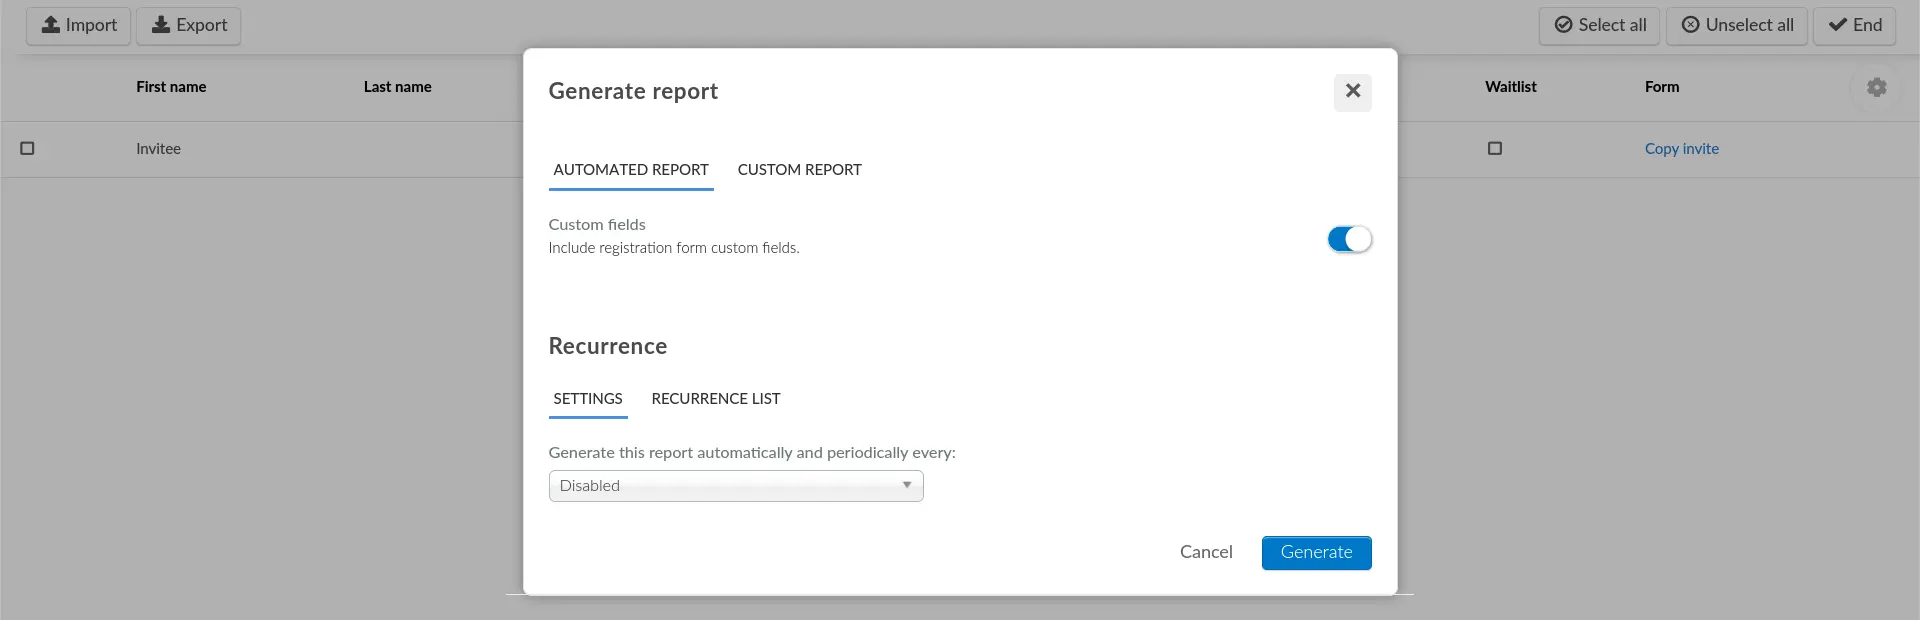
- Click on Spreadsheet. The Generate report pop-up box will be displayed.
- Select the Automated report you wish to extract. The available Automated report is Custom fields, which contains custom fields with answers that have been defined by event administrators.
- Click on the Generate button. A blue notification banner will be displayed at the top of the page. Once the spreadsheet is processed, it will be sent to your e-mail.
Custom report
By extracting a Custom report, you can choose the information to be included in the report as needed. To extract an Custom report, follow the steps below:
- Click Edit > Export on the Invitees page. The Export data pop-up box will be displayed.
- Click on Spreadsheet. The Generate report pop-up box will be displayed.
- Click on the Custom report tab.
- Click on Add columns and select the category of information you want to generate a report of. The available categories are as follows:
- Standard fields: This category contains invitees' standard fields, such as personal information, business information, social media information, QR code, and magic link.
- Custom fields: This category contains custom questions that have been added to your registration form.
- Check the box(es) next to the information you want to generate a report of. The column will automatically be added to the report preview.
- Click on the Generate button. A blue notification banner will be displayed at the top of the page. Once the spreadsheet is processed, it will be sent to your e-mail.
After completing the steps above, you will find your Custom report showing only the columns you selected.
Recurring reports
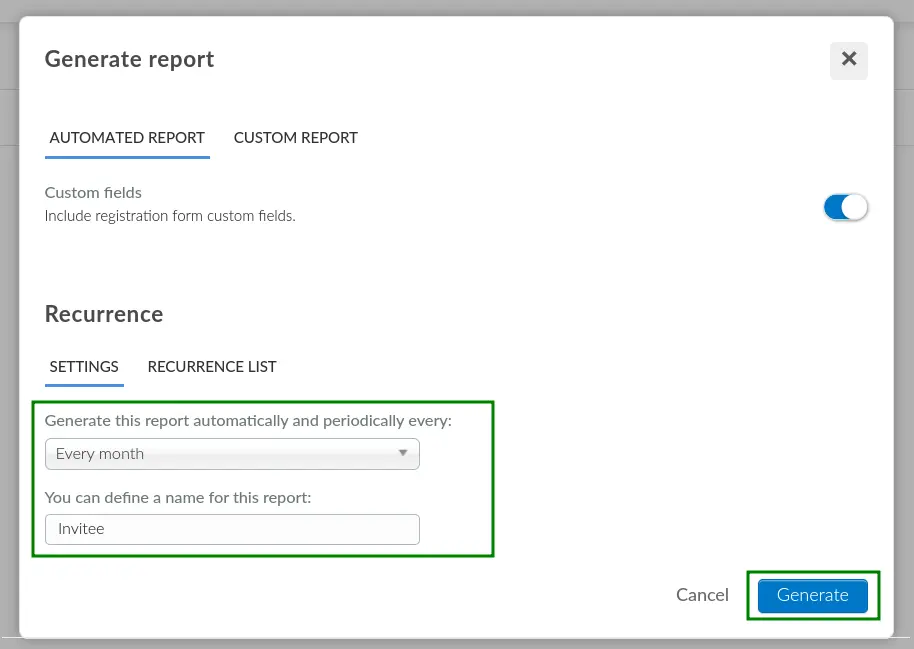
You can set up Recurring reports to automatically receive updated reports in your e-mail inbox following a defined frequency. To set up Recurring reports, follow the steps provided below.
- Click on Edit > Export on the Invitees page. The Export data pop-up box will be displayed.
- Click on Spreadsheet. The Generate report pop-up box will be displayed.
- Select whether you want to generate a recurring Automated report or Custom report.
- Select your preferred report generation frequency using the provided drop-down menu. The available options are Every 12 hours, Every day, Every week, Every month, and Custom.
- Define a name for the recurring report.
- Click Done to save your changes.
After finishing the steps described above, the recurring report will be created and sent to your e-mail in accordance to the defined schedule.
Editing recurring reports
Event organizers can edit and modify the name and schedule of the recurring reports. To do so, follow the steps provided below:
- Click on Edit > Export.
- Select Spreadsheet as data destination.
- Select RECURRENCE LIST within the Settings pop-up box.
- Click on the orange edit icon next to the target recurrence report.
- Modify the Report name and Recurrence as needed.
- Click on the blue save button to save your changes,
After completing the steps above, the recurring report details will be modified.
Deleting recurring reports
To stop the recurring report generation, event organizers can remove the target recurring report configuration. To do so, follow the steps described below.
- Click on Edit > Export.
- Select Spreadsheet as data destination.
- Select RECURRENCE LIST within the Settings pop-up box.
- Click on the red trash can icon next to the target recurrence report. The Remove report reminder pop-up box will be displayed.
- Enter REMOVE REPORT in the confirmation text field.
- Click on Remove to delete your report.
After completing the steps above, the recurring report will no longer be generated, and you will stop receiving the generated report spreadsheets in your e-mail inbox.