Sponsors and Exhibitors: People, Invite, Files, Ads, Tickets and Chats
 Updated 2 weeks ago
by
Lorenzo
Updated 2 weeks ago
by
Lorenzo
You can create dedicated virtual rooms for each Sponsor or Exhibitor supporting your event. Using the InEvent Virtual Lobby, sponsors and exhibitors can engage and network with attendees on 1-1 and group meetings; increasing brand awareness, building relationships, and expanding their reach in their target audience. Between branded covers, ads, files, and engaging features, sponsors and exhibitors have plenty of options to get the most out of their investment.
To learn more about how to add sponsors to your event and how to create sponsor booths, refer to the Sponsors article, and to learn about how to add exhibitors and create exhibitors booths in your event, refer to the Exhibitors article.
Purpose of these tabs

People (representatives)
It allows each person added to join the Sponsor or Exhibitor virtual room with Presenter abilities.
Besides having Presenter abilities, people added to the People tab are sponsor/exhibitor representatives as they will be able to edit the Sponsor or Exhibitor profile and allocate Sponsor or Exhibitor tickets.
To add someone to the People tab, follow these steps:
- Click on Event > Sponsors or Event > Exhibitors depending on who you wish to add a rep .
- Select a sponsor.
- Press the People > +Add person.
- Search for and select a person from the search box or click the Create new person button to add a new rep.
Sponsor and Exhibitor accounts
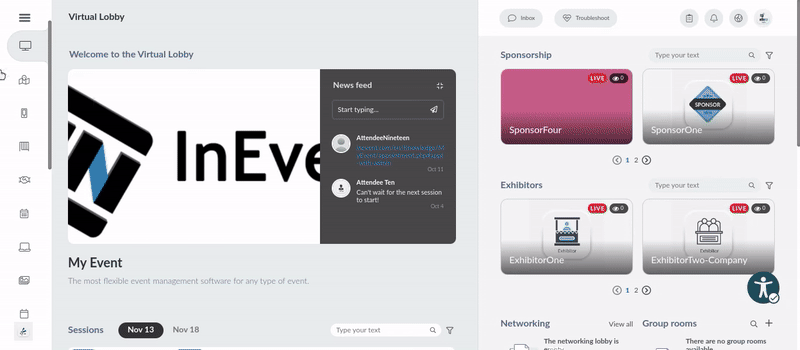
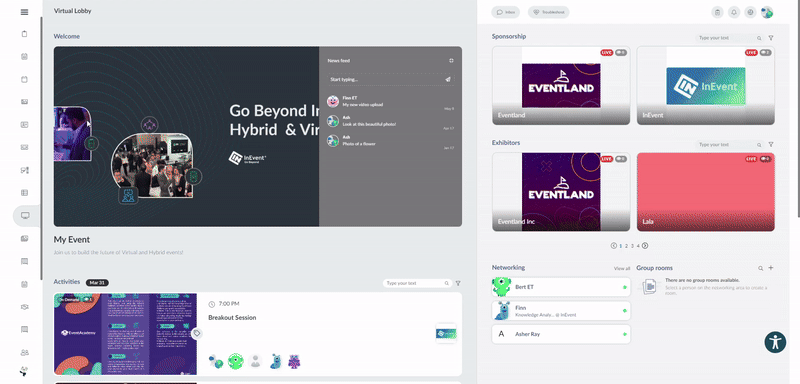
When individuals listed in the Sponsor or Exhibitor's People tab access the Virtual Lobby, they'll find a dedicated Sponsor or Exhibitor account tab, depending on their listing.
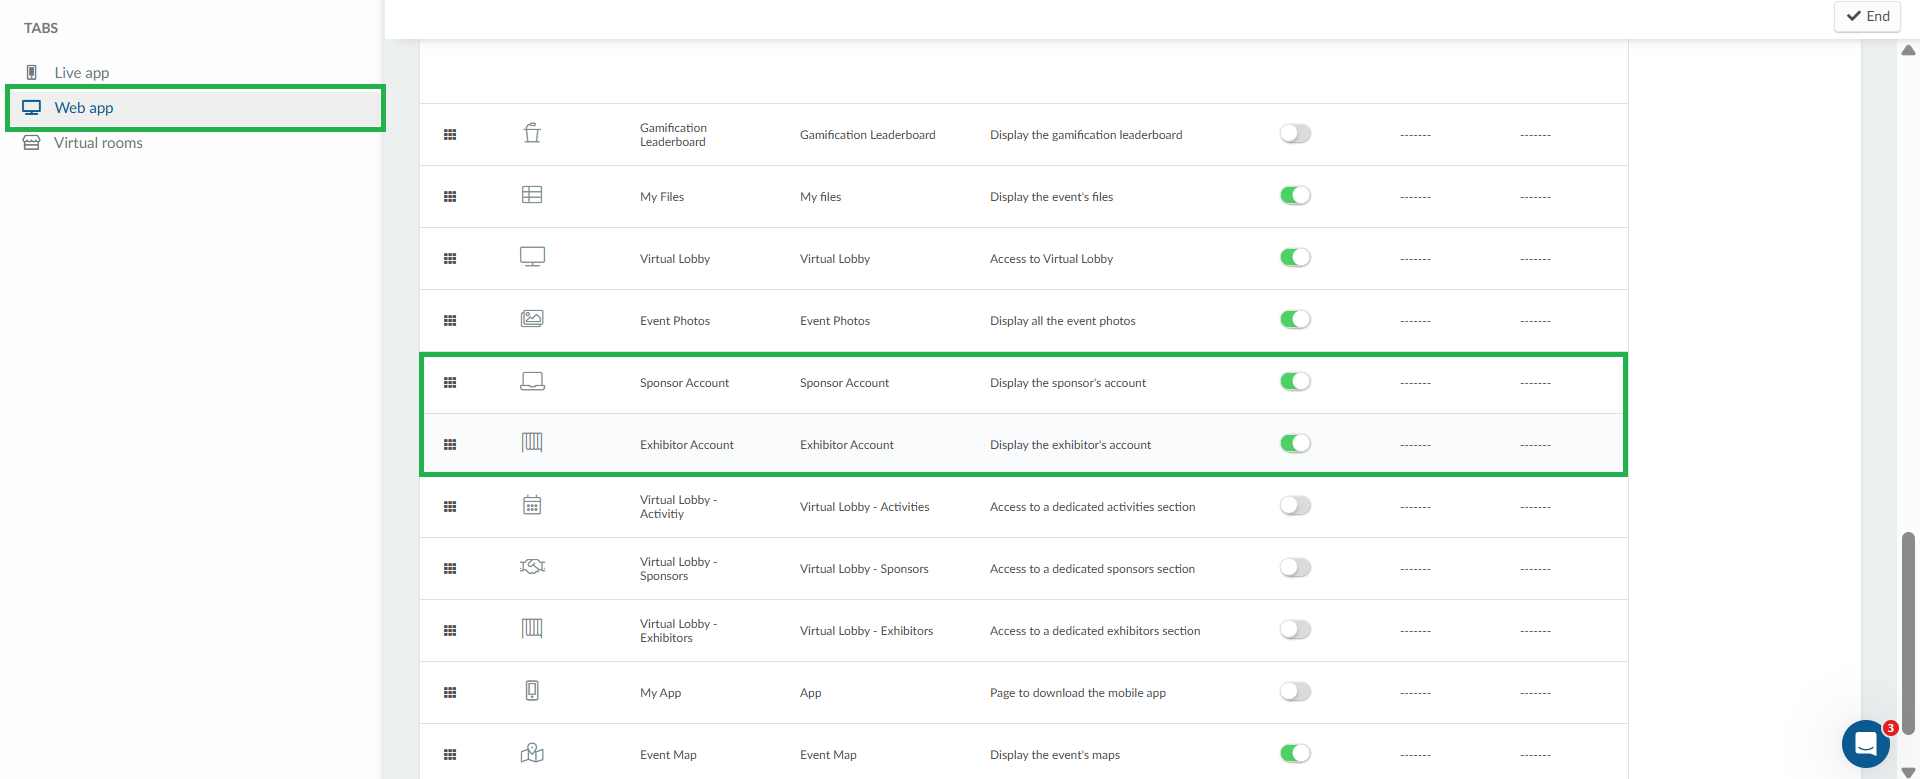
While people listed beneath sponsors and exhibitors (representatives) can view this page, they must first enable it from Settings > Tab > Web app by clicking on Edit and ticking the corresponding box:
On this page, they can easily edit information such as company name, telephone, mini-bio, tags, logo, virtual room cover, etc. by clicking on the Edit button. They can also download the QR code for their booth by clicking the Download button in the Company QR code field. Additionally, right beside the Edit button, they'll find an Open Virtual Room button. Clicking this will automatically redirect them to the Sponsor or Exhibitor's virtual booth.
Below is a gif showing how to navigate to the Sponsor account tab in the Virtual Lobby:
Below is a gif showing how to navigate to the Exhibitor account tab in the Virtual Lobby:
It also allows for a feature to be enabled called Data collector (this is an Add-on feature therefore not available in all packages). To learn more about the Data collector, refer to the Lead Retrieval: Data Collector for sponsors and exhibitors article.
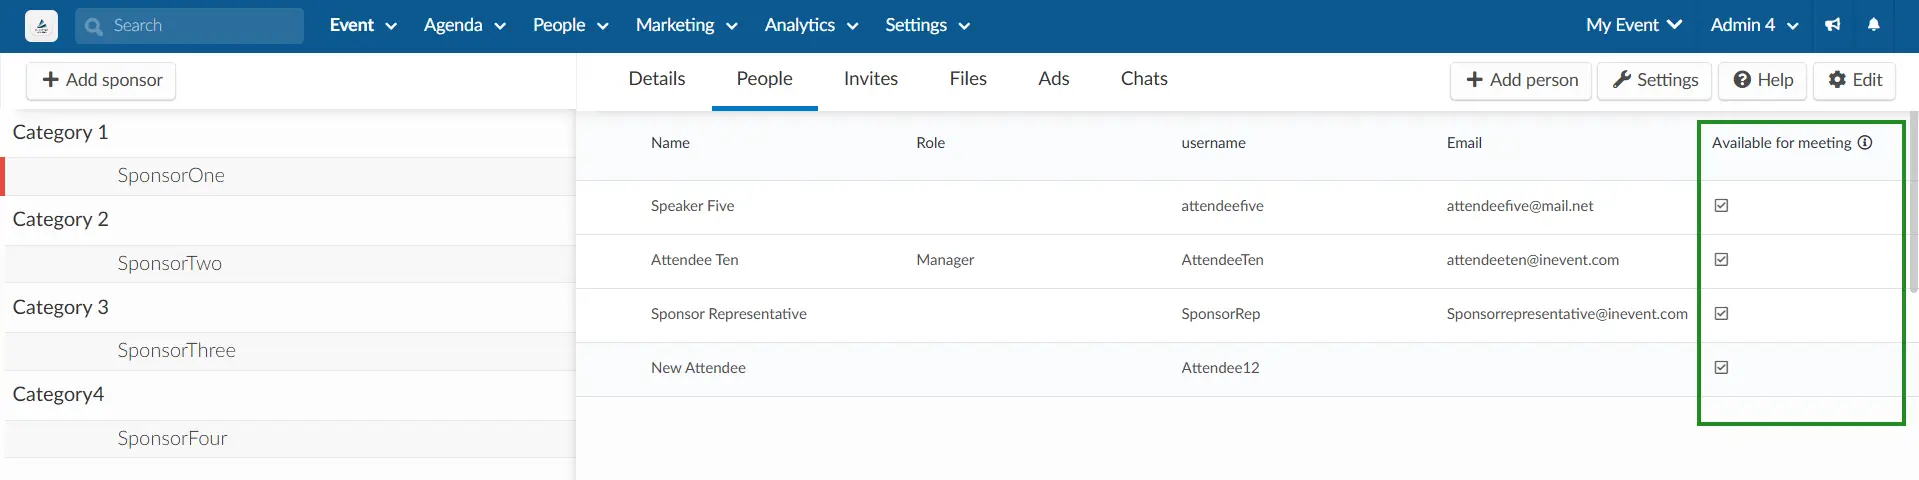
Sponsors and Exhibitor representatives availability
Another way to engage with people who join the Sponsor or Exhibitor rooms is to make the Sponsor and Exhibitor reps available for meetings. After following the steps to add a person in the People's tab, simply click on Edit and tick the corresponding case as shown below:
When making the Sponsor and Exhibitor reps available for meetings, their profile pictures will be displayed on the Sponsors and Exhibitors' room page (similar to the Presenters' display in the activities):
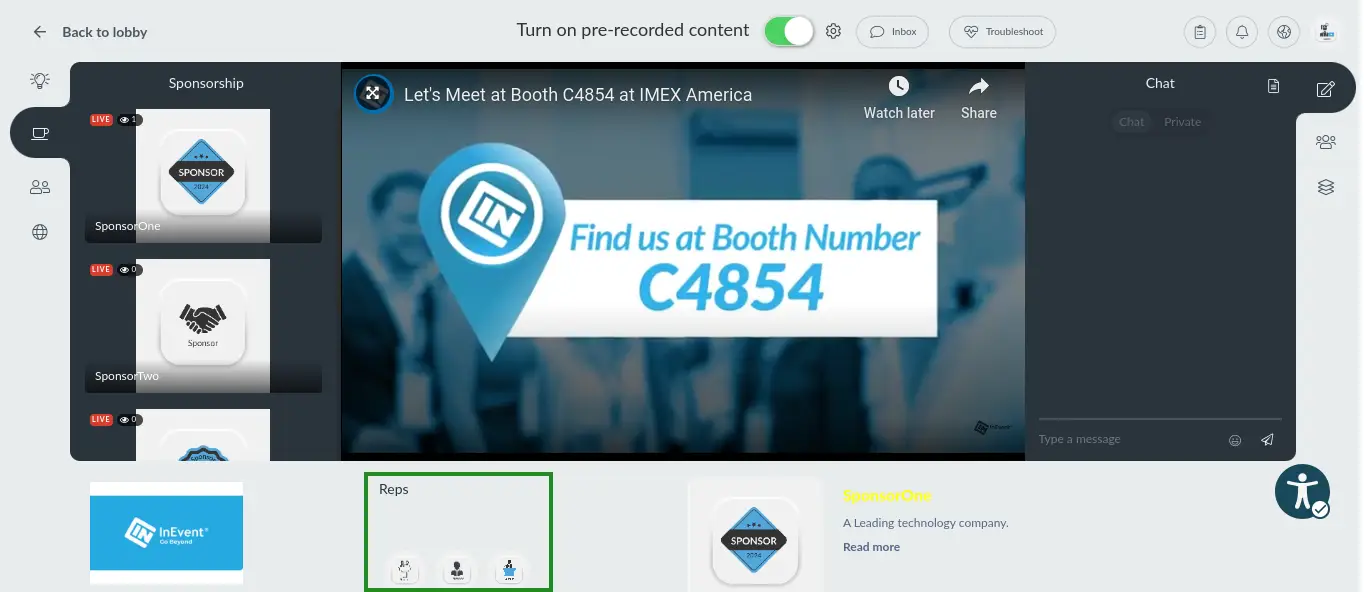
The participants can hover over the Sponsor and Exhibitor representative profile and network, either by message or call:
To learn more about Meetings, refer to the Meetings: guide for participants article.
Download a report of your Sponsor and Exhibitor reps
To download a report of your sponsor and exhibitor reps, go to the either the Sponsor or Exhibitor page, select the sponsor or exhibitor, click on the People tab, press Edit and click on the Report people button. A spreadsheet report will be processed and sent to your email shortly.
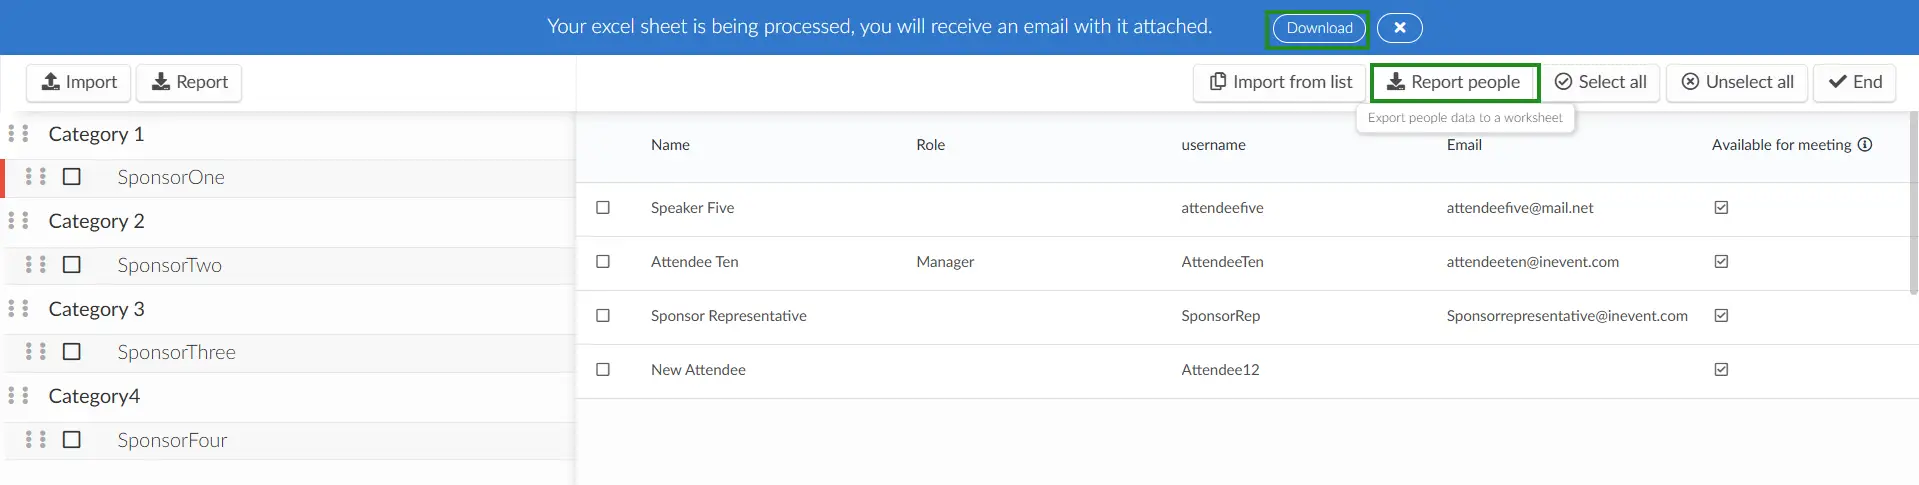
The report will contain information such as the event ID, sponsor ID, person ID, name, firstName, last name username, email, role, telephone, etc.
Invites
This feature allows for a push notification to be sent to a person when their invitee has entered the event and printed their badge. Refer to the Allow for a push notification when my invitees enter the event article for further information about Invites.
Downloading the invites' report
To download a report of your sponsor or exhibitor invites, go to the either the Sponsor or Exhibitor page, select the sponsor or exhibitor, click on the Invites tab, press Edit and click on the Report invites button. A spreadsheet report will be processed and sent to your email shortly.
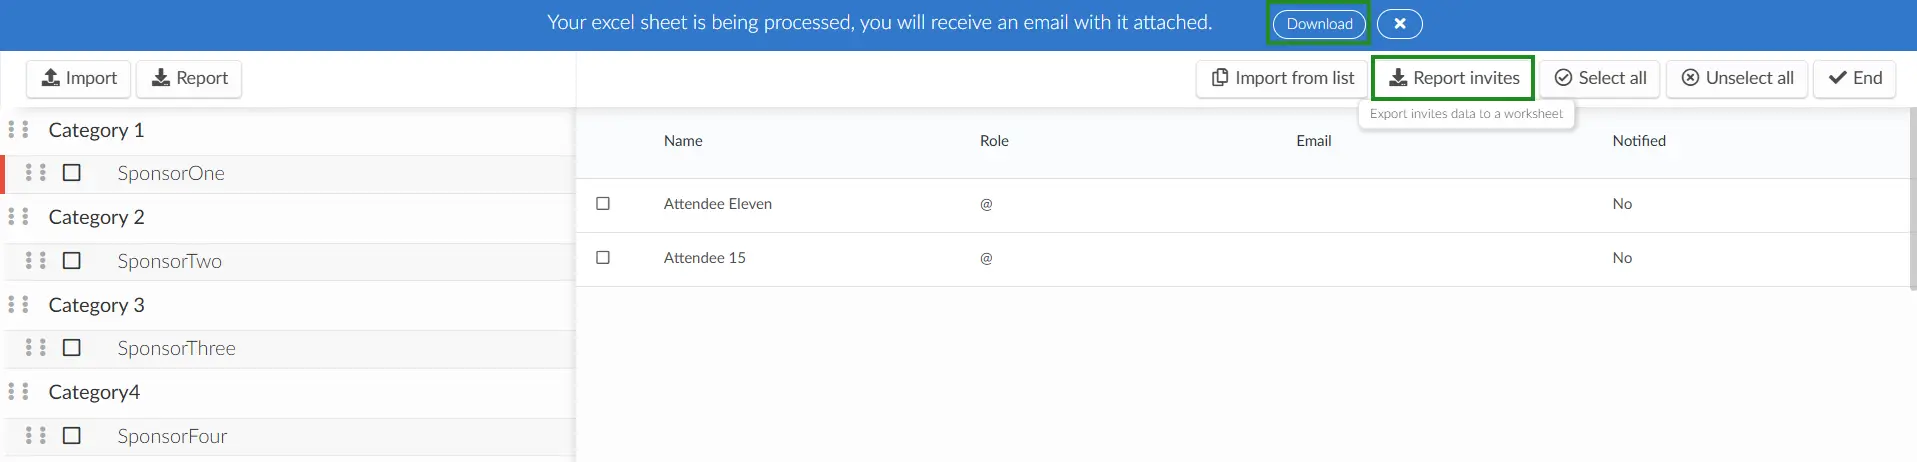
The report gives a general report of the invites such as, eventID, sponsorID, facebookID, linkedInID, username, email, twitterID, email, telephone, personId, name, firstName, lastName, role, company, enrollmentDate and updateDate (date and time the user checked into the event), etc.
Ads
To create an ad for your Sponsors click on Event > Sponsors, select a sponsor > press Ads > + New ad. Follow this same process to create ads for your Exhibitors under Event > Exhibitors.
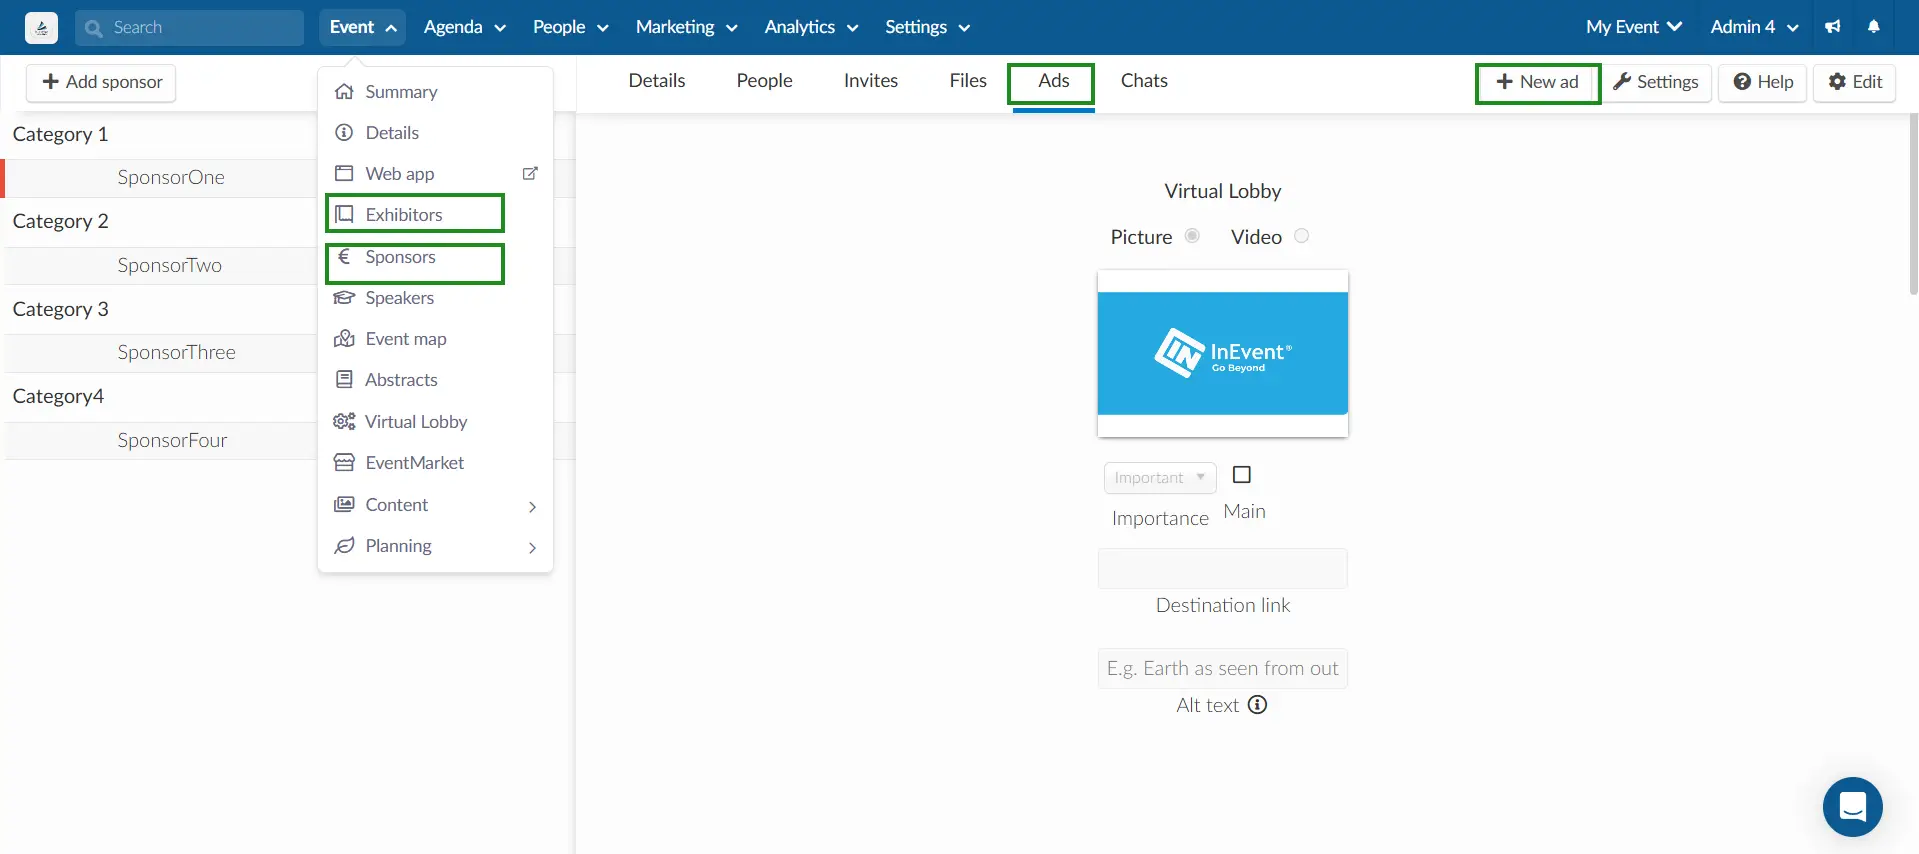
Next, you should select if you'd like to create an ad for the Event App or for the Virtual Lobby and press Create.

If you wish to have more information related to the Sponsor or Exhibitor advertisements, check out the How to create sponsor and exhibitor advertisements for the app & Virtual Lobby article.
Files
The Files tab allows you to upload files that will be available in your sponsor and exhibitor booths.
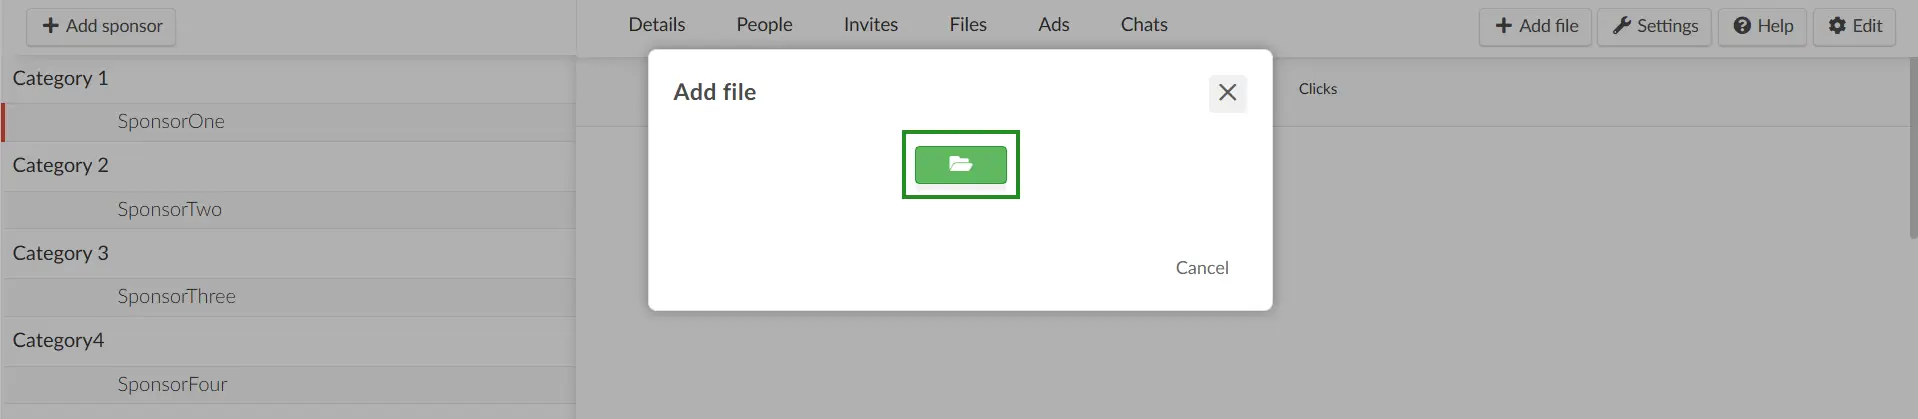
To add a file, select a sponsor or an exhibitor on the left and then press +Add file.

After that, click on the green button to choose documents from your device to upload.
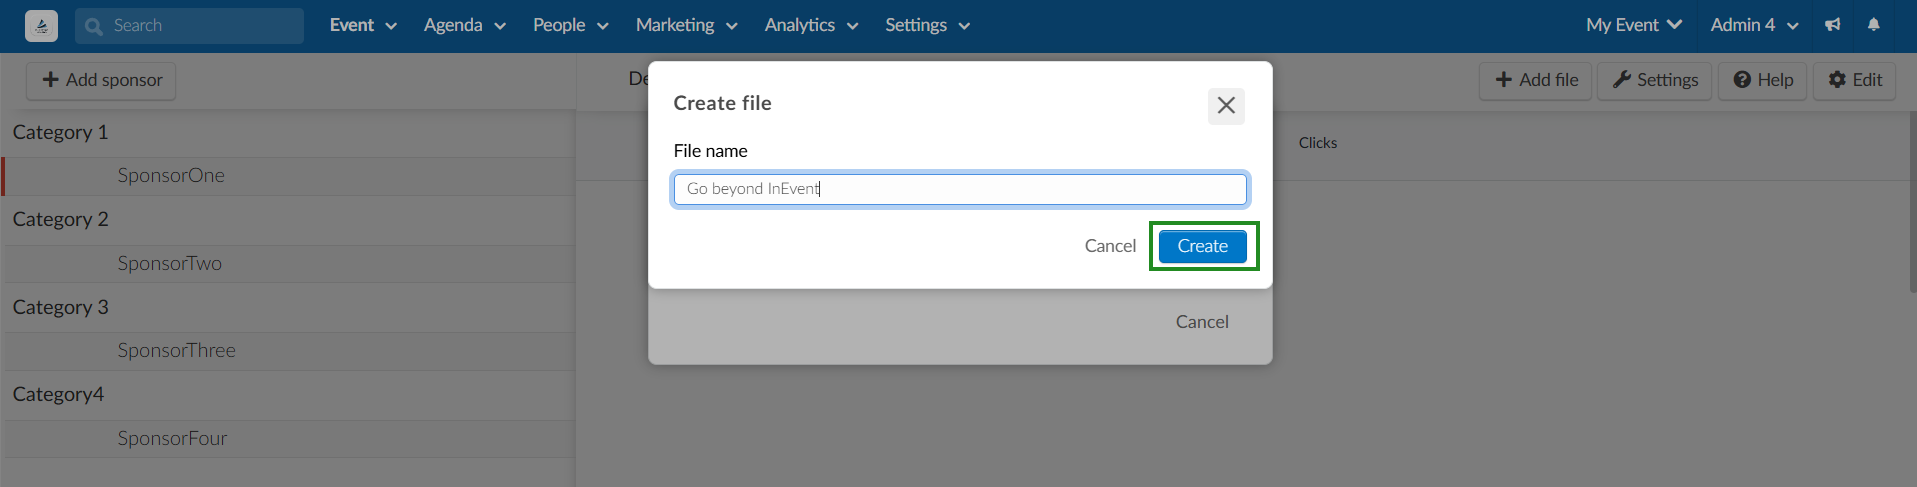
Once you have chosen the files you wish to upload, you will need to fill in the File name and press Create.
That's all! Your files are now visible to the audience!
Reporting clicks on files
As shown in the image above, you will be able to see how many clicks each file got under the column Clicks.
If you wish to know who clicked on each file, you should generate an excel report by clicking Edit in the upper right and pressing Report Files.

When you click the button, a message will appear at the top of the screen, warning you that you will receive the file with the data in your email, when the process is complete.
The report will inform you which participant have clicked on each file and how many times.
To learn more about Files, refer to the Files and documents article.
Tickets
This tab allows you to allocate tickets to your sponsors and exhibitors at no cost. Refer to the How to allocate tickets to my sponsors and exhibitors article for further information.
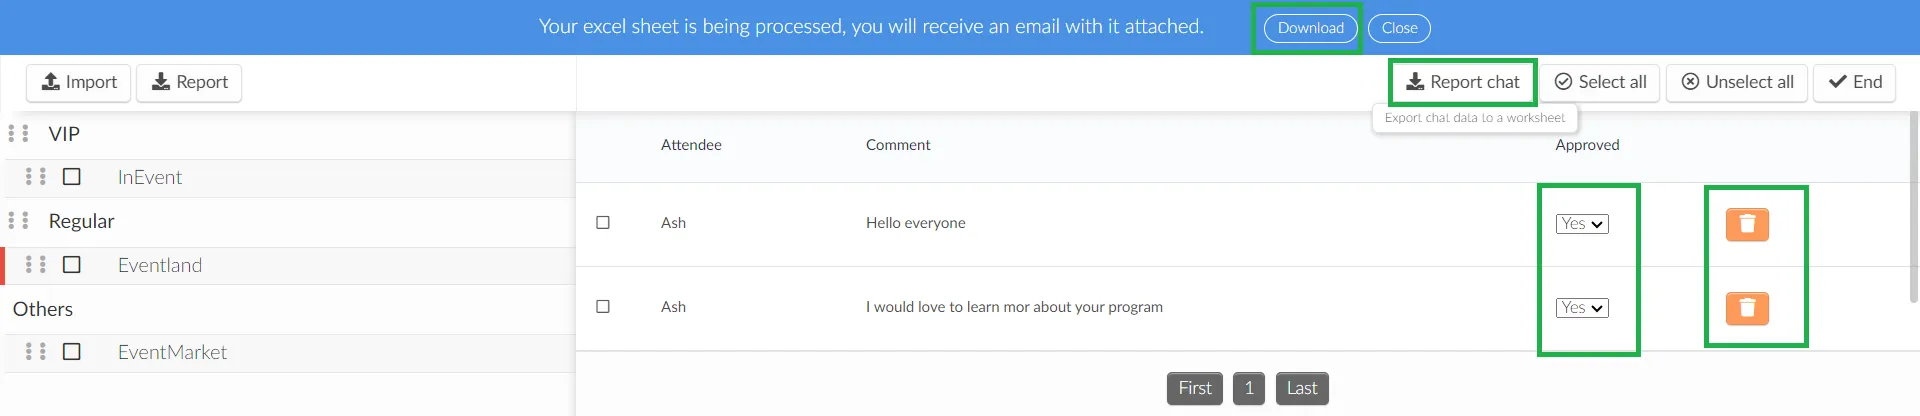
Chats
This tab will allow you to visualize all chat comments from sponsor or exhibitor booths.
Besides visualizing chat comments, you can also:
- Moderate chat comments: Click on the chat comment you would like to moderate, then press Edit on the top right corner. You will be able to approve, reject or even delete a comment. Refer to the Comments: live chat article for further information on that.
- Save chat comments by generating reports: you will be able to save all chat comments by pressing Edit > Report chat. A spreadsheet with all data will be sent to your email.
Sponsor and Exhibitor Guide
If you are sponsoring an event happening on our platform, refer to the User guide for sponsors and exhibitors article to help you understand what you are going to be able to do and how you can manage your own information within InEvent.