Tabs
You can customize the tabs of your event by altering the name, icon and order of presentation on the Virtual Lobby and mobile app. You can also create a custom tab, to add any additional content you wish to your event.
Customizing tabs
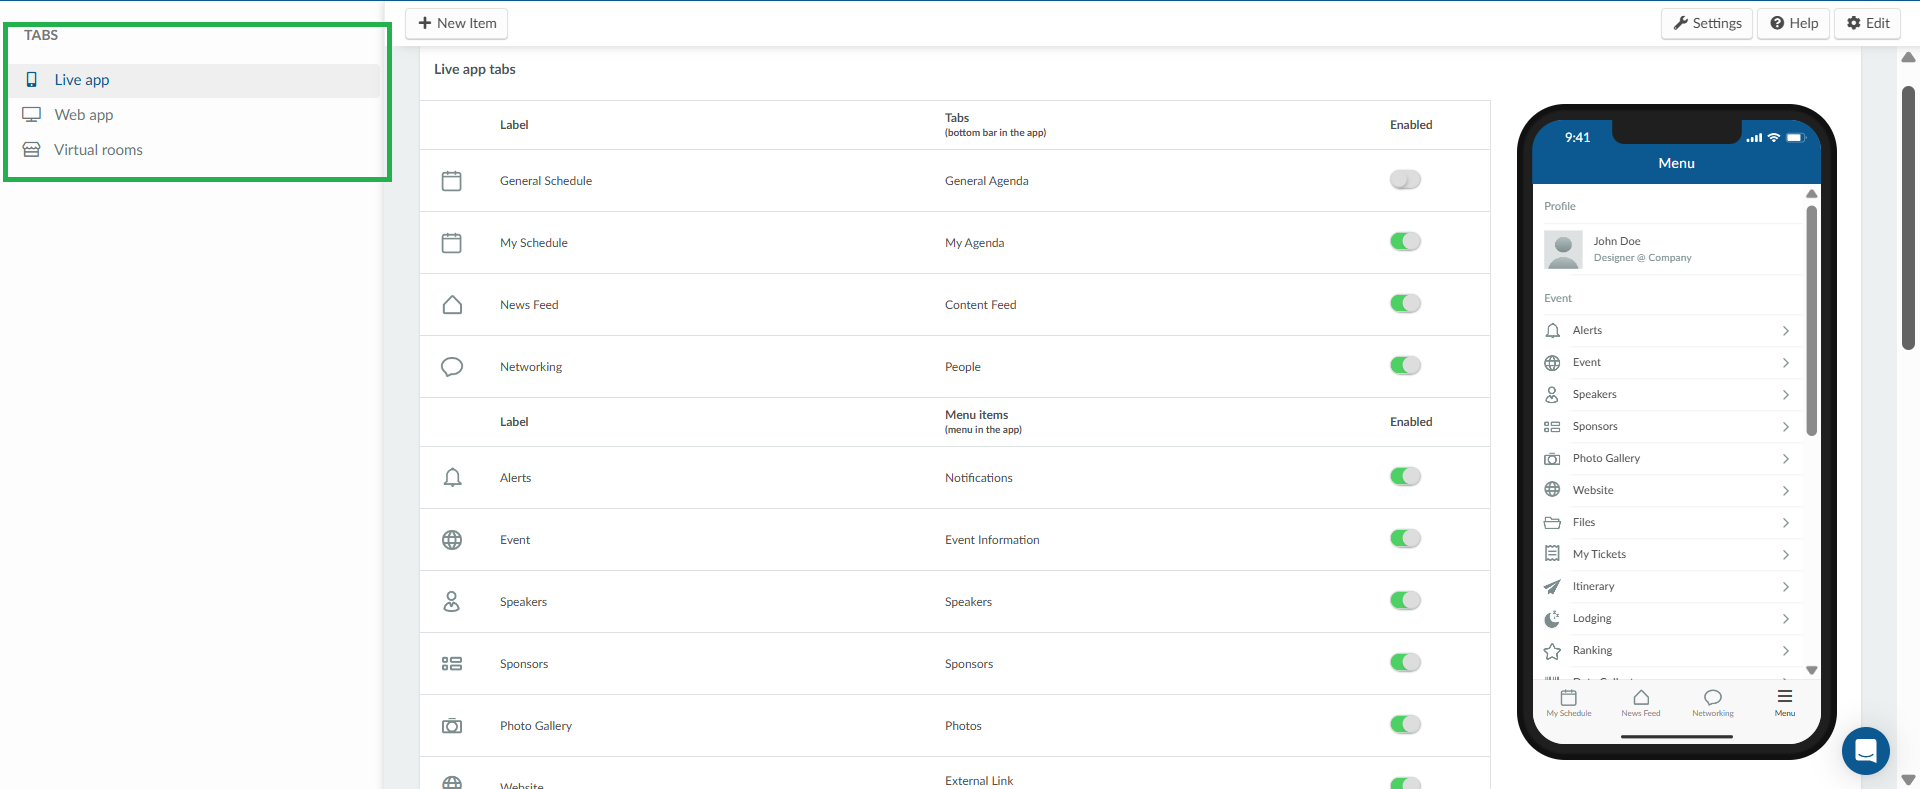
To customize and create tabs, navigate to Settings > Tabs. From the left menu, choose whether you want to manage tabs for the Live App, Web App, or Virtual Rooms.
Live App
In the Live App (mobile application) settings, you can customize the app's layout and preview changes in real time using the live mobile app simulator.
The first four tabs will appear on the bottom bar and in the Menu section (as shown in the image below). Additionally, you can adjust tab visibility, customize icons and labels, and add new customized tabs.
Web app
If you select Web app, you will see the default tabs that are displayed on the Web app's main page. You can define their visibility, change their icons, label, and if a new item is created, you can add an URL and also embed it (depending on the website's restriction).
Your new tab will appear in the menu on the left-hand side (outlined in the image below) when you are using the Neo layout. And on the top of the screen if you are using the Classic layout.

Virtual Rooms
By navigating to Settings > Tabs and selecting Virtual Rooms and clicking on Edit, you will have the option to:
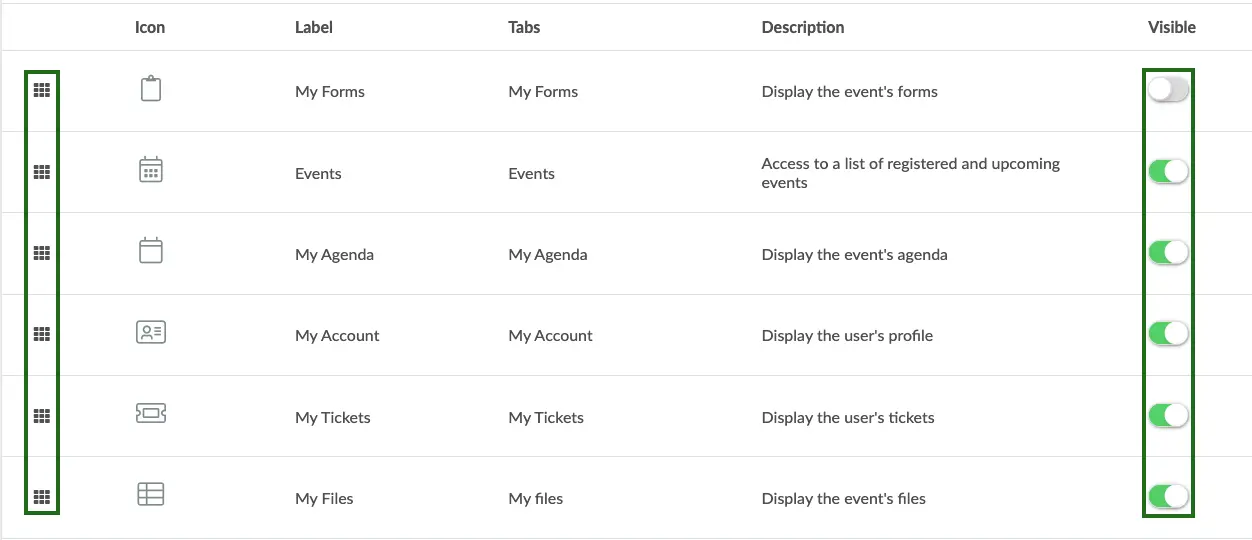
- Rename and change the icons of the tabs that appear while inside activities by clicking on the tab and making the changes in the window that appears on the right.


- You can also disable any or all tabs in all activities at once by turning off the Visible switch corresponding to the tab you want to disable as shown below:

Creating tabs
To create tabs, you will need to select either Live App or Web app. The Virtual Rooms option will only allow you to customize the tabs that already exist.
There are four types of tabs you can choose from when creating a tab:
- Custom tabs
- Website sections
- Appointment page
- Web app page
Custom tabs
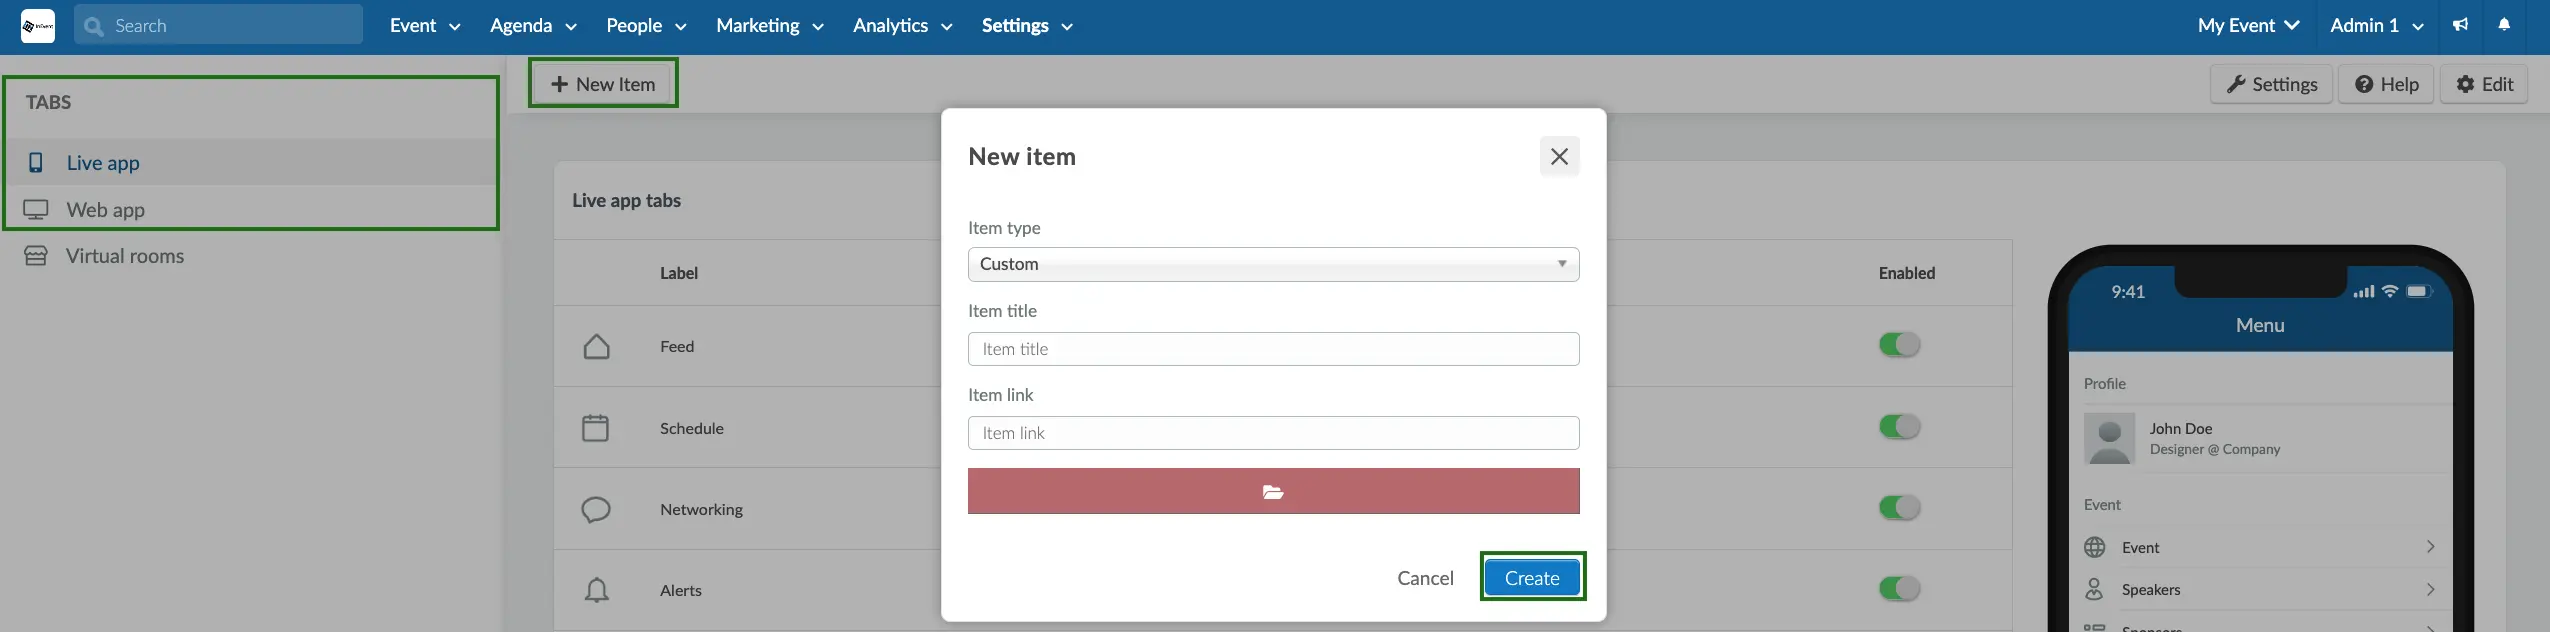
To create custom tabs, follow the steps below:
- Select Live app or Web app from the menu on top.
- Click on + New item. The New item pop-up box will appear.
- Enter your Item title and Item link to the corresponding fields. Alternatively, you can also upload your own file using the red folder button.
- Press Create to finish creating your custom tab.
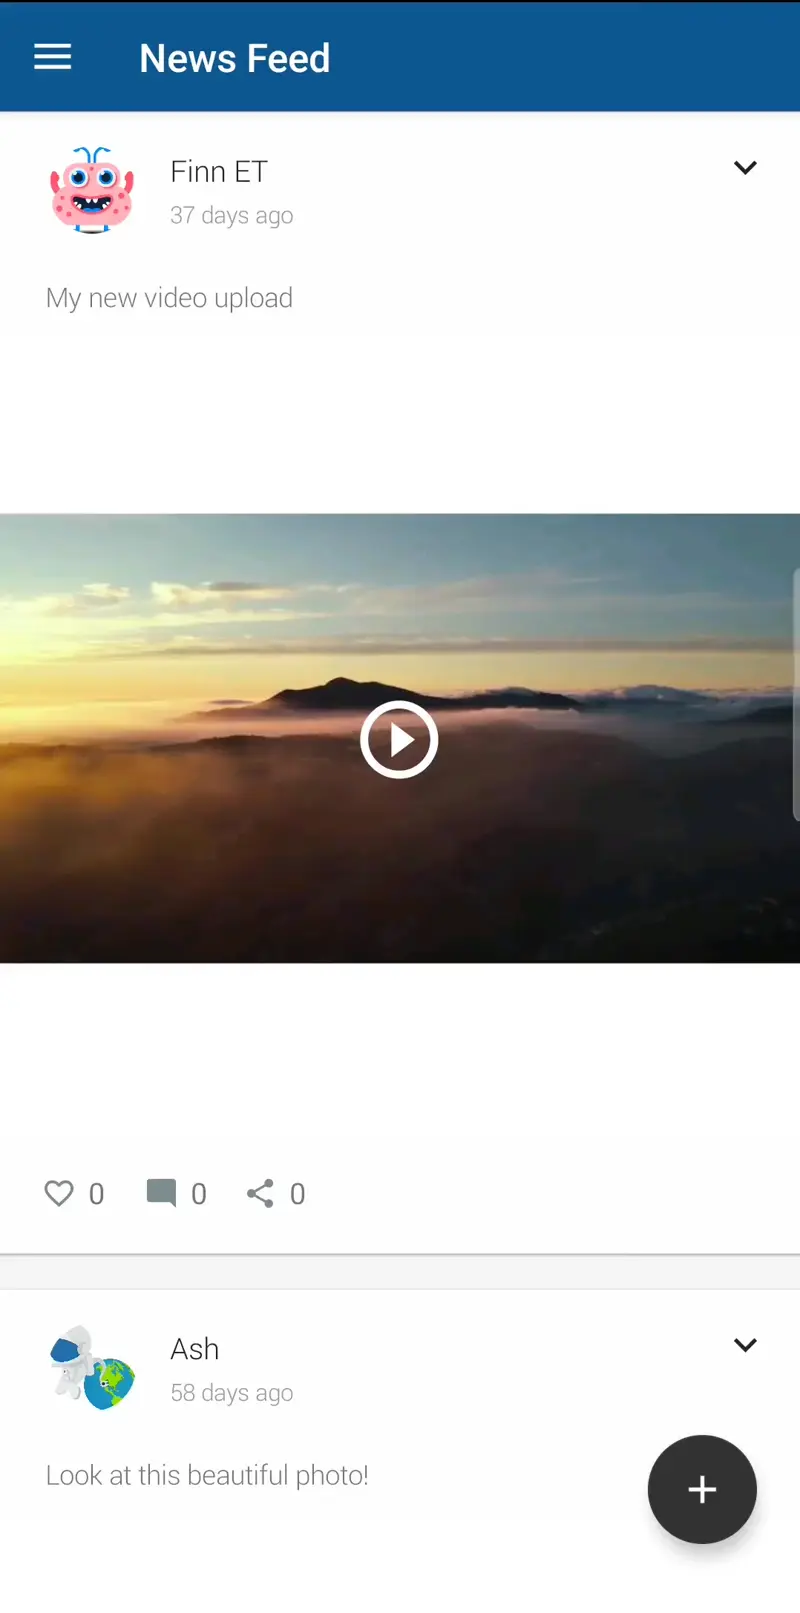
Custom tabs in the mobile app
Custom tabs embedded in the mobile app will be easily identified by a chain link icon beside them when accessed from the Menu section in the mobile app.
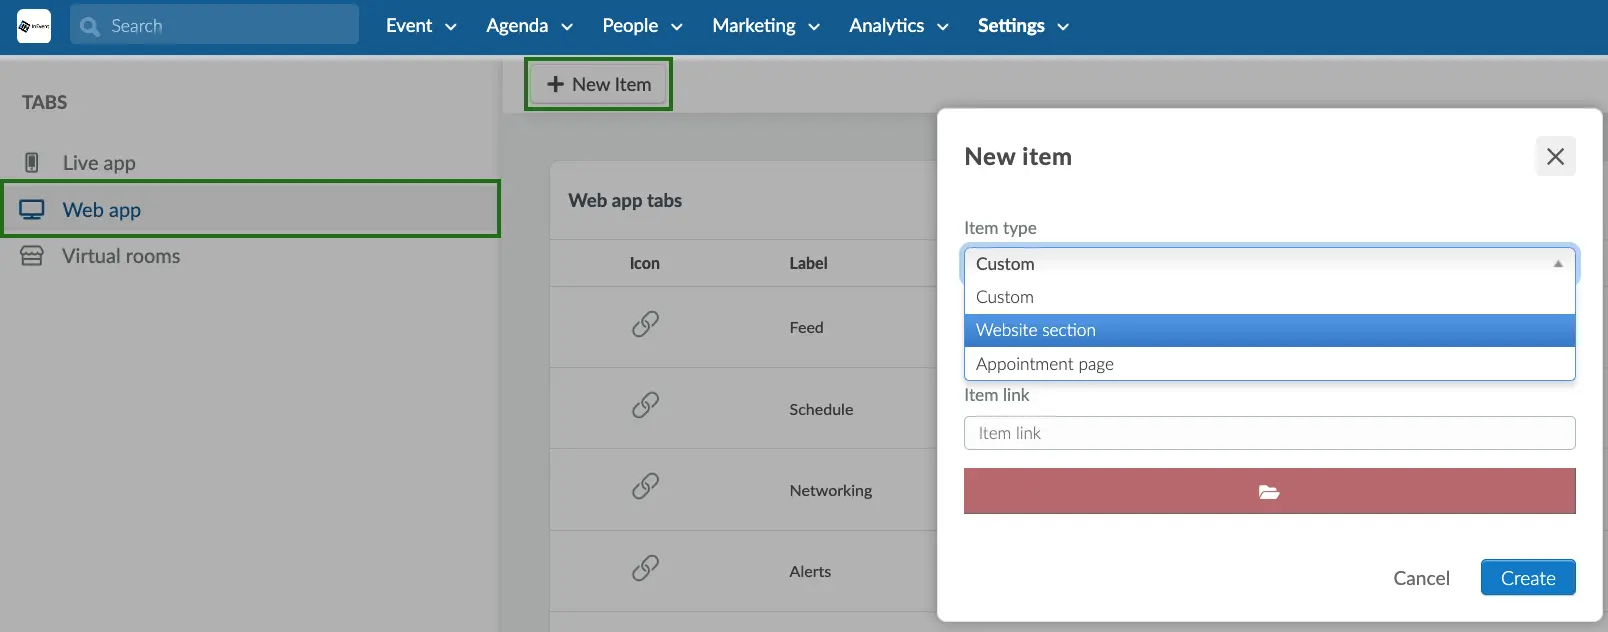
Website sections
Besides the option to create a custom tab, you can also create a tab from the website sections template. To do so, press Web app on the upper left, and click + New Item. A new window will pop up and under Item type you should select Website section.
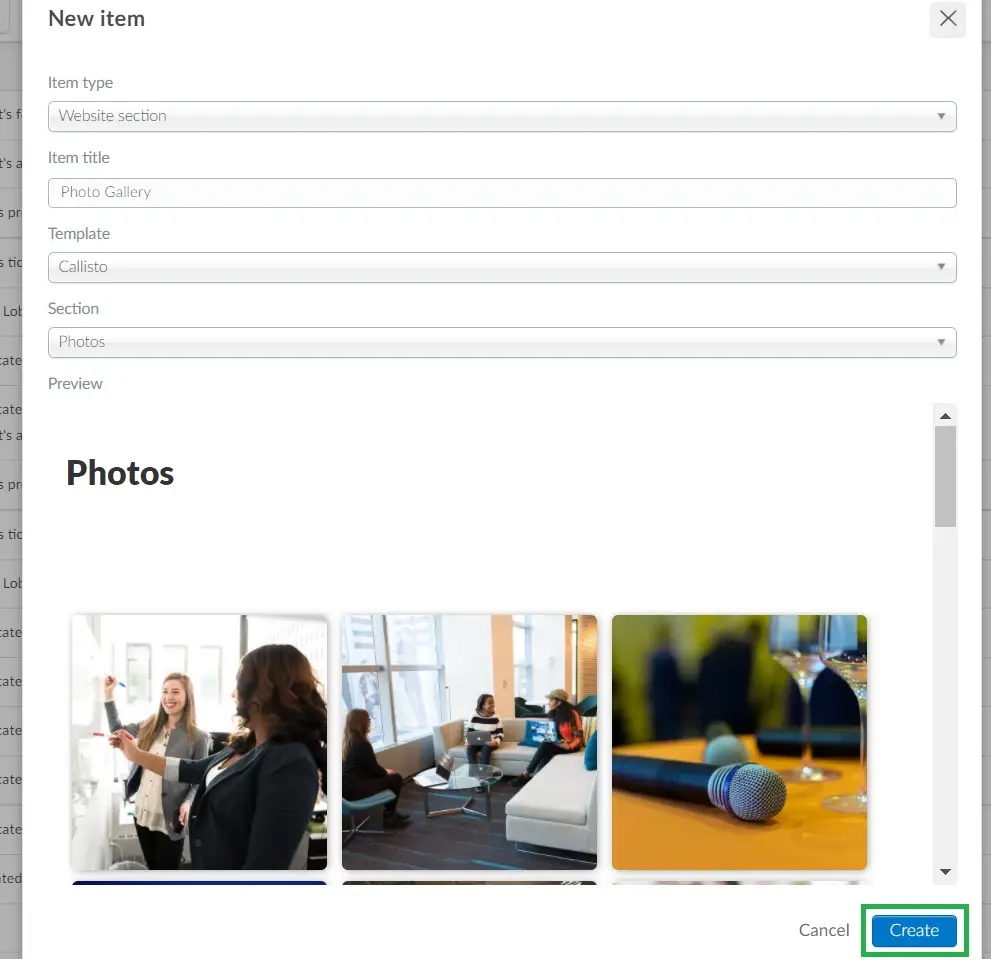
Once you select this option, you will need to set up the items below:
- Item title: you should type in the tab title that should be displayed on the Virtual Lobby menu
- Template: you will have a list of website template options for you to choose from on the dropdown bar. The template will determine your tab's layout. You can see what the tab is going to look like under Preview.
- Section: you will have a list of website sections options for you to choose from on the dropdown bar. Refer to the Website article for further information on website sections.
Once you have set it all up, press Create.
Appointment page
The appointment page allows you to create tabs on both the Live app and the Web app. These tabs will take you directly to your appointment page, where you can book appointments.
To create the Appointment page, follow the steps below:
- Select Live app or Web app from the menu on top.
- Click on + New item. The New item pop-up box will appear.
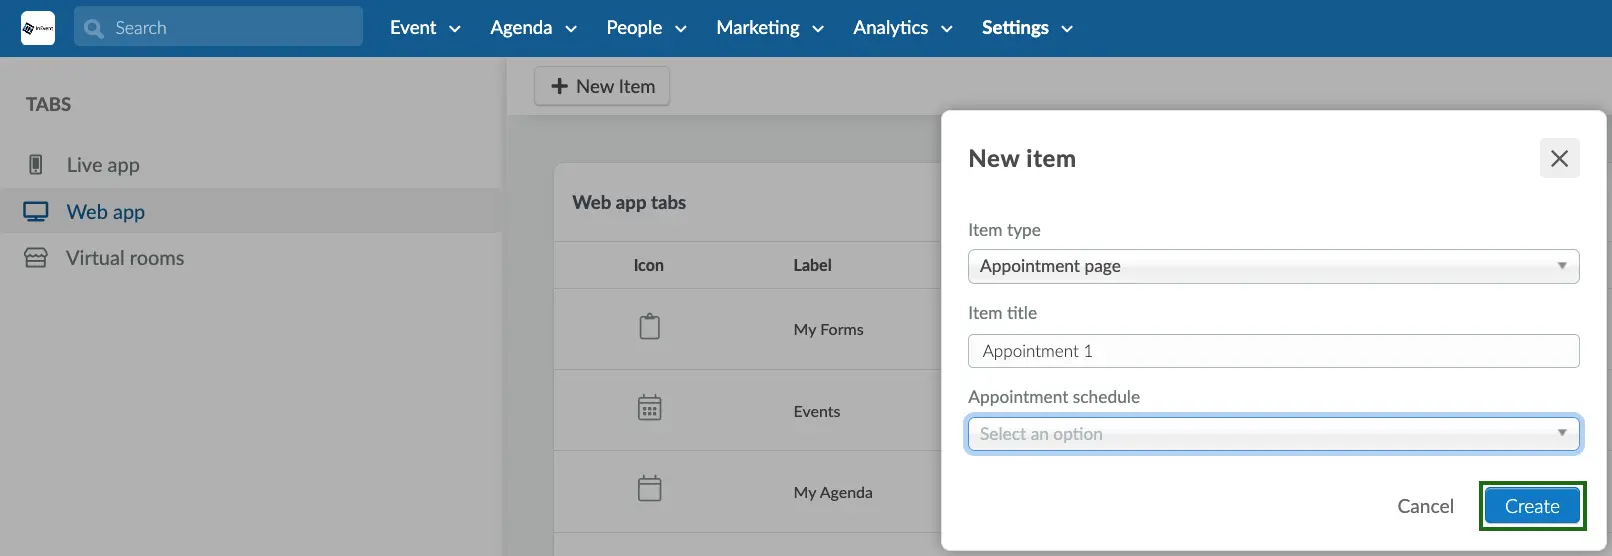
- Select Appointment page from the Item type drop down.
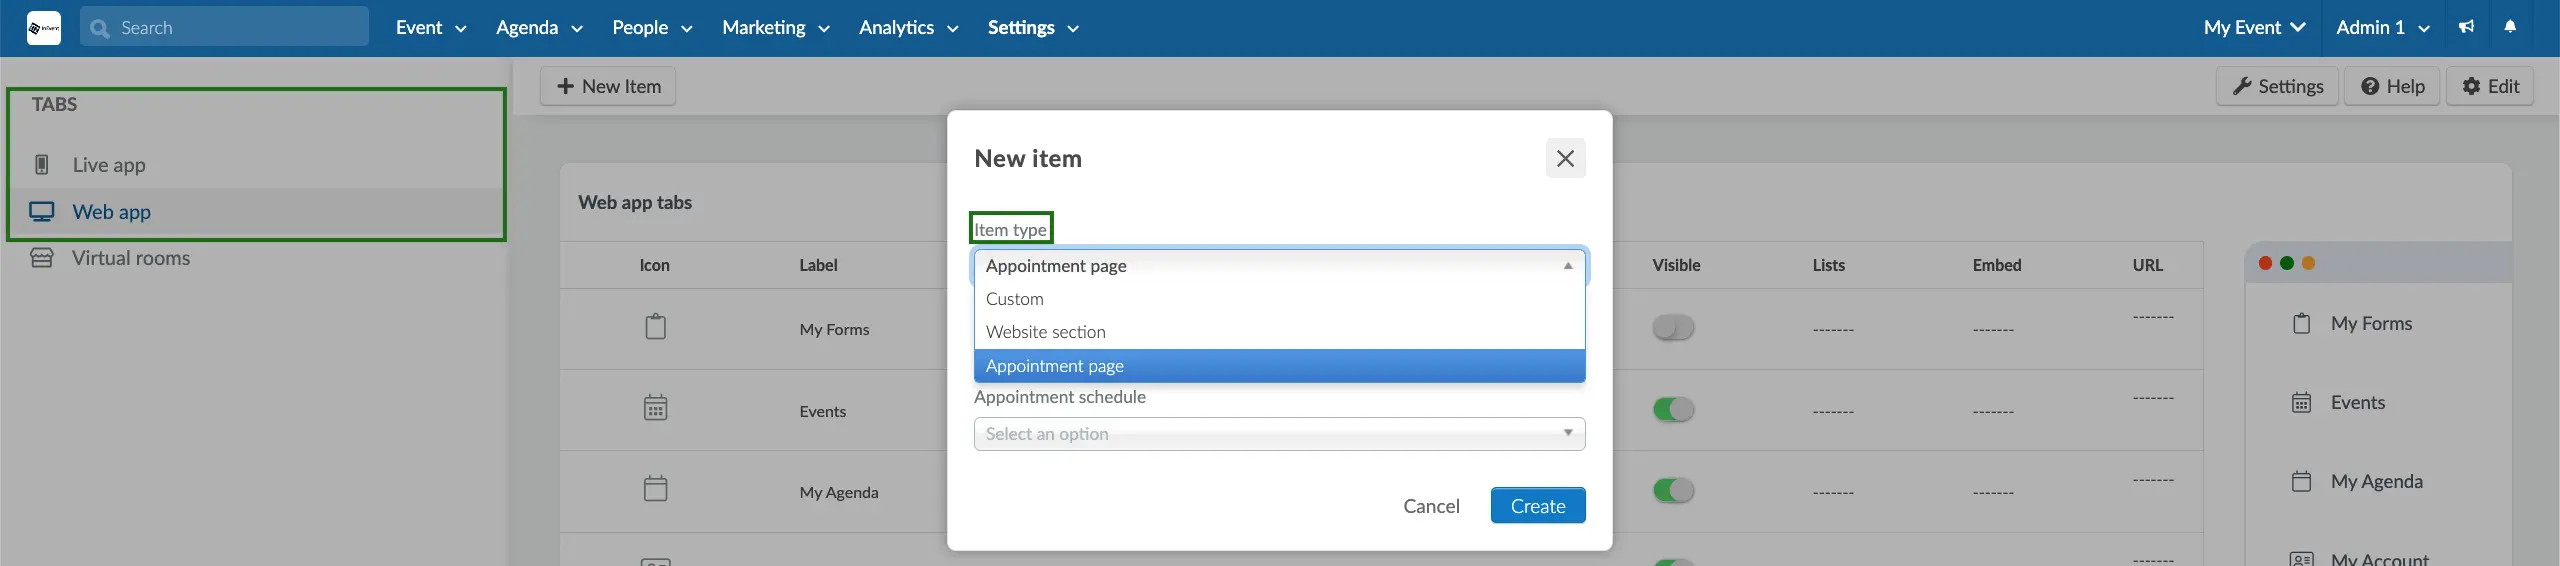
- Enter your Item title and select an Appointment Schedule.
- Press Create to finish creating your appointment tab.
Once you are done setting this up, in the Web app, you will find the Appointment page tab. Clicking on this tab will take you directly to your appointment page, where attendees can book appointments.
Tabs' appearance on the mobile app
You will also be able to see this tab on the Live app as shown below:

Web App page
You can also create tabs from the Web app. This allows you to select and set pages on the web app as tabs in the Live app. The pages you can create as tabs in the Live App are as follows:
- My Events
- My Forms
- My Agenda
- My Account
- My Meetings
- Event Photos
- Abstracts
- Sponsor account
- Exhibitor account
- Card Reader
- Sponsor Favorite
- Gamification Leaderboard
- My Tickets
- My Files
- My App
- Event Map
- Speakers
- Virtual Lobby
- Virtual Lobby-Activities
- Virtual Lobby-Sponsor
- Virtual Lobby-Exhibitor
- Virtual Lobby-Group Rooms
- Virtual Lobby-Speed Networking
- Networking
To create Web page tabs, follow the steps below:
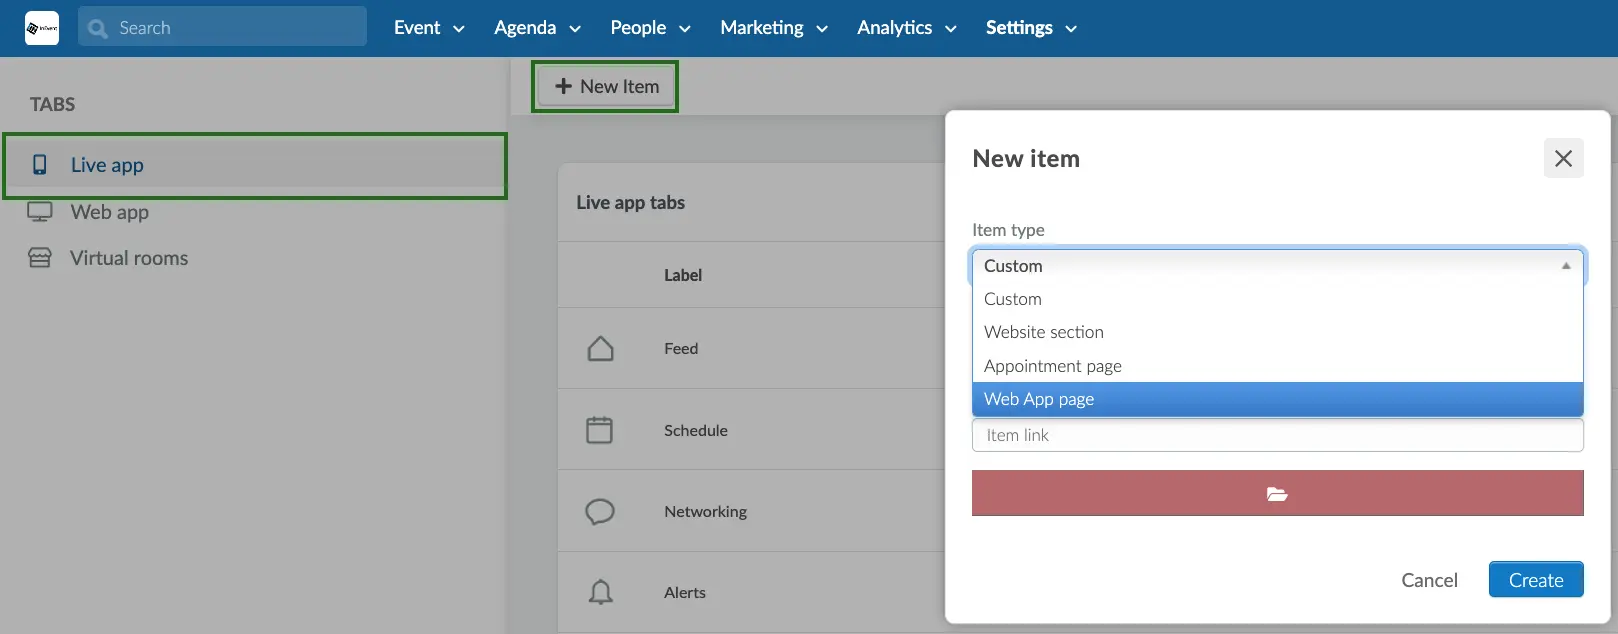
- Select Live app from the top menu.
- Click on + New item. The New item pop-up box will appear.
- Select Web App page from the Item type drop down.
- Enter your Item title and select a Web App page option.
- Press Create to finish creating your Web App page tab
Tabs' appearance on the mobile app
You will also be able to view these tabs on the mobile app. When you click on these tabs in the Live App, you will be taken directly to the web app page you selected.
Editing an existing tab
To edit an existing tab, you need to click the Edit button in the top right corner.
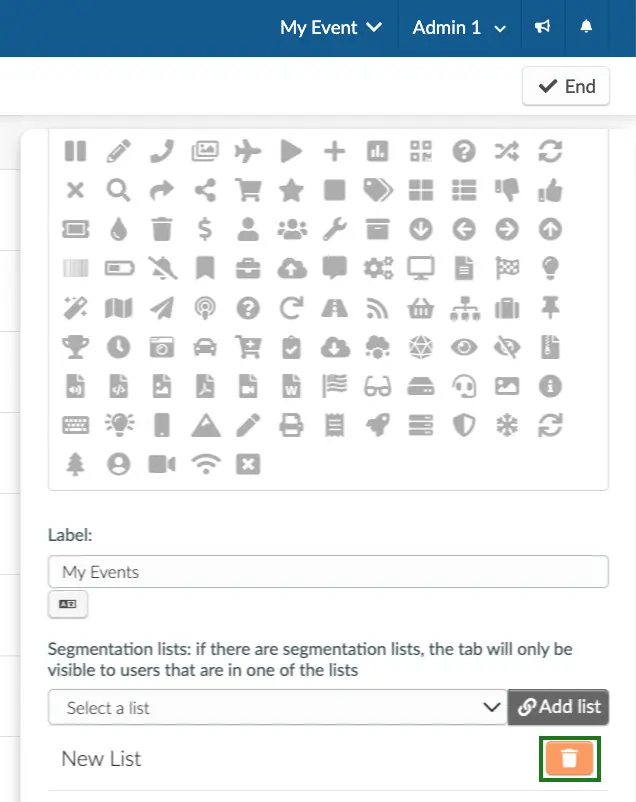
Click on the tab you would like to edit and a window will open to the right. Here, you have the option to edit the name of the tab, add a language translation, add a segmentation list, change the icon and the URL, and choose whether or not to embed the tab.
When you have finished editing, click on End to save the changes.
Segmentation lists for Web app tabs
The Segmentation lists feature allows you control which users can see specific tabs in your Virtual Lobby. To use Segmentation lists, follow these steps:
- Create custom lists and add to these lists the users that you want to have access to the specific tab.
- In the Settings > Tabs page, click on Web app, and click on the desired tab which will open a window on the right side.
- Click on Edit and scroll down to Segmentation lists.
- Select your desired list(s) from the drop down menu, and click the +Add list button.
- Press End to save your changes.
By following these steps, only users belonging to the specified lists can access the designated tab that has been linked to the list within the Virtual Lobby.
To remove a list, simply click on Edit and press the orange thrash icon beside the list.
Making tabs invisible or visible and changing their order
You can make tabs visible or Invisible in the Virtual Lobby by switching on or off the Visible switch of the tab.
If it is a tab of the system tools (bottom bar tabs), you won't be able to delete it, so you should make it invisible. To do this, click Edit and turn off the switch in the Visible column and then click End.
Additionally, you can change the order of the tabs by clicking and dragging the pixelated square of the tab. To save the edit, click on End in the top right corner.
Deleting a tab
If you want to delete a tab you created, click Edit and click on the red Remove button in the window of the tab and verify by clicking on the Remove in the confirmation pop-up. 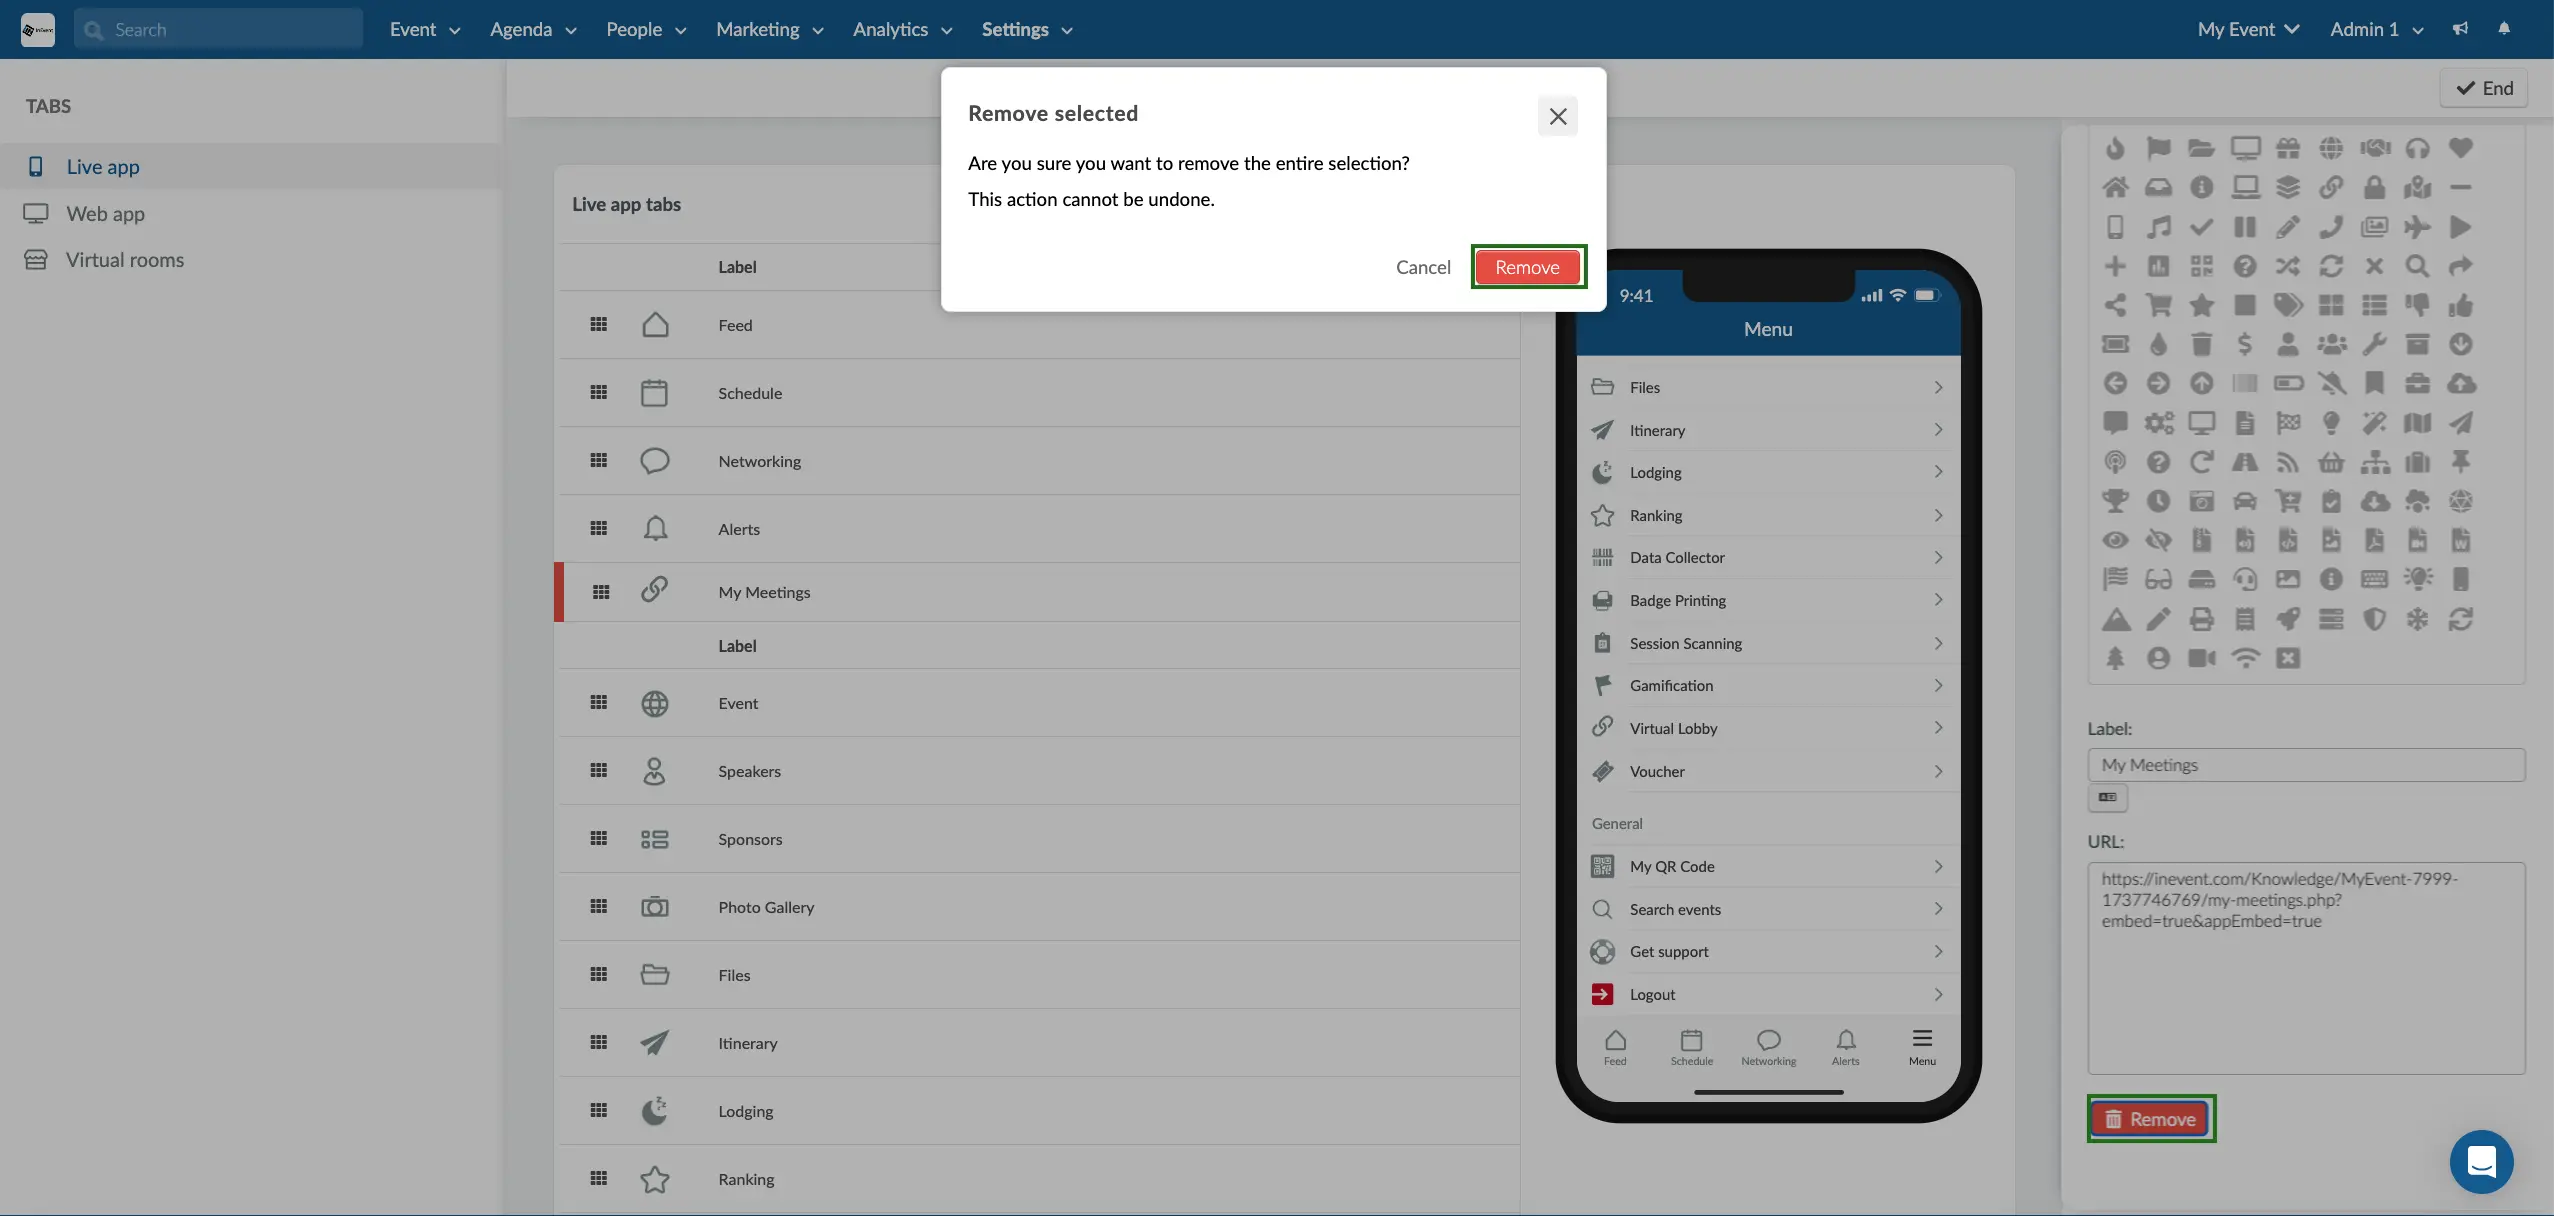
Embedding a tab into the Virtual Lobby
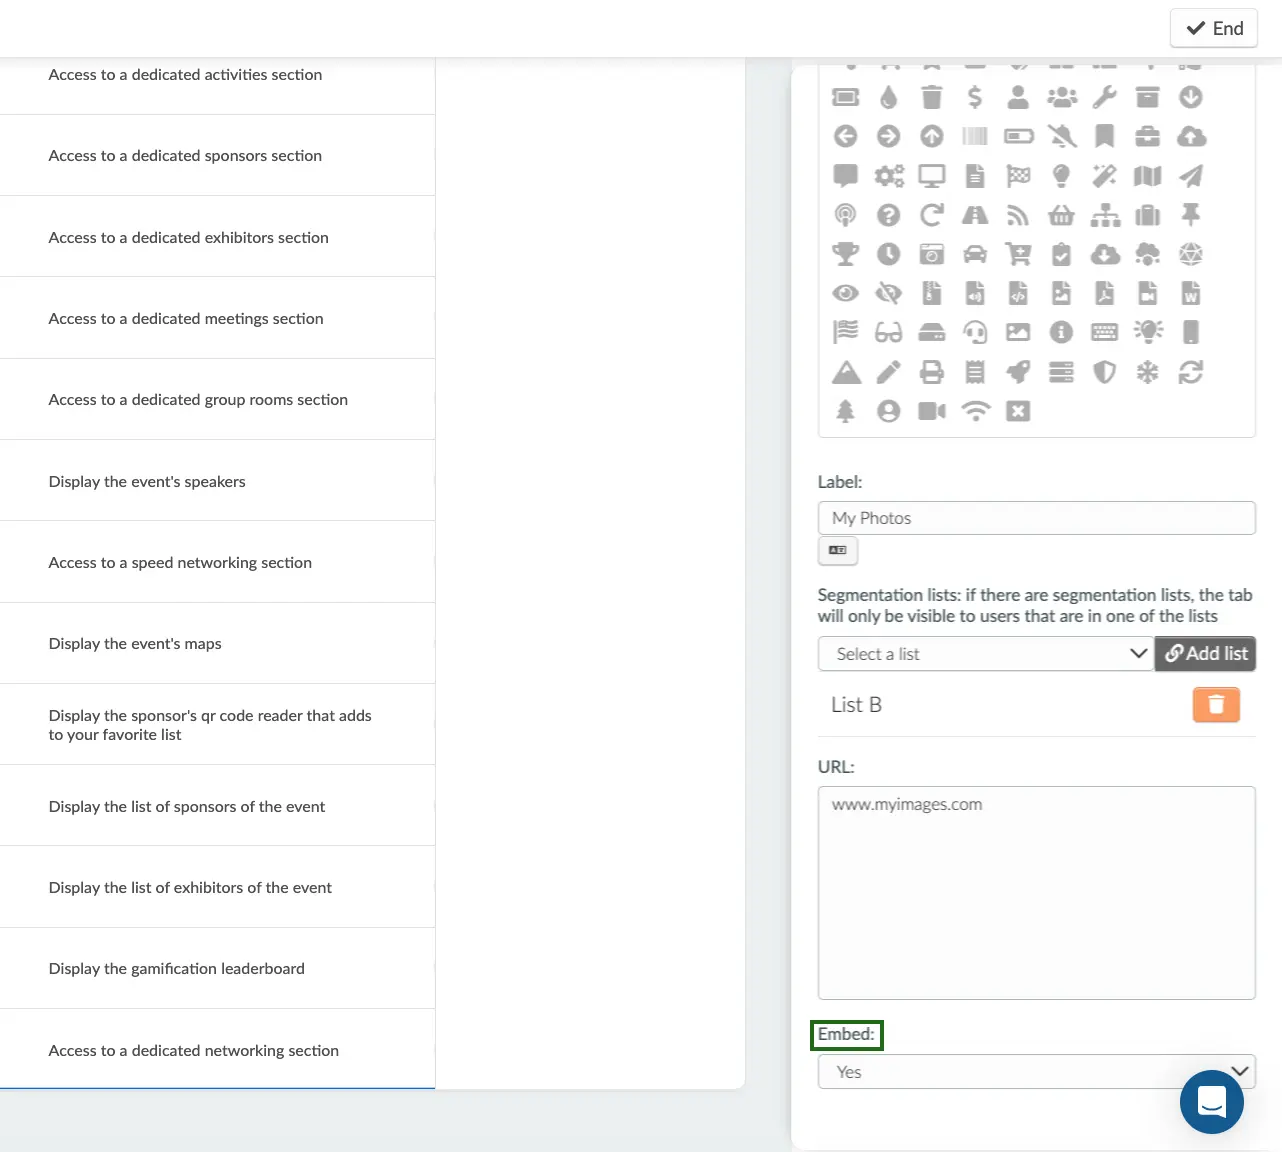
To add an external link and have this page being open inside the Virtual Lobby instead of taking the user to a new window, you should enable Embed under the tab details.
Press Edit and click on the tab you just created. A new window will appear on the right, scroll down until you see Embed and make sure to set it to Yes.
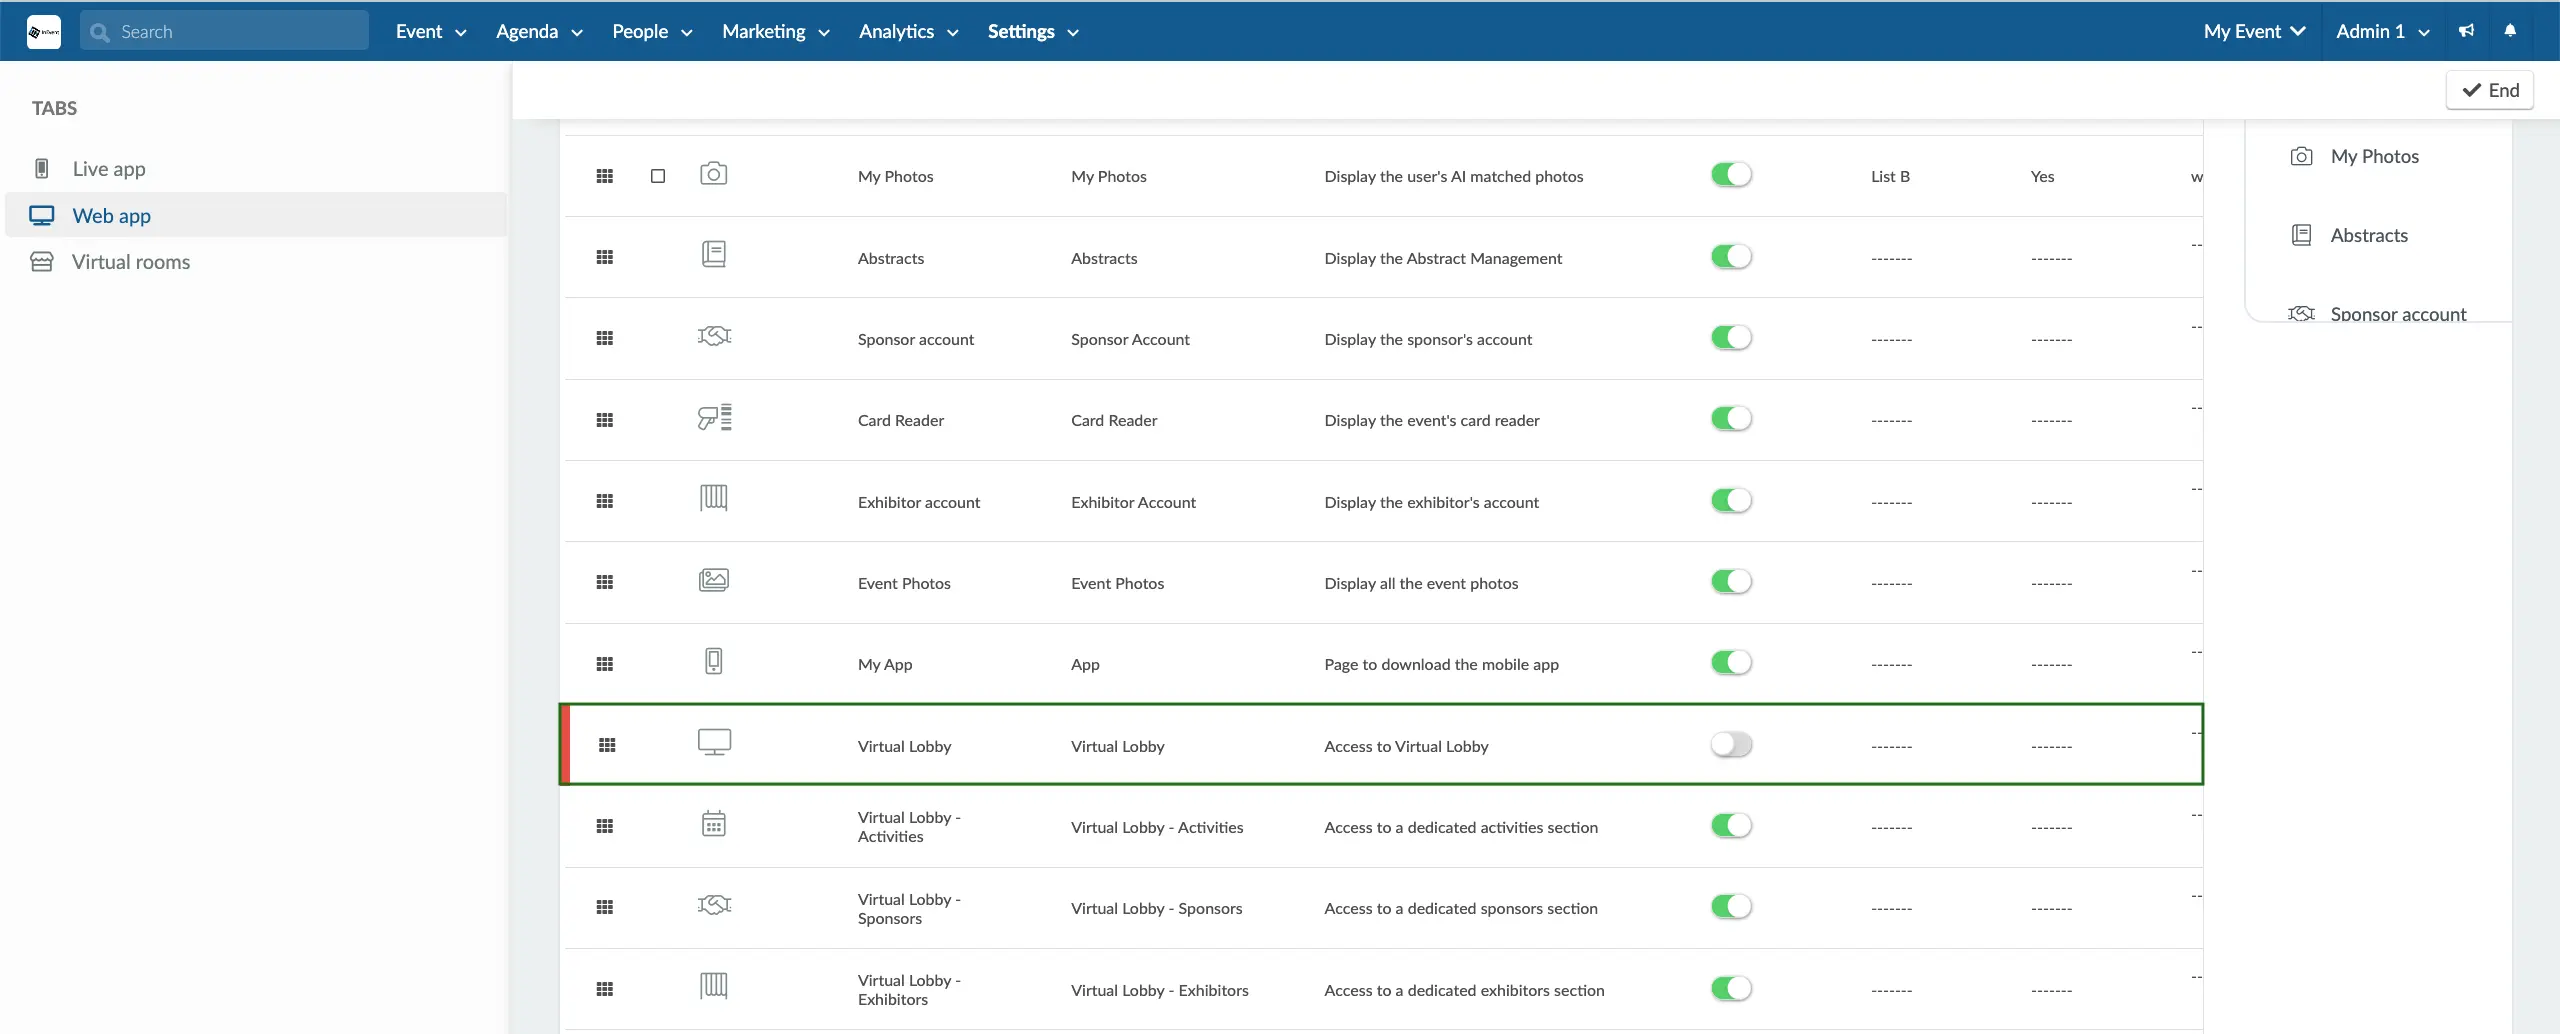
Hiding the Virtual Lobby tab
Some event organizers may not want attendees to have access to the Virtual Lobby before an event starts. If that's the case, you could hide the Virtual Lobby tab until the event starts by pressing Settings > Tabs > Web app and turn off the switch so that it is grey in the Visible column corresponding the Virtual Lobby. Press End to save your changes.
After doing this, the Virtual Lobby icon should disappear from the Lobby's menu. However, the Open Lobby button will still be displayed under My Account. To hide the button, you will need to edit your Source Code via CSS. Refer to the Most frequently requested CSS codes article to learn how to do it.
Setting a tab as an entry tab
You can choose which tab will be the Entry tab for registered users when they access the web app or mobile app. To set this, click on Edit, click the tab you want to set as the Entry tab, scroll down to its settings, and change the Entry tab option from No to Yes.
Only one tab can be set as the Entry tab at a time. Selecting a new Entry tab will automatically revert the previous one to No.

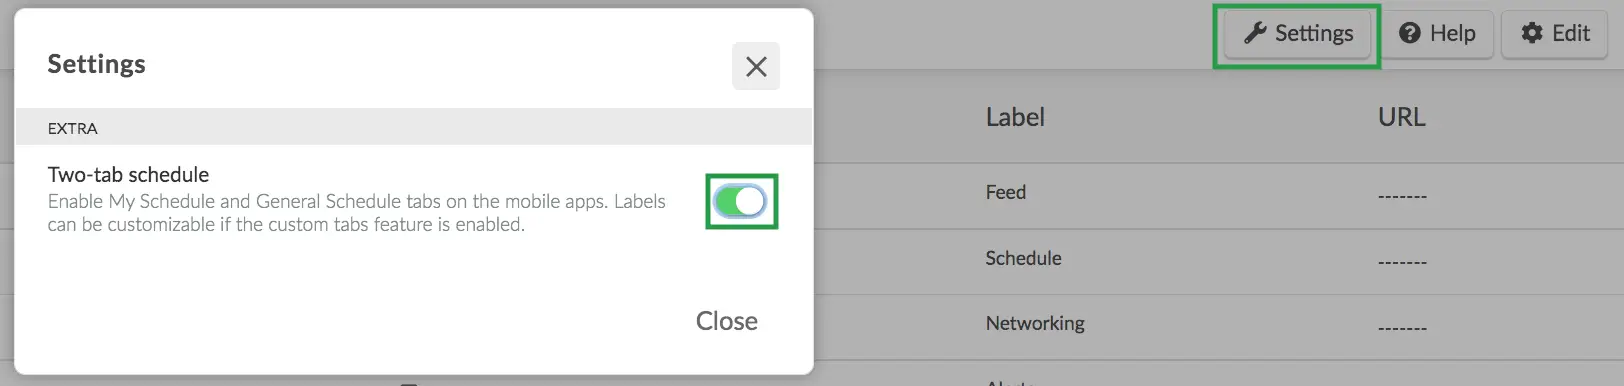
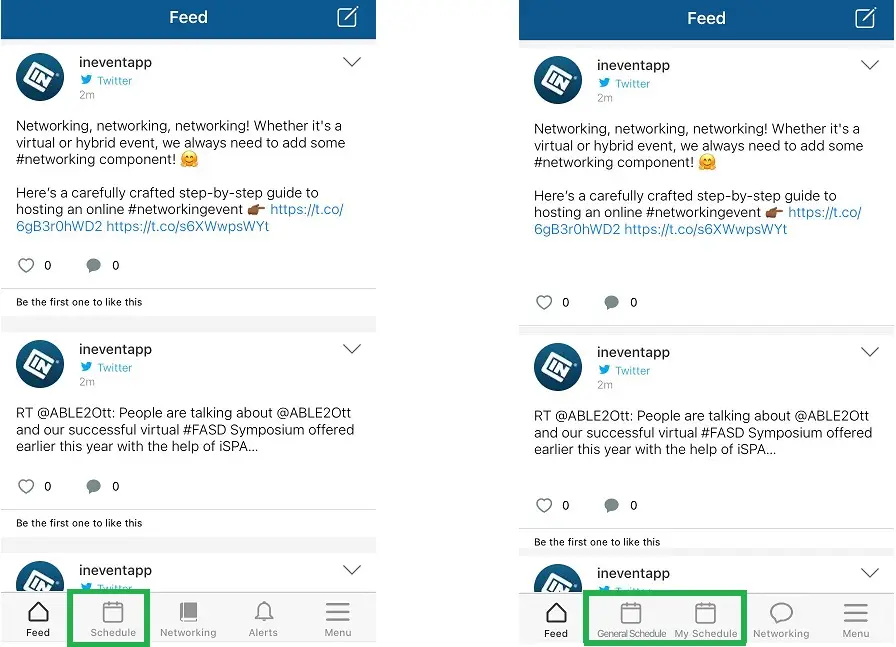
Enabling the Two-tab schedule
The Two-tab schedule feature allows you to separate each attendees' agenda from your event's full schedule. Once the feature is turned on, attendees will have access to the following tabs on the mobile apps:
- General Schedule: This will display all activities of the event, including the ones that an attendee is not registered in.
- My Schedule: This will only display the activities that an attendee has registered for.
In the image below, Two-tab schedule is disabled on the left-hand side, while the feature is enabled on the right-hand side:
To enable Two-tab schedule directly from the Tabs page, click on the Settings button in the top right corner, then turn on the feature as shown below: