Briefing Management: event booking forms, custom forms and membership forms
 Updated 4 weeks ago
by
Amalia
Updated 4 weeks ago
by
Amalia
- Setting up a new form at the company level
- Adding fields to forms at the company level
- Form Sections
- Form settings
- Form branding
- Previewing your form
- Form submissions
- Submissions tab in the Forms page
- Submissions page
- Filtering submissions by status
- Archiving form submissions
- Assigning an administrator to an event
- Editing form submissions
- Approving and rejecting event booking and membership form requests from the Submissions page
- Can I approve a rejected submission?
- Additional information
- Downloading form submission reports
Your event spreadsheet can be replaced by a system that enables you to create forms and important business regulations for your organization. The forms are made so employees can fill them out, thus helping the process of requesting event bookings. In addition, you can grant access to agents, such as event agencies and suppliers, and, through the main panel, request additional information.
Setting up a new form at the company level
At the company level, click on Booking > Forms > New form. Then, fill in the form name, define its type and press Create.
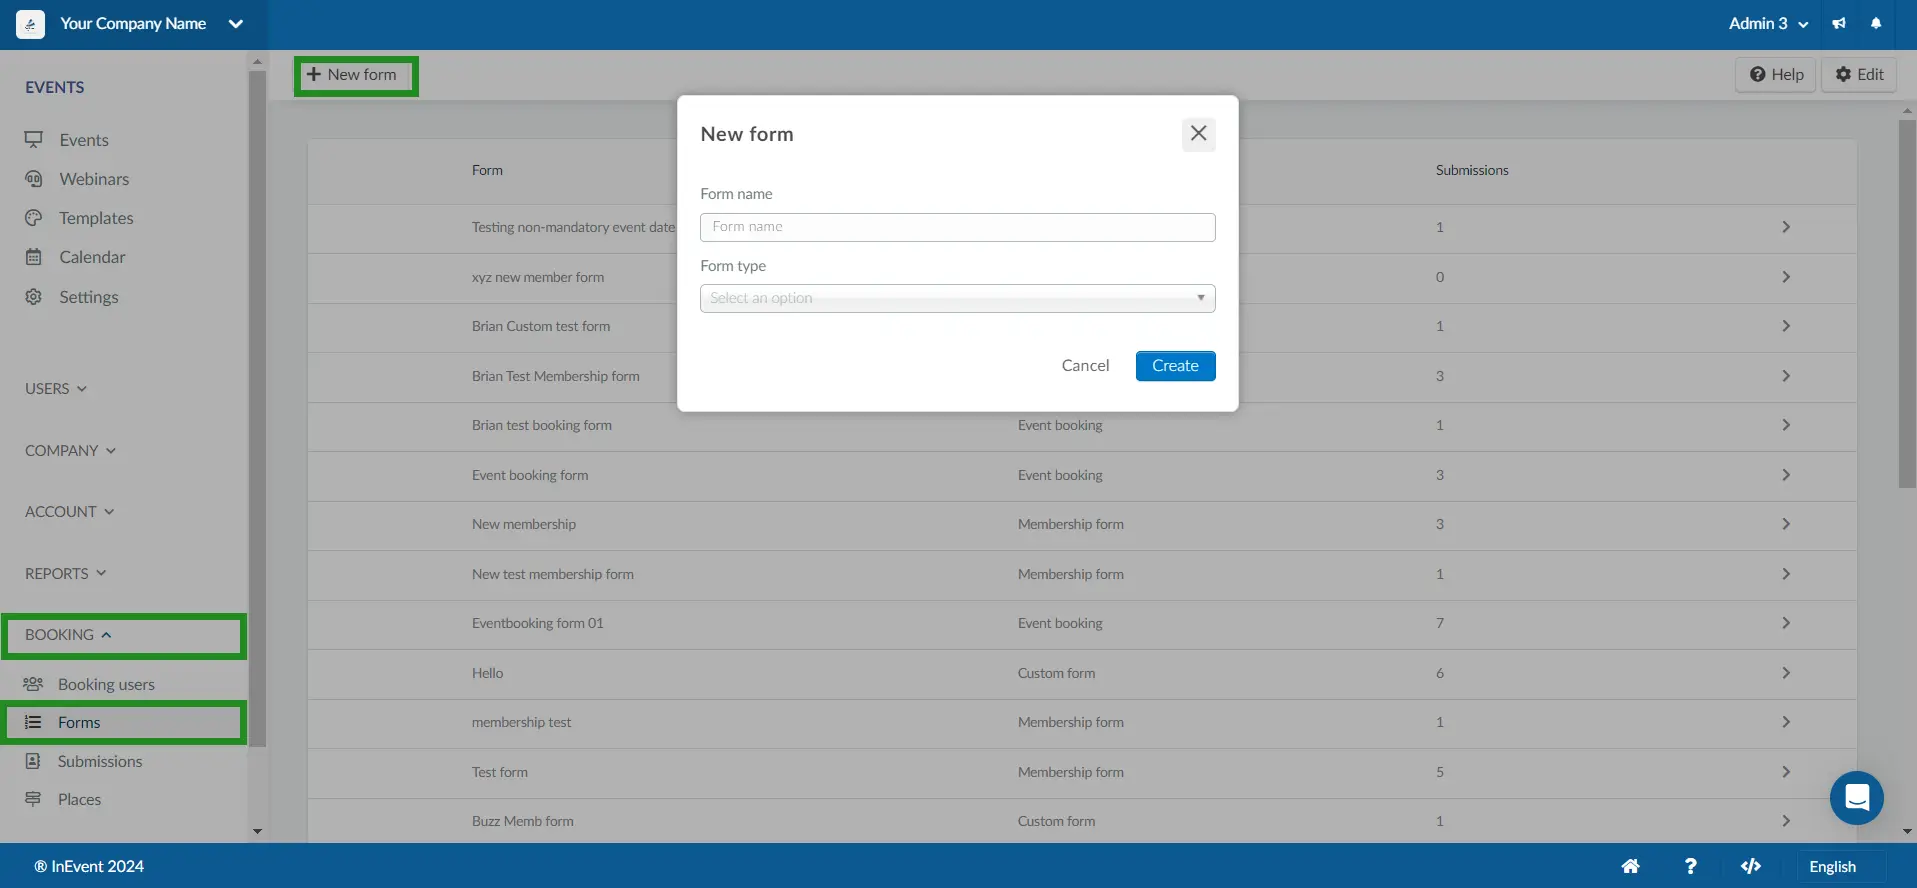
Forms type
There are three types of forms:
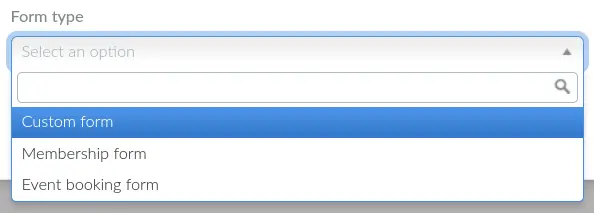
- Custom form: The goal is to capture information regarding any theme. Simply provide the form link so it can be responded. The answers are available for export.
- Membership form: This form is for use together with Contact lists at the company level. Company administrators can approve submissions, adding approved users to the target Contact lists.
- Event booking form: This form should be shared only with booking users. By using this form, they will be able to request the creation of an event.
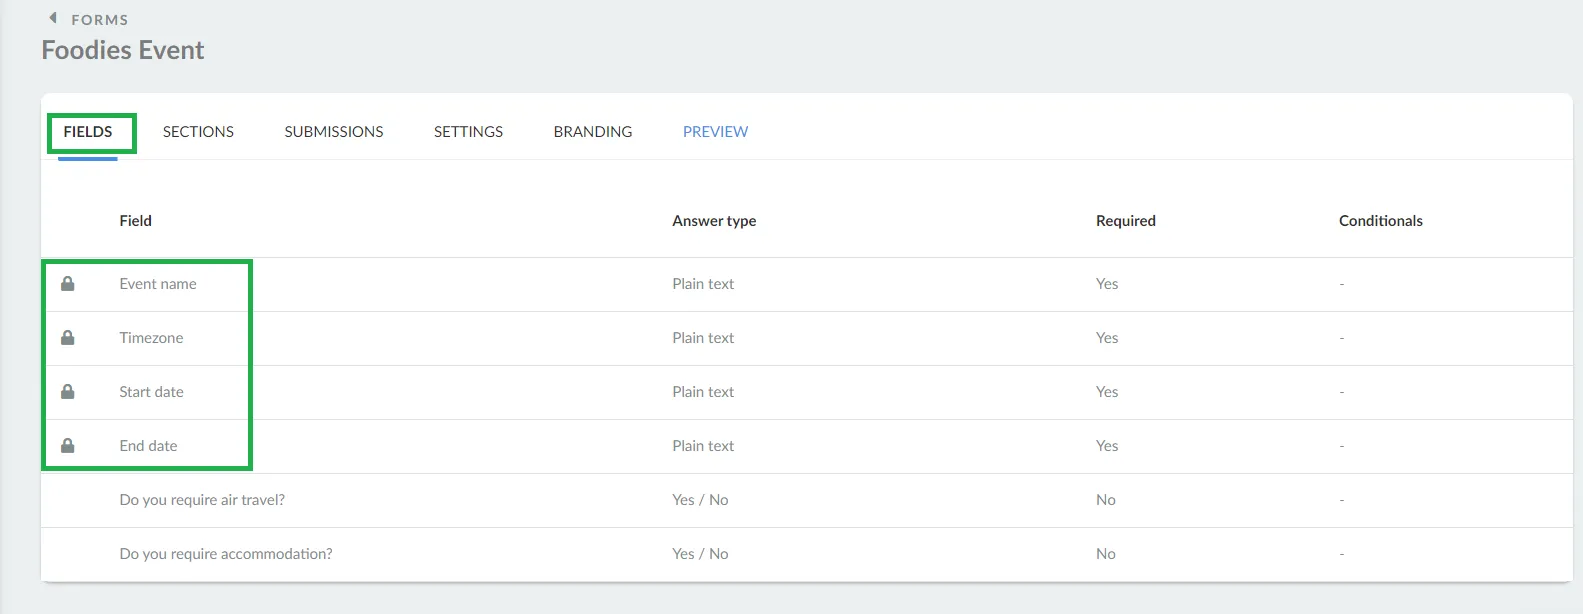
Adding fields to forms at the company level
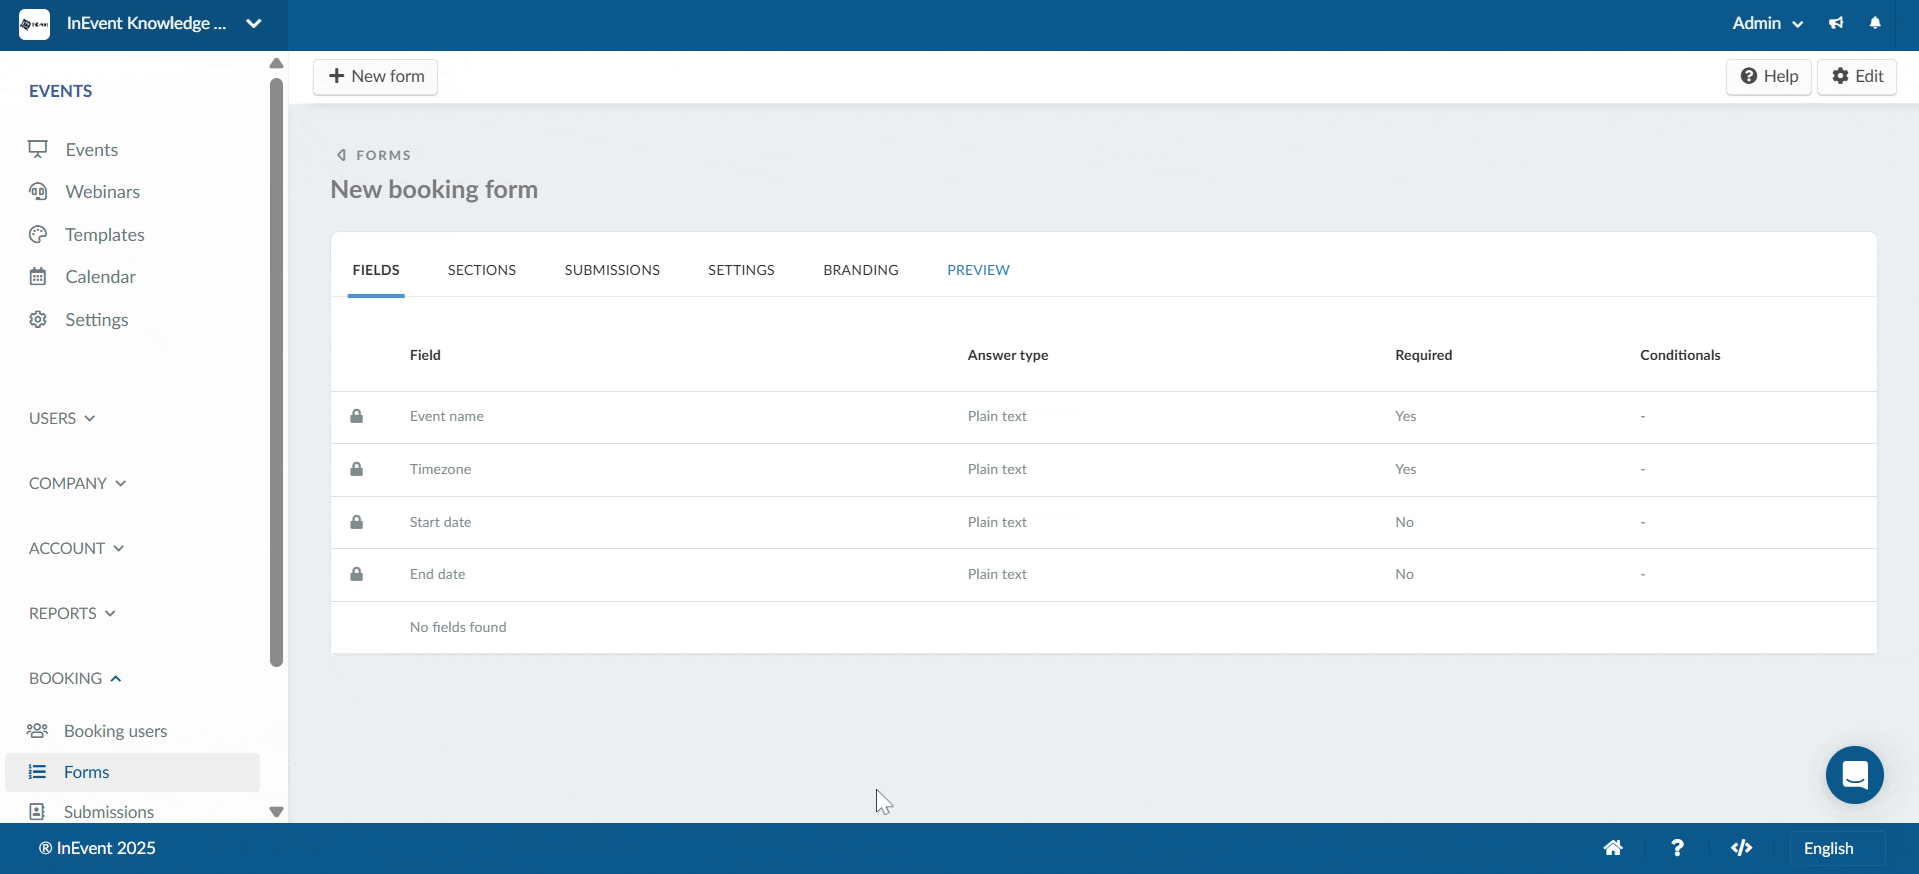
The booking form comes with four default fields. It also allows you to add new fields or questions and modify existing ones.
Default fields
In the image below you can see the default fields on the booking form.
Adding new fields to the forms
You can add new fields or questions to the forms by selecting the form you wish to add fields to and pressing Edit on the top right corner. Then, type your field name or question in the box provided at the bottom of the form and press New field.
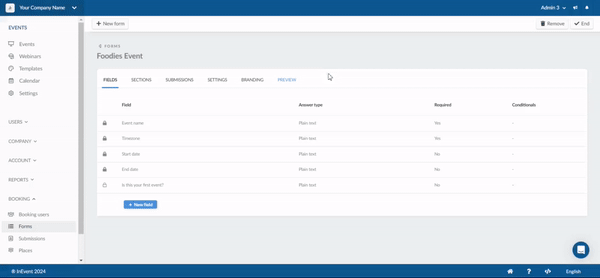
Once you have added a new field, you can click on it to edit it.

Refer to the Configuring custom fields for forms article for further information on how to configure fields on forms.
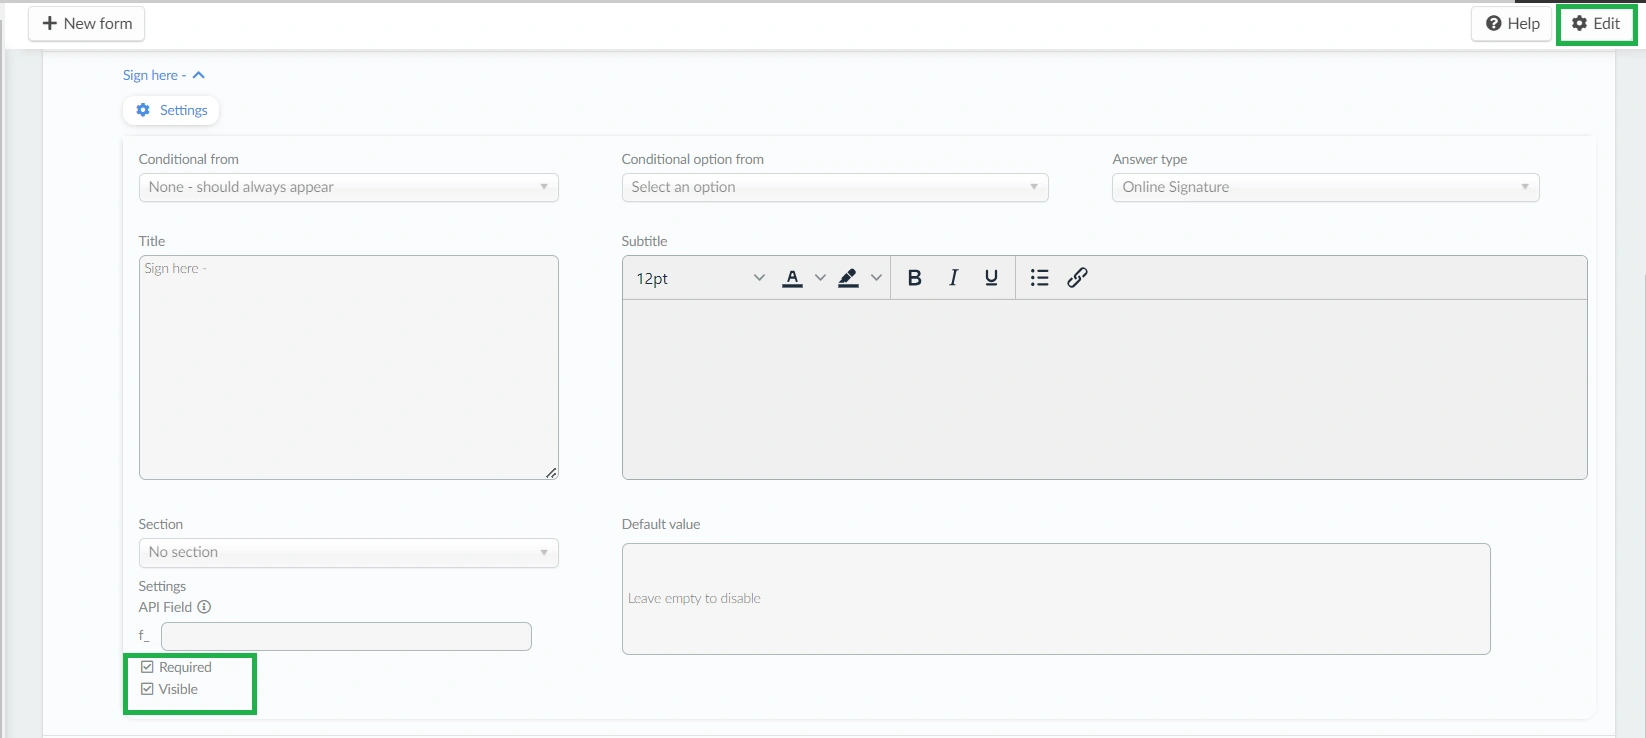
Adding form approver signature
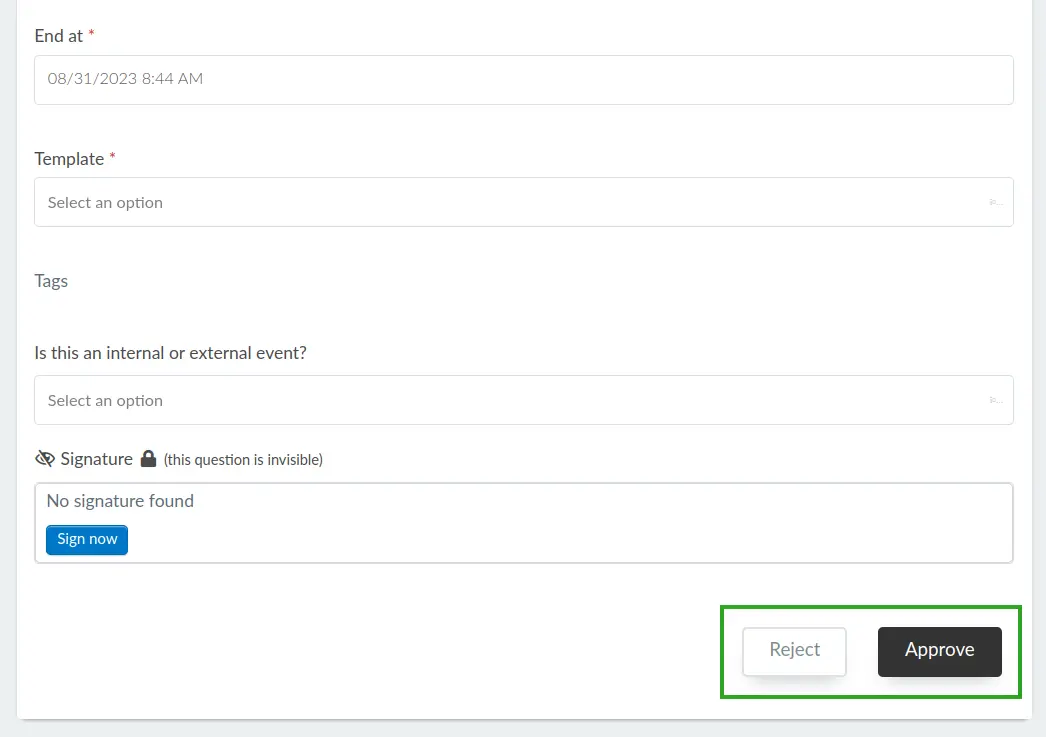
You can configure your form to have the signature of the approver by using the Online Signature option. To do so, follow the steps below:
- Create a field with the Online Signature answer type on your event booking form.
- Set the question to invisible by unchecking the Visible checkbox.
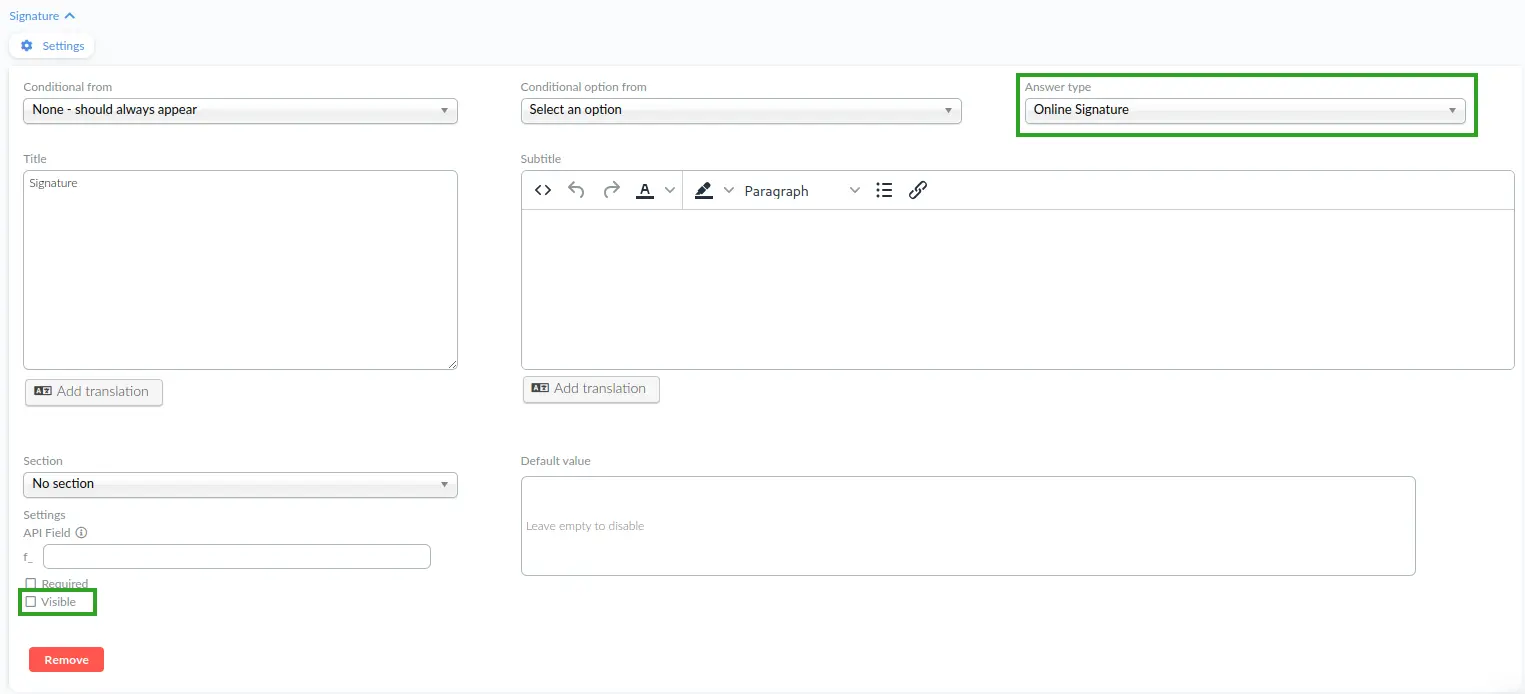
- Set the form to Public in Form Settings.
After completing the steps above, the form approver will be able to view the Online Signature field and enter their signature by pressing the Sign now button when reviewing a form submission.
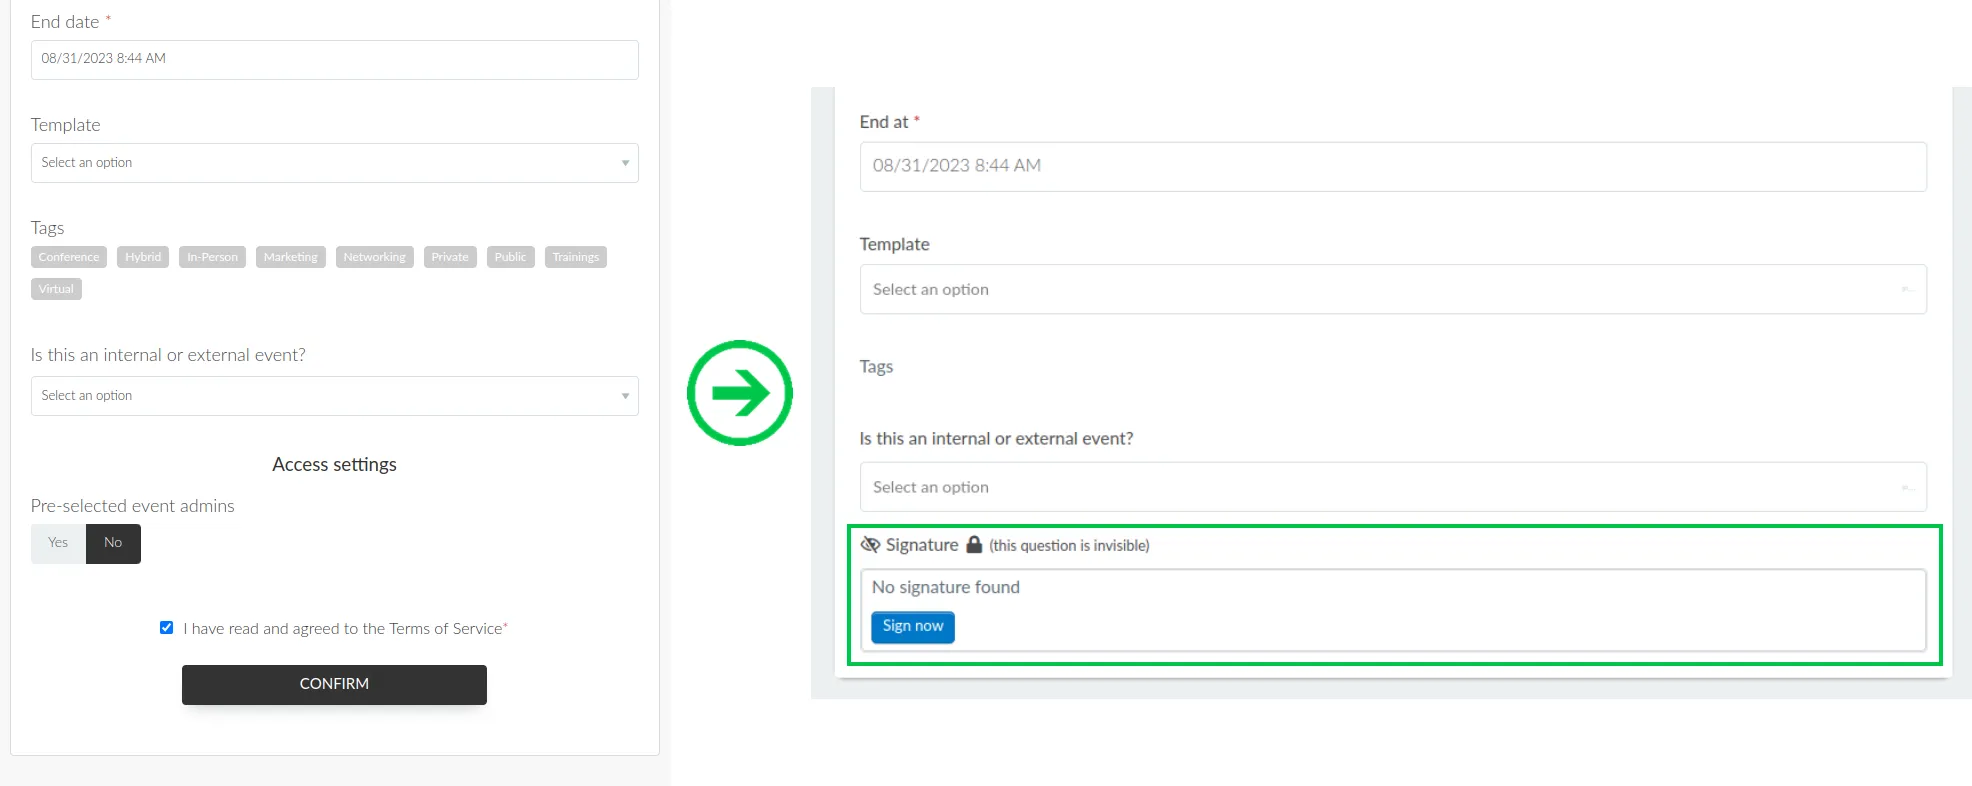
Adding online signature field for custom forms
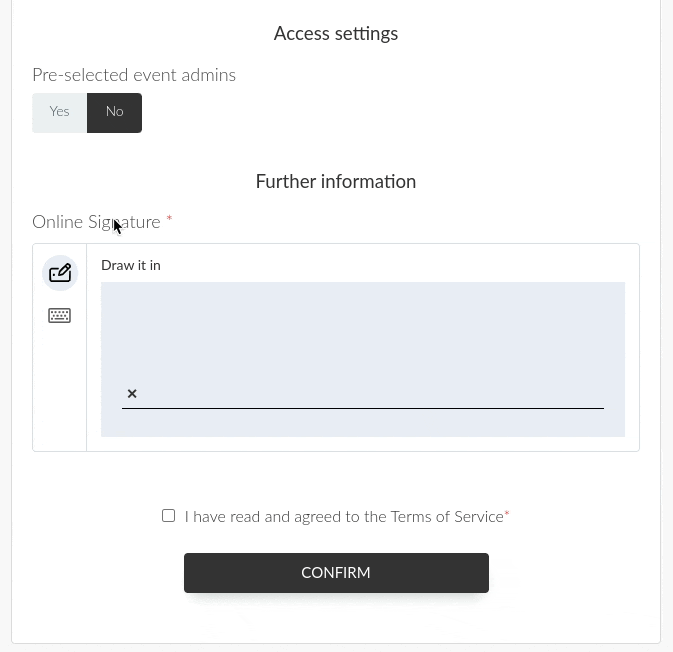
If you are configuring a custom form, you can set up your custom form to have an online signature field for the participant when filling the form. To do this follow these steps:
- Create a question with the Online Signature answer type on your event booking form.
- Open the question and click on Edit.
- Set the question to be visible and required by checking the Visible checkbox.
- Set the form to Public in the form Settings.
The signature field will appear as a required field for the participant to input their signature when filling the form.
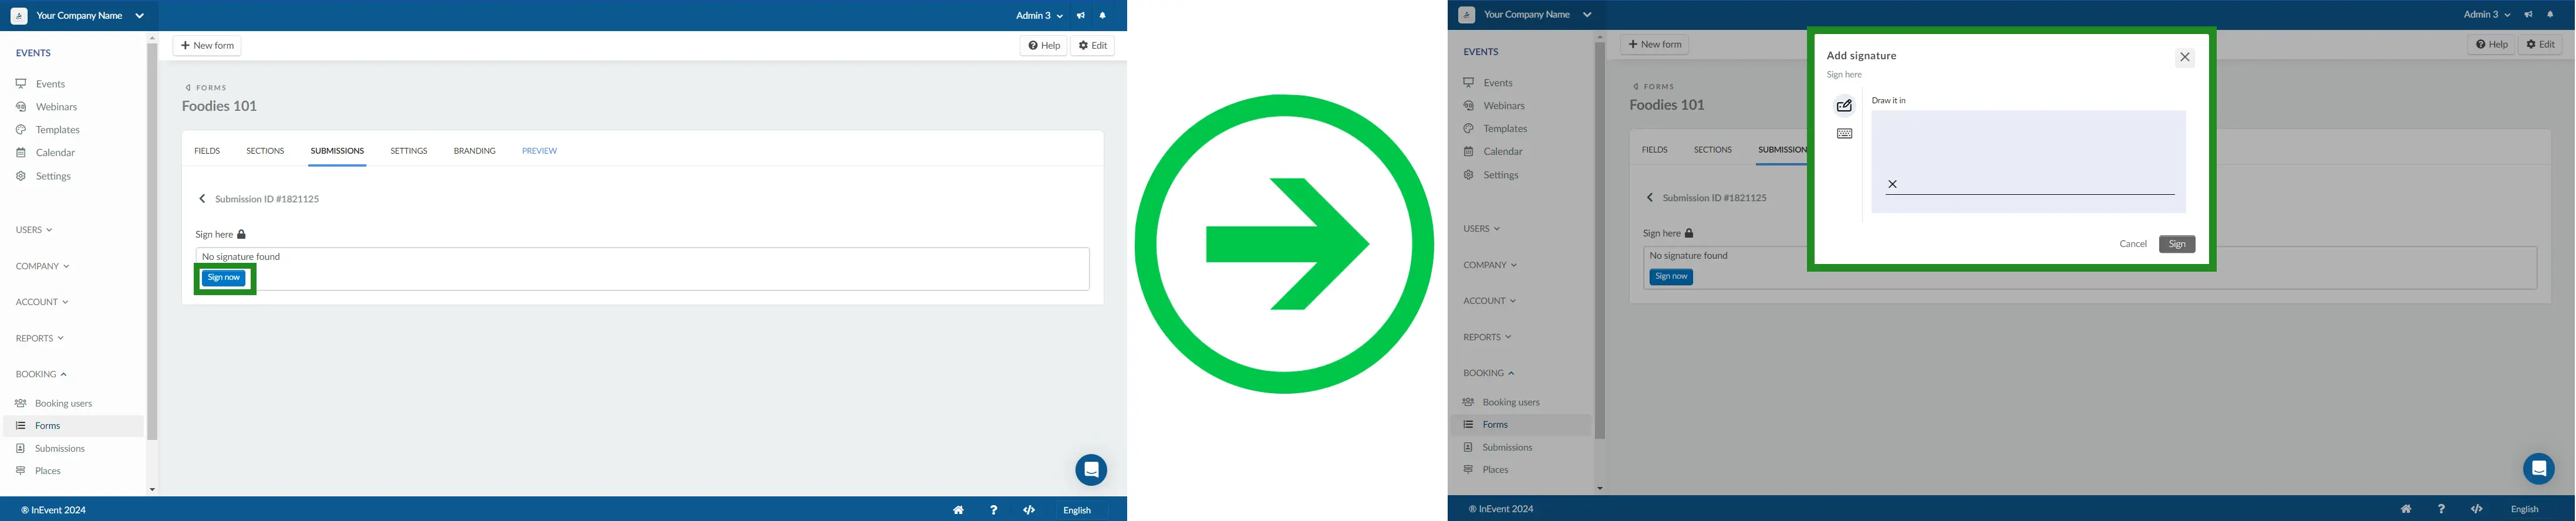
If the online signature field is set to visible but not required, on the Submissions section of the custom form, a blue Sign now button will appear so that even if the form was already submitted, the participant can later on add their signature. When the participant clicks on the Sign now button, a window will appear for them to write or draw their signature, Once done click on Sign, and the signature will be saved to the custom form.
Form Sections
Sections allow you to separate fields of your custom form into their own group. With sections, you can group similar fields on your form for better organization. You can also add titles and subtitles to better describe each section. To learn how to add sections to Booking, Custom and Membership forms, check our article How do I configure Sections and Dividers on forms.
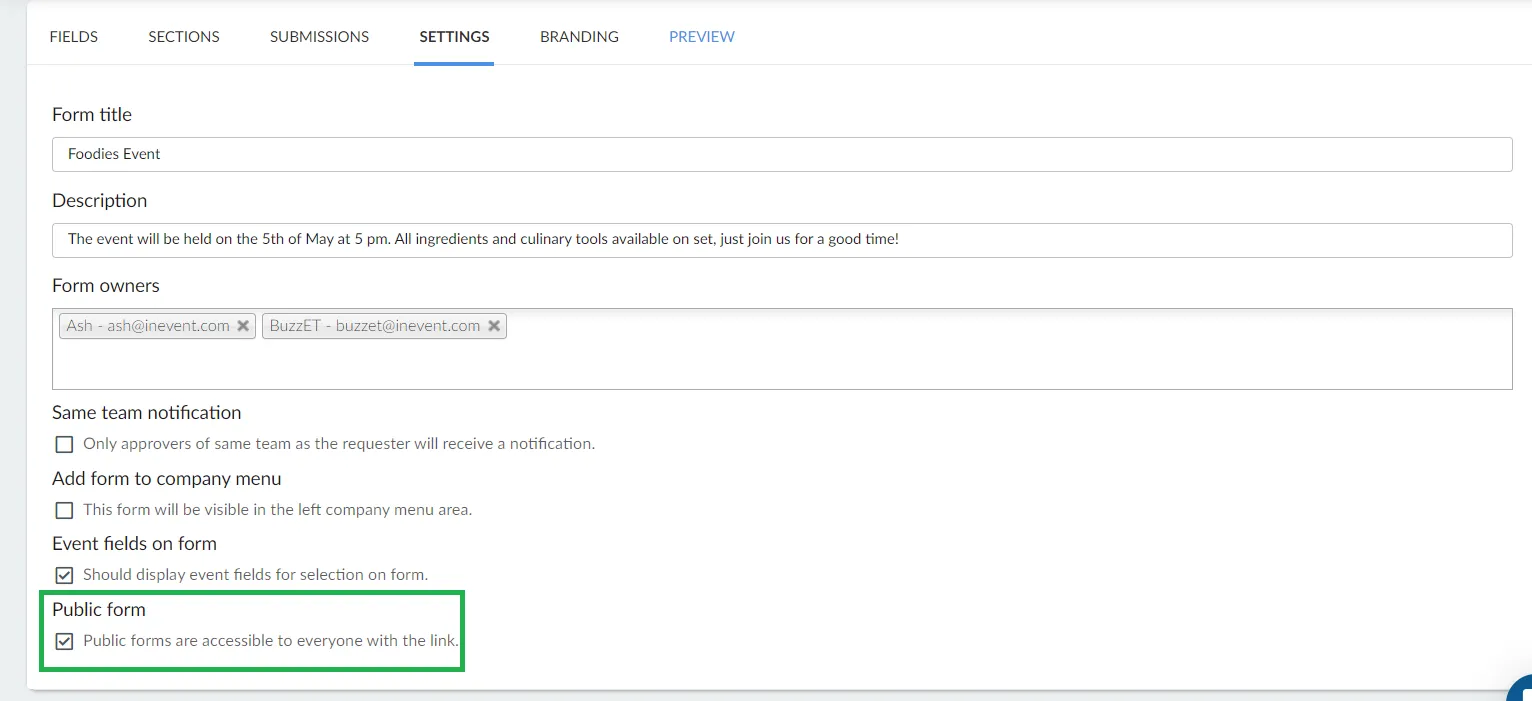
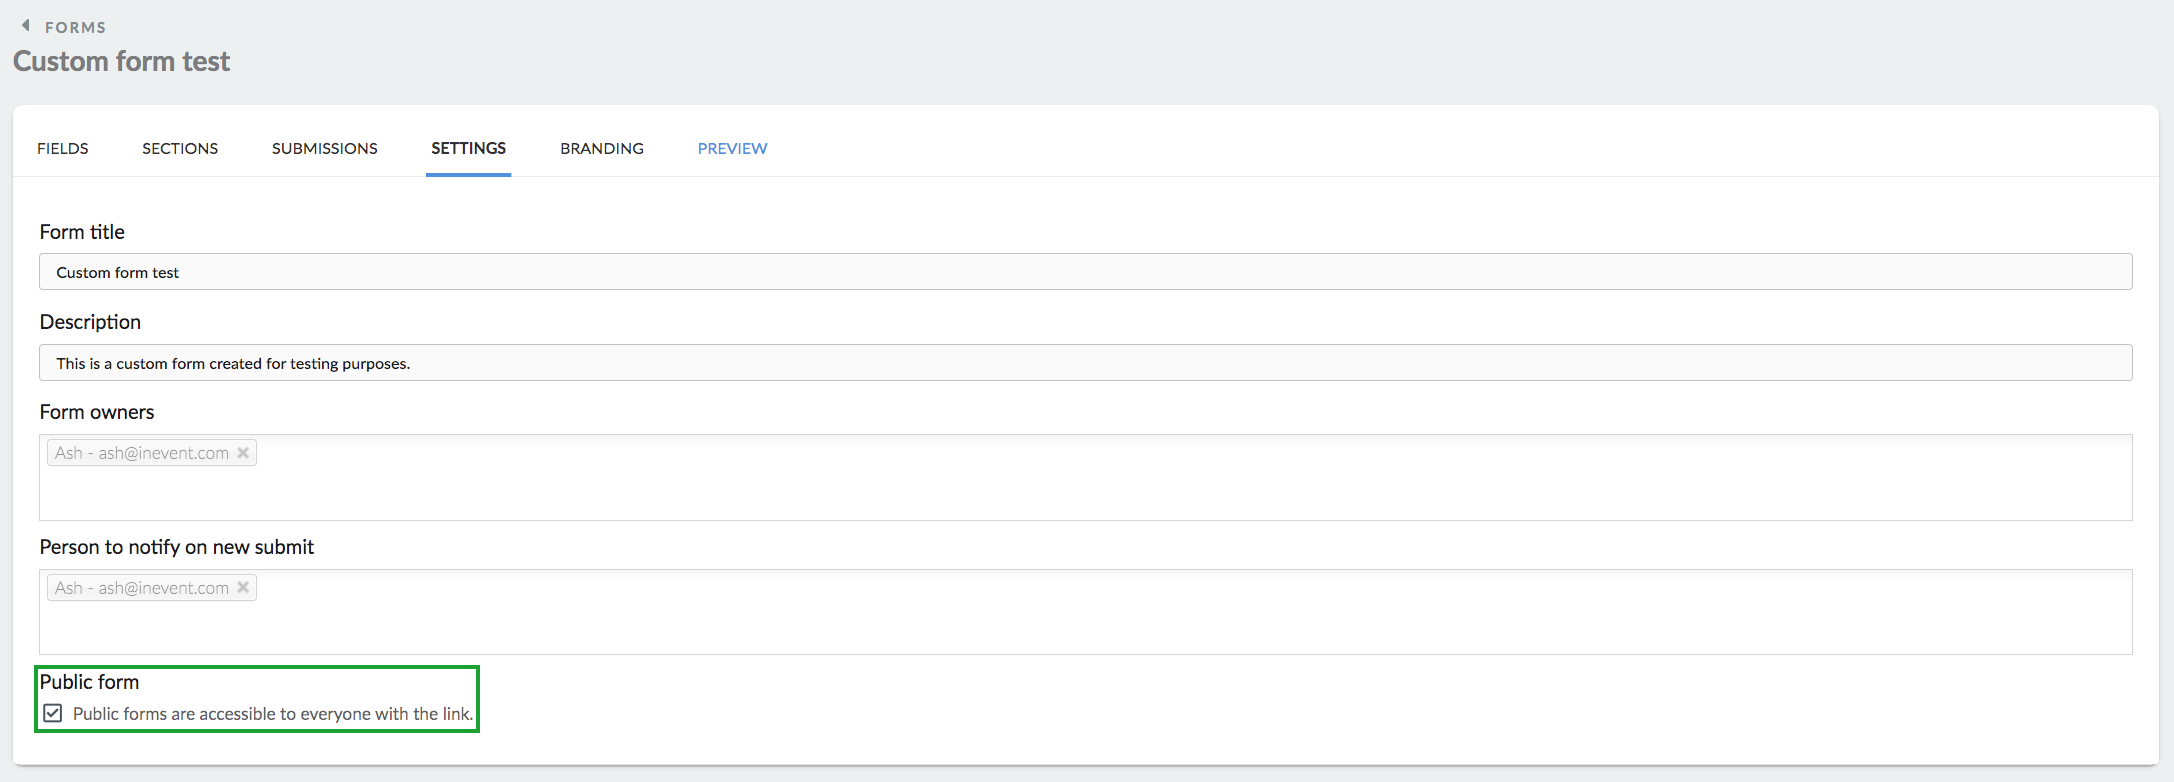
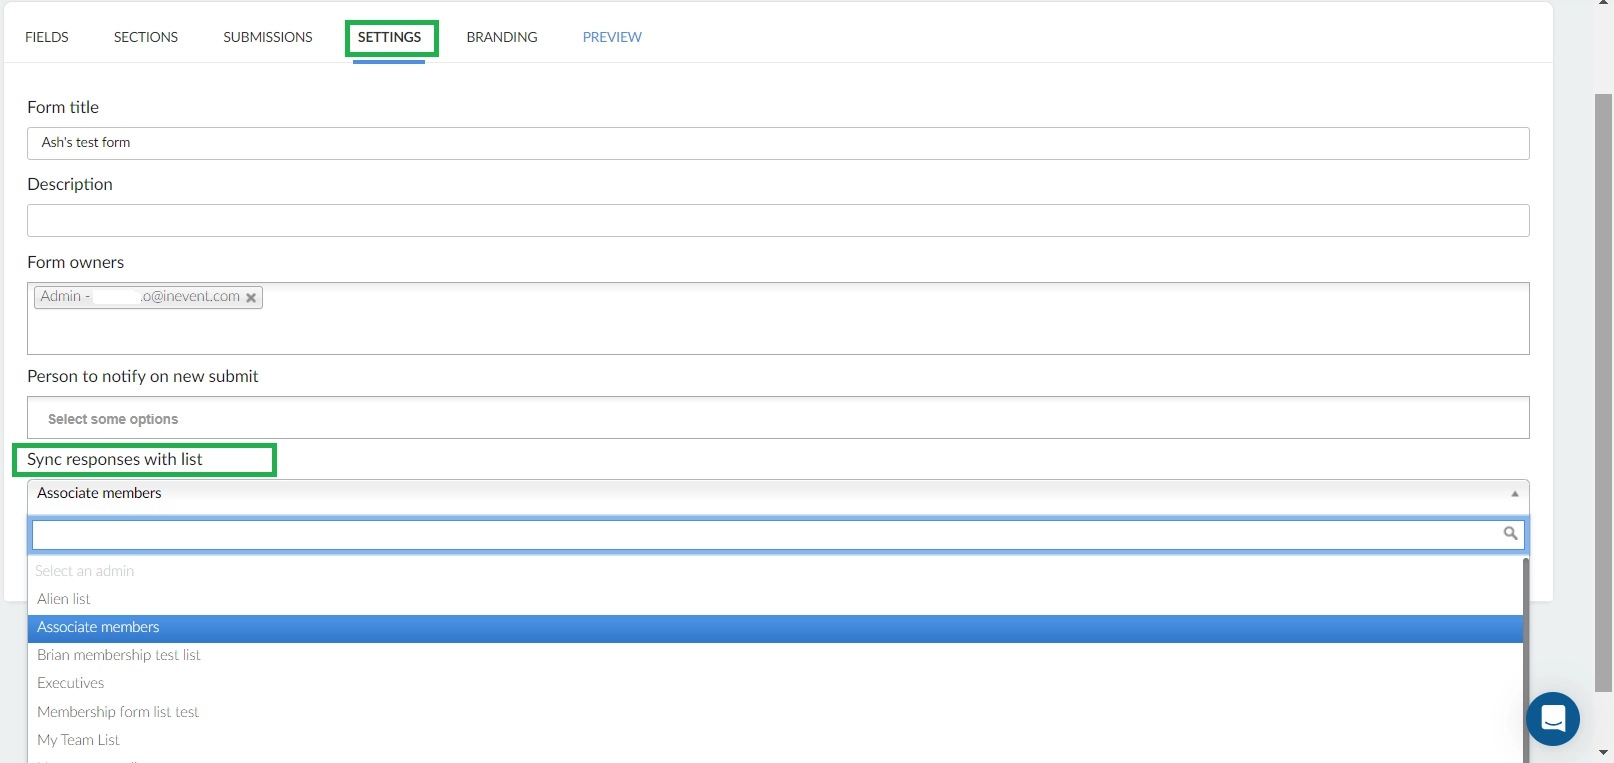
Form settings
In the Settings tab, you can configure the following items:
- Form title: Modify the title of your form.
- Form description: Modify the description of your form.
- Form owners: Add or modify the owners (must be admins) of your form. A form can have multiple form owners.
- Person to notify on new submit: Select the admin(s) who will be notified by email upon a new form submission.
- Same team notification: Set whether or not to notify the approvers of the same team as the requester.
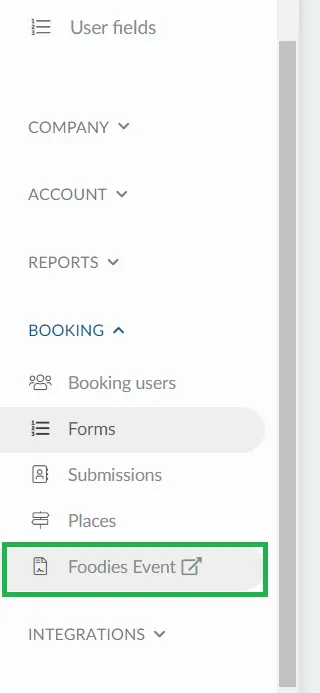
- Add form to company menu: Set the form to be visible in the left company menu, under the Booking section. Below is an example of how the form will appear in the left menu company area when this tool is enabled.
- Event fields on form: Set whether or not to display event custom fields on form (enabled by default, uncheck to disable).
- Select Template: Allows user to choose a template for their event. When enabled, a Template field will appear on the event booking form. However, if the Event booking templates lock tool is turned on, this field will appear locked and cannot be edited or enabled.
- Select admins: Allow users to pre-select admins for their event. If enabled, this will display the Access settings section on the event booking form. However, if the Event booking admins lock tool is turned on, this field will appear locked and cannot be edited or enabled.
- Public form: Set whether or not to make your form accessible to everyone with the link.
For membership forms, you will see the option Sync responses with lists. This allows you to change the list associated with the membership form using the dropdown, even after the form has been created.
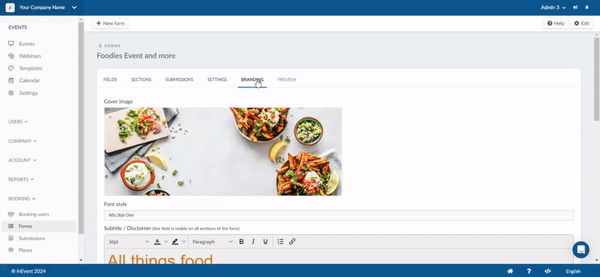
Form branding
In the Branding tab, you can decide to brand your form by adding cover images as well as other customized details. You can configure the following items:
- Cover image: Add a cover photo to your form.
- Font style: Choose a font style for your form.
- Subtitle/ disclaimer: You can add a subtitle or a disclaimer for your form. The text box provides tools for text customizations.
- Welcome section: Enable a welcome section which will be displayed before further accessing the main content of the form. When enabled, you can add a message as well as customize it using the tools available in the text box. A sub field, Welcome CTA label, will be displayed, where you can add a CTA (call to action) message for the welcome section.
- Confirm button label: Add a label to customize the Confirm button of your form. This appears at the end of the form.
- Footer: Add a footer to your form. You can customize the footer using the available tools in the text box.
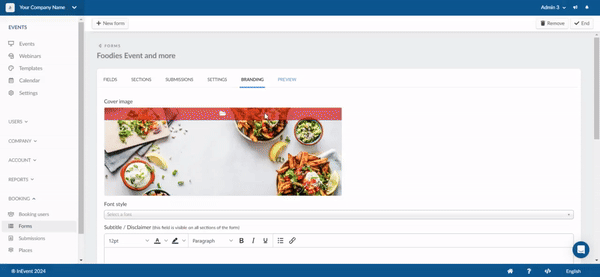
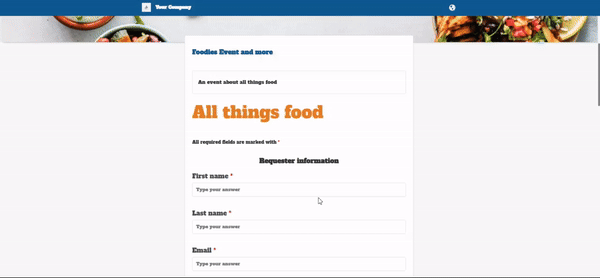
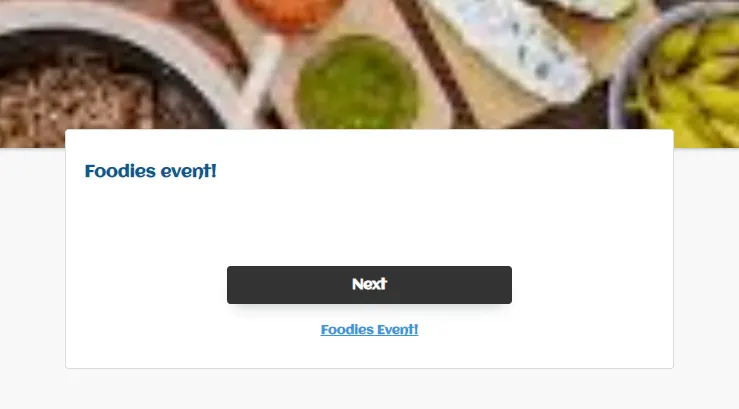
After customizing your form, below is an example of how it will appear:
Previewing your form
To preview your created form, click on the form you want to view, and then press Preview. The form will open automatically on a new page.
Booking form sections
The booking form contains three sections: Event information, Access settings, and Further information.
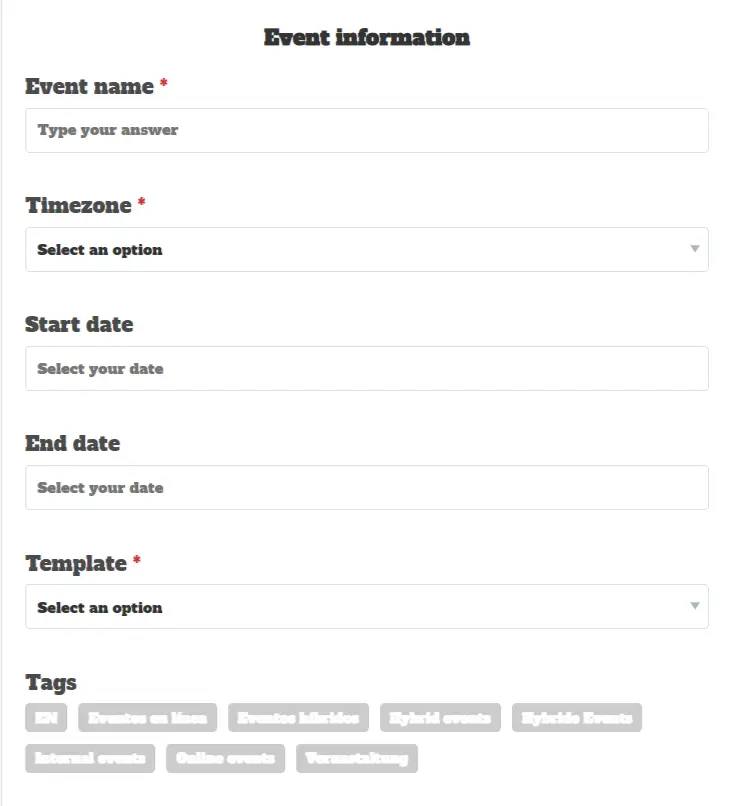
Event information
This section contains the four default fields. It also has the following fields:
- Template: This is a mandatory field that allows booking users to choose a Template for their event.
Alternatively, it can be removed from individual booking forms by disabling the Select template field in the form’s settings.
- Tags: This field allows booking users to choose one or multiple existing Tags for their event.
- Event field: If you have added event fields to your event and also enabled Event fields on form tool under the Form settings, it will appear on the booking form.
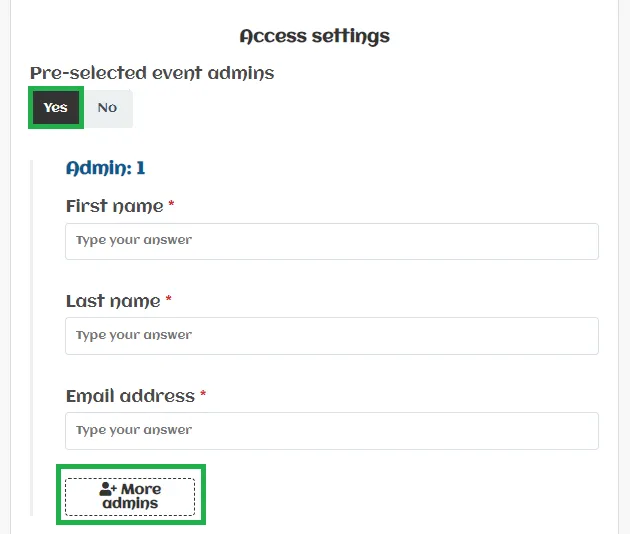
Access settings
This section allows the booking users to pre-select admins for their events. To pre-select admins, click on the Yes option, and a segment will appear to enter the details of the admin. Once the form submission is approved, the pre-selected admin(s) will be automatically added to the event.
Alternatively, it can be removed from individual booking forms by disabling the Select admin field in the form’s settings.
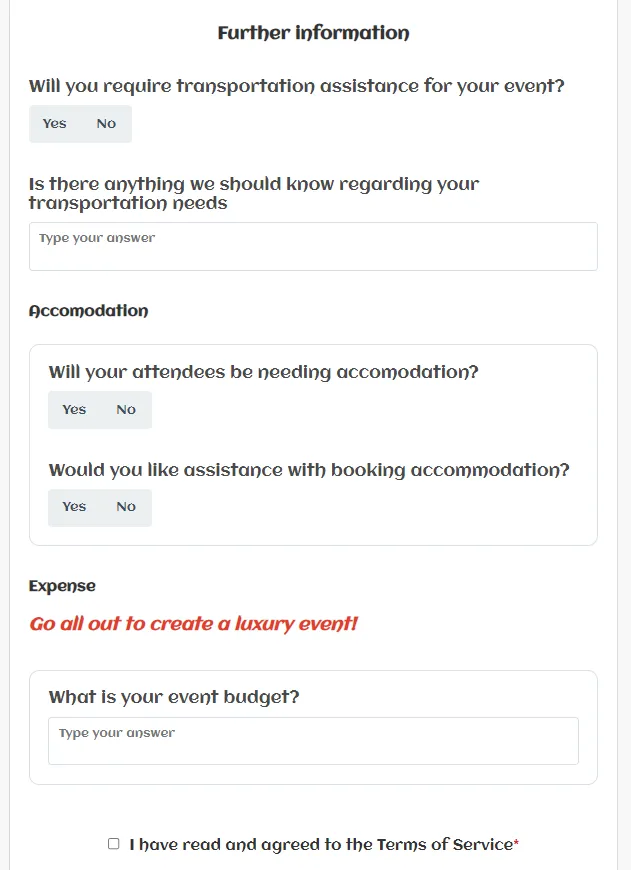
Further information
This section only appears if your created Custom fields for your booking form.
Form submissions
You can review and approve event booking form submissions in two pages: the Submissions tab in the Forms page and the Submissions page.
Submissions tab in the Forms page
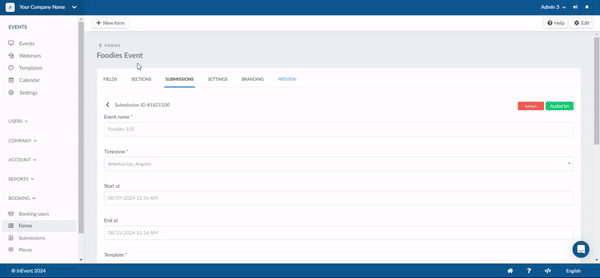
To view event booking form submissions, click on the Submissions tab in the Forms page.
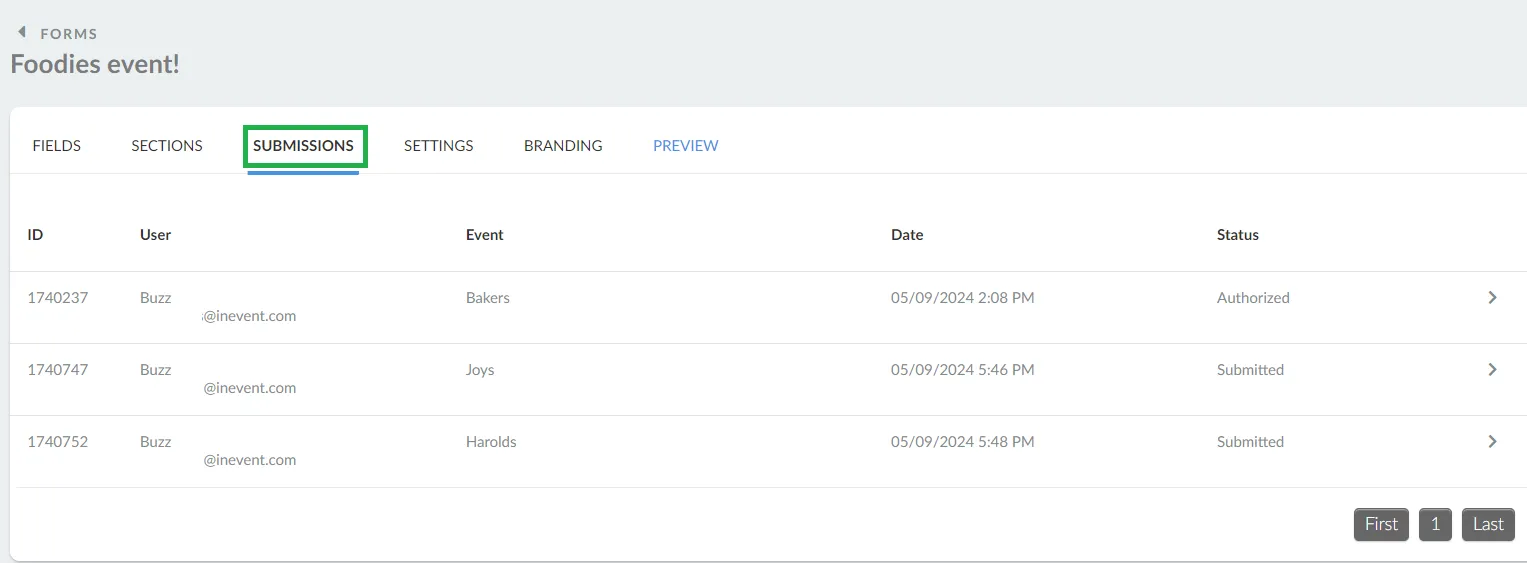
This tab will display all event booking form submissions of all statuses. To view the the event booking form submission, simply click one one of the entries from this page.
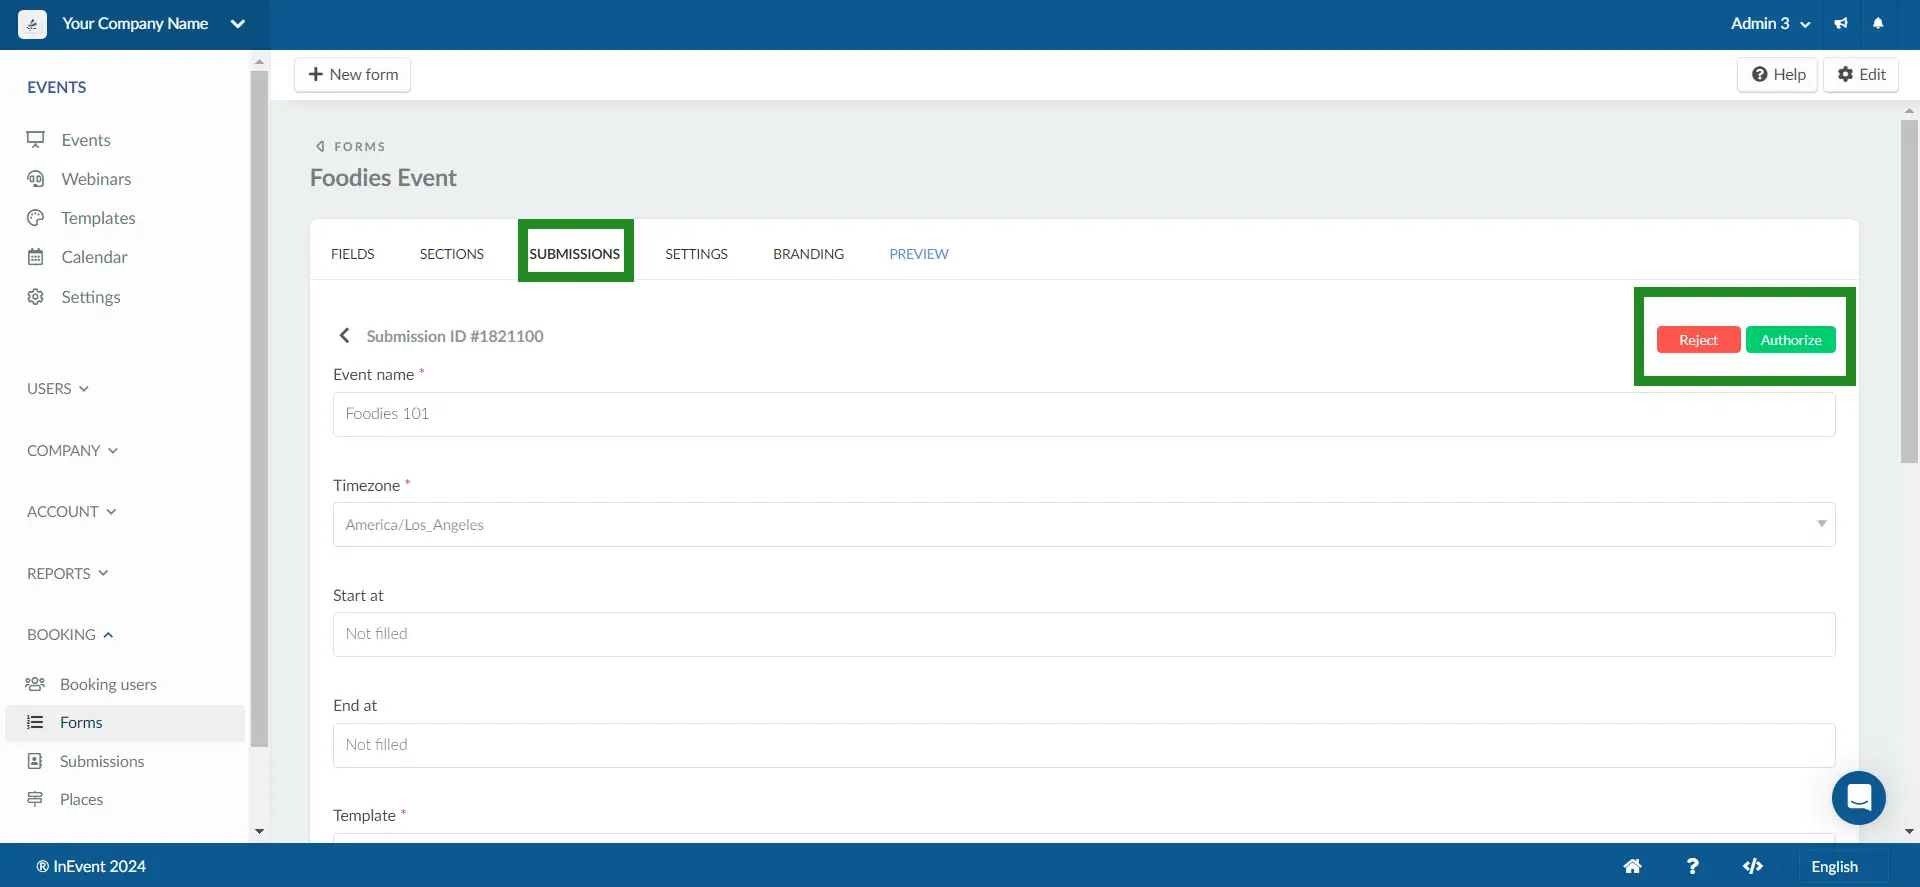
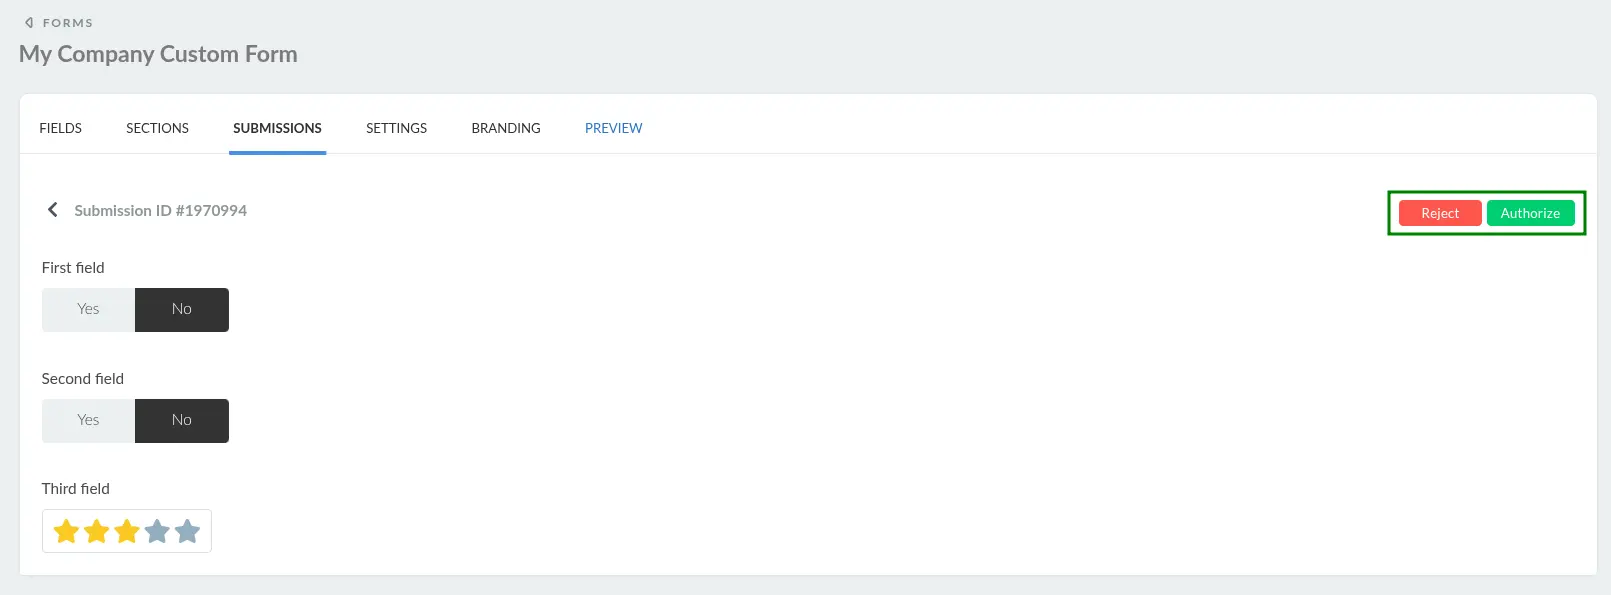
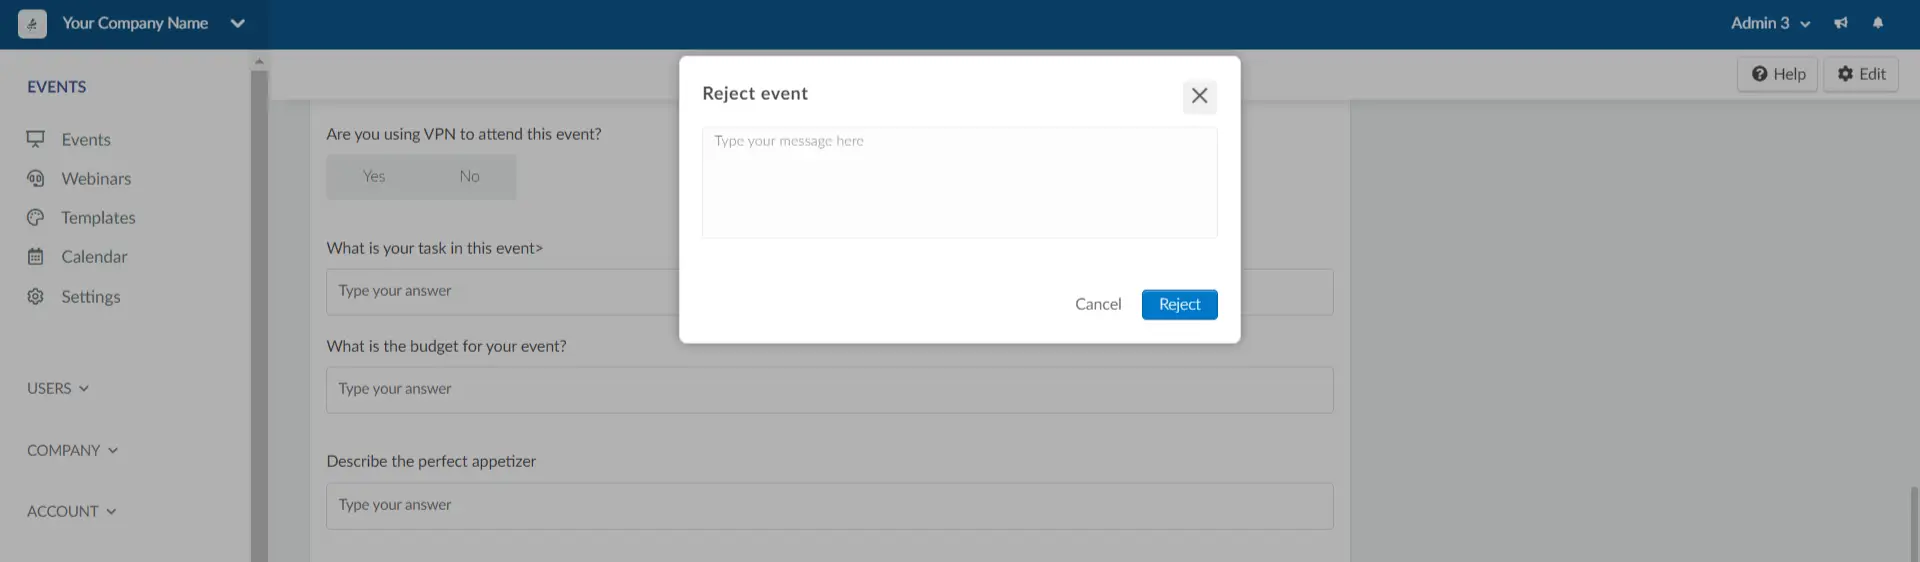
Approving and rejecting form submissions
Administrators or other users with form approval permissions can approve or reject event booking form and custom form submissions from this page. When a form with the Submitted status is opened, administrators or form approvers will see the Reject and Authorize buttons.
- Event booking form: This form should be shared only with booking users. By using this form, they will be able to request the creation of an event.
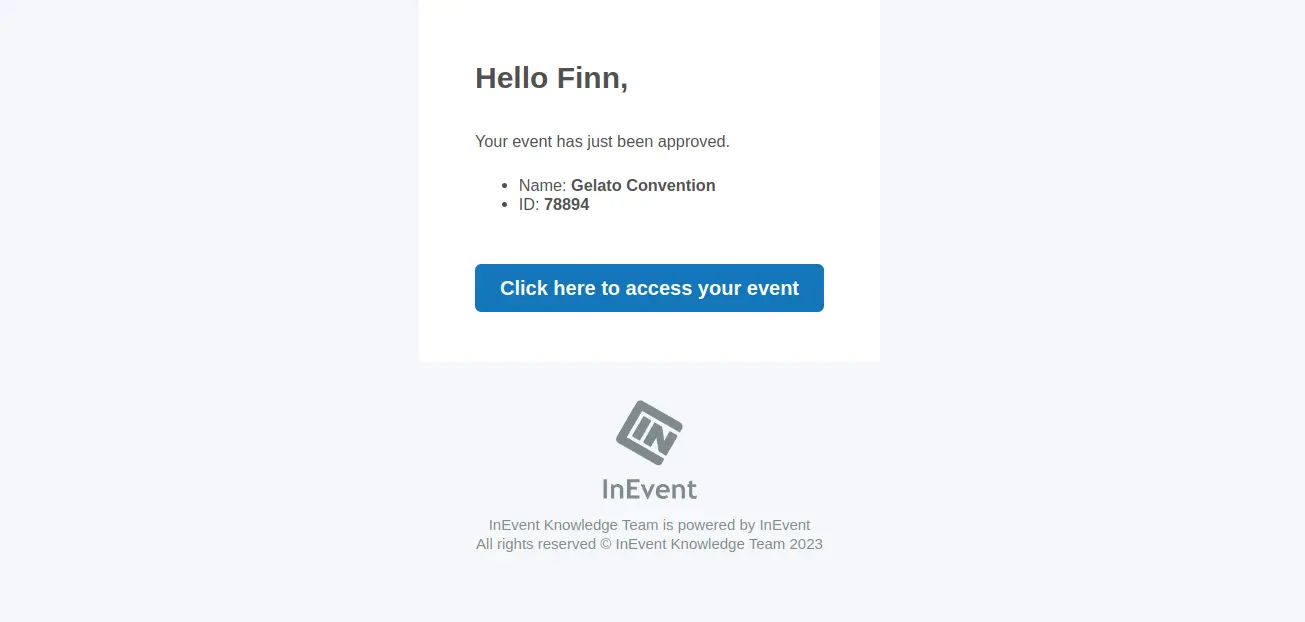
If you press Authorize, a pop-up box will appear and you will be required to select an option: New event, Use Template or Copy event.
Once approved, the event will be created within the platform and the form submitter will be notified by email, with the link to enter the event.
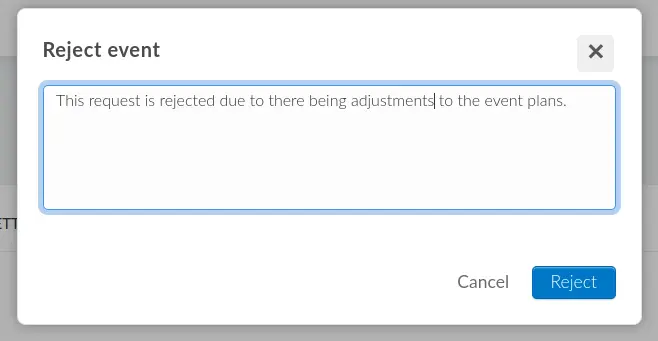
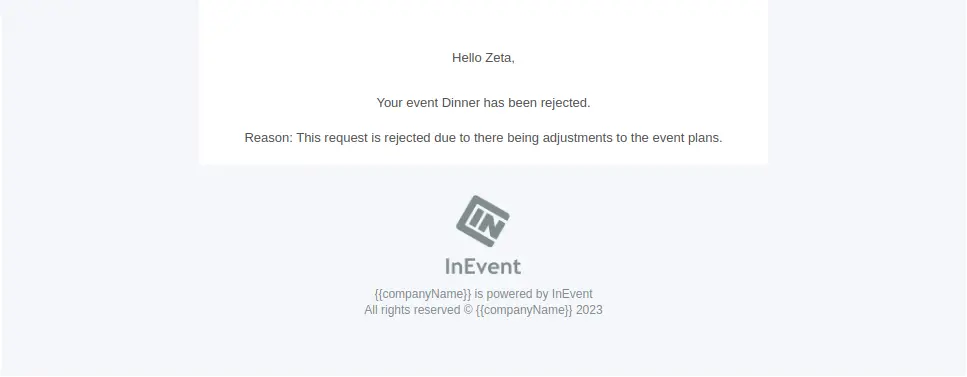
If you press Reject, there will be a field for you to explain why the event request was rejected. The message you enter in this field will be sent to the booking user who submitted the request.
The booking user of the rejected request will receive a rejection notification email, as shown below:
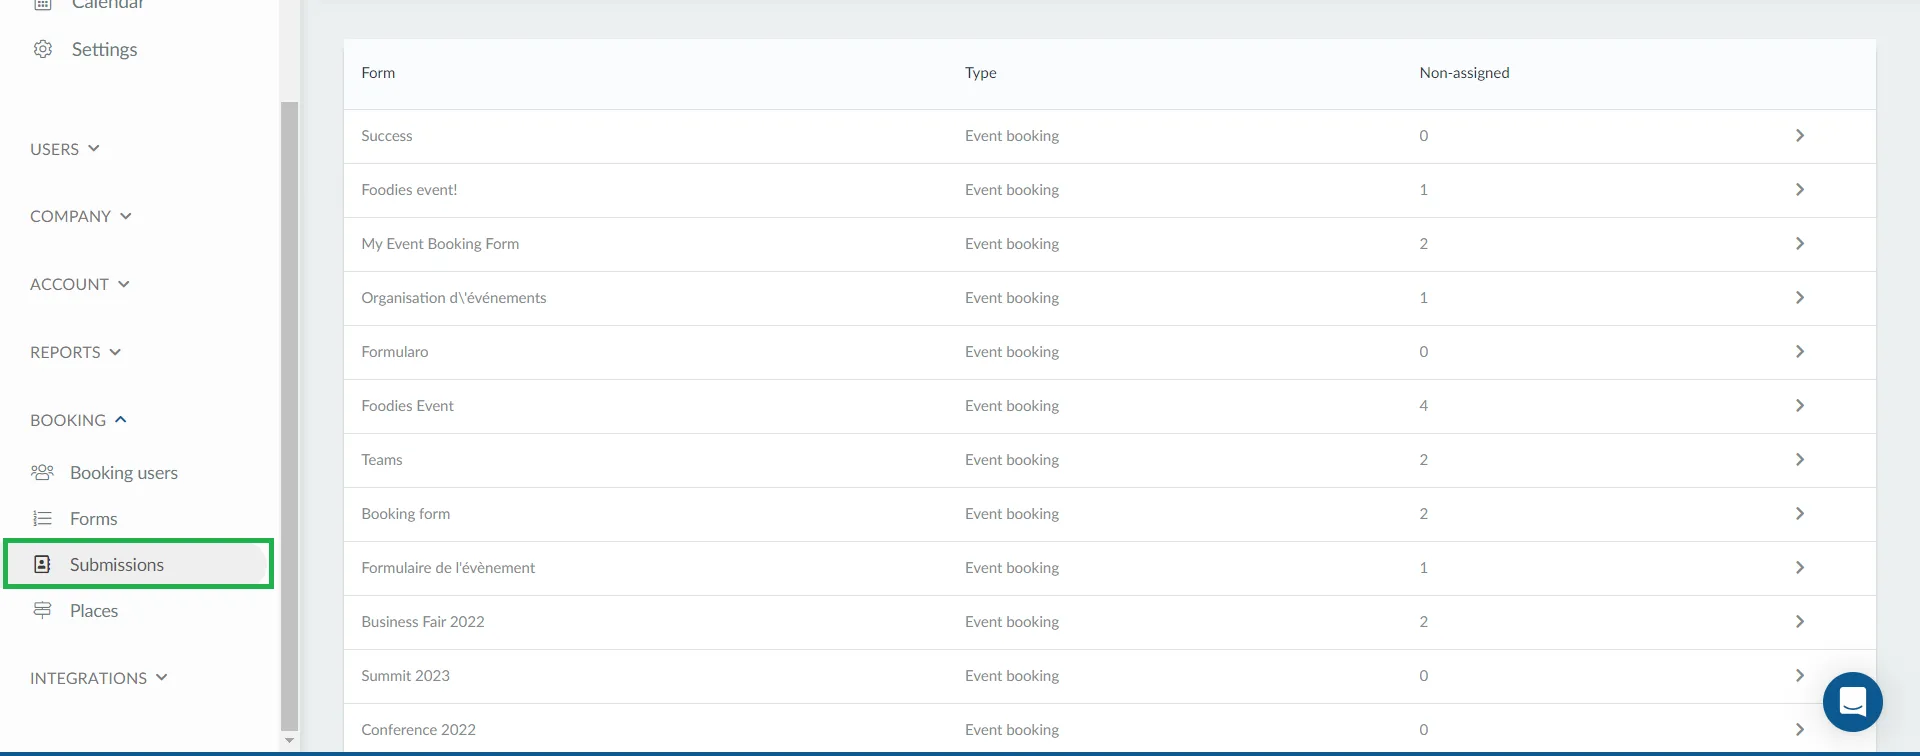
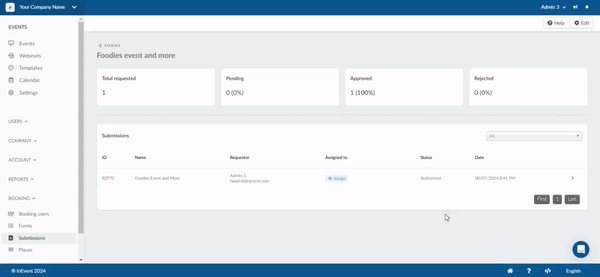
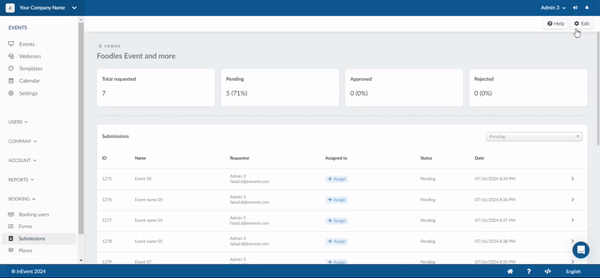
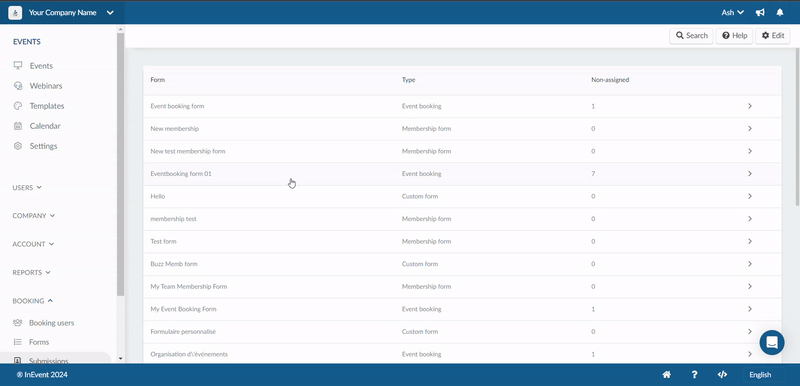
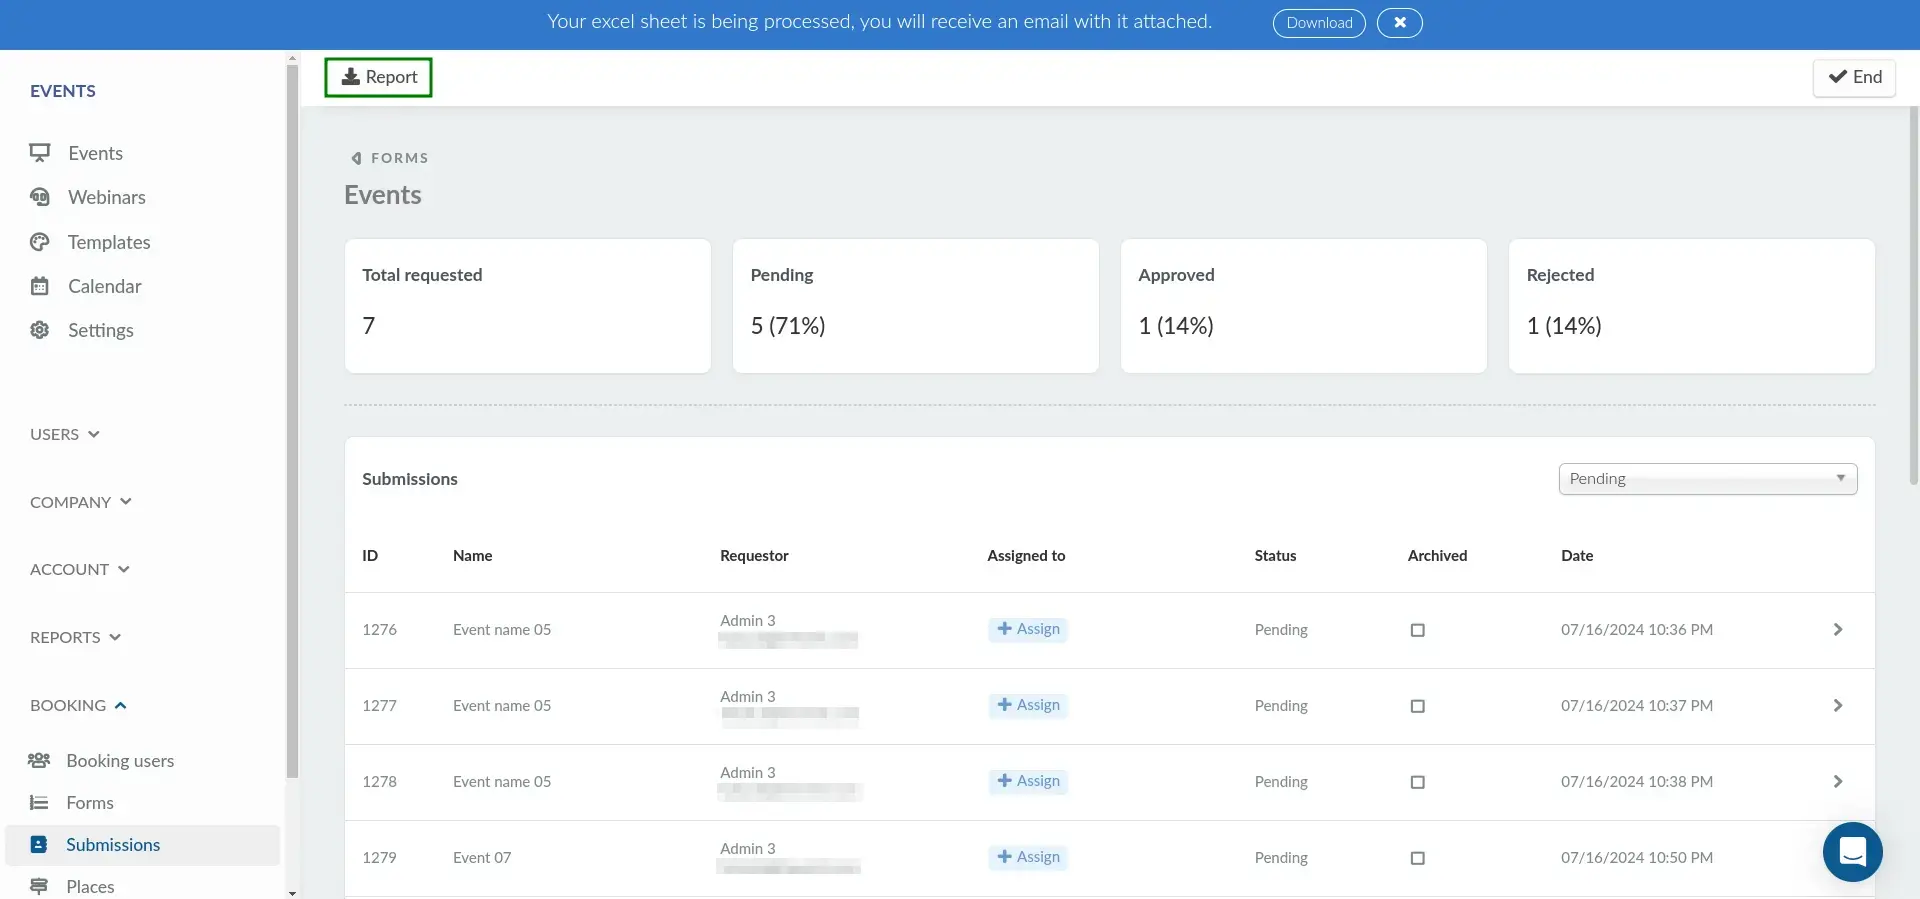
Submissions page
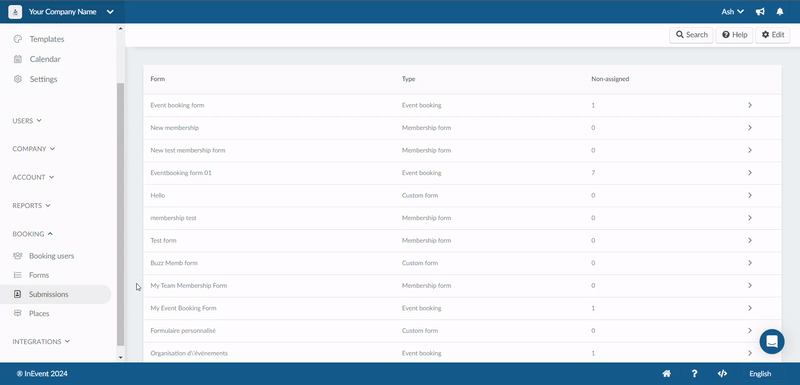
You can also view form submissions from the Submissions page at the Company level. To do so, navigate to Booking > Submissions and click on the desired form.
At the top of the page, you will find four boxes with general information about the submissions:
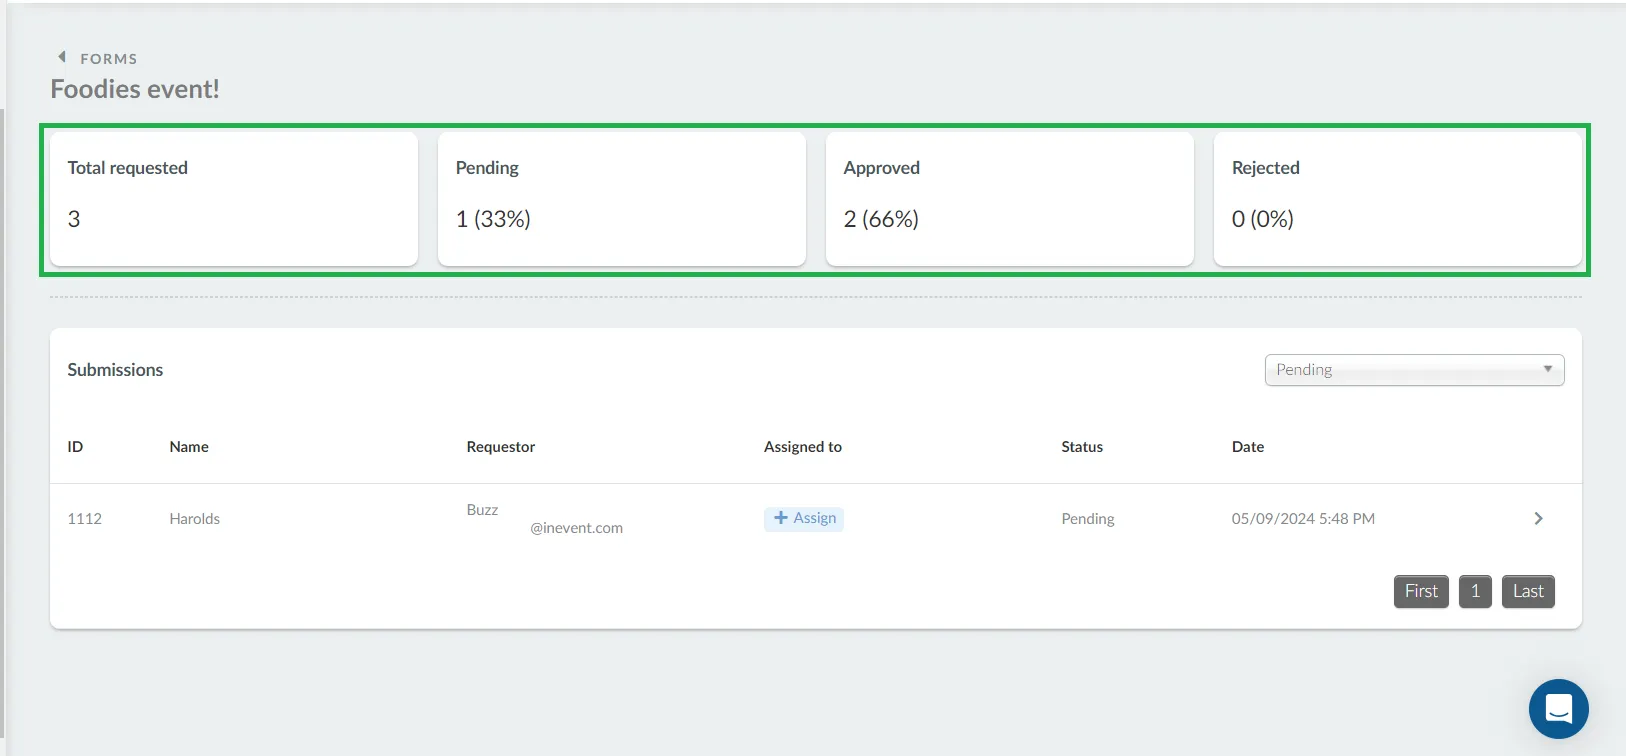
- Total requested: Counts how many event booking forms have been submitted.
- Pending: Counts how many event bookings are pending approval.
- Approved: Counts how many event bookings have been approved.
- Rejected: Counts how many event bookings have been rejected.
Filtering submissions by status
From this page, you can filter event booking form submissions by status by clicking on the Filter drop-down box.
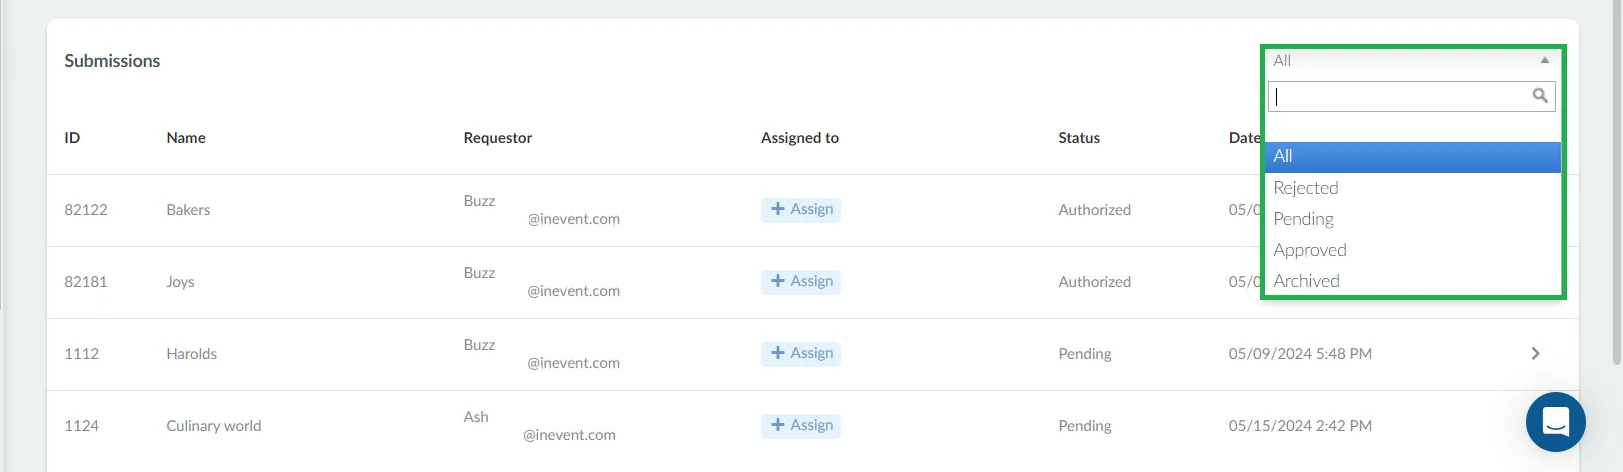
The available status filters are:
- All: Display forms of all statuses.
- Rejected: Display rejected forms.
- Pending: Display pending forms.
- Approved: Display approved forms.
- Archived: Displays archived forms.
Archiving form submissions
To archive a booking form follow these steps on the Booking > Submissions page:
- Click on a booking form.
- Click on Edit and the Archived column will appear.
- Tick the Archived checkbox of the submission form you want to archive.
- Click on End.
To unarchive a submission form, use the status filter and select Archived to see the archived submission(s), click on Edit to display the Archived column, then untick the checkbox.
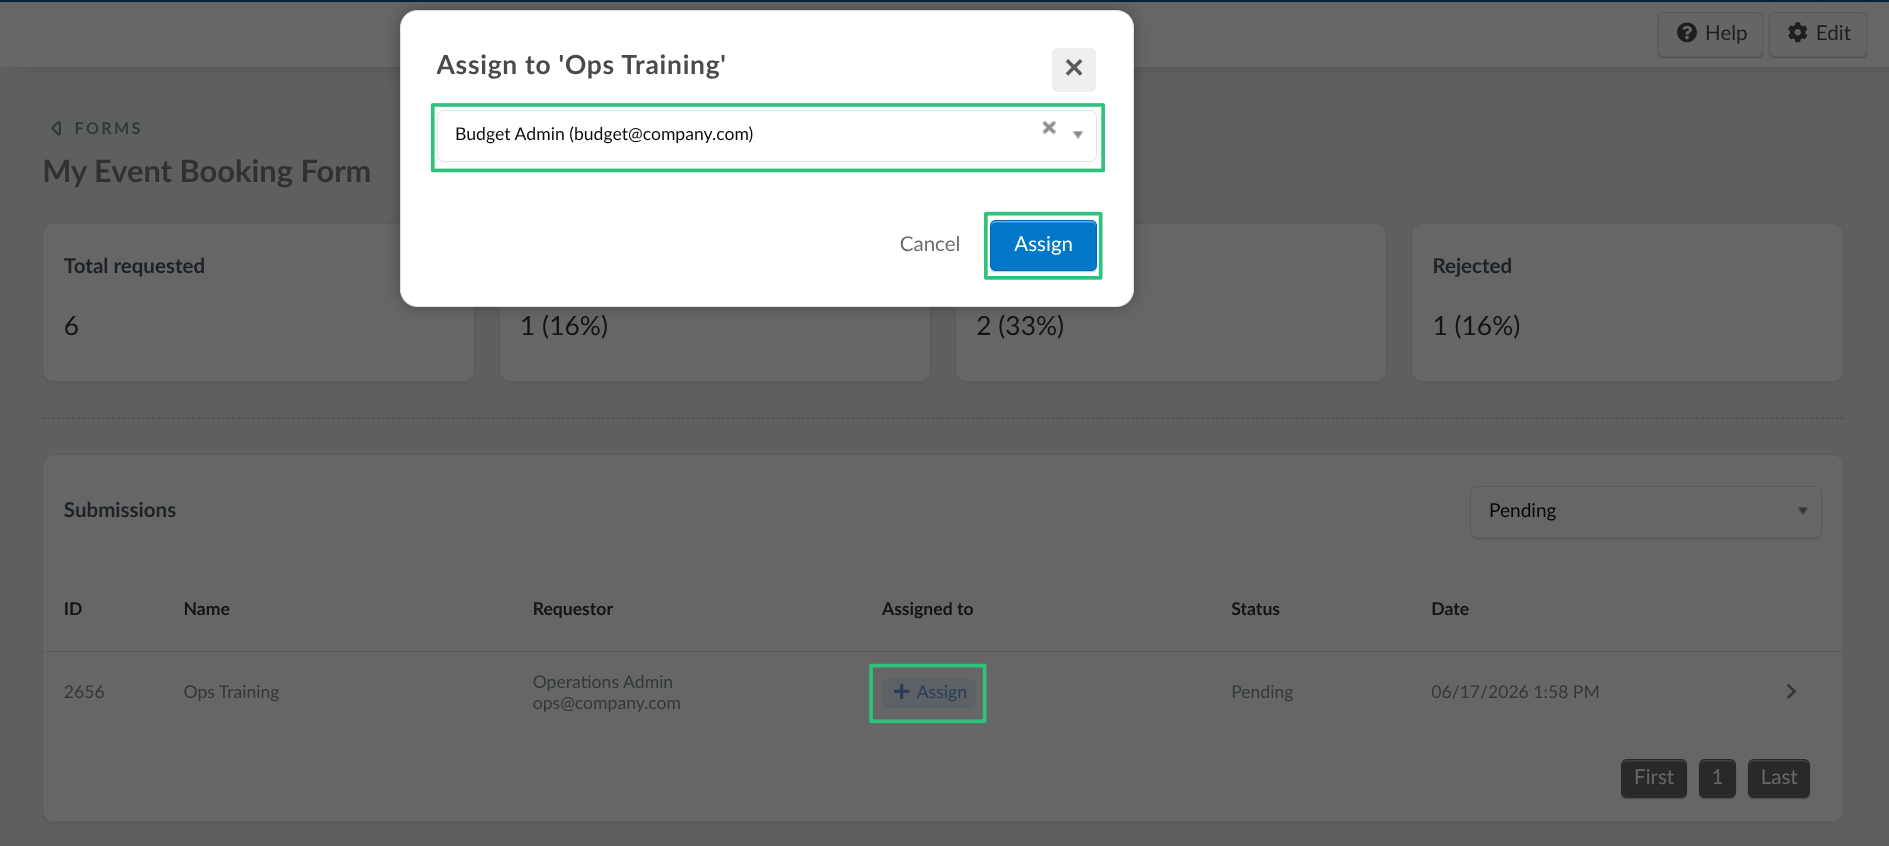
Assigning an administrator to an event
You can assign an administrator to an event upon event booking form submission approval from this page by clicking +Assign under the Assigned to column. On the Assign to pop-up box, select the user to be set as administrator and press the Assign button.
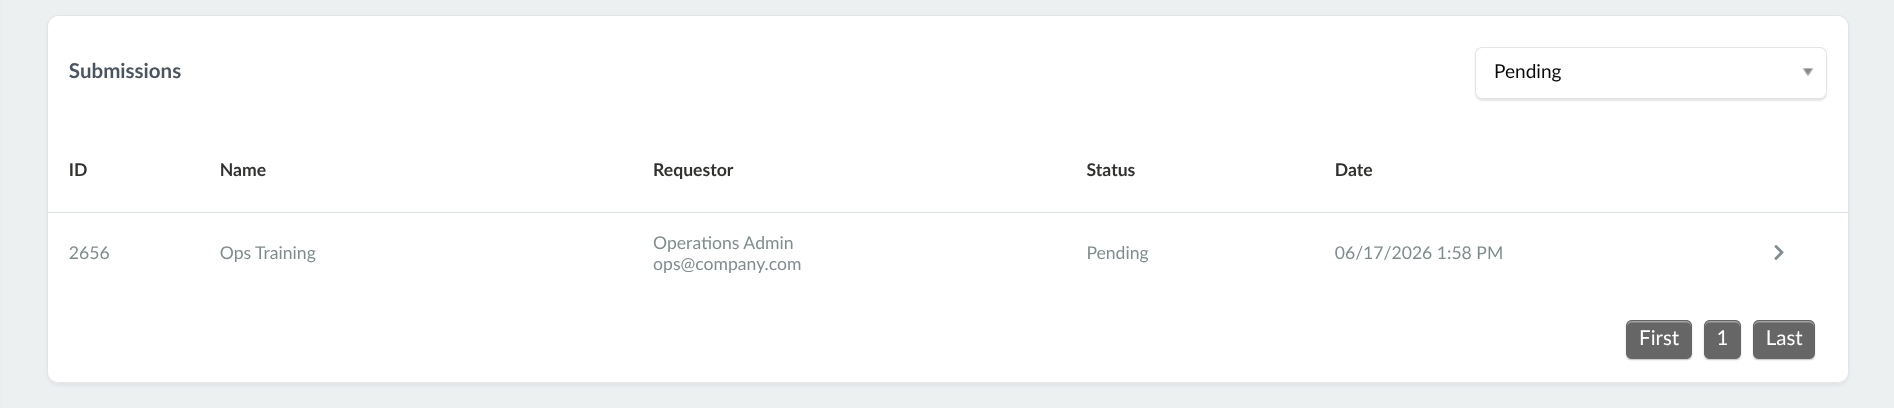
In addition, you can also fully disable assigning of administrators to an event upon booking form submission approval using the Assigned to admin lock tool. This tool can be located within Account > Tools > Block at the Company level.

When the Event booking admins lock is enabled, the Assign to column will not be visible in the event booking form submissions table, as shown in the screenshot below.
Editing form submissions
On the Submissions page, booking form owners have the ability to edit their booking form submissions. To edit a booking form submission, follow these steps:
- Locate and click on the form you wish to edit from the Submissions dashboard.
- Click on the Edit button at the top right corner.
- Make the desired changes to the booking form information.
- Click on the End button to save the updated information.
Approving and rejecting event booking and membership form requests from the Submissions page
Administrators or other users with form approval permissions can also approve or reject event booking form and membership form submissions from the Submissions page. When a form with the Submitted status is opened, administrators or form approvers will see the Reject and Approve buttons at the end of the form submission.
If you press Approve, the event will be created within the platform and the form submitter will be notified by email, with the link to enter the event.
If you press Reject, there will be a field for you to explain why the event request was rejected. The message you enter in this field will be sent to the booking user in the rejection email.
Can I approve a rejected submission?
To approve a submission initially rejected, go to the Submissions page, select the form, and choose Rejected from the filter drop-down to locate the submission. Click on the form, scroll down, and press Approve. Once approved, the event will be created on the platform, and the submitter will receive an email notification with the event link.
Additional information
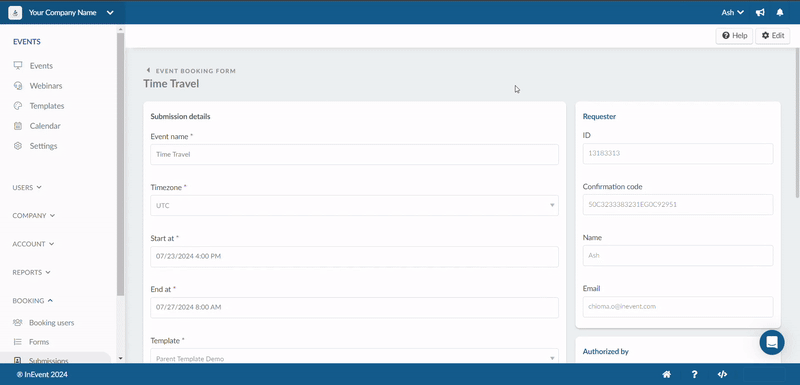
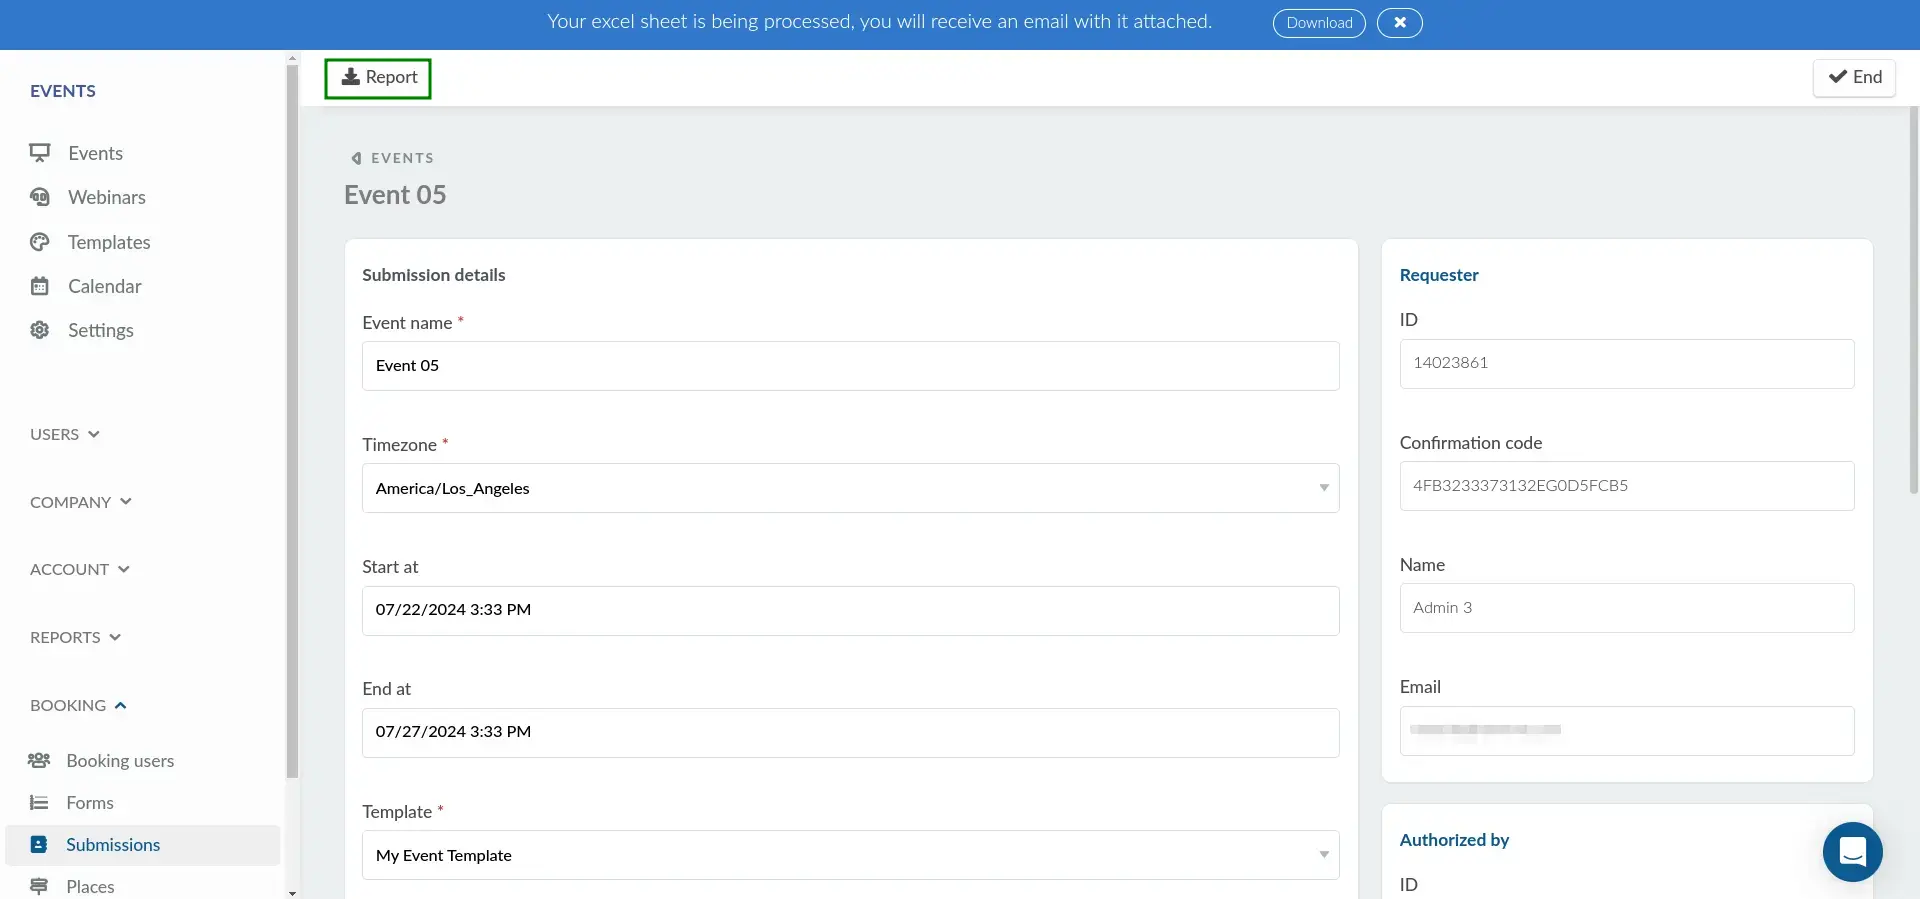
At the right corner of a selected user's submission, you will be able to see more fields - Requester, Authorized by, Options and Location.
- The Requester field displays the ID, Confirmation code, Name and Email address of the Requester.
- The Authorized by field shows the ID, Name and Email address of the form authorizer.
- The Options field allows you print form submissions directly from the platform.
- The Location field allows you select a location for the event. By clicking on the Pen icon, you will be redirected to the Company places page to select a place for the event.
Downloading form submission reports
To download a form submission report, navigate to the Submissions page and click on the target form. Then, click Edit > Report.
In addition, you can also download reports of each submission. To do so, click on the target form submission. Then, click Edit > Report.
After clicking Report, a blue notification banner will be displayed, informing that your report is being generated. Once the process is done, the report will be sent to your e-mail address.
Event booking form reports will contain the following fields: feedbackSubmissionID, personID, status (submission), target (form type), targetID, formID, date (submission), archived, confirmationCode, name (applicant), email, updatedDate, eventID, eventBookingID, forCompanyID, eventBookingExtras, eventName, eventTimezone, eventDateBegin, eventDateEnd, eventNick, eventPlaceID, eventPlaceName, eventPlaceCategory, eventBudget, eventAuthorized, eventOwnerID, eventOwnerName, eventBookingAuthorizedByID, eventBookingAuthorizedByName, eventBookingAuthorizedByEmail, eventTemplateID, custom form fields, preSelectedAdminsNames, and preSelectedAdminsEmails.
eventID and eventNick will only be generated in the submissions if the event booking form is approved.
Membership and Custom form reports will contain the following fields: feedbackSubmissionID, personID, status (of submission), target (form type), targetID, formID, date (of submisision), archived, name (of applicant), email, updatedDate, and custom form fields.

status column.