Scheduled Meetings: guide for event organizers
 Updated 1 month ago
by
Caleb Kotey
Updated 1 month ago
by
Caleb Kotey
- Enabling the Meetings feature
- Scheduled meetings dashboard
- Setting up meetings
- Configuring date and time slots for meetings to be scheduled by participants
- Meetings scheduled by the event organizers
- Creating a place to hold meetings
- Creating meeting time slots for attendees
- Creating a meeting for participants
- Creating a meeting between two participants
- Creating a meeting between multiple participants
- Creating in-person meetings for hybrid events
- Setting a meeting status
- Clearing a meeting
- Viewing and managing the locations of meetings within your event
- Matchmaking
Meeting people to conduct business on site is key at sponsored events. In addition to the networking functionality, you can set up meetings using our self-service booking system. You can request more info, add your inbox, confirm or reject a meeting, add check-in options and assign automatic survey forms. As an event admin, you can schedule meetings for your attendees directly from the platform.
Enabling the Meetings feature
Select Settings > Tools. Click on the Registration section and enable the Meetings functionality by pressing Edit, then toggle the button on and finally click on End. The setting should display Yes.
If you want the attendees to be able to schedule meetings for themselves, you'll need to enable Networking and make sure Profile Lock is disabled.
Scheduled meetings dashboard
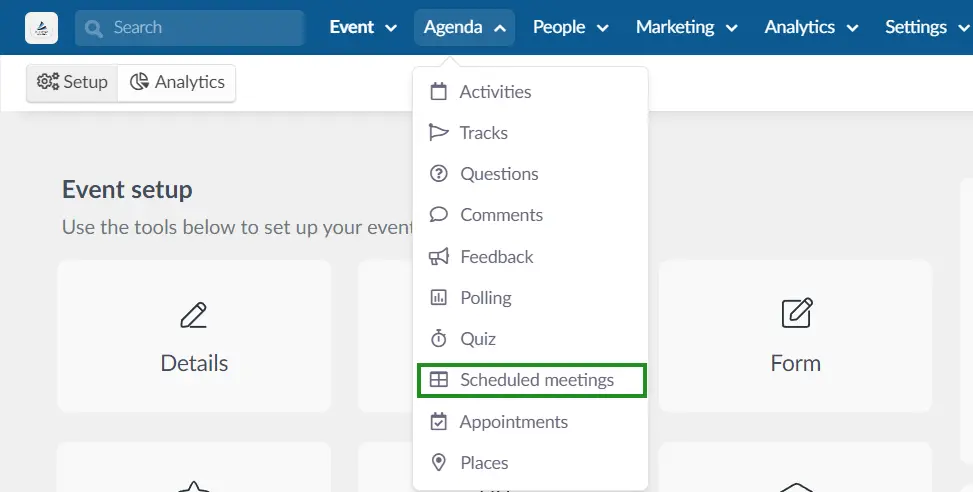
After enabling the Meetings feature, navigate to Agenda > Scheduled meetings.
This will bring you to the Full list page, where you can view all scheduled meetings within your event. This includes meetings scheduled by event admins for participants, as well as meetings participants scheduled themselves in the Virtual Lobby.
On the dashboard, you will see the following details for each meeting: ID, Host, Guests, Location, Date, Duration, and Status.
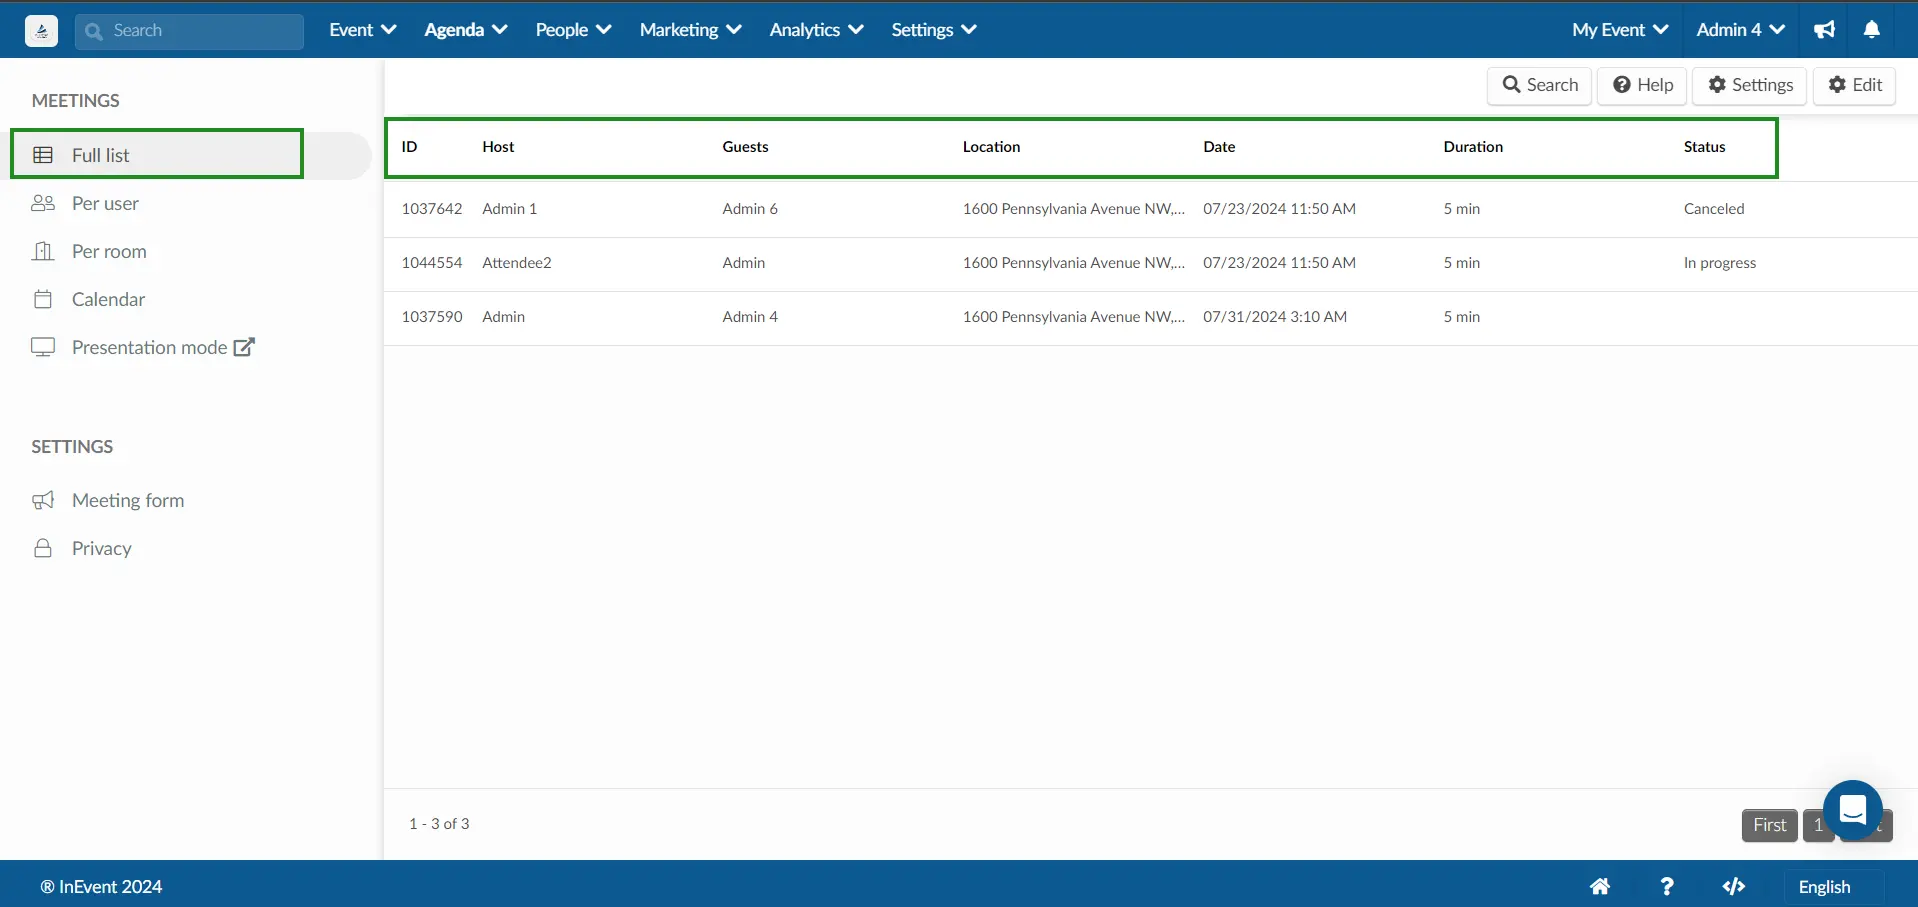
You can search for an attendee by clicking the Search button and typing in the attendee's name in the text box, then press Search again.
On the left menu, you will find additional fields accessible to you:
- Per user
- Per room
- Calendar
- Presentation mode
- Meeting form
Setting up meetings
There are two options when it comes to scheduled 1x1 meetings:
- Participants can decide with whom and when they would like to meet by scheduling meetings through the Virtual Lobby.
- Event organizers can schedule all participants' meetings in the backend.
Configuring date and time slots for meetings to be scheduled by participants
To define the meetings slots that will be displayed on the Virtual Lobby for participants during your event:
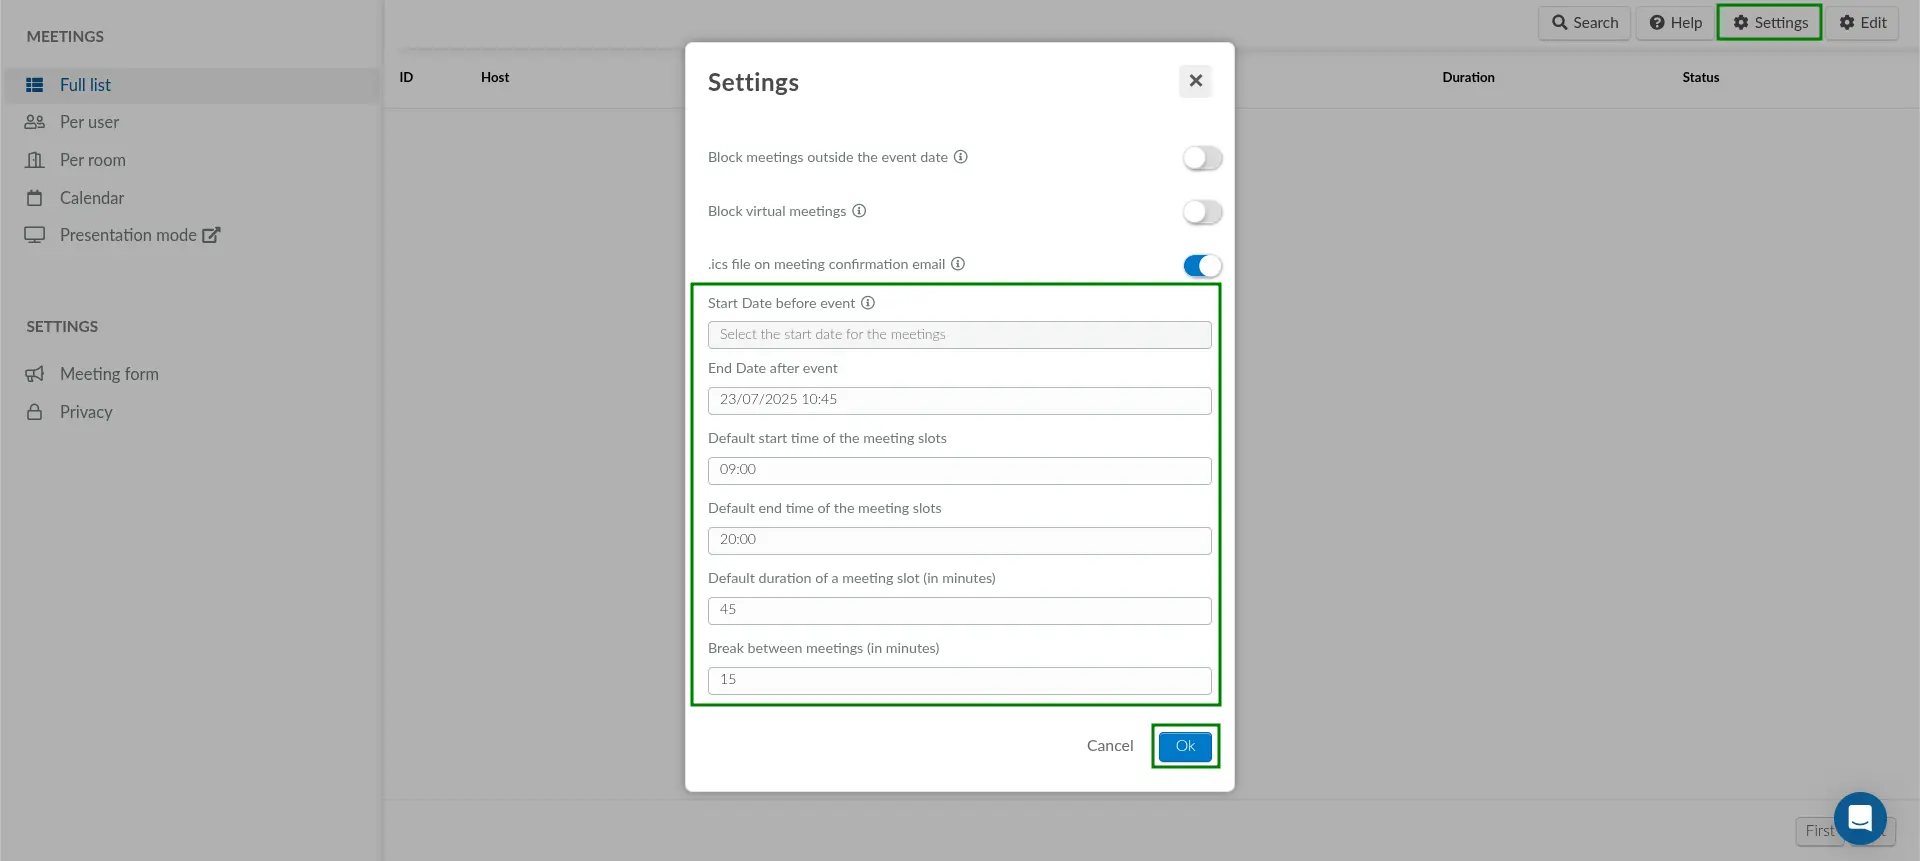
- Click on the Settings button In the top right corner of the page.
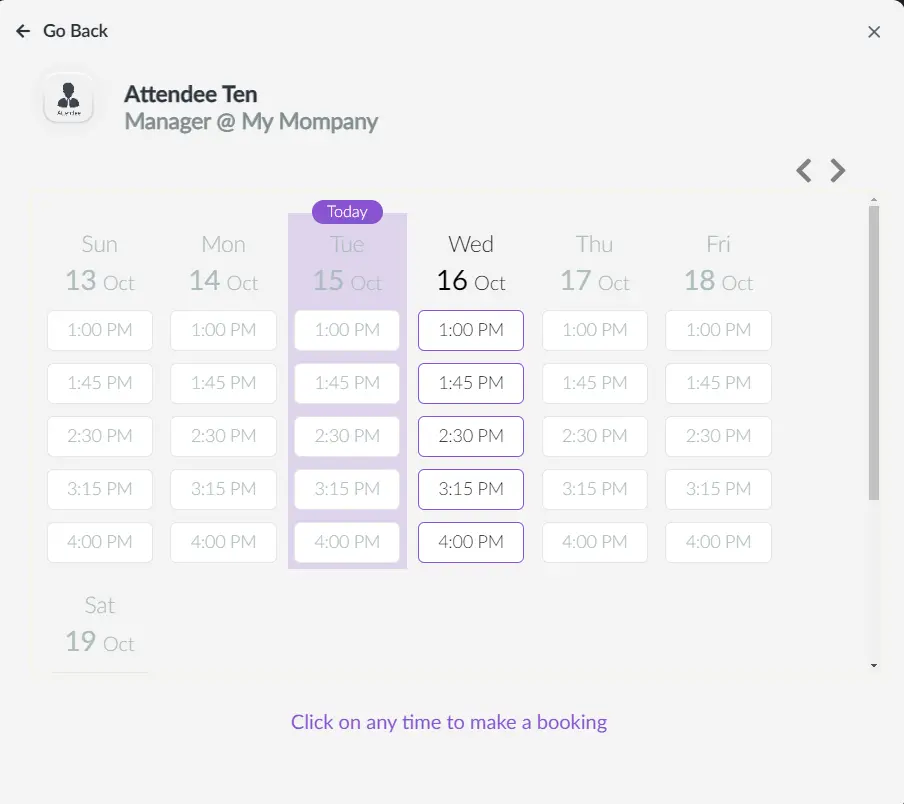
- Define the default Start and End time for meeting slots, as well as the default Duration of each meeting through the pop-up window. Additionally, you can also define a default time for Break between meetings.
- Click on Ok.
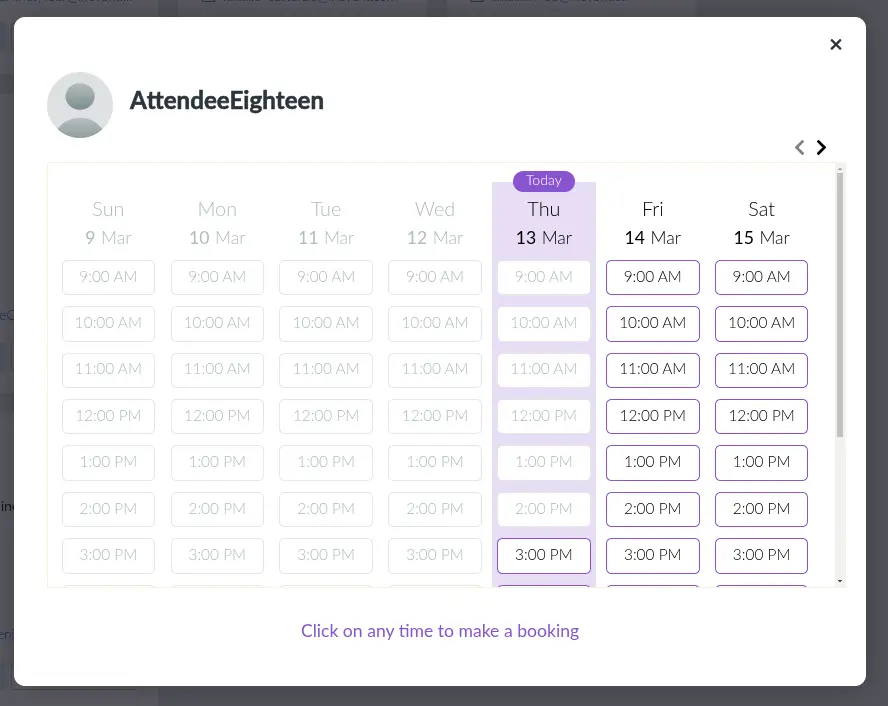
This will affect the meeting slots displayed to all attendees who try booking 1:1 meetings, as shown below:
For further information on meetings scheduled by the participants, refer to our Meetings: guide for participants
Booking meetings outside event start and end date bounds
If you would like participants to book meetings before the start and after the end of your event, follow these steps:
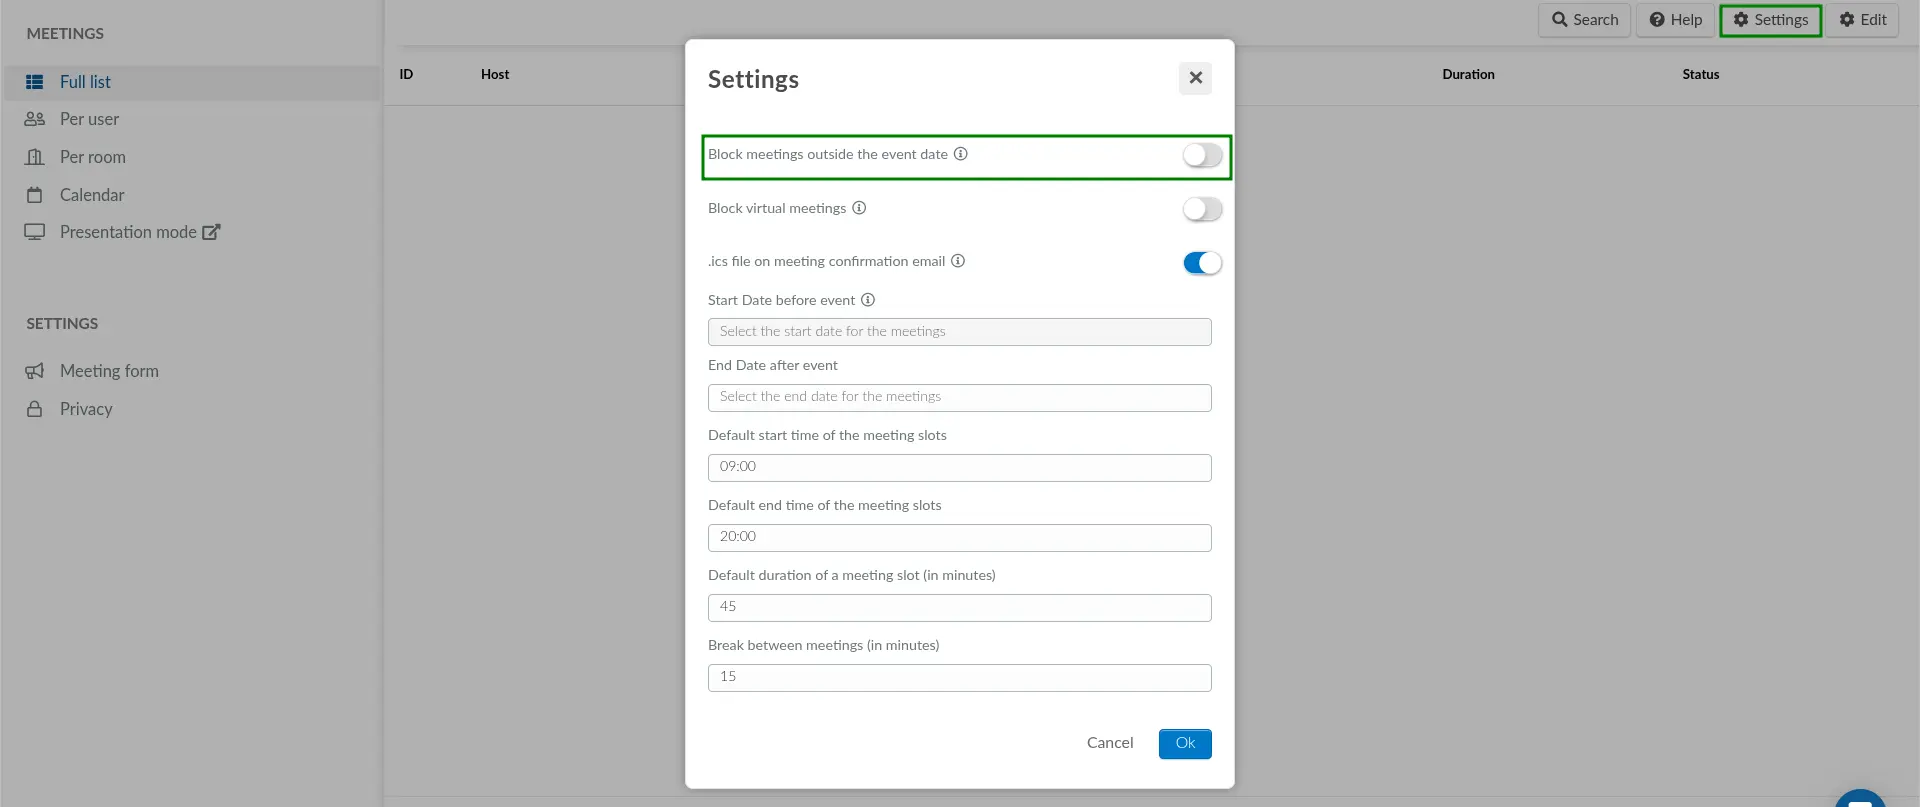
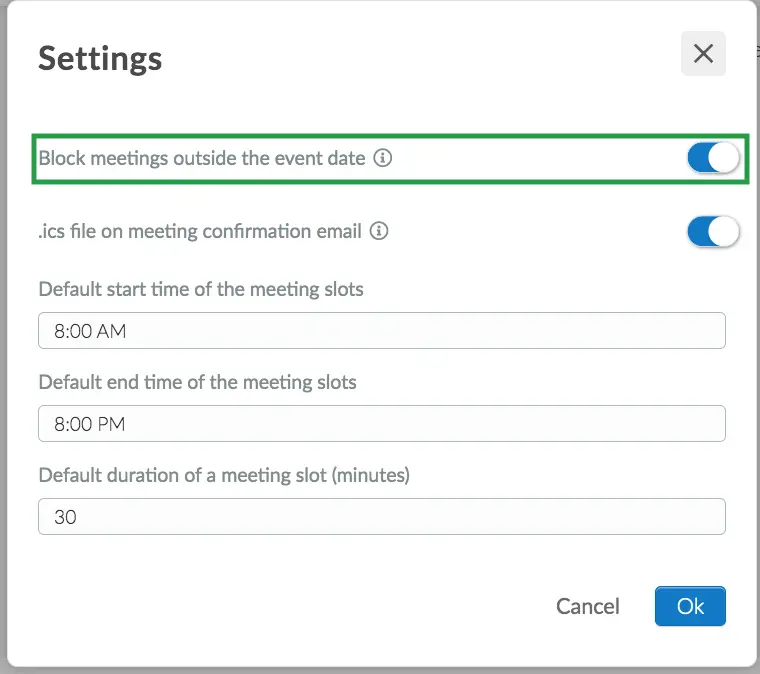
- Click on Settings at the top right corner of the page.
- Disable the Block meetings outside the event date tool.
- Select a date and time under Start date before event and End date after event.
- Click on Ok once you are done.
In the Virtual lobby, participants will be able to book meetings with available slots before and after the event.
To disable meetings outside your event start and end dates, turn on the Block meetings outside event date option.
For more information about creating event meetings before and after an event, consult the Event meeting dates article.
Meetings scheduled by the event organizers
If you, the event organizer, wish to book all participant's meetings in the backend, follow the steps listed below:
Creating a place to hold meetings
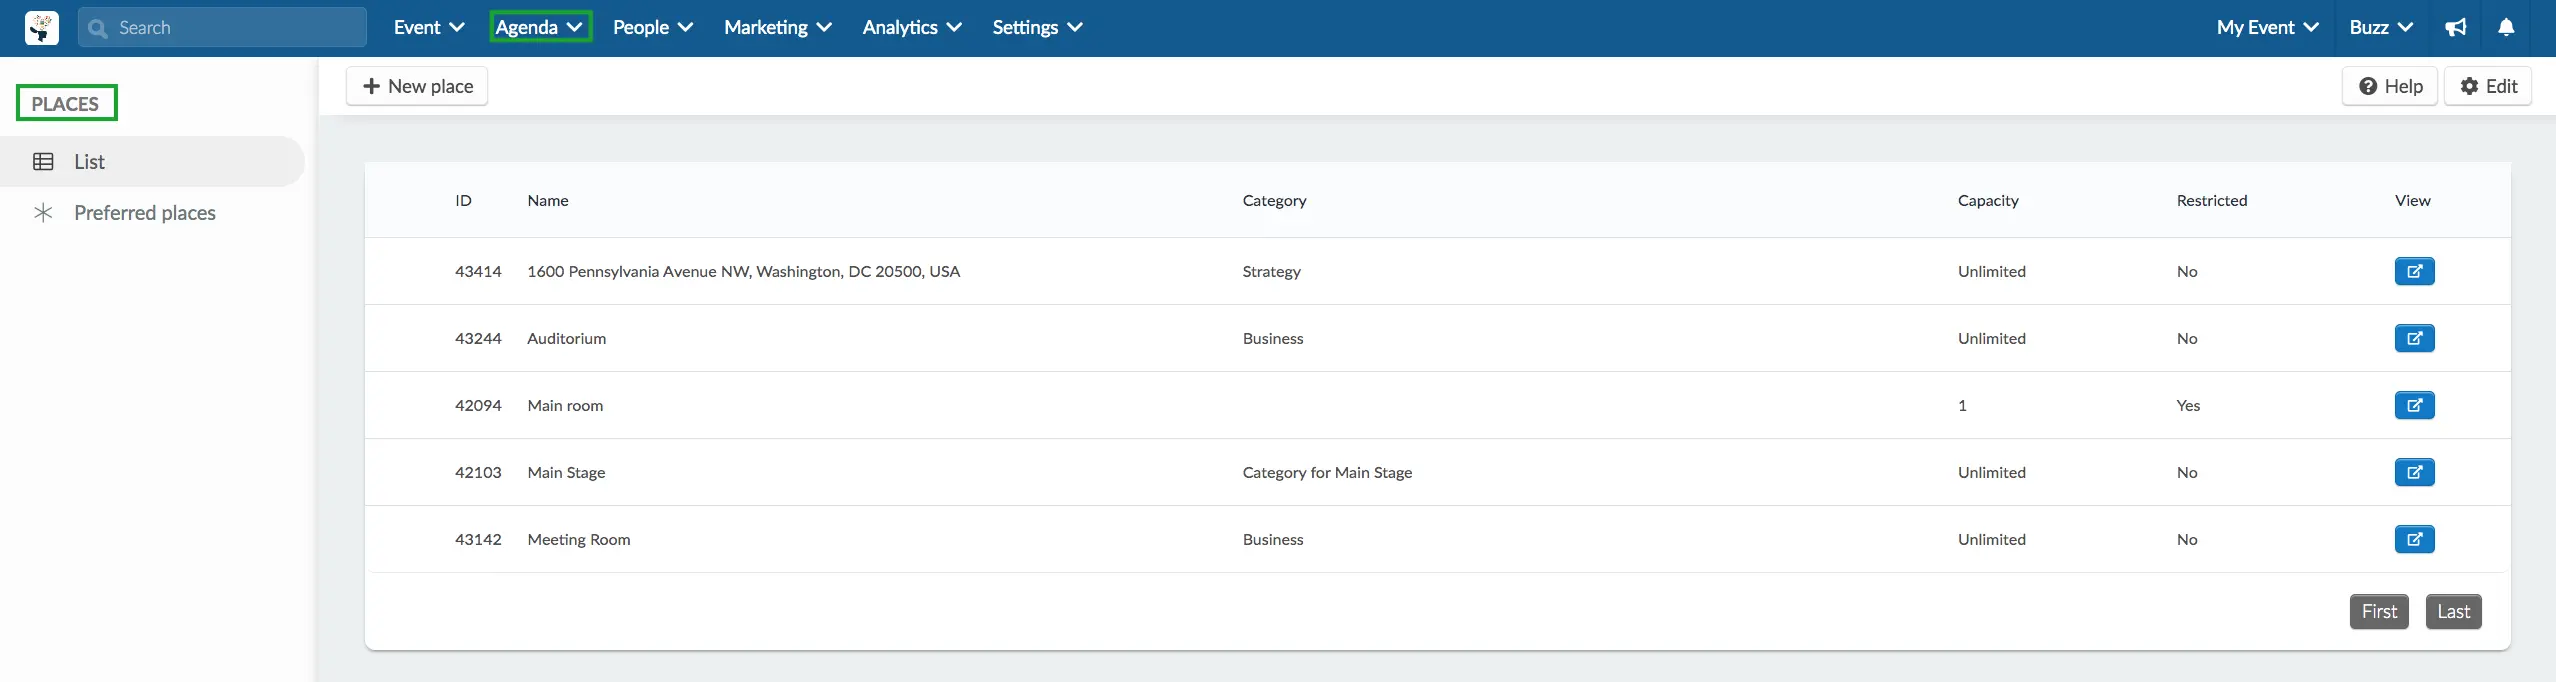
To be able to schedule meetings for your participants, you first need to create a place to hold your meetings by going to Agenda > Places. Please refer to the Event Places article to learn more about this.
Creating meeting time slots for attendees
To create meeting time slots, on the meetings page follow these steps:
- Click on Per user from the left menu to see a list of your attendees.
- Select an attendee > +Add slot.
- Then, select the place that you have created,
- Enter the start and end dates, along with the meeting's duration (in minutes).
- (Optional) Specify the break between meetings (in minutes).
- Click on Create.
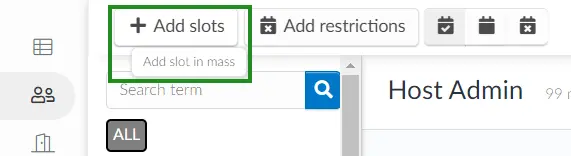
You can also add slots in mass by pressing the + icon in the upper left.
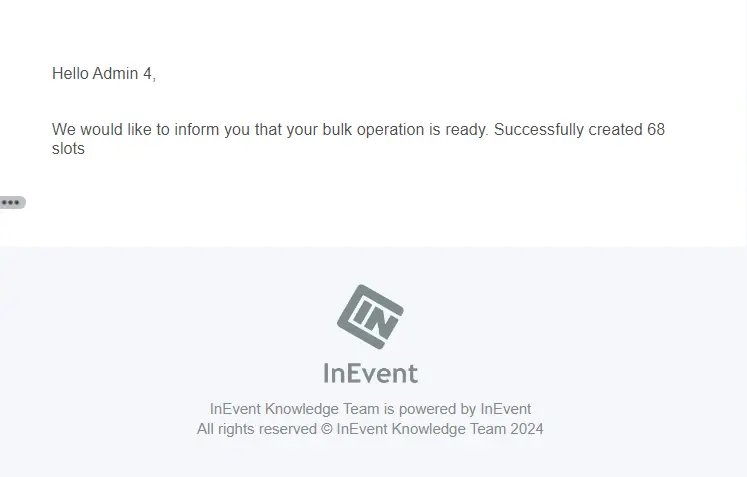
Once you have created mass slots, you will receive an email informing you the operation was successful and confirming the amount of slots. The email will look like this:
Creating a meeting for participants
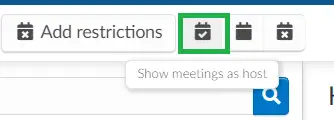
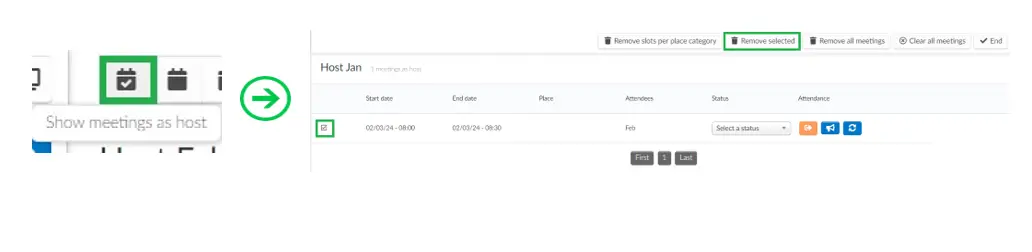
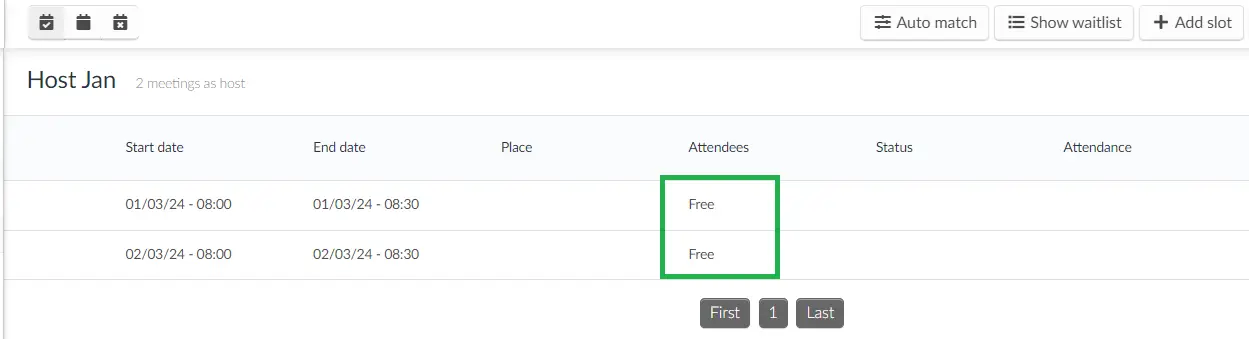
Click on Per user, and select a participant. Ensure that prior to this step you have created meeting time slots.
Ensure you are in the Show meetings as host view, by selecting the icon shown below.
Creating a meeting between two participants
Meetings are created per participant. Thus, selecting one of the participants as the meeting host is necessary before carrying out the remaining steps. To create a meeting between two participants, follow the steps below:
- Select a meeting host from the list of participants in the Per user page
- Click on Edit and press the blue Schedule meeting button on any of the host's vacant slots.
- Click the blue button next to the person you want to add to the meeting.
- Press End to save your changes.
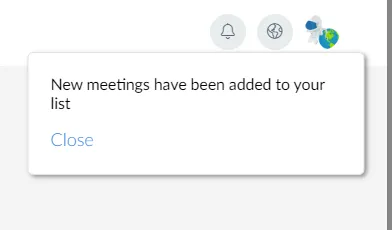
The guest will receive a New meetings have been added to your list notification in the Virtual Lobby when a meeting is added by admins on the backend. In addition, they will receive a You have a meeting starting soon notification when it is time for the meeting to take place.
Creating a meeting between multiple participants
To book a meeting between multiple participants, follow the steps below:
- Select a meeting host from the list of participants on the left-hand menu.
- Click on Edit and press the blue Schedule meeting button on any of the host's vacant slots.
- Select the participants you would like to add to the meeting.
- Click on the blue Select button showing the number of selected people.
- Press End to save your changes.
Creating in-person meetings for hybrid events
You can schedule in-person meetings for hybrid events, allowing attendees to connect on-site while still benefiting from virtual components of your event.
To ensure that all scheduled meetings take place in person, follow these steps:
- Navigate to Agenda > Scheduled Meetings.
- Click on Settings in the top-right corner of the Scheduled Meetings page.
- Turn on or enable the Block Virtual Meeting option.
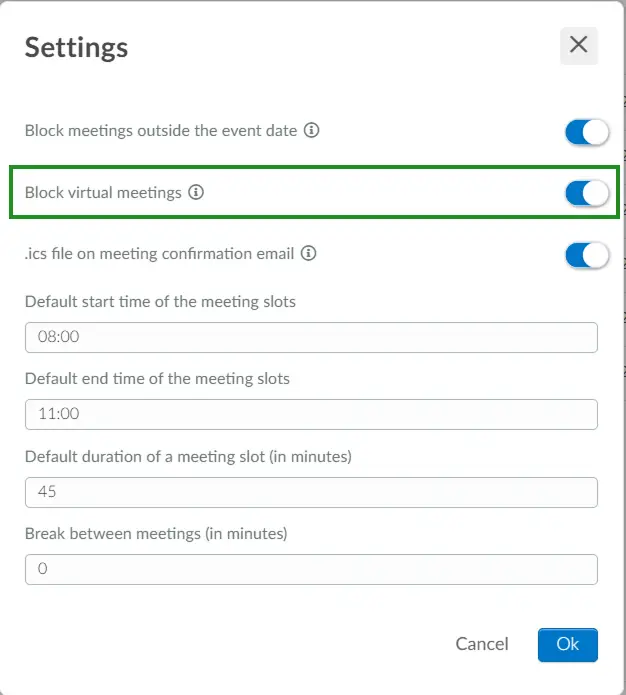
Once this is done, attendees booking or scheduling meetings in the Virtual Lobby will only have the option to schedule in-person meetings by selecting a meeting place.
If you want attendees to have the flexibility to schedule either virtual or in-person meetings, ensure the Block Virtual Meeting option is disabled in the Scheduled Meetings Settings. This will allow attendees to check the Is this meeting in-person ? box to schedule an on-site meeting, or leave it unchecked to schedule a virtual meeting in the virtual lobby.
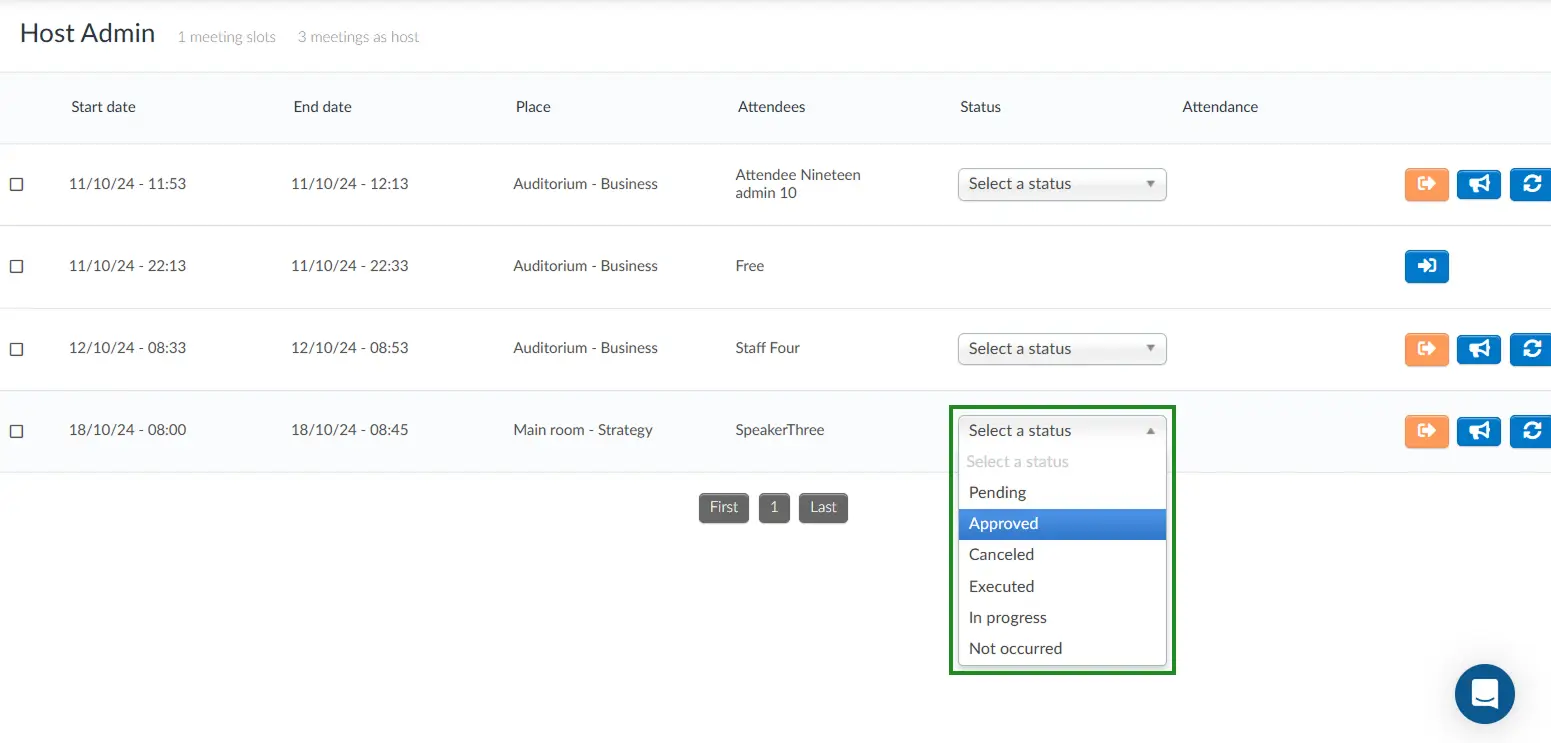
Setting a meeting status
After creating a meeting between participants, you can select a status for your meeting. To do this, simply click on Edit, click on the dropdown beside the scheduled meeting slot and select a status.
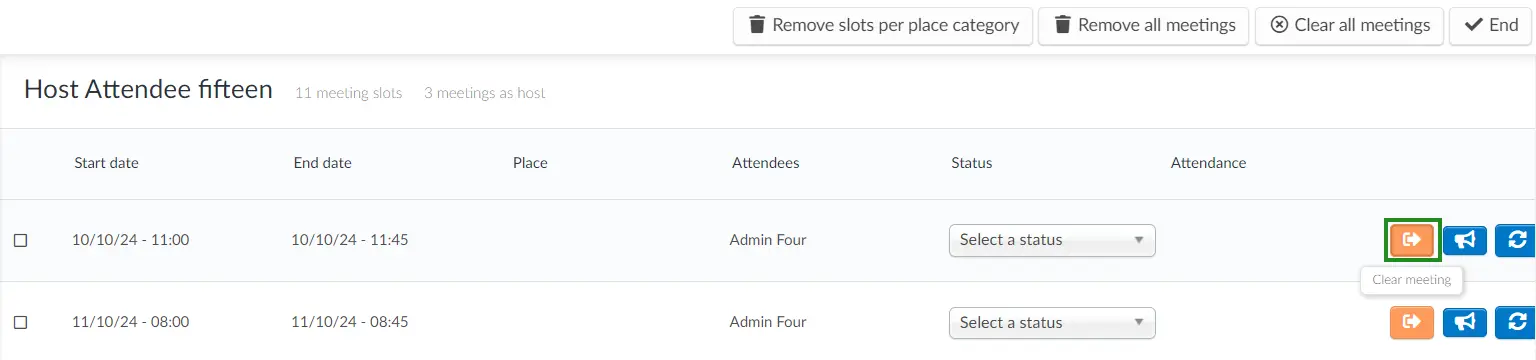
Clearing a meeting
To clear a meeting, simply click on Edit and press the orange icon beside the meeting slot you wish to remove. The meeting will automatically be cleared from the participant's agenda and the slot will become free.
Viewing and managing the locations of meetings within your event
You can easily view all scheduled meetings and slots through the Scheduled Meetings Per room dashboard. On the dashboard, you will see the following details:
ID, Host, Guests, Location, Date, Duration, and Status.
Here’s what you can do on this page:
- View Meetings by Room: You can view your meetings organized by the Place selected when creating your meeting timeslots.
- Manage Meeting Status: You can select or edit the status of Scheduled Meetings. This includes meetings scheduled by event admins for participants and meetings participants scheduled themselves in the Virtual Lobby.
- Respond to meeting Feedback forms: You can respond to meeting forms by clicking on the blue icon next to the scheduled meeting.
This facilitates effective management and tracking of all the scheduled meetings/ meeting time slots for your event and organizes and locates any meetings you've created.
Matchmaking
The matchmaking option allows you to schedule individual and group meetings automatically, considering restrictions and labels.
Matchmaking a host with a participant
To matchmake a host with one participant, follow these steps.
- Click on Per user from the left menu and select the host of the meeting from the attendee list.
- Go to the Show meetings as host view and click on Auto match at the top right side of the page. (If you cannot see the Auto match button, this means you are yet to create any meeting slots for the host.)
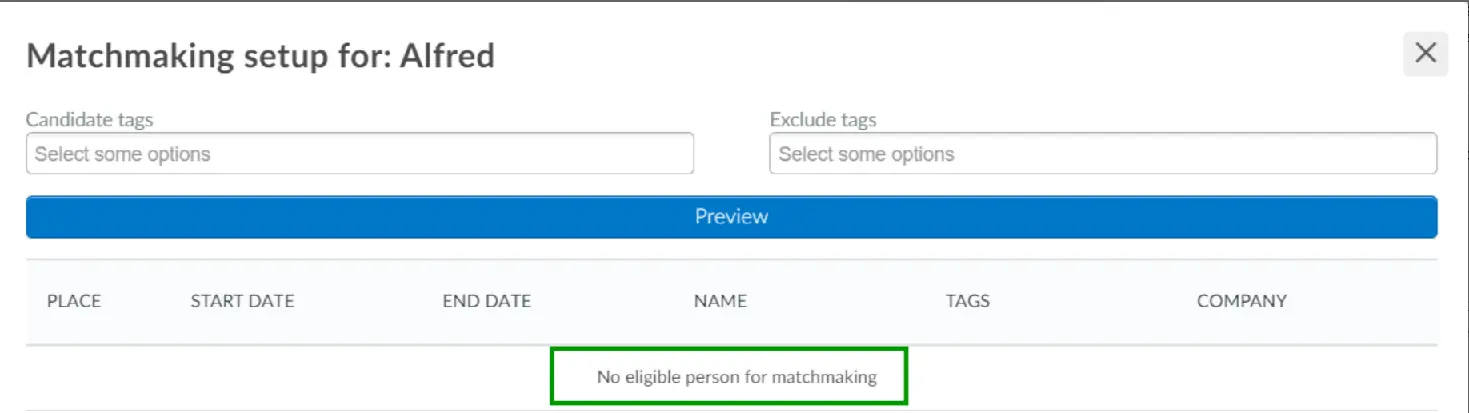
- Select the Candidate tags box and pick the tags you wish to match with. Repeat in the Exclude tags box with any tags you do not want to match (Optional).
- Ensure that the number selected in the People Matched box is 1.
- Click the Preview button, then press Match.
- Refresh your page and click on the Host's name once again to see the meeting slots booked.
Matchmaking a host with multiple participants
To match-make a host with multiple participants, follow these steps:
- Click on Per user in the left menu and select the host of the meeting.
- Go to the Show meetings as host view and click on Auto match at the top right side of the page. (If you cannot see the Auto match button, this means you are yet to create any meeting slots for the host.)
- Select the number of people you want to match the host with per meeting from the People matched box.
- Select the Candidate tags box and pick the tags you wish to match with. Repeat in the Exclude tags box with any tags you do not want to match (Optional).
- Click the Preview button, then press Match.
- Refresh your page and click on the Host's name once again to see the meeting slots created.
Besides the matchmaking feature, we also offer another networking option that will randomly assign 1x1 meetings in the Virtual Lobby: the Speed Networking.
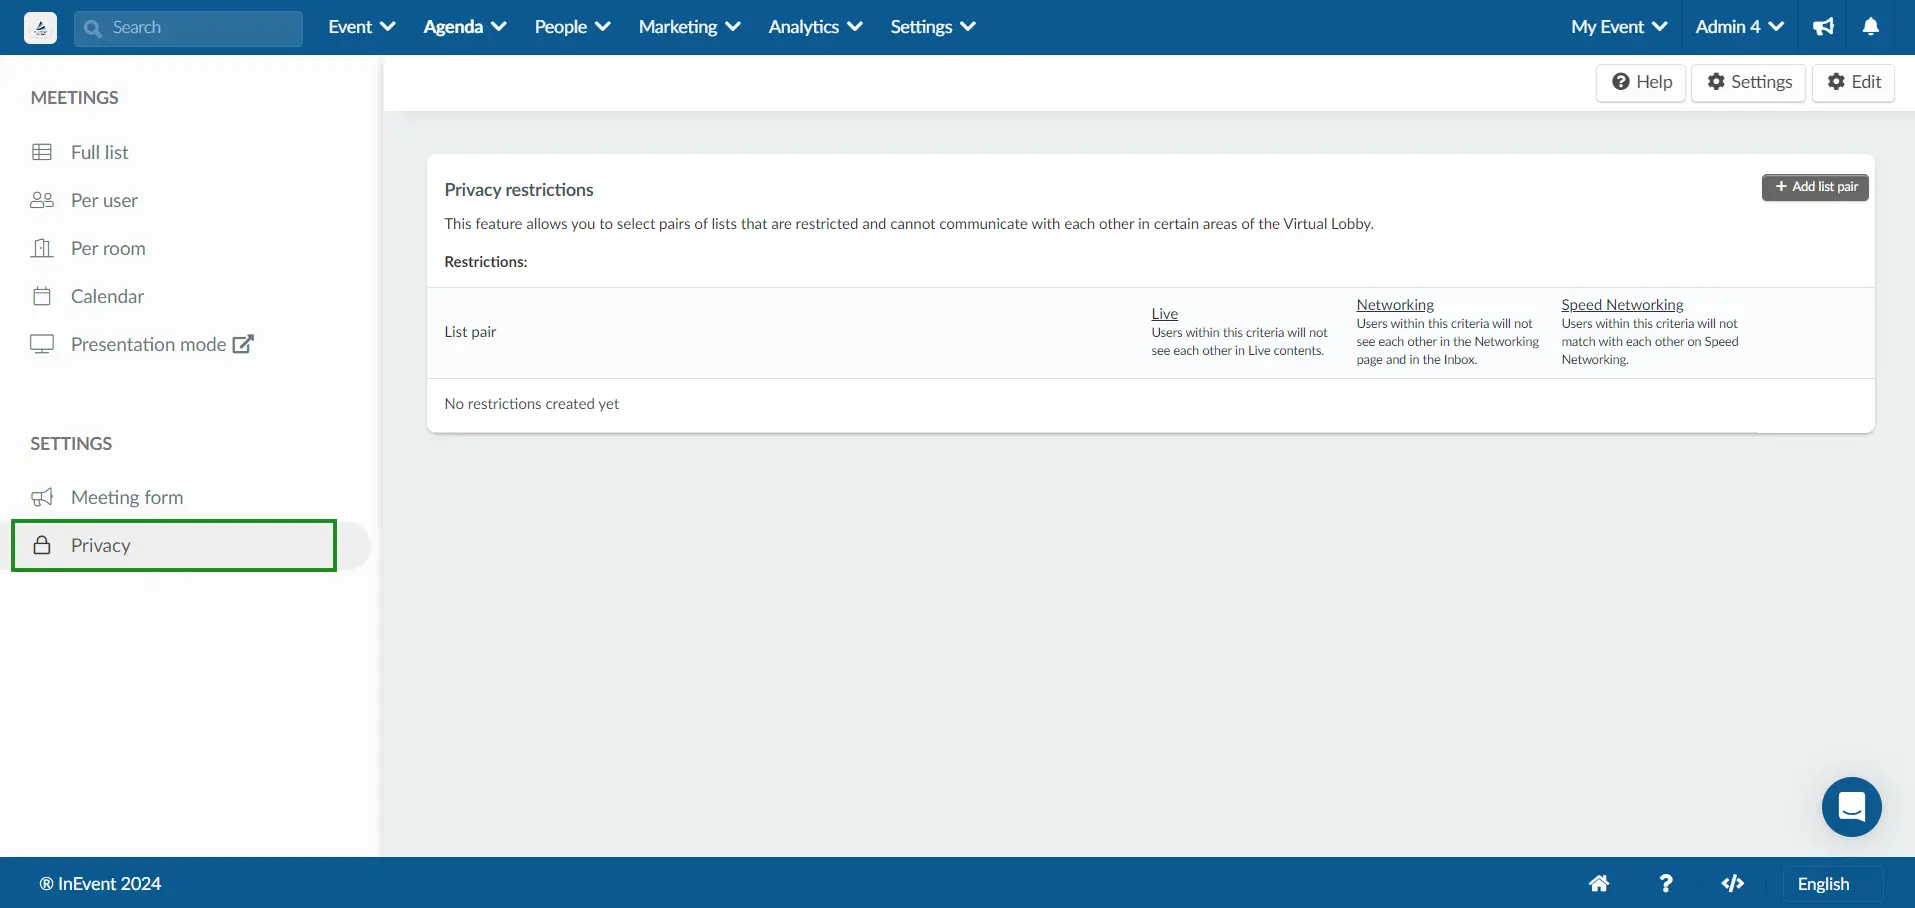
Privacy restrictions
Using Privacy restrictions, you can create list-based restrictions to prevent attendees of said lists to connect with each other during Live content, Networking, as well as Speed Networking. For complete information on using this utility, refer to our detailed explanation on Privacy Restrictions.
Waitlist
Once automatic matchmaking has been done, participants who match your survey, but who were unable to be allocated to the available slots, will be placed on the Waiting List. You can view this list before the Combination or afterward by clicking the Show waitlist button.

Using spreadsheets to set your meetings
There is also the option of using spreadsheets when setting up meetings for your event. To use it, click on Per user from the left menu, click the Edit button (top right corner of the screen) > Import > Download demo file and fill up the spreadsheet with the participants’ emails, place, starting date, duration, and capacity of the meeting.

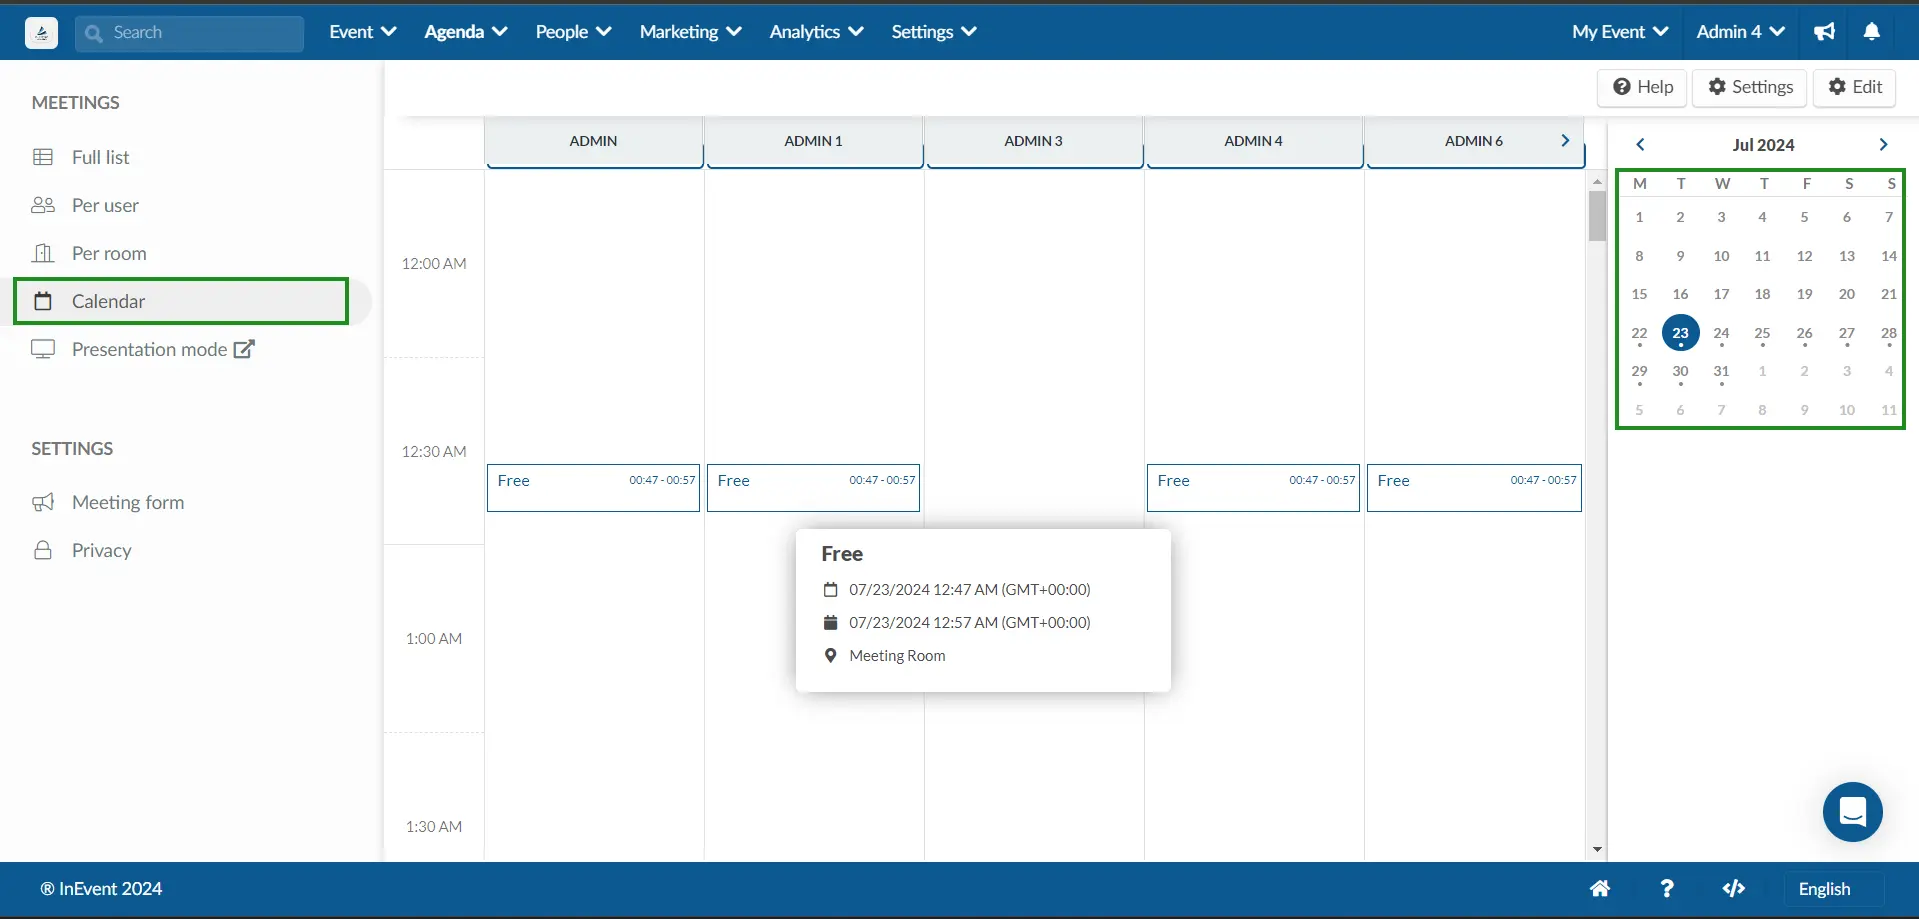
Viewing the hosts' calendar
To view the meeting slots of hosts, go to the Calendar option in the left menu. Here, you'll find both the free and booked meeting slots of hosts. The Calendar page lists all meeting hosts along with their meeting schedules. To navigate to a specific date, use the date picker located on the right side of the page.
Creating a meeting restriction for a host
To create a meeting restriction (a constraint that prohibits the host from holding meetings at certain times).
on the host, follow these steps:
- Click on Per user in the left menu and select a meeting host.
- In the toolbar select the Show restrictions icon.
- Click on +Add restriction located on the top right side of the page.
- Choose the type of restriction: Date and time range, Recurring times or Entire date.
- Enter the required specifications depending on the desired Type of restriction:
- Date & time range: Start date and time of the restriction and End date and time of the restriction
- Recurring times: Start time, End time, Repeats on, and Ends at
- Entire date: Day
- Press Create.

Once a restriction has been fixed on a host, the set date will be blocked in the host's calendar when scheduling a meeting in the Virtual Lobby.
Creating meeting restrictions for everyone
To create meeting restrictions for everyone, follow the steps below:
- Click on Per user in the left menu and press the Add restriction for everyone button.
- Select the desired Type of restriction using the drop-down box. The available options are Date & time range, Recurring time, and Entire date.
- Enter the required specifications depending on the desired Type of restriction:
- Date & time range: Start date and time of the restriction and End date and time of the restriction
- Recurring times: Start time, End time, Repeats on, and Ends at
- Entire date: Day
- Press Create.

Removing an attendee's restrictions in bulk
You can select single or multiple restrictions to be removed from an attendee, or remove all of your attendee's restrictions at once. To do so, follow the steps below:
- Select an attendee from the left panel.
- Click on the Show restrictions button on the toolbar.
- Click on Edit on the top right corner.
- Select the restrictions you wish to remove by checking the boxes of the restrictions you wish to remove.
- Click on Remove selected to remove the restrictions you have selected. A confirmation pop-up box will be displayed.
- Click on Remove on the confirmation pop-up box.
- Click on End to finalize.
Once you have completed the steps above, selected restrictions or all restrictions associated with the selected attendee will be removed.
Swapping meeting times
To do so follow these steps:
- Click on Per user in the left menu and then select the host of the meeting, ensuring that prior to this step you have created meeting time slots.
- Ensure you are in the Show meetings as host view, press Edit and click on the Swap meeting icon.
- Select the Schedule meeting icon next to the time you wish to reschedule the meeting.
Deleting a meeting
Click on Per user from the left menu and select the attendee:
- Removing a host's meeting: Click the Show meetings as host icon, tick the checkbox of the meeting you wish to delete and press Remove selected.
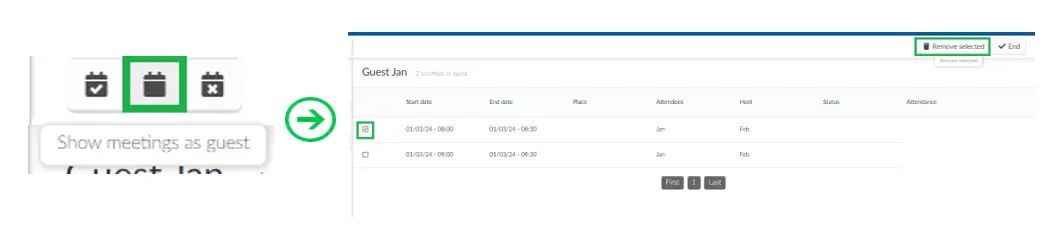
- Removing a guest's meeting: Click the Show meetings as guest icon, tick the checkbox of the meeting you wish to delete and press Remove selected.
Deleting all scheduled host meetings
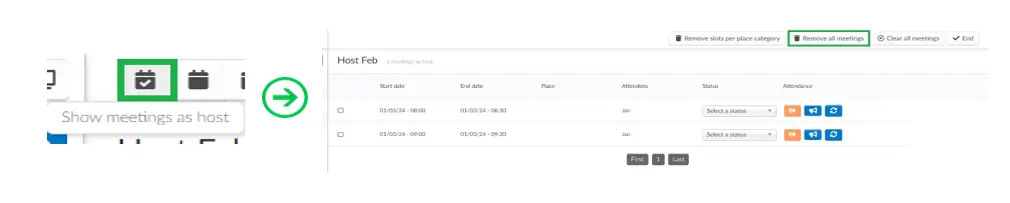
Navigate to Agenda > Meetings and filter or search for a host and select the attendee. Click the Show meetings as host and press Remove all meetings.
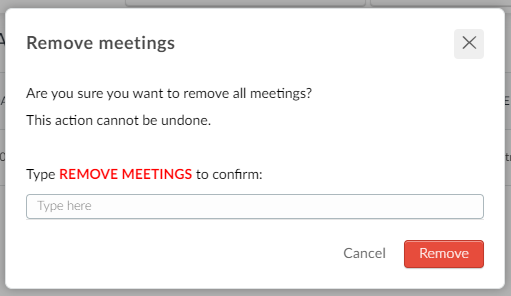
A confirmation box will appear. Type Remove meetings to confirm your action and select Remove.
Deleting all meetings from one place
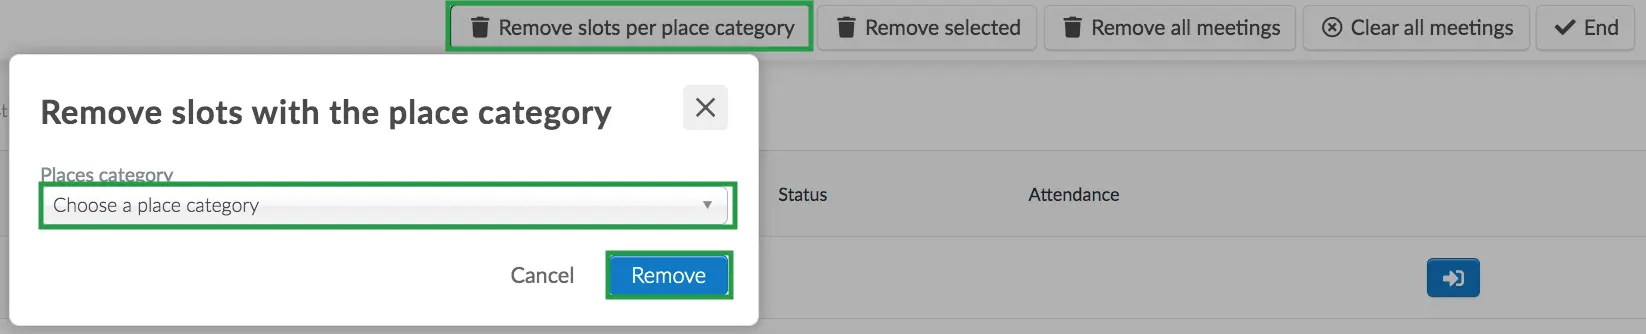
Navigate to Agenda > Meetings > Edit > Remove slots per place category > select the place you wish to remove from the drop down menu > Remove.
Clearing all meeting slots from a host
Navigate to Per user and select the attendee. Ensure you are on the Show meetings as host page, click on Edit and press Clear all meetings.

Extending the event meetings date outside the event date range
If you wish to enable meetings even before the event starts and/or after the event has finished, go to the Event meeting dates article to learn how to do so.
Displaying or projecting meeting times on a television or projector
You can display meetings times on a television or projector or even your computer by clicking on the Presentation mode button.
Click on Presentation mode in the left menu. A new window will appear that you can use to project meeting times on a television or projector.
- Select the date of the meeting from the date selector.
- Select the meeting location from the drop down menu and then click on the circular arrows icon to load the meetings:

You can learn about creating a new place by referring to the article Places.
Creating a meeting form
To create a meeting form that can be answered by meeting participants, follow these steps:
- Navigate to Meeting form in the left menu.
- Click on +Add field.
- Enter the field's title and choose an answer type.
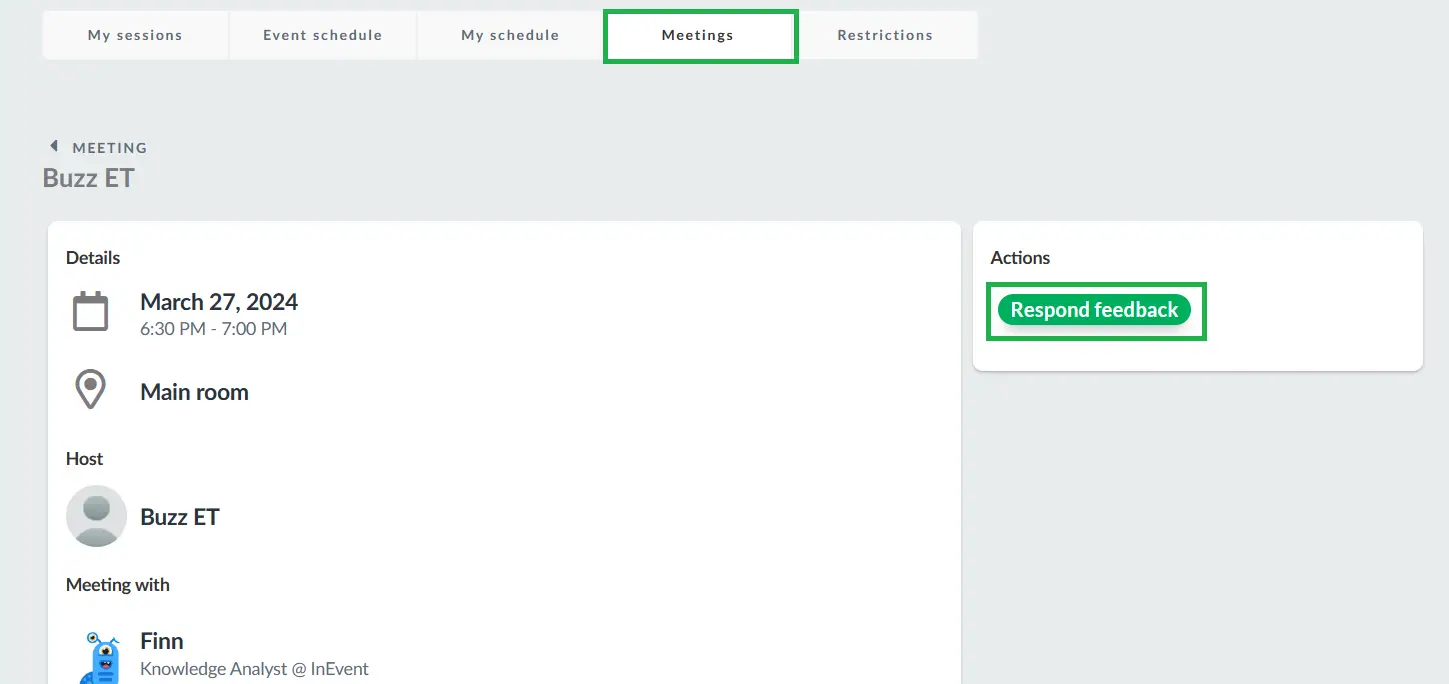
The meeting feedback form can be accessed from the meeting details section on the My Agenda > Meetings page of the Virtual Lobby. Participants will find a Respond to Feedback button within the meeting details. Clicking on this button will redirect them to the feedback form where they can submit their responses
After participants have filled out the form, their answers will be displayed in the Submissions field of the meeting form on the platform. To view a participant's answer, simply click on the participant's name

Notifying participants about their meetings
Virtual Lobby notifications
When the event admin creates a meeting between two or multiple participants, the meeting guest(s) will receive a Virtual Lobby notification informing them that they have a meeting. The meeting slot will also appear in the main page of the Virtual Lobby and in the My agenda tab.
Automatic meeting email
If attendees book meetings themselves directly from the Virtual Lobby, they will receive meeting-related emails. For this to happen, the Meeting email tool must be enabled (it is usually enabled by default). When active, each meeting consumes two email credits, as both participants receive an email with the meeting details.
Send a .ics file attached to the meeting confirmation email
The .ics file will be attached to the confirmation email if the event admin has enabled the ics file on meeting confirmation tool (usually enabled by default), allowing the participant to save the meeting on their calendars.
Sending meeting notification manually
If you had scheduled the meetings in the backend or allowed participants to schedule themselves in the Virtual Lobby, either way, you can send emails with their individual Meeting tables. It's very simple and easy:
- First, you need to follow the instructions on How to add dynamic content to my email.
- Then on Dynamic contents > select Event > Meetings.
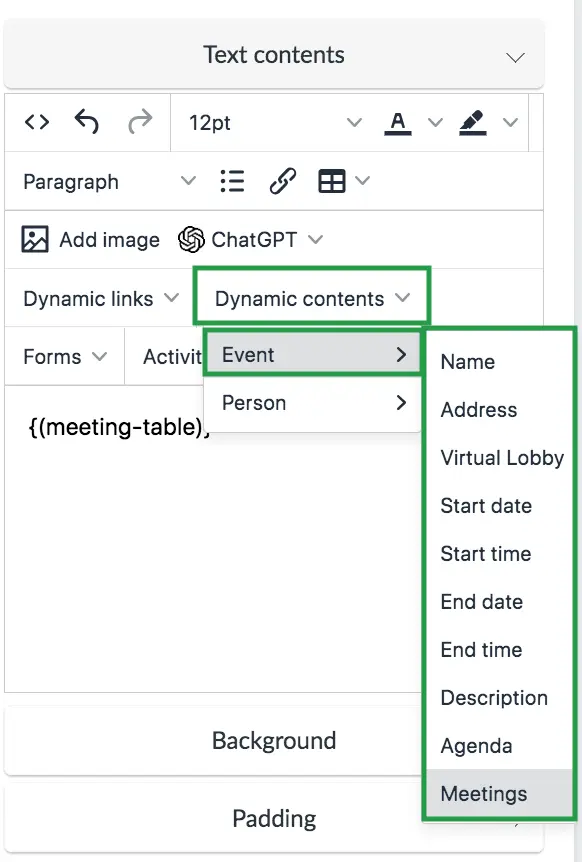
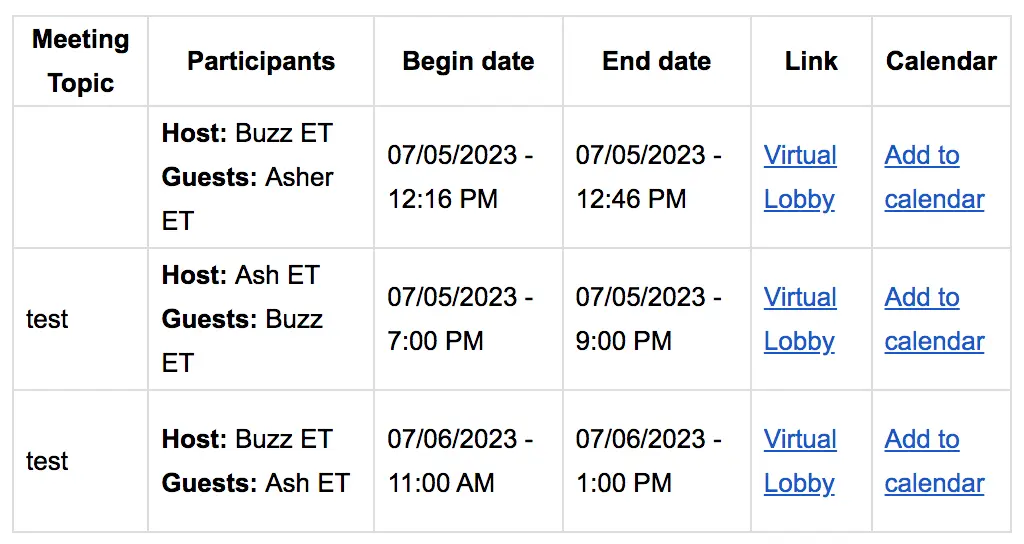
- And the participant will receive an email with a Meeting table looking like this:
Managing meeting requests between attendees
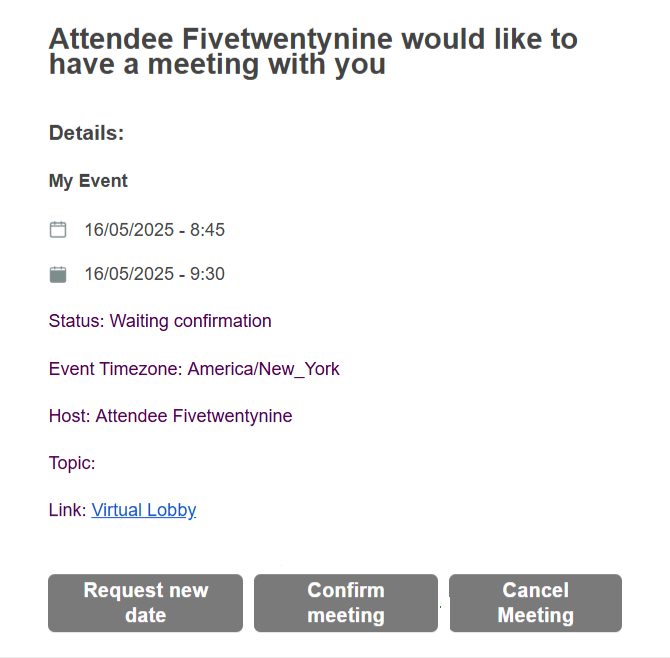
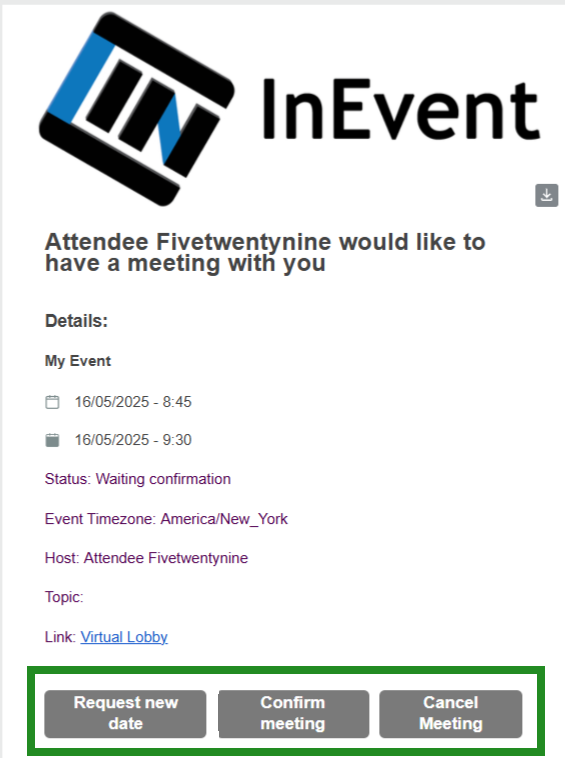
Once an attendee (host) schedules a meeting with another attendee (guest), the invited attendee (guest) will receive an email notification with all the details i.e. proposed time, date, and topic.
From there, they can confirm, decline or request new date for the meeting based on their availability. In the email, the invited attendee will be able to click on one of three buttons: confirm, cancel or request new date.
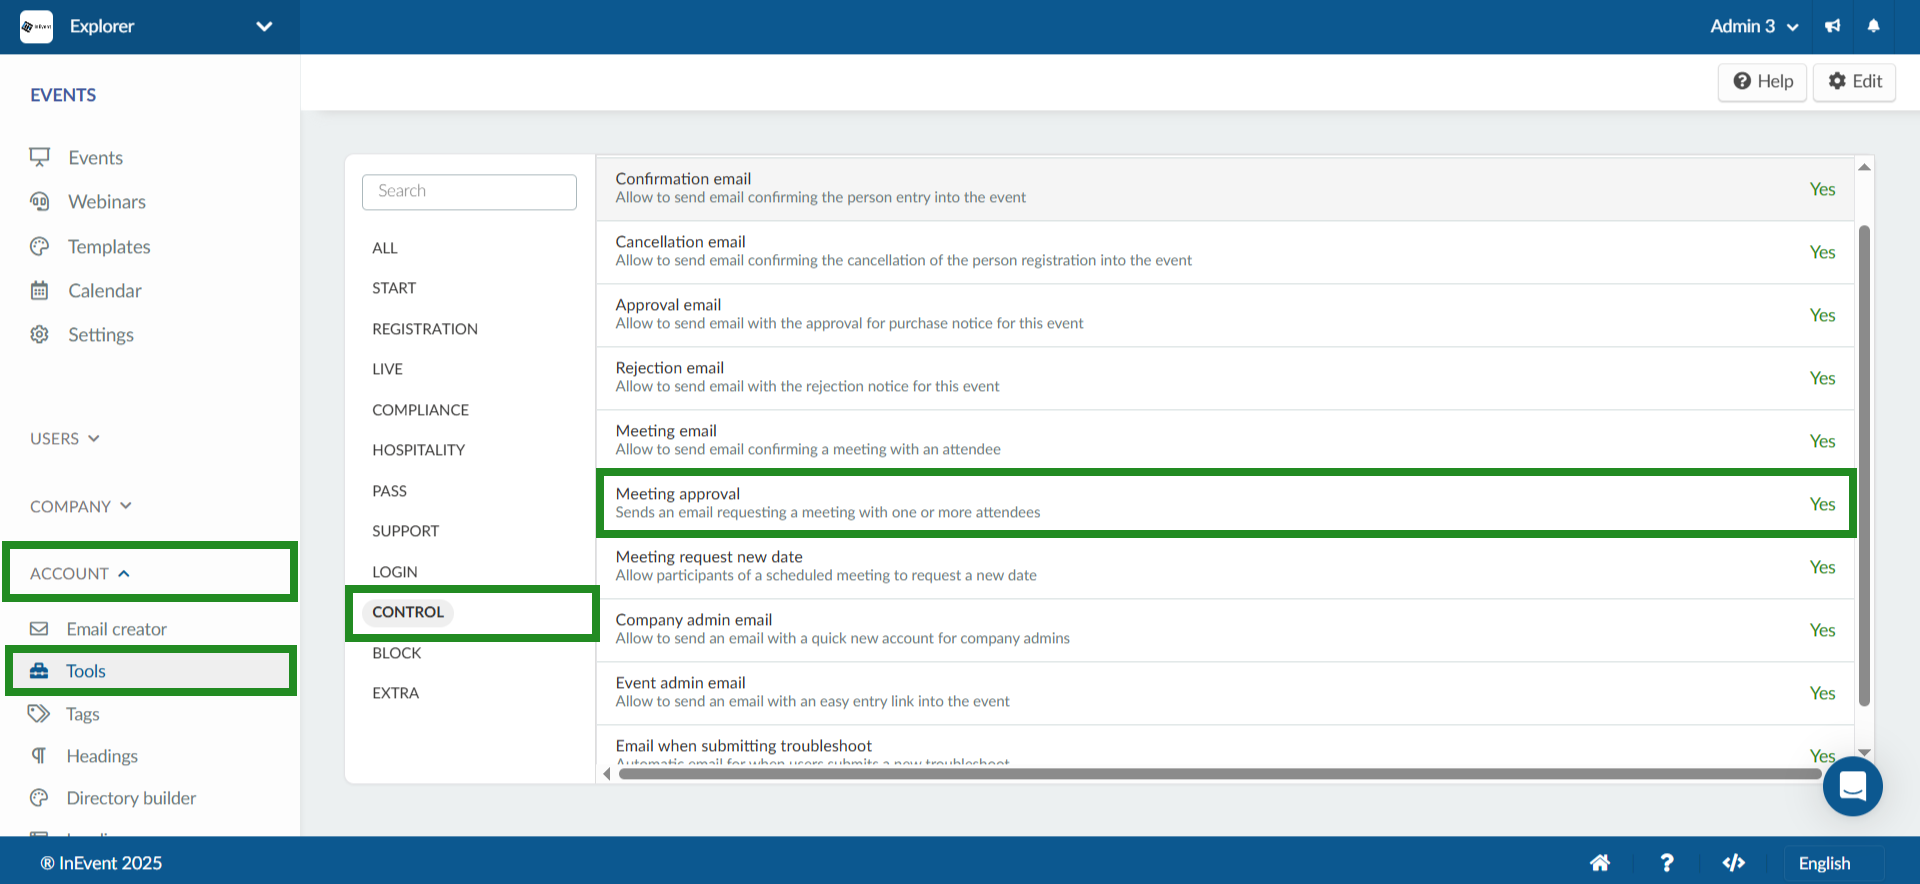
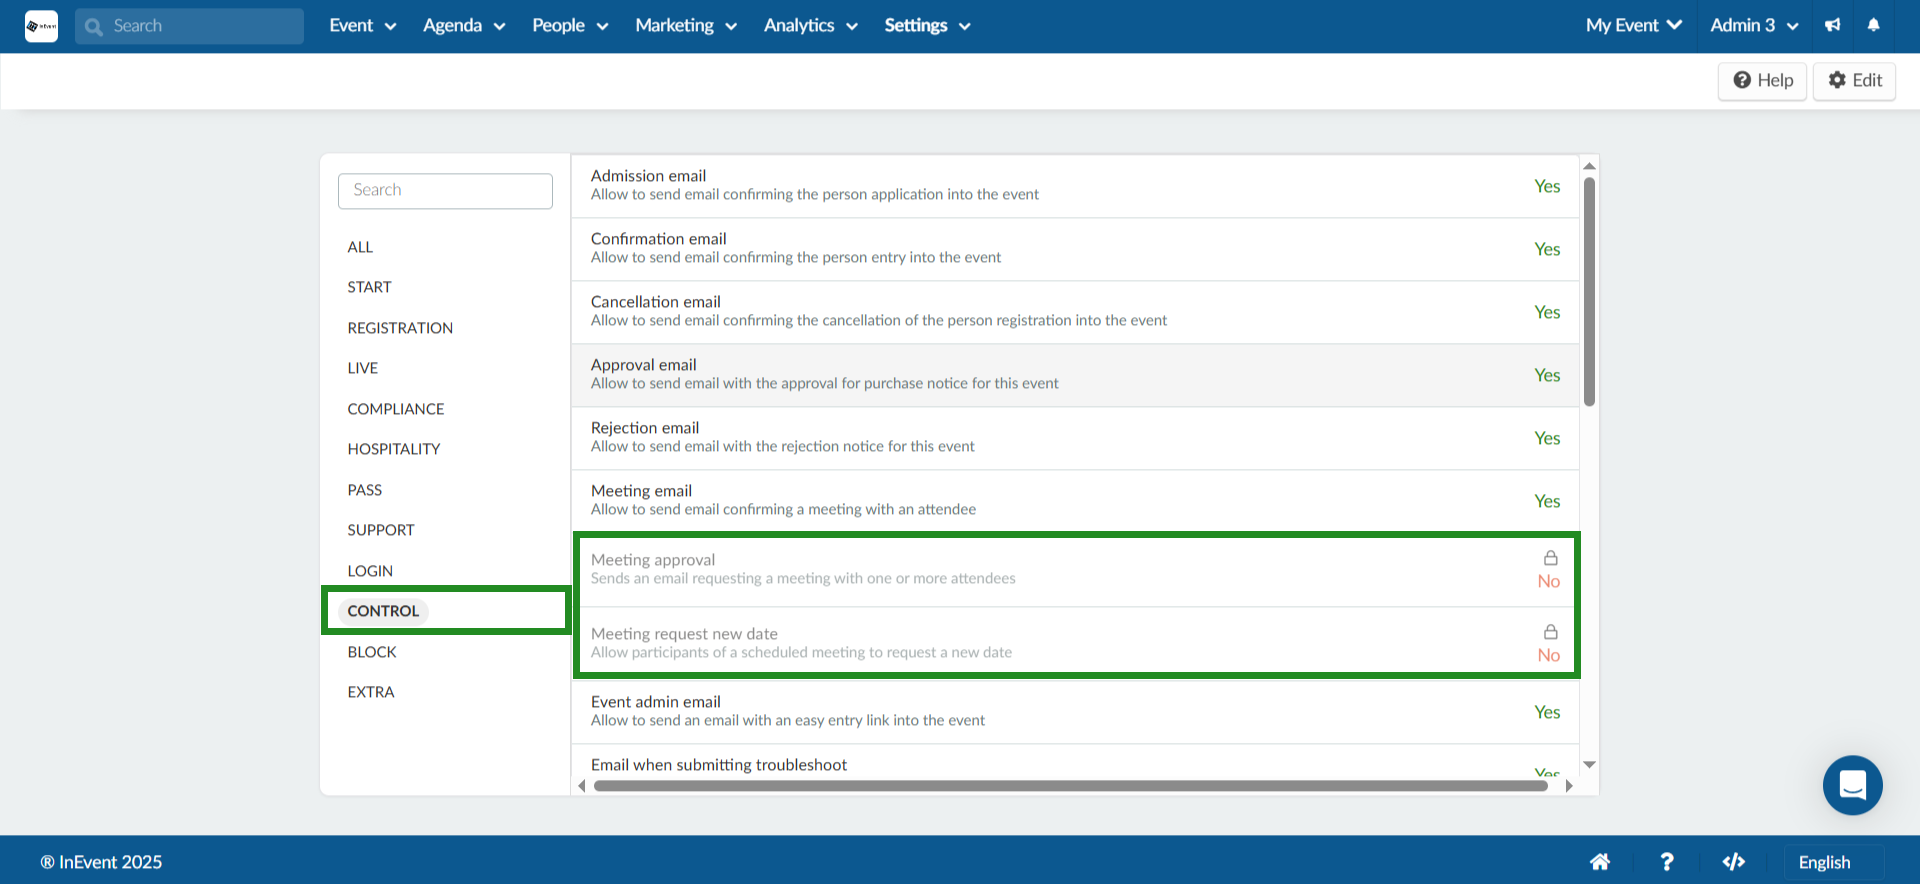
To enable the Meeting Approval tool, follow these steps:
- Go to Account > Tools at the company level.
- Select Control.
- Click on Edit.
- Locate Meeting Approval.
- Toggle on the corresponding button.
Once you are done enabling the Meeting approval tool at the company level, navigate to your event Settings > Tools select Control and toggle on the corresponding button for Meeting approval to enable the Confirm button in the email.
To enable the Meeting request new date tool, follow the same steps by first enabling the tool at the company level and then at the event level. The attendee will then be able to see the confirm, cancel and request new date button as shown below.
To know more about requesting new date for meetings, refer to our Meetings: Guide for participants article.
Checking the Meetings' report
You can get an Excel report on the meetings created by clicking on Edit > Report at the top left corner of the page.

An Excel sheet will be sent to your email containing:
- Information on the meeting such as: IDs (meeting,person,host,guest), PlaceID, reason, type, placeName, placeCategory, Capacity, dateBegin, dateEnd, totalTimeSpent, dateBeginTimezone, dateEndTimeZone.
- Information on the host and guest: names, roles, companies, images, status, check-ins, emails, telephones and hostPersonheadline.
- Attendance: You can check the meeting attendance by looking at the check-in columns in the report.
To find out if the host attended the meeting view hostCheckIn, if the field contains a yes, it means the host attended, if the field contains a no, then it means the host did not attend the meeting.

To find out if the guest attended the meeting, view guestCheckIn. Once again, if the field contains a yes, it means the guest attended, if it contains a no, it means the guest did not.

- Duration: To find out the duration of the meeting, check the column totalTimeSpent:

Live Performance
To check the analytics of the Meetings that took place, you can go to Analytics> Virtual Lobby reports. Under the Live Performance, at the column name you can see the Meeting room #
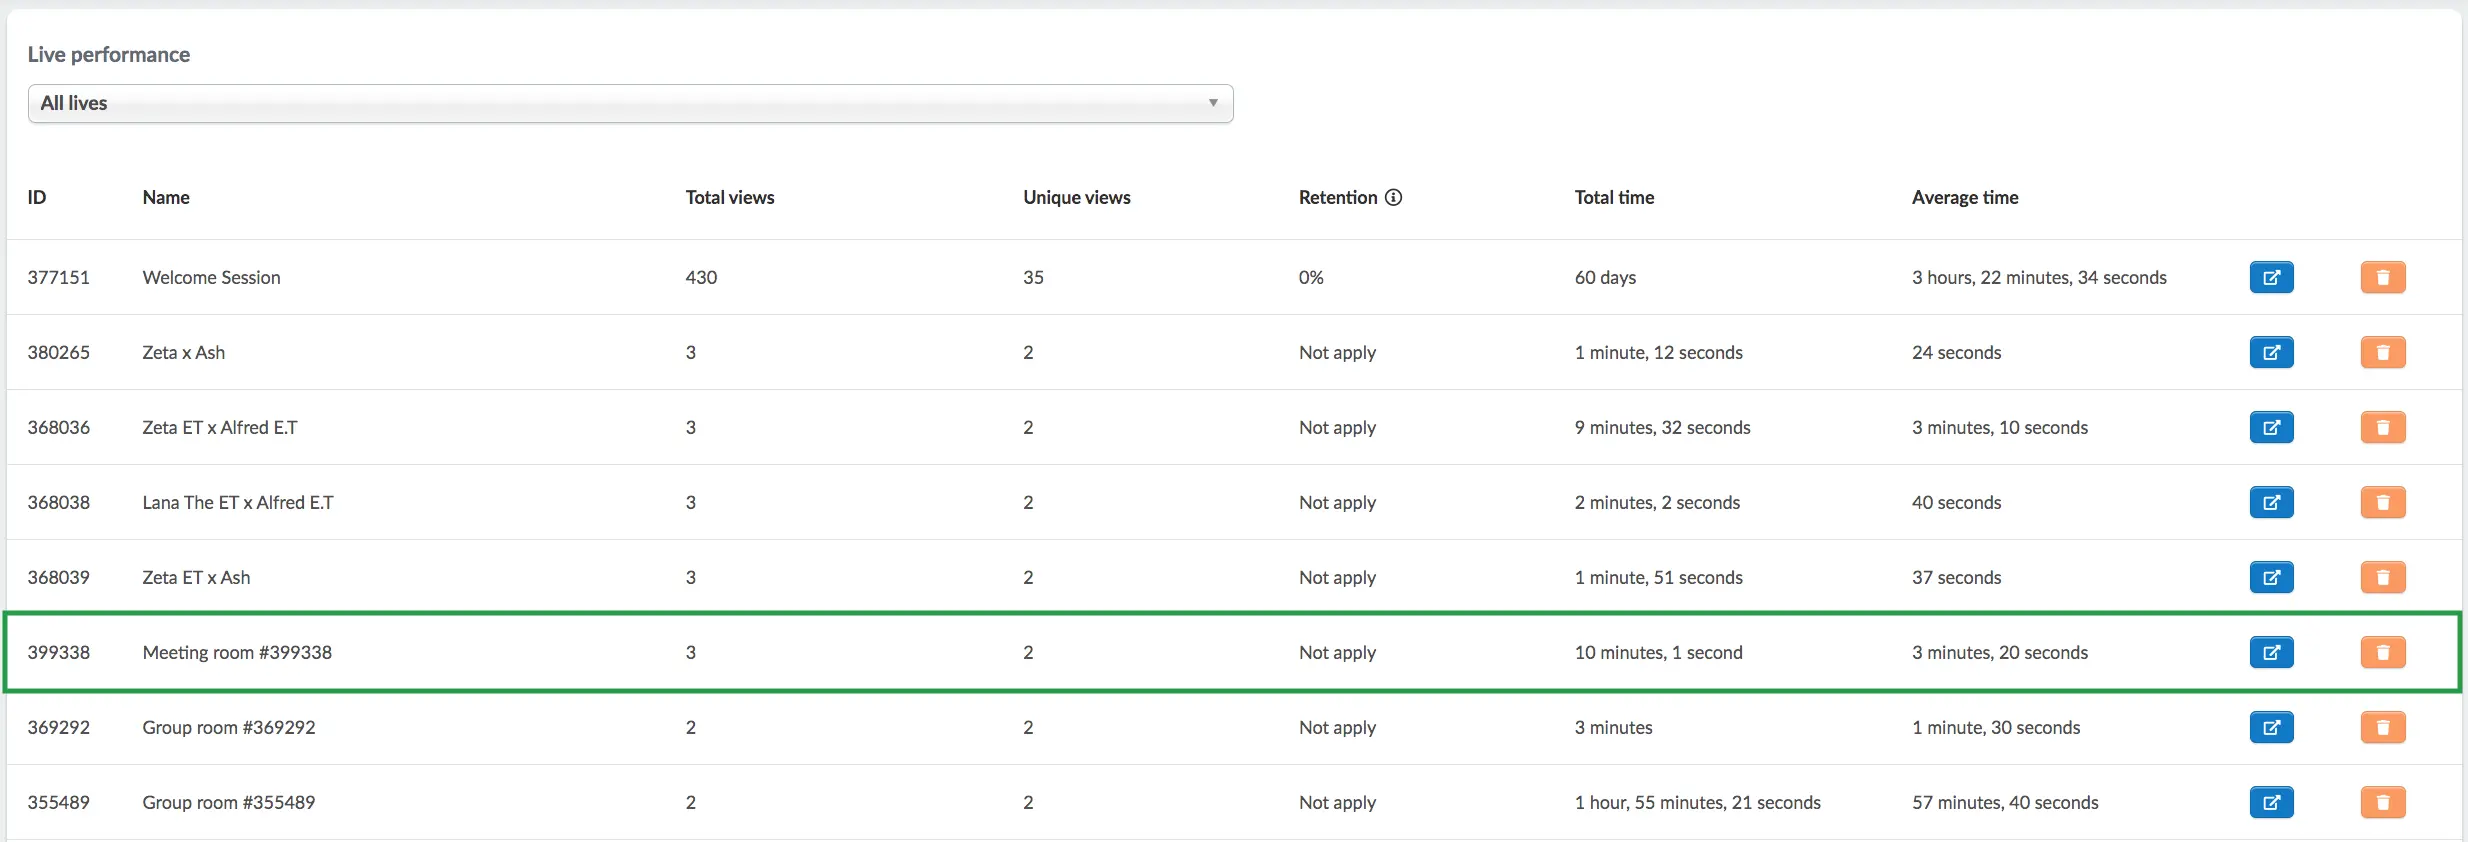
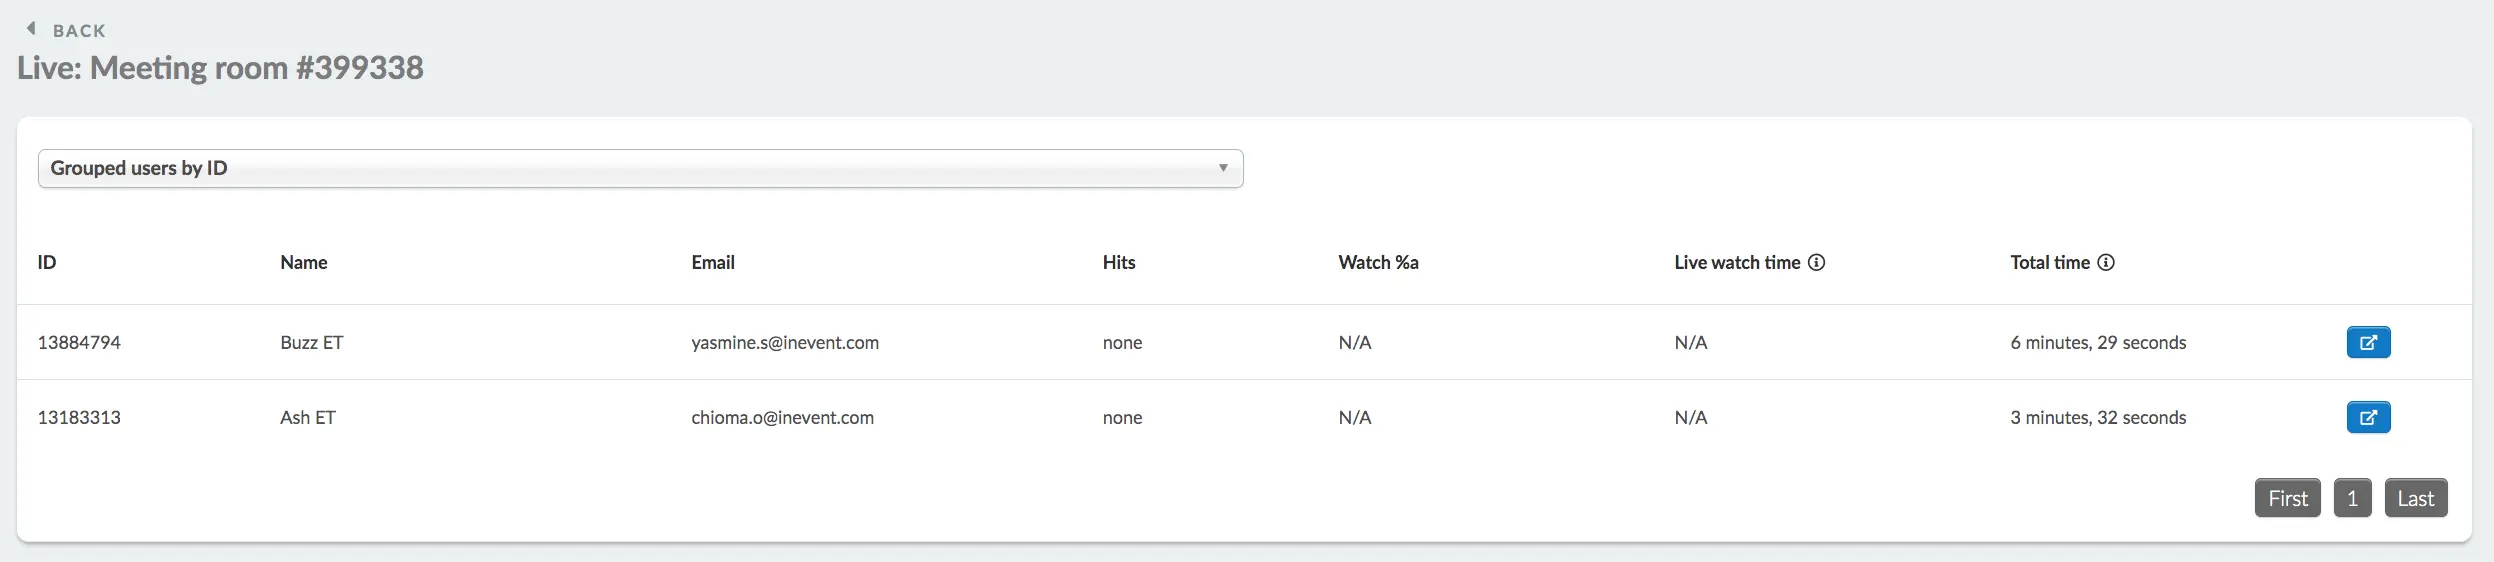
By clicking on the blue button on the far right, you can find more details such as the participants, the time spent inside the room, etc.
Instructions for participants
If you are an attendee and you wish to learn how to find out about your meetings, how to answer feedback surveys about your 1x1s, and much more, refer to our Meetings: guide for participants article.