Multi-Events
 Updated 4 months ago
by
Lorenzo
Updated 4 months ago
by
Lorenzo
The platform allows you to create and manage multiple events, with different permissions, sorted in a list separated by dates, names, and visibility. Each event is separated from the other and can be navigated by each participant independently, which means that access to an event does not necessarily give access to another event.
This article intends to show you how to create, edit and manage your events through the InEvent platform.
Permission levels that can create events
Company administrators can create, access, and delete events, as well as create templates, add other company admins, set up the features for all events, and much more.
Besides this option, booking users can use the event booking forms to request the creation of an event.
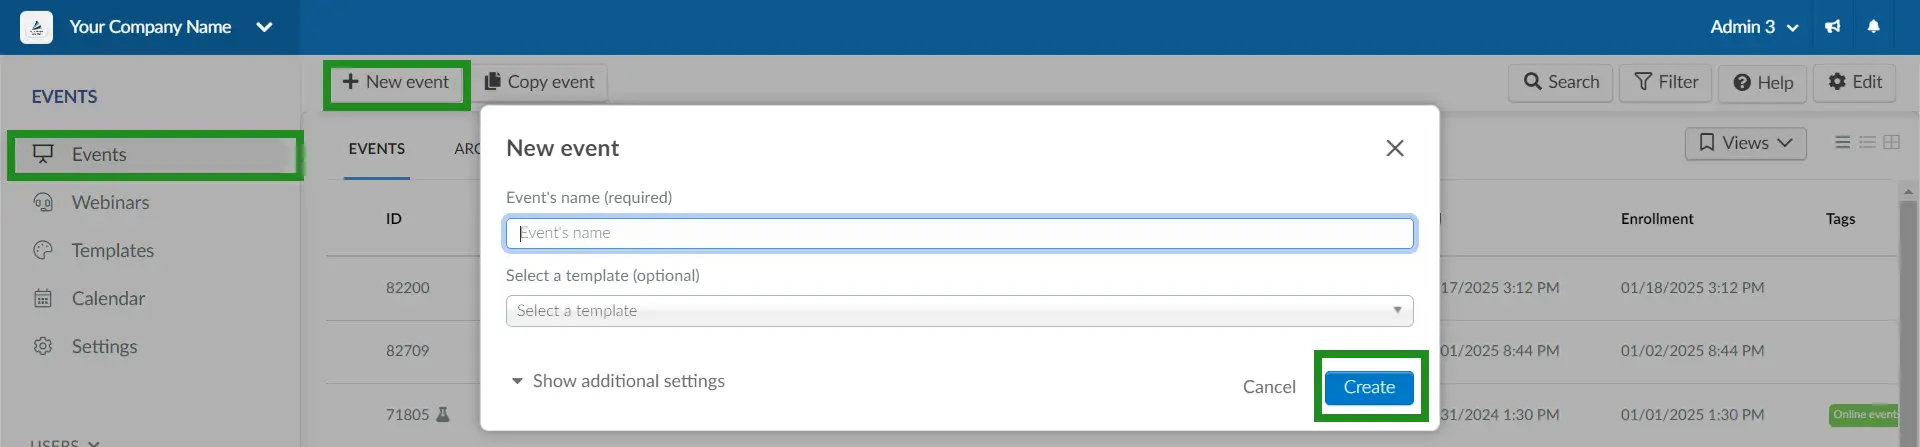
Creating an event
You must click on Events > + New event, complete Event's name field, and then click on Create button. You can choose if your event will have a pre-defined template.
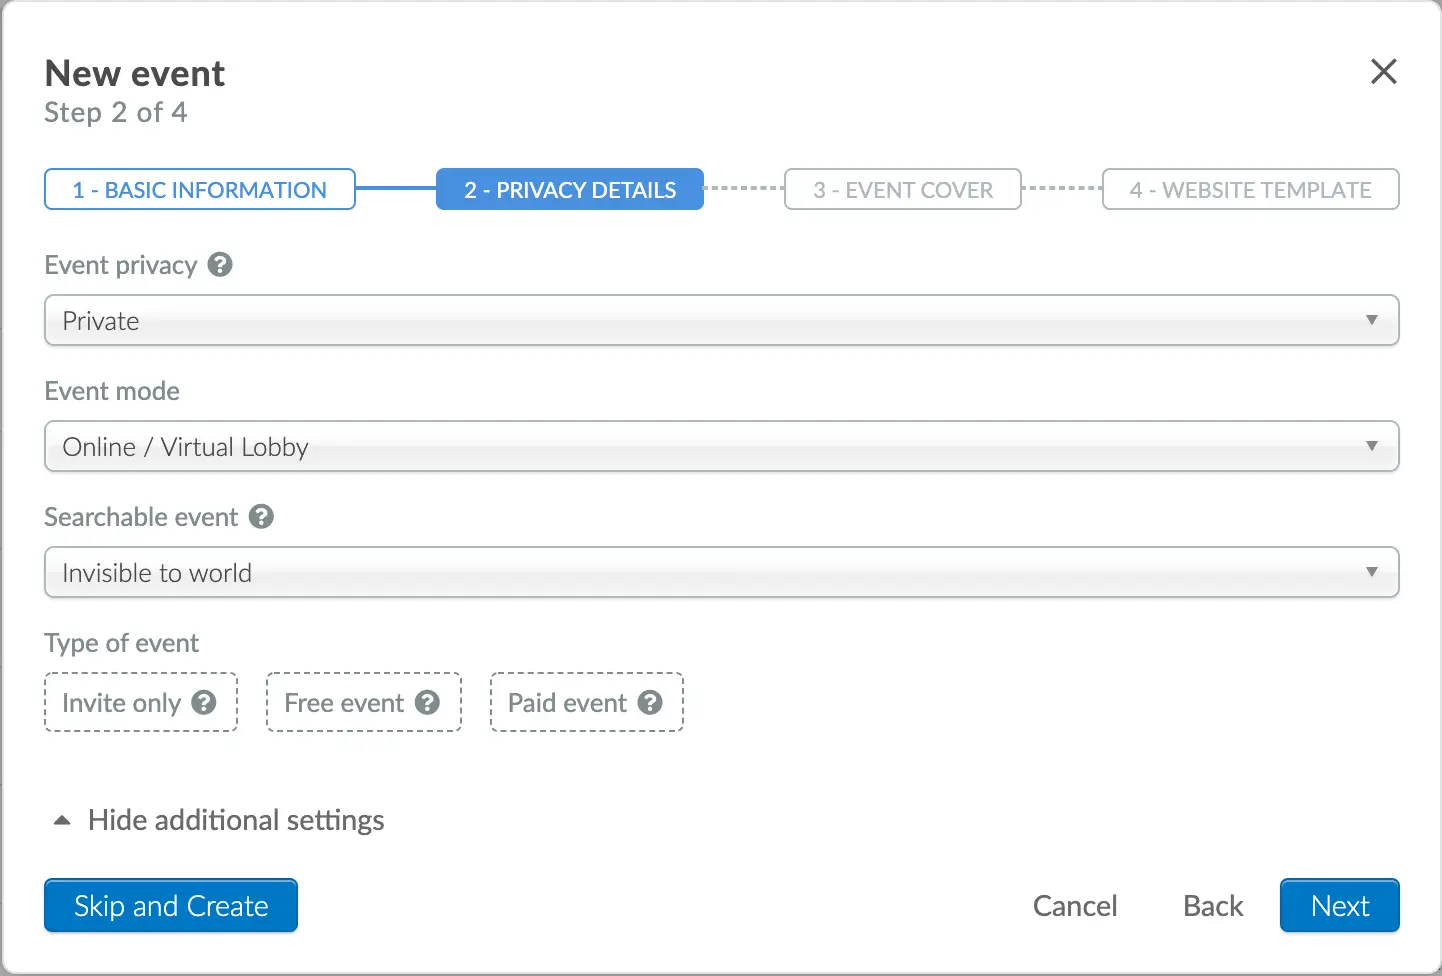
Additional settings
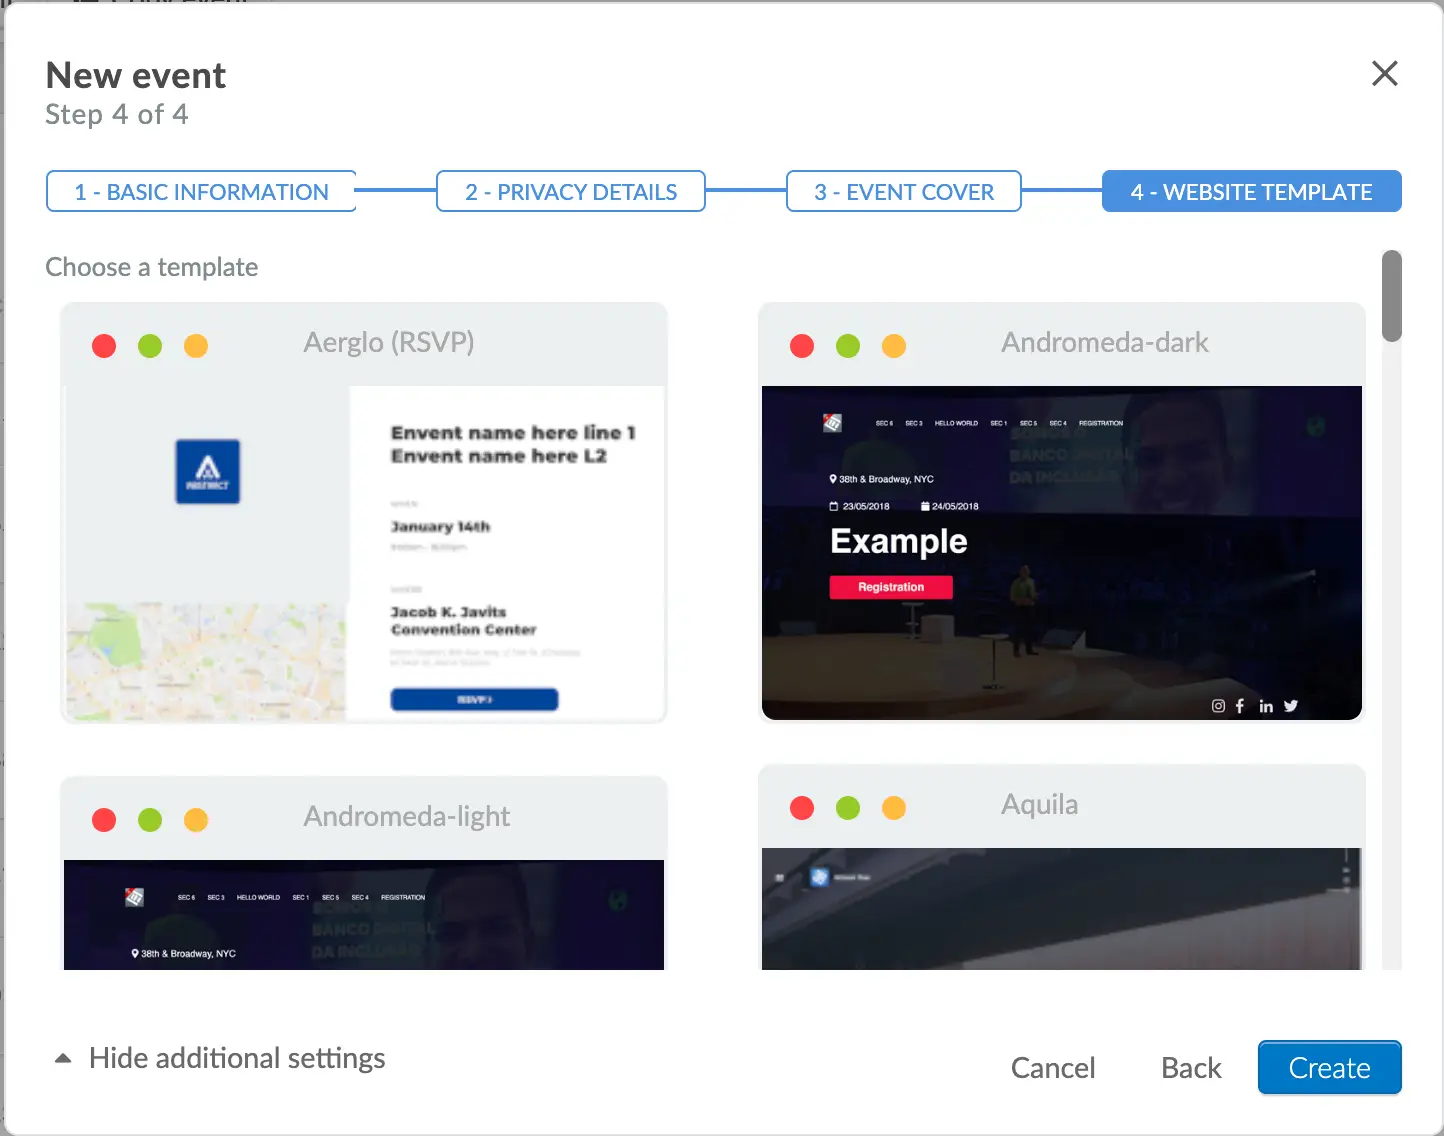
Instead of simply creating an event by just defining its name, you can also use the additional settings of the event.
By clicking on Additional settings when creating an event, you'll be able to define not only its name, but also to add information such as:
- Basic information
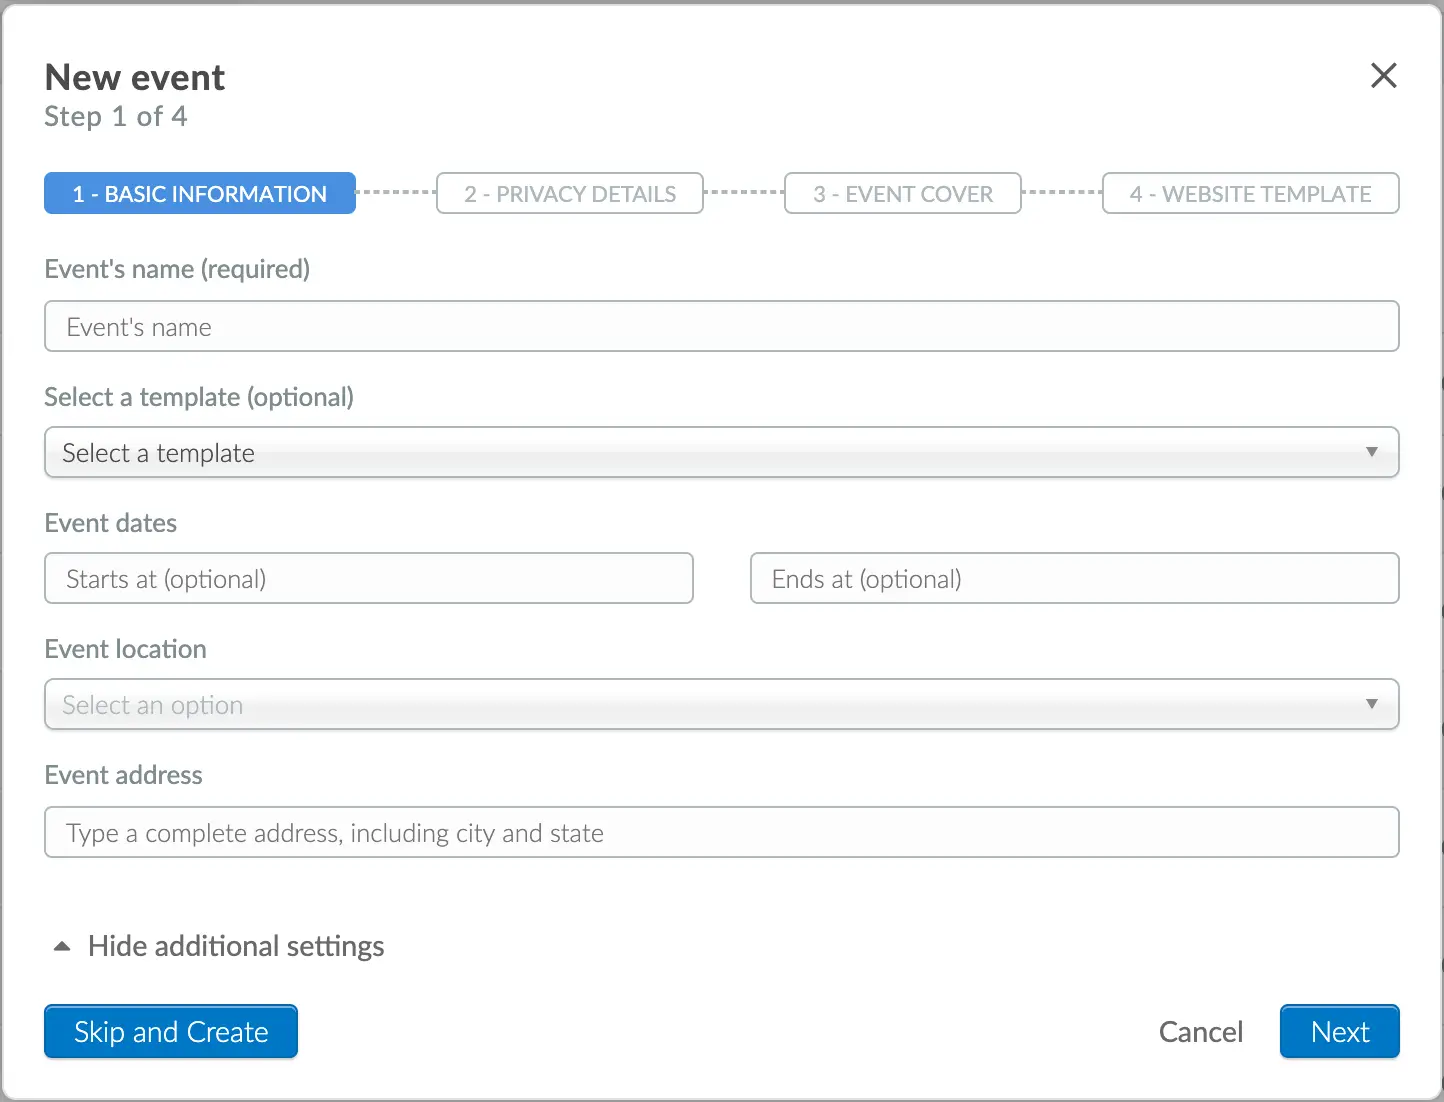
- Privacy details
- Event cover
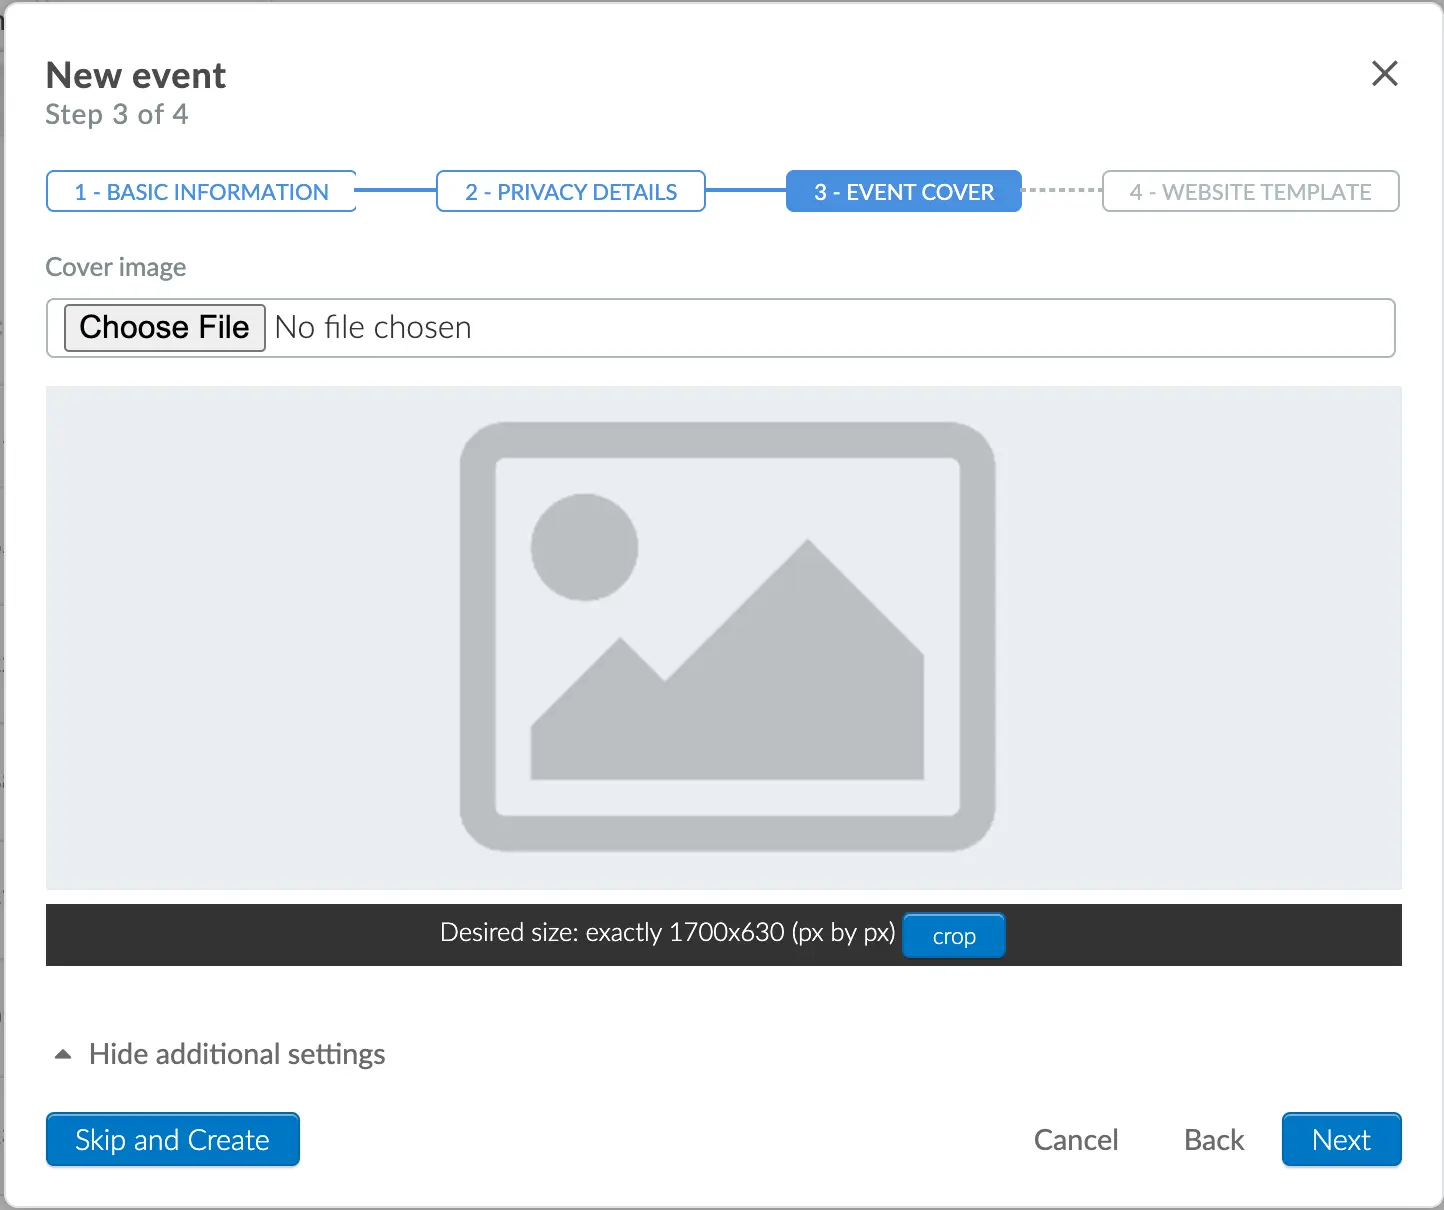
- Website Template
Finding events you have created
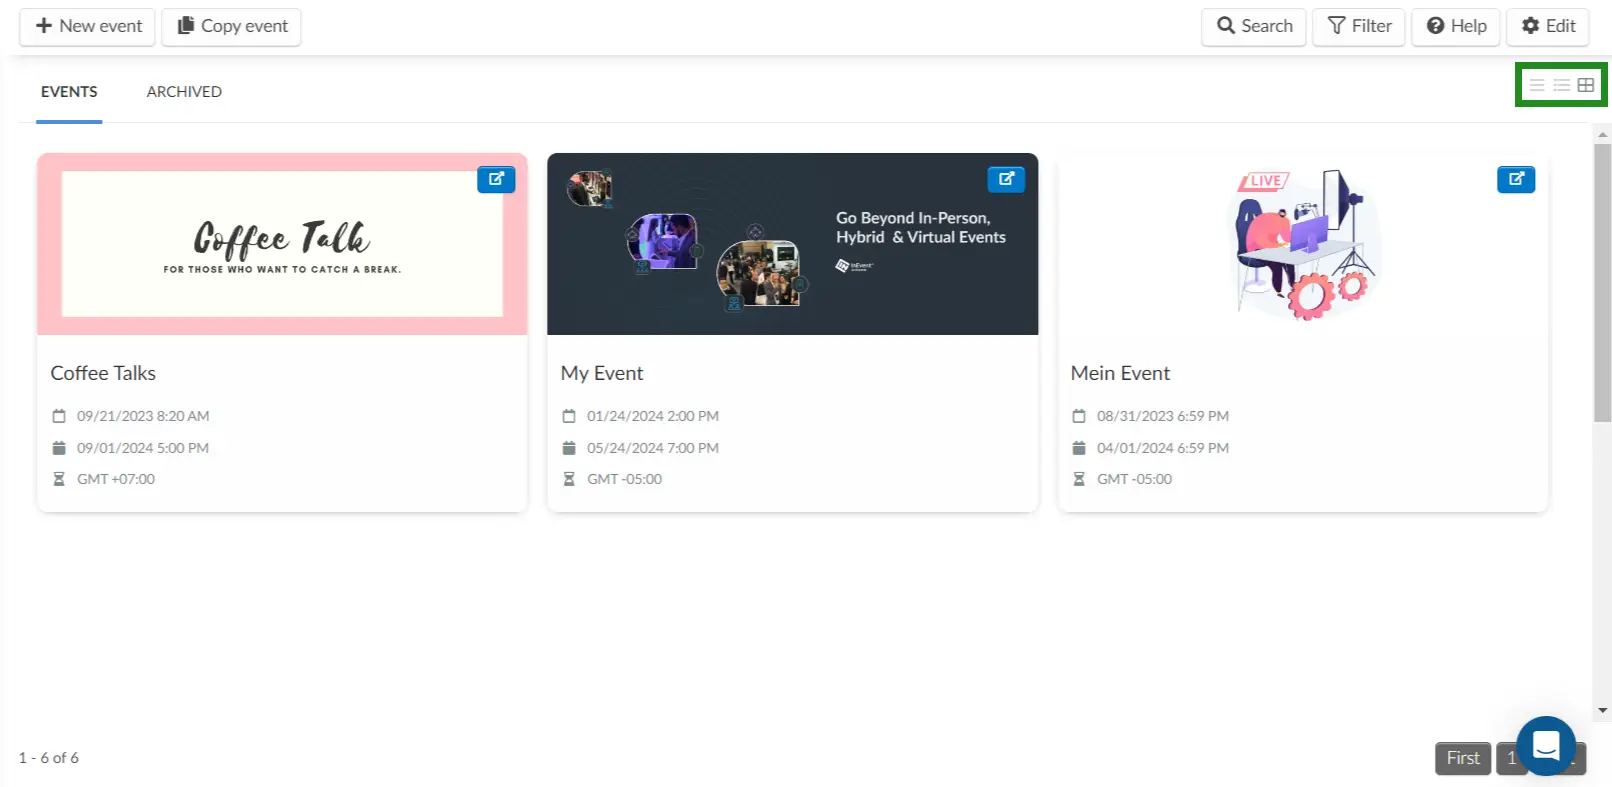
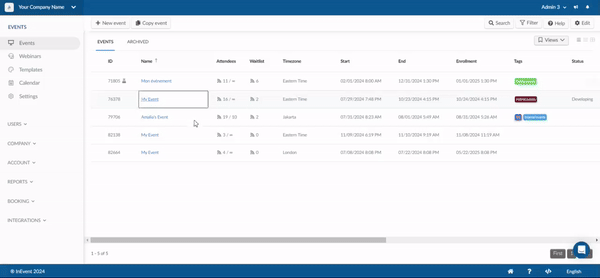
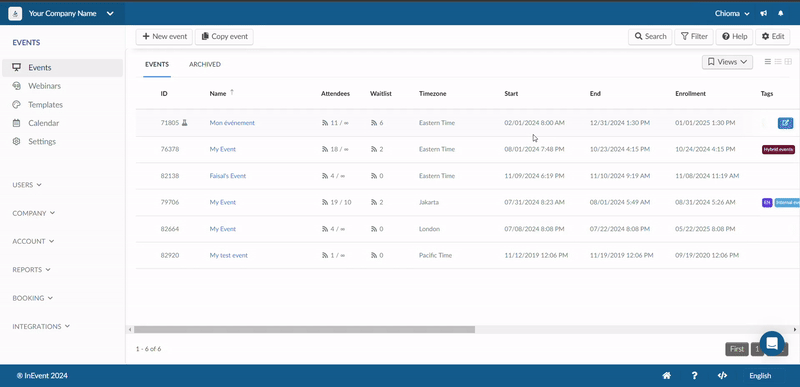
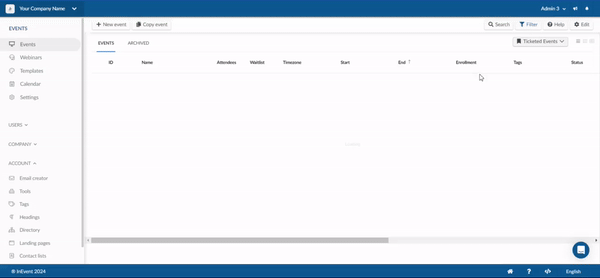
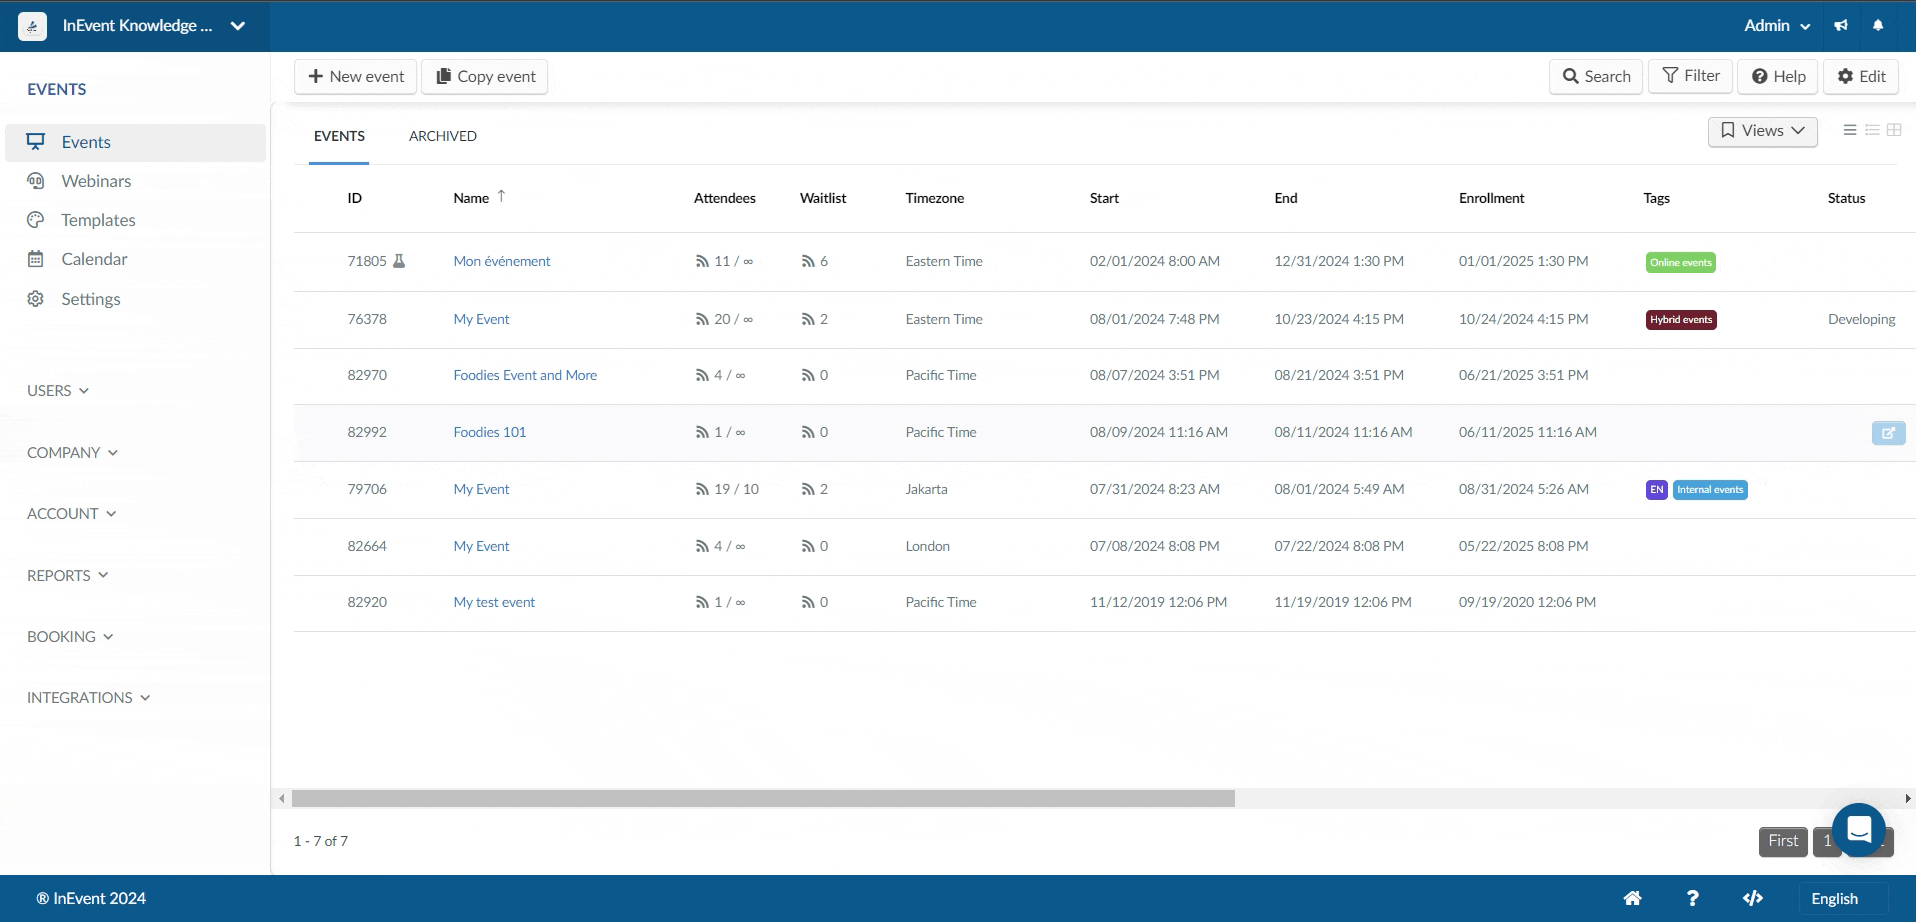
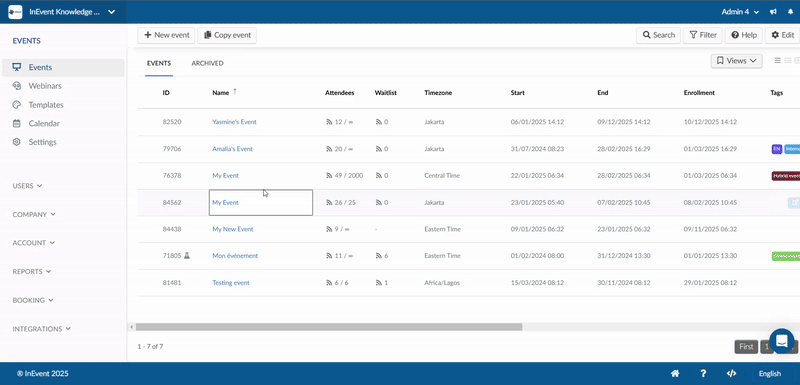
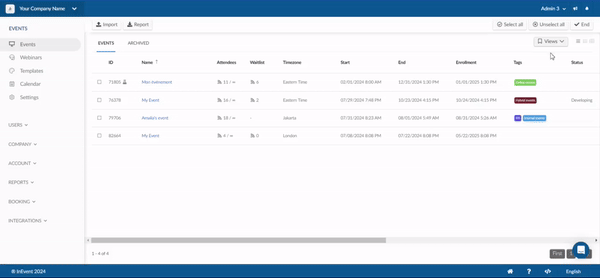
In the events screen, you can see a complete list of all events that have already been created in your Company. You can view the number of attendees/capacity, and also the number of people on the waitlist of each event, as well as dates, tags and other information.
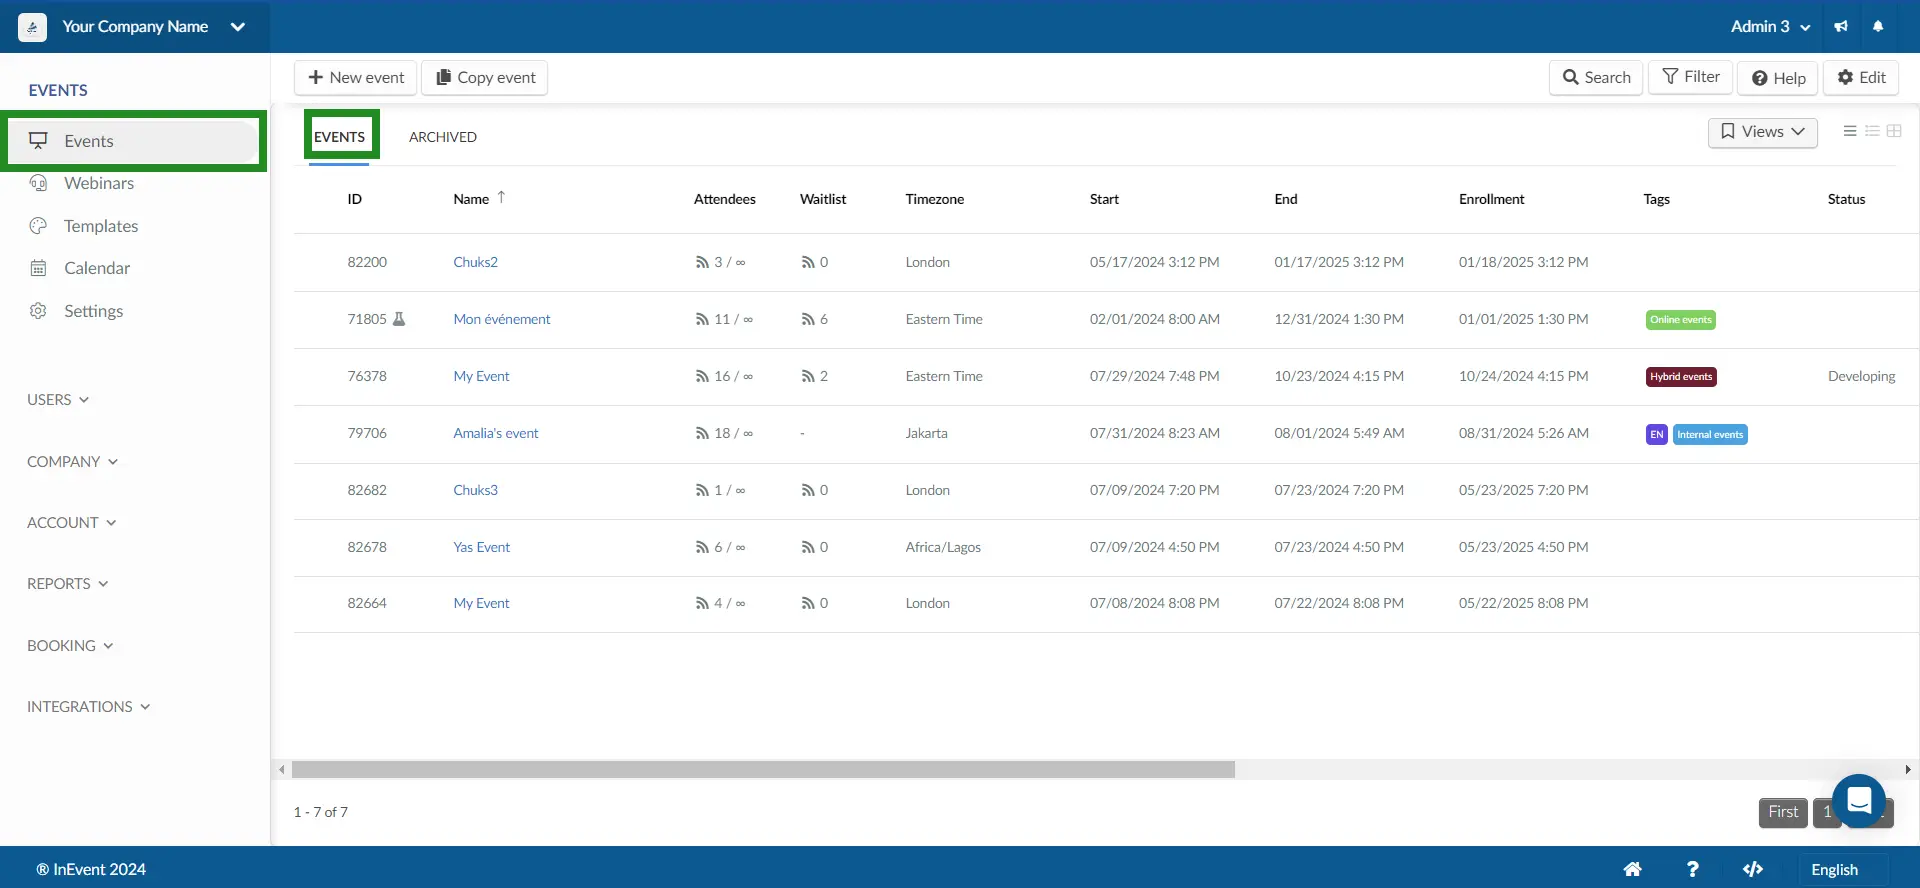
In addition, you can also change the way the list of events is displayed, including the cover image selected for each event. To do this click on the icons on the top right corner to change the event's list format.
Viewing details of the events
In the Events page all the events specific to the company selected will be visible. Once you hover your cursor on the row of an event, a blue button will appear for you to click. Upon clicking this button, the details window of the corresponding event will pop-up from the right-hand side of the platform as shown below:
This detail card will include the following information:
- Name, date and time of the event.
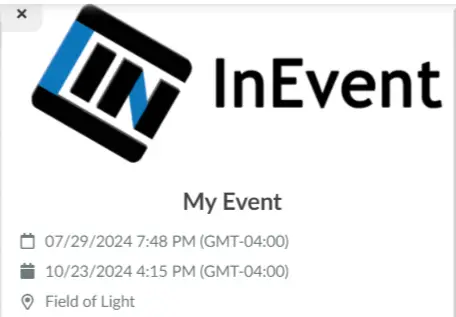
- Virtual Lobby, Registration form and website links.
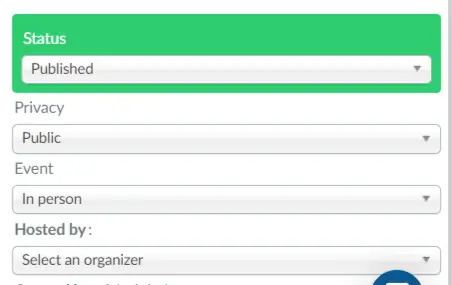
- Status, Privacy, Event (type of event) and host selection: Press Edit and click on the dropdown menus to select the privacy, type of event and host of the event.
Additionally, you can also scroll right on the Events dashboard to view some more details such as: the ID, number of enrolled attendees, number of applicants on the Waitlist, Time zone, Tags, Template used, Event settings fields etc.
Creating a template
Creating event templates is a great way to save time when creating the same multiple events. Here you can set your overall layout for your event and then use the template to duplicate certain events of the same structure. Refer to the Templates article for further information.
Copying an event
If you want to have the same event structure that has been previously developed, there is a simple and easy way to do so without doing all the setup again. Refer to the Copy Event article for further information on copying an event.
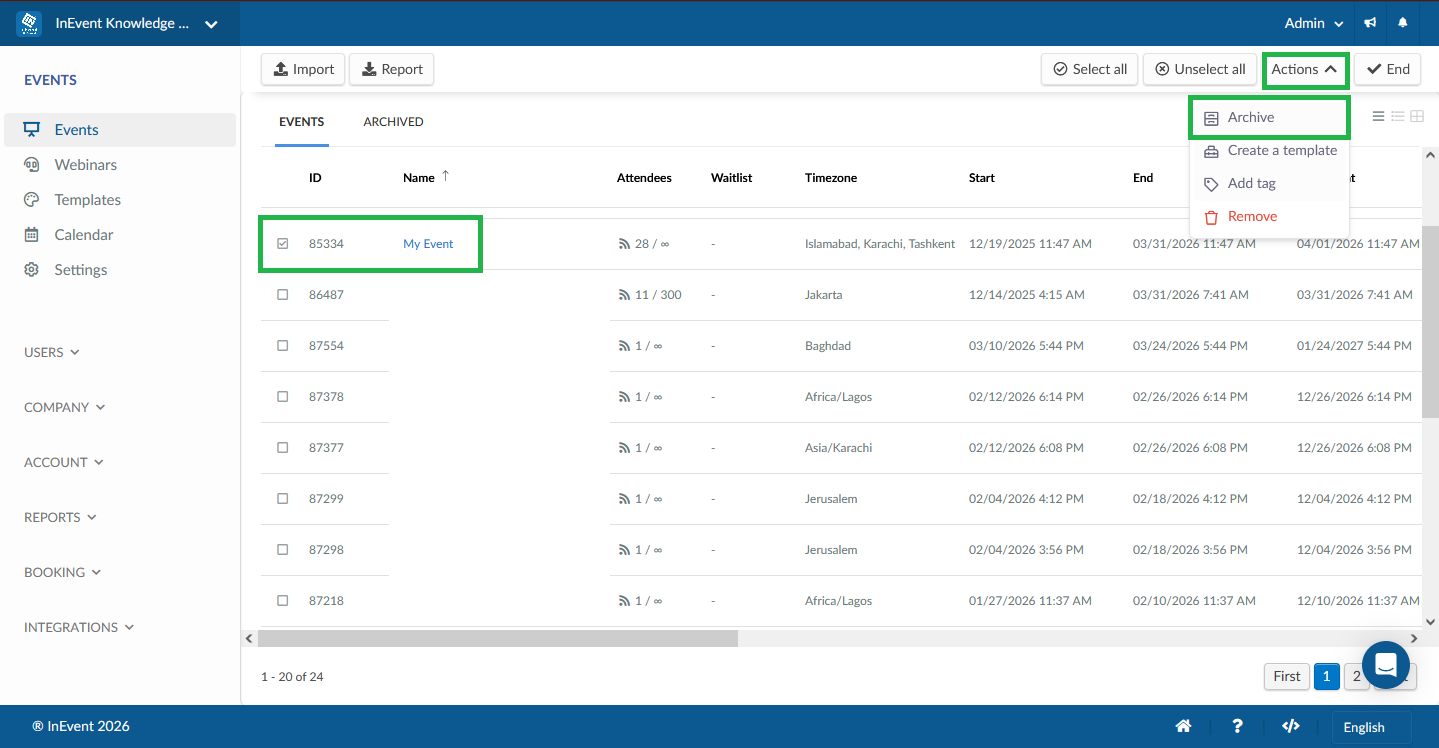
Archiving events
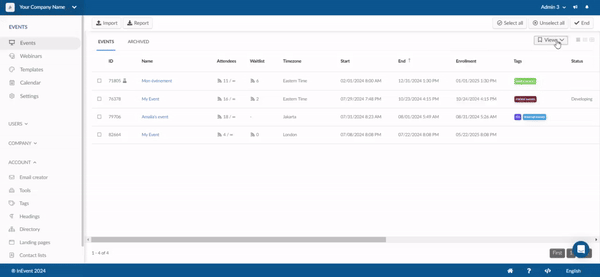
You can archive events, which allows you to free up your event list page without having to delete old events. To archive an event, click on the Edit button in the top right corner, tick the check box of the event you wish to archive, then click on the Actions drop down in the top right corner., then click Archive button.
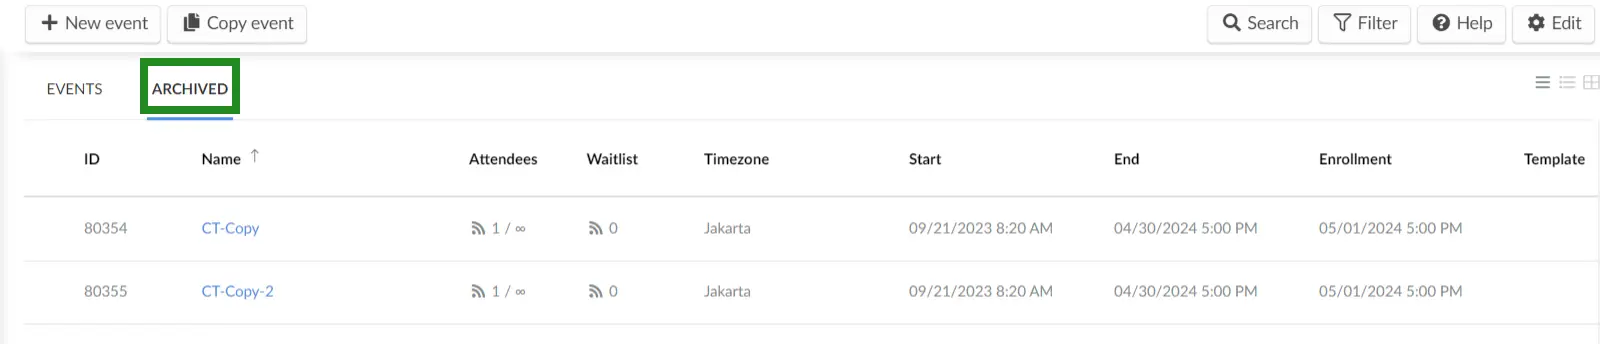
To view the archived events, simply click on the Archived tab.
You can un-archive an event, by going to the archived tab, pressing the Edit button, checking the box of the event you wish to un-archive, then pressing the Actions drop-down and then the Unarchive events button. The event will be returned to the events tab.
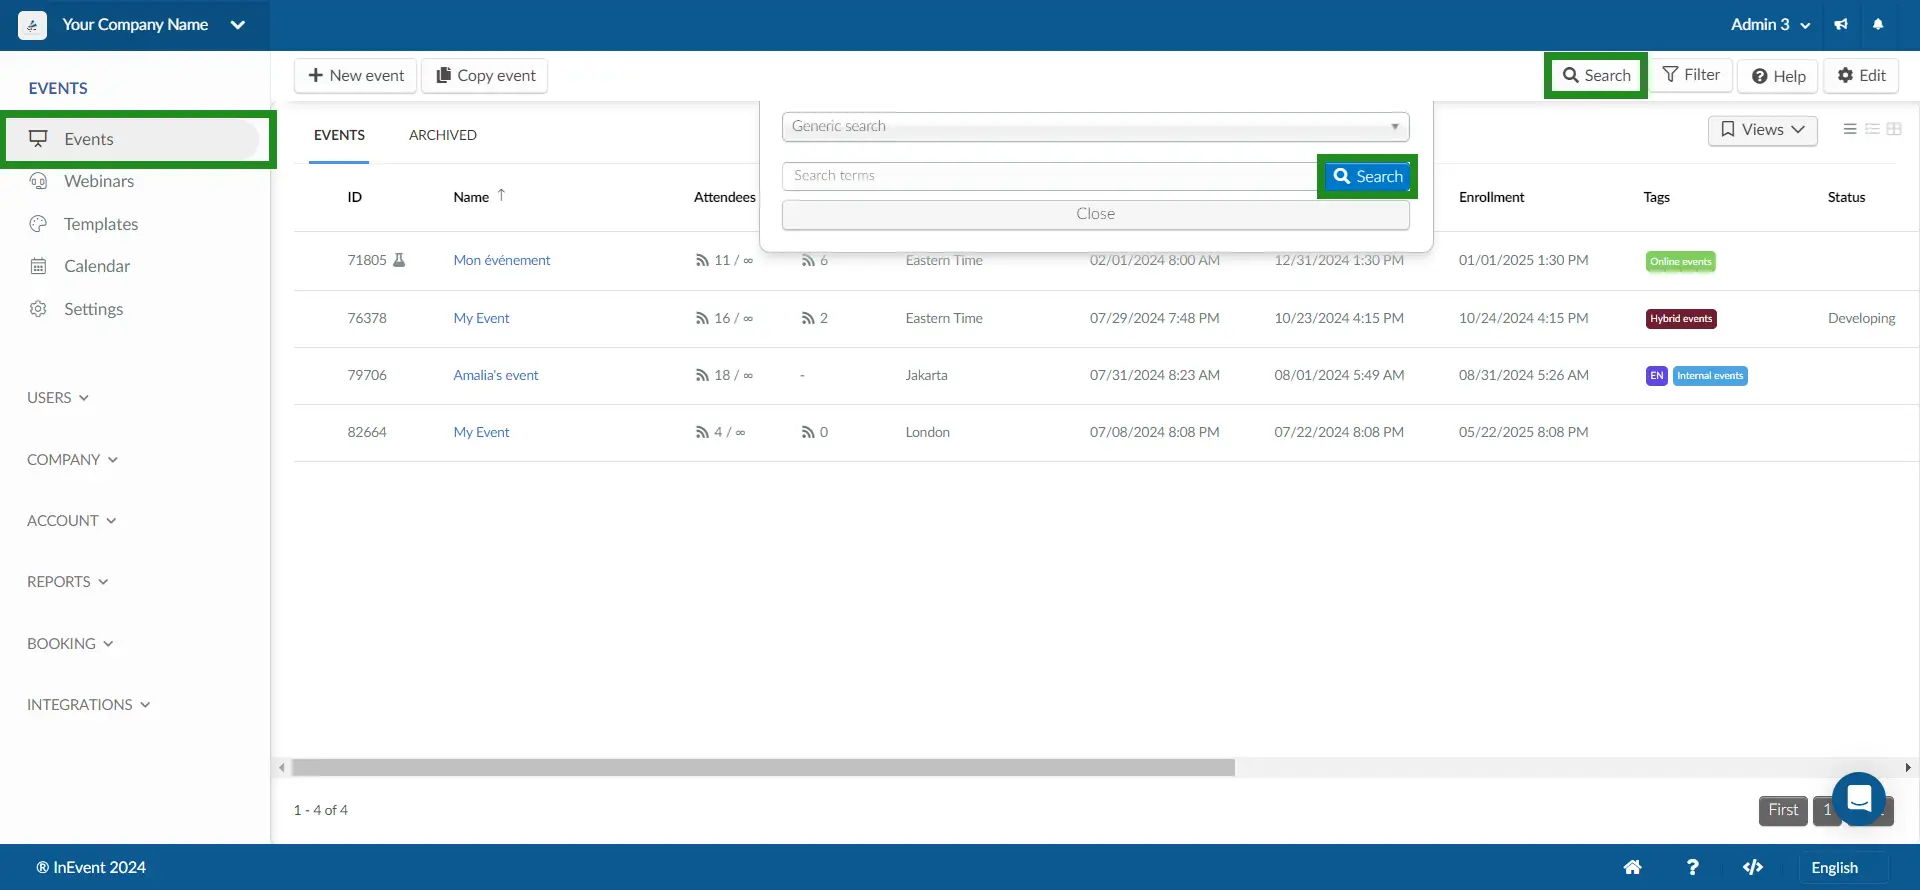
Searching for events
You can search for events, by clicking on Events > Search (upper right corner). It is possible to specify your search by ID, Name, City, In Person, Public, Visible, Custom fields, from the drop down menu or simply enter the name of the event in the search box and press the blue Search button.
Filtering events
To filter your events, press Events on the left side, then in the top right corner press the Filter button.
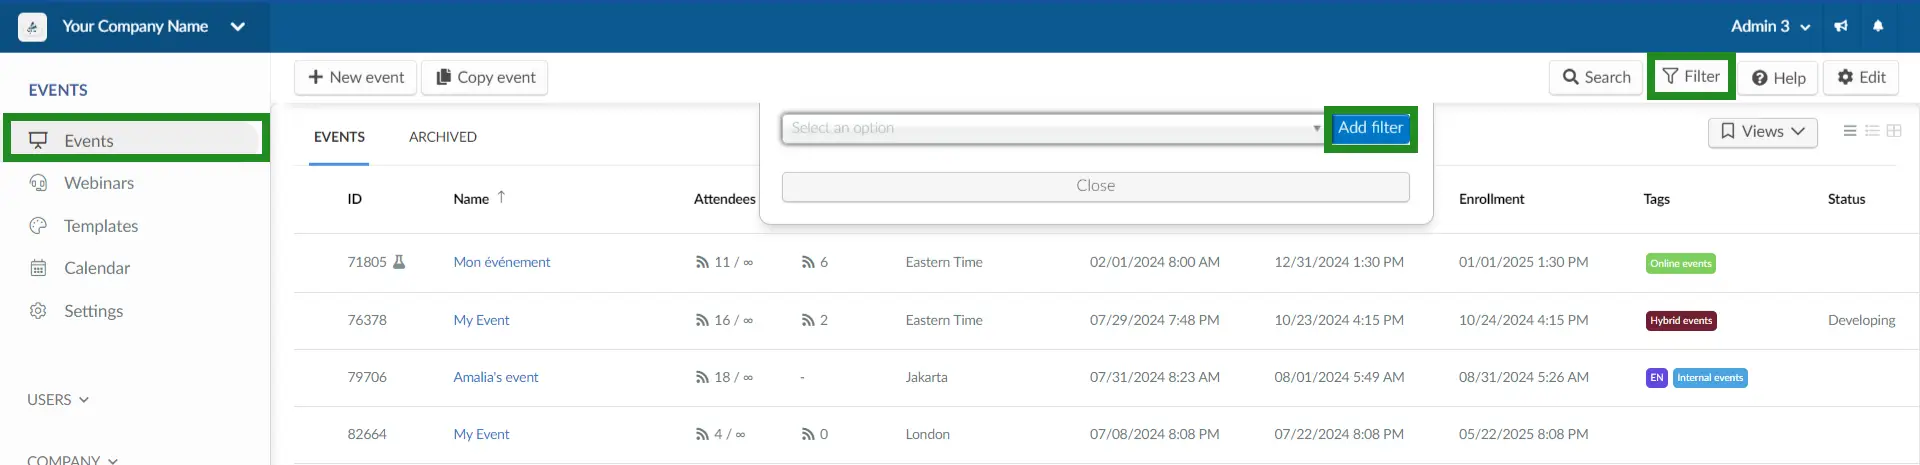
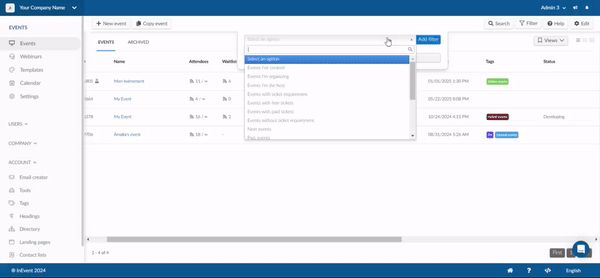
Click the dropdown box and choose from the following filters:
- Events I've created: Events you have created.
- Events I'm organizing: Events in which you are an admin.
- Events I'm the host: Events in which you are the host.
- Events with ticket requirement: Events that have the ticket requirement tool enabled.
- Events with free tickets: Events that have tickets at no cost.
- Events with paid tickets: Events that have tickets with prices attached.
- Events without ticket requirement: Events that have the ticket requirement tool disabled.
- Next events: Upcoming events that are yet to commence.
- Past events: Event that have ended.
- Current events: Events that are currently ongoing.
- Single day events: Events spanning a single day, commencing and concluding on the same day.
- Multi day events: Events extending across multiple days, with distinct start and end dates.
- Online events: Events whose event mode is set to Virtual/Online.
- In-person events: Events whose event mode is set to In-Person.
- Tags: Event with tags.
You can choose a filter or multiple filters by selecting the filter(s) and pressing the blue Add filter button.
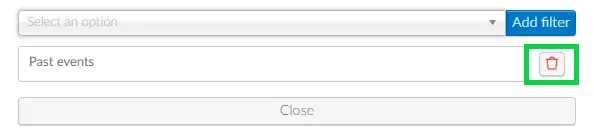
To remove a filter, simply click on the trash icon on the right side of the filter you wish to remove as highlighted in the image below:
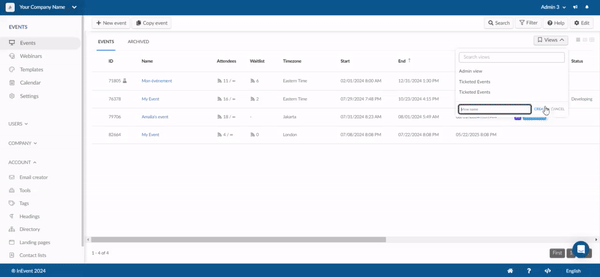
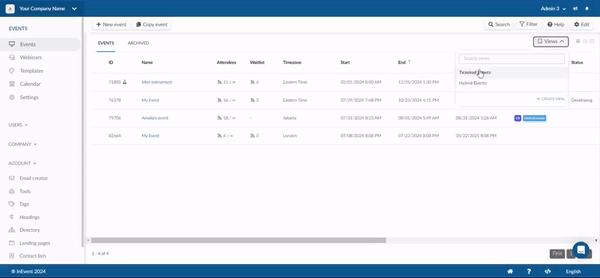
Using the Views button
The Views feature allows users to save and access events and webinars based on a selected filter. After selecting events or webinars through a desired filter, users can save them as a view. This allows users to easily access the events or webinars according to the filters added to that particular view. Views help users to organize and sort their events into different categories from a large pool of events. To create a view follow these steps:
- Click on the Views button in the Events or Webinars page
- Click Create View and enter the name and click on Create.
- After creating the view, click on the filter icon, select the desired filter and click Add filter.
- Click on the Views button again and select the desired View.
- Click on Save View.
- Now once you click on the view that you created, you will only see the events/webinars according to the filters added to that specific view.
Duplicating a view
To duplicate existing views, click on the view you wish to duplicate, then click on the Duplicate button and enter a new name for the view. The duplicated view will be an exact replica of the original view. After duplicating a view, you can also make changes to the events in it by selecting a new filter specific to your preferences.
Clearing a view
To clear a view and display all the events in the Events dashboard, simply click on the drop-down beside the selected view and press the Clear button.
Deleting a view
To delete a view that was created follow these steps:
- Click on Edit.
- Click on the Views drop-down button.
- Click on the Red trash-bin corresponding to the view you want to delete.
- Click on Confirm to delete.
- Click on End to save changes.
Switching between events
You can switch between events by following the steps below:
- Go to the Events page and access an event.
- Click on the event's name at the top right corner of the page.
- You'll see two tabs: Event and Templates:
- Beneath the Event tab, you can switch to a different event by simply clicking on it.
- Beneath the Templates tab, you can choose and switch to a different template.
Accessing the event list from personal settings
You can access your list of events directly from your personal settings. This allows you to view and manage both your upcoming and past events associated with your account. To do this follow the steps below:
- Click on your profile name in the top bar.
- Select Personal Settings from the dropdown menu.
- Click on Person Profile from the sub-list. You will be redirected to the edit profile page.
- Click on your profile name in the top bar again.
- From the dropdown list that appears, select Events.
You will be redirected to a page displaying all your events, making it easy to access and manage them.
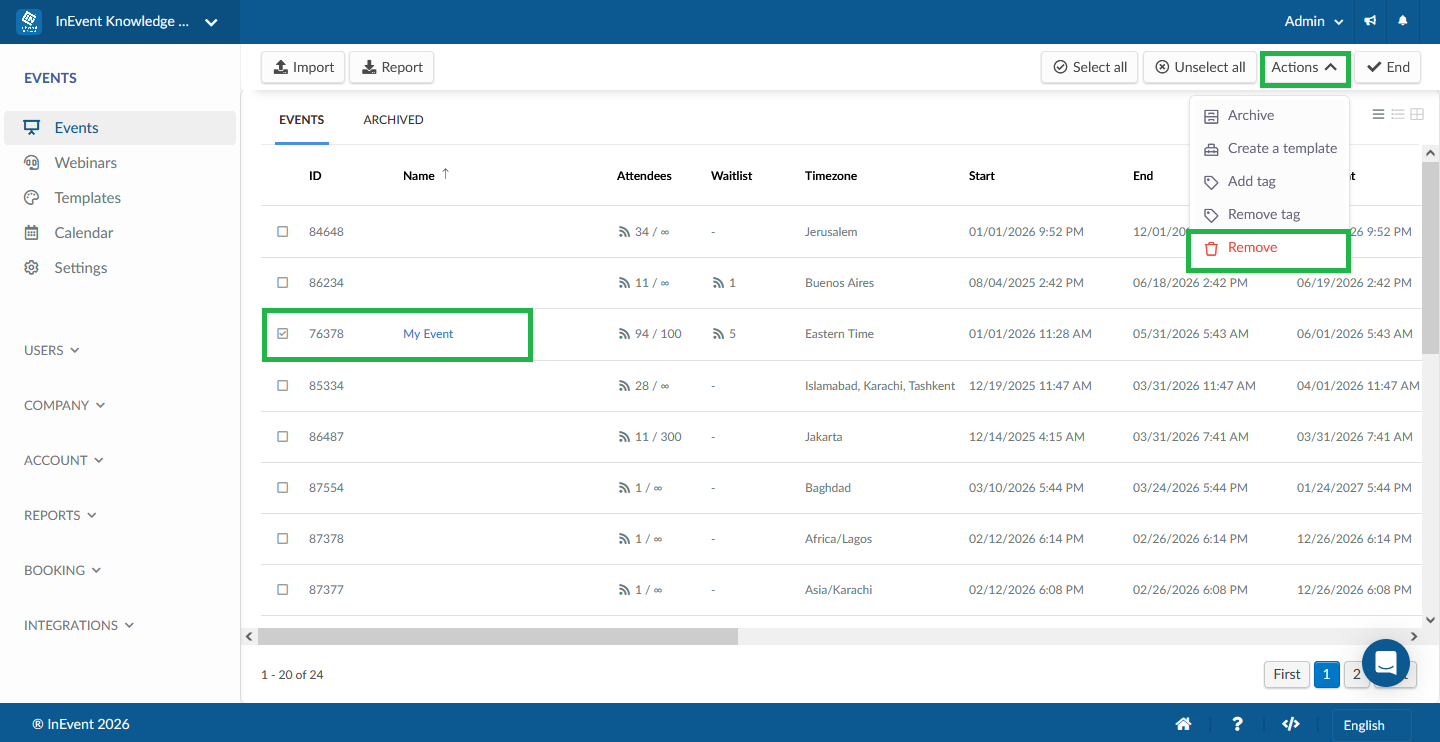
Deleting an event
To delete an event, after clicking on Edit, select the event checkbox you wish to remove, and then click on Remove button at the top right corner of the page. A confirmation box will appear for you to confirm your action. Click on the red Remove button to confirm. Press End to save changes.
Extracting a report of events
You can extract a report of events from the Company level. To do so, click Edit from the Events page and click Report. A blue notification banner will then appear to notify that your report is being processed.
Once your report is finished, it will be sent to your email. You can also access it by navigating to Reports > Report center from the Company level.
On the Report center page, you can preview your report by clicking on Preview under the title of the report. To download your report in an .XLSX format, click on the blue Download button under the Actions column.

In the report, you will find information such as the names of the event creators, event names, event nicknames, event descriptions, event time and dates, and other event details.
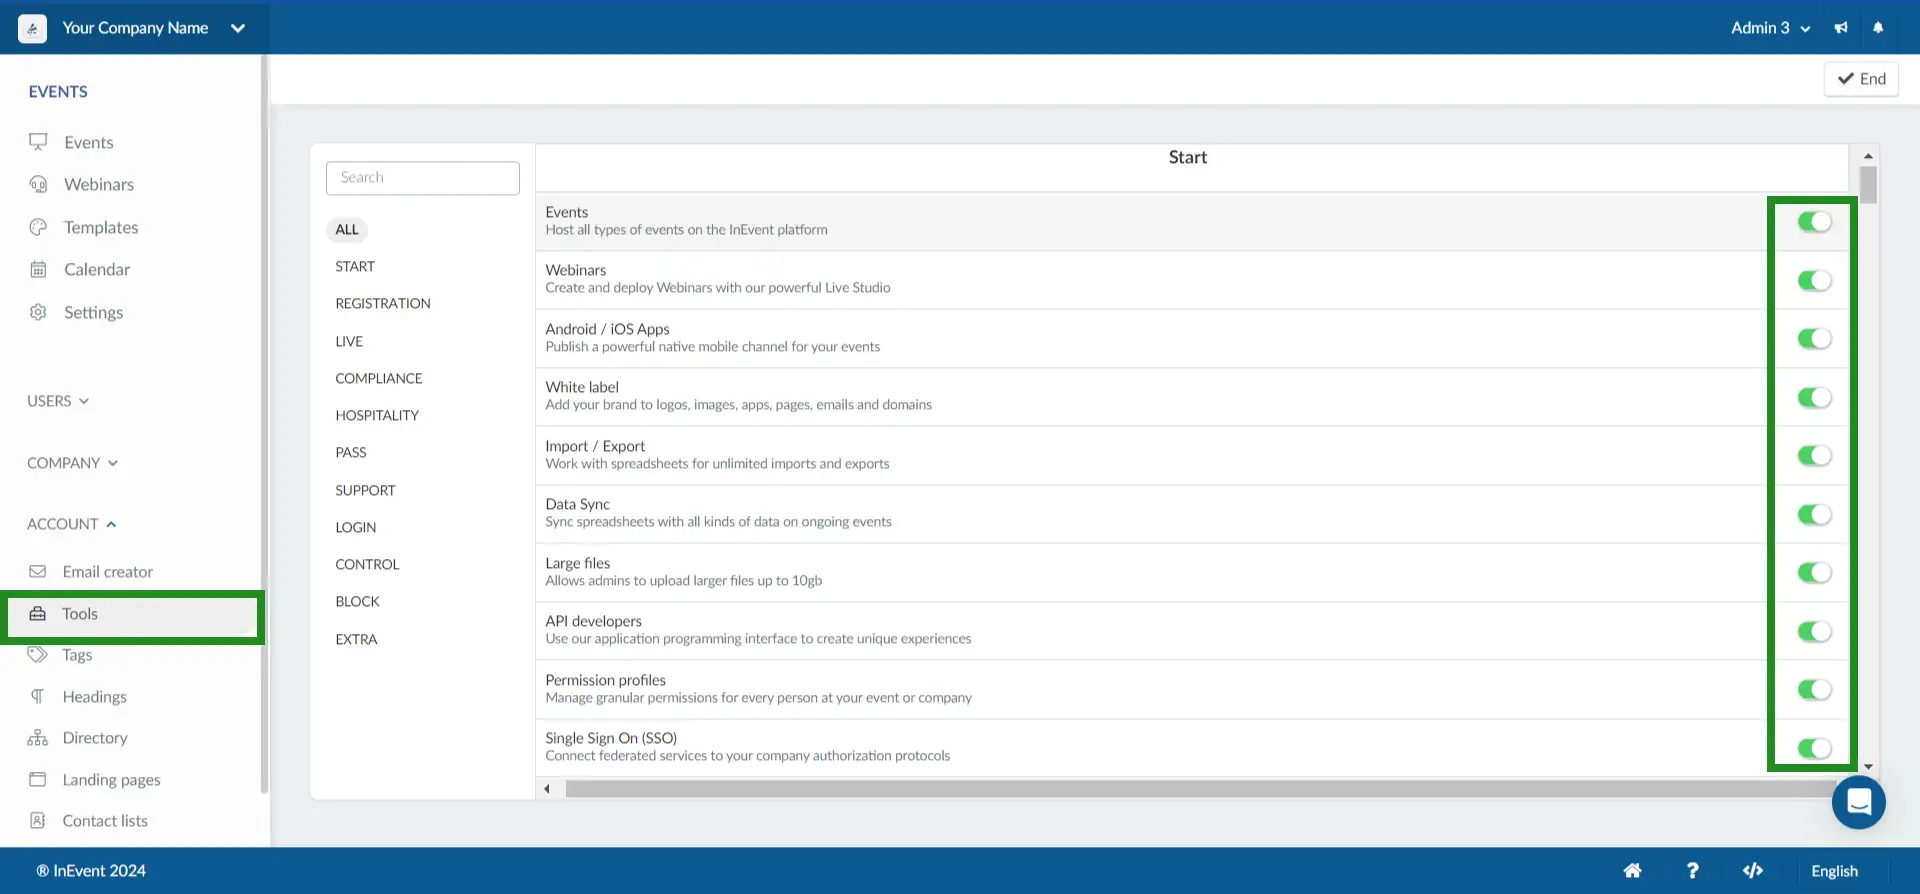
Changing the company tools
To define which tools will be available to all of your events, go to Account > Tools > Edit. According to your needs, toggle the buttons on or off and click on End.