Virtual Lobby
 Updated 2 months ago
by
Faisal Durrani
Updated 2 months ago
by
Faisal Durrani
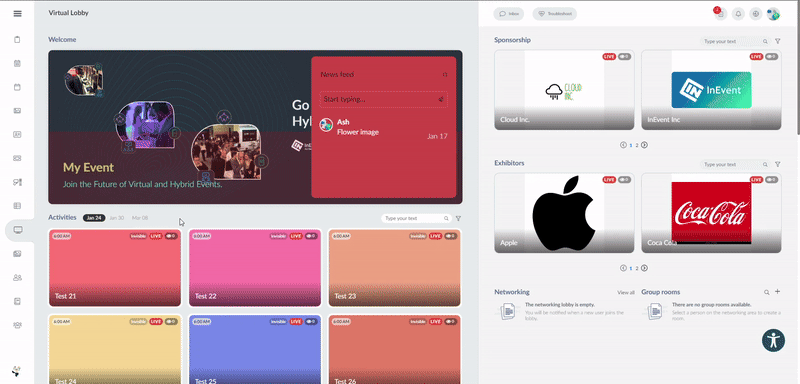
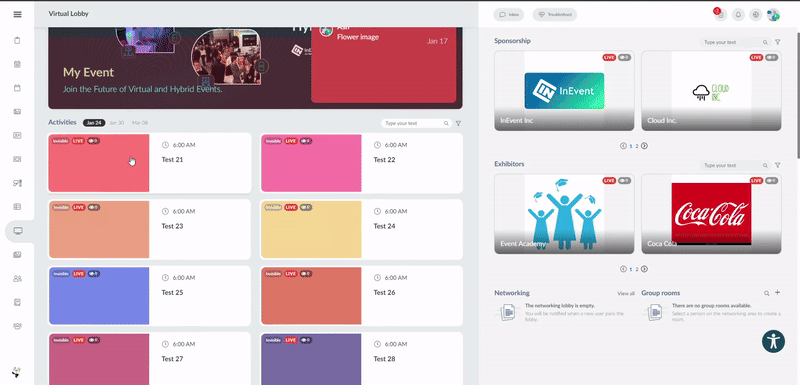
The Virtual Lobby is a tool designed to host your events virtually. It creates a dynamic online environment capable of broadcasting a wide range of activities, from large networking events to single sessions or even multiple simultaneous sessions with individual conversations.
Setting up your online event in the Virtual Lobby
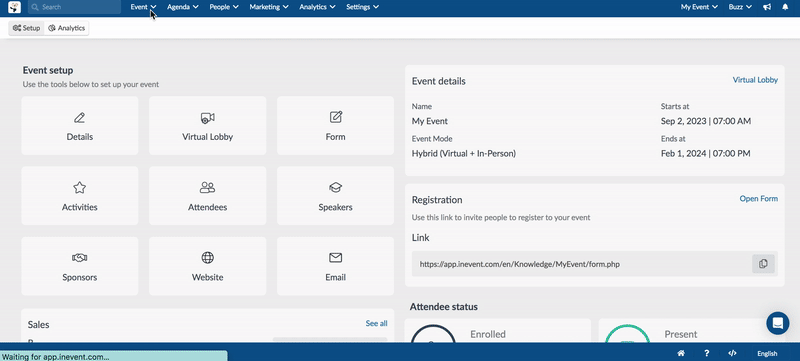
Go to Event > Details and make sure your event is set to Published and Online/Virtual Lobby or Hybrid (Virtual + In Person).
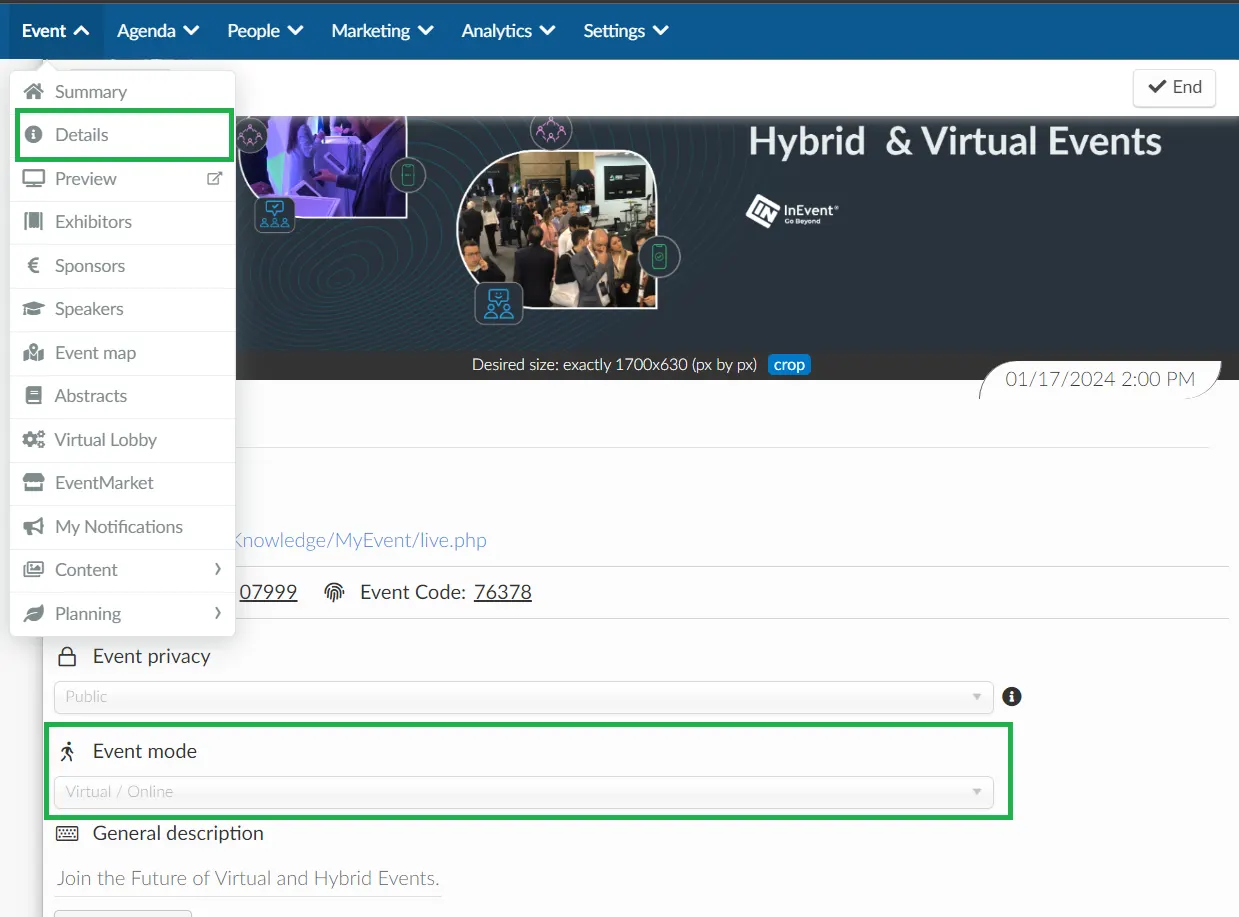
When set to Online / Virtual Lobby or Hybrid (Virtual + In Person), a link will automatically be generated to access and view the Virtual Lobby, as displayed above.
Now it's time for you to set up your Virtual Lobby preferences! To do so, click on Event > Virtual Lobby.
On this page, you'll be able to set up both the Design and the Settings of the Virtual Lobby.
Design
To customize the design of the Virtual Lobby, you can set up its layout, Live Studio background, Virtual background, background image, and Reactions. It's also possible to customize reactions and virtual backgrounds for the Live Studio separately.
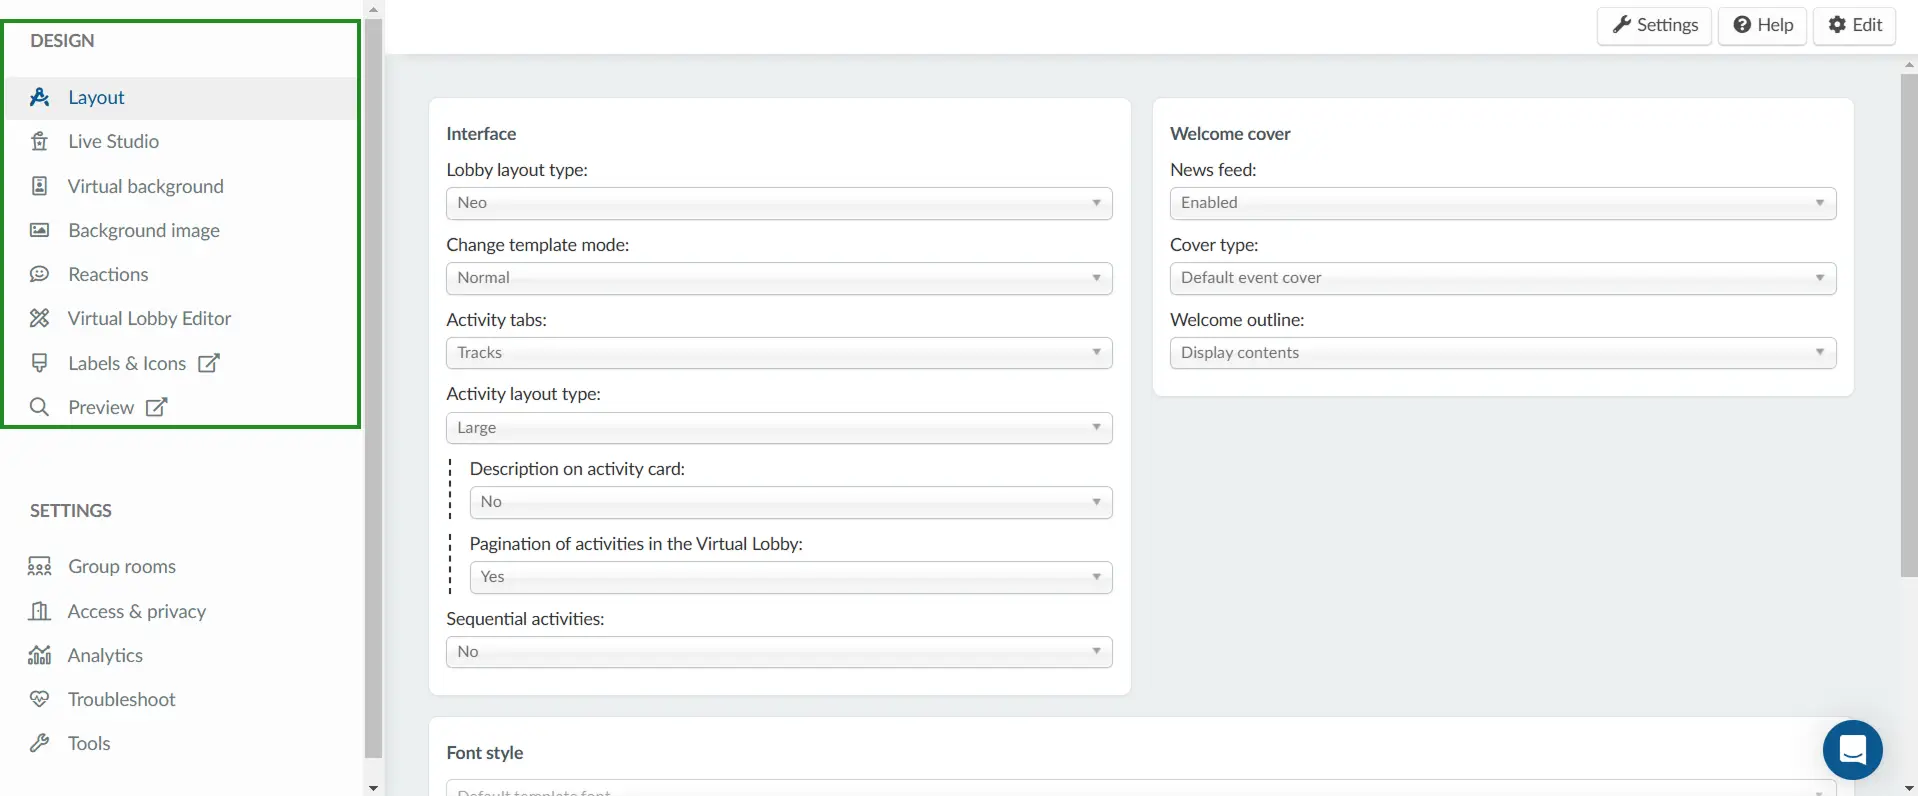
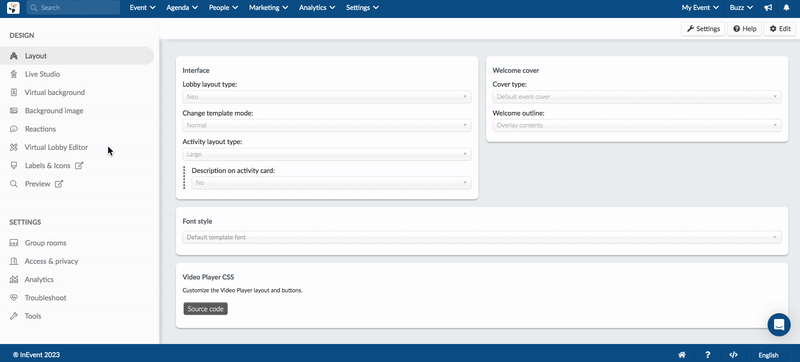
Layout
On the layout tab, you can customize the Interface, template mode, activity layout type, welcome cover, and the font style.
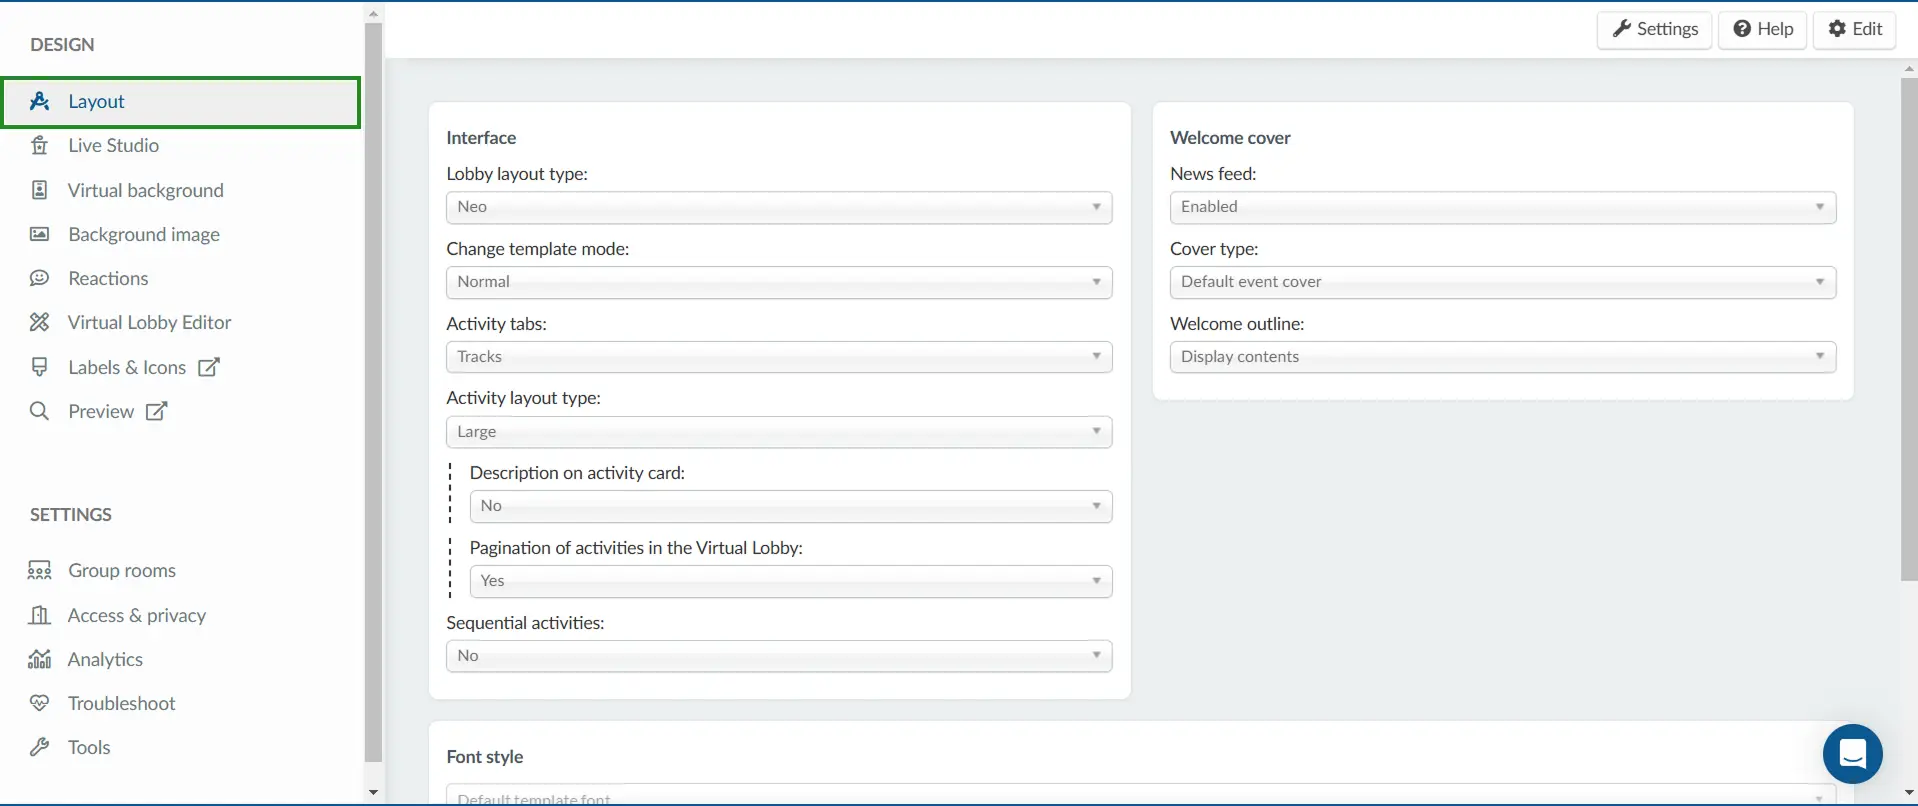
Interface
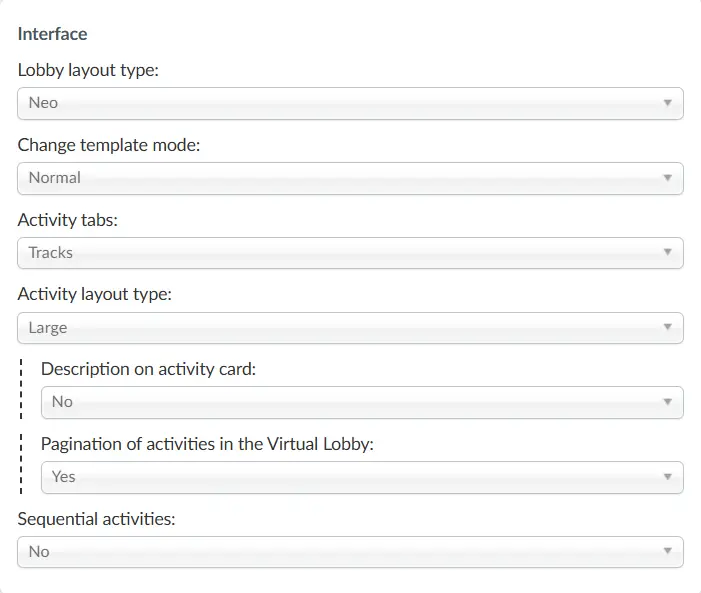
- Lobby layout type
When selecting the layout type, you can choose from:
- The Classic layout
- The Neo layout
To learn more about this, refer to our Virtual Lobby layouts article.
- Template mode
- The Normal template
- The Dark mode
To learn more about this , refer to our Virtual Lobby layouts article.
- Activity tabs
- The Event dates tab
- The Tracks tab
To learn more about this , refer to our Virtual Lobby layouts article.
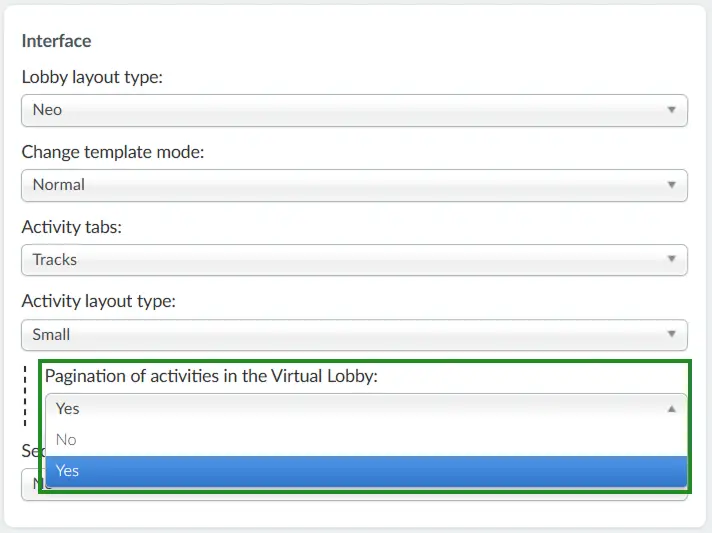
- Activity layout type
To select your activity cover size and style, you should click on the drop-down bar under Activity layout type.
To learn more about this, refer to our Virtual Lobby layouts article.
- Pagination of activities in the Virtual Lobby
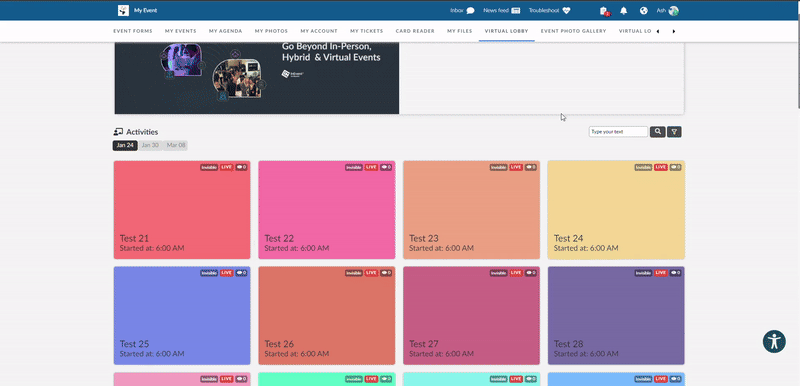
By default, the Virtual Lobby will show all activities in the same page, regardless of how many there are. However, if there are numerous activities listed, you have the option to enable pagination. To do so, simply choose Yes in the Pagination of activities in the virtual lobby field. This will organize the activities into pages for easier navigation.
- When pagination is enabled in the Classic layout, each page dedicated to a specific activity date will display 32 activities. To view more activities, users can navigate through the available pages using the number navigation arrows, which indicate the number of remaining pages.
- When pagination is enabled in the Neo layout for the Small activity layout type, each page dedicated to a specific activity date will show 30 activities. To view more activities, users can navigate through the available pages using the number navigation arrows, which indicate the number of remaining pages.
- When pagination is enabled on in the Neo layout for the Medium activity layout type, each page dedicated to a specific activity date will show 28 activities. To view more activities, users can navigate through the available pages using the number navigation arrows, which indicate the number of remaining pages.
- When pagination is enabled in the Neo layout for the Large activity layout type due to a large number of activities, each page dedicated to a specific activity date will show 10 activities. To view more activities, users can navigate through the available pages using the number navigation arrows, which indicate the number of remaining pages.

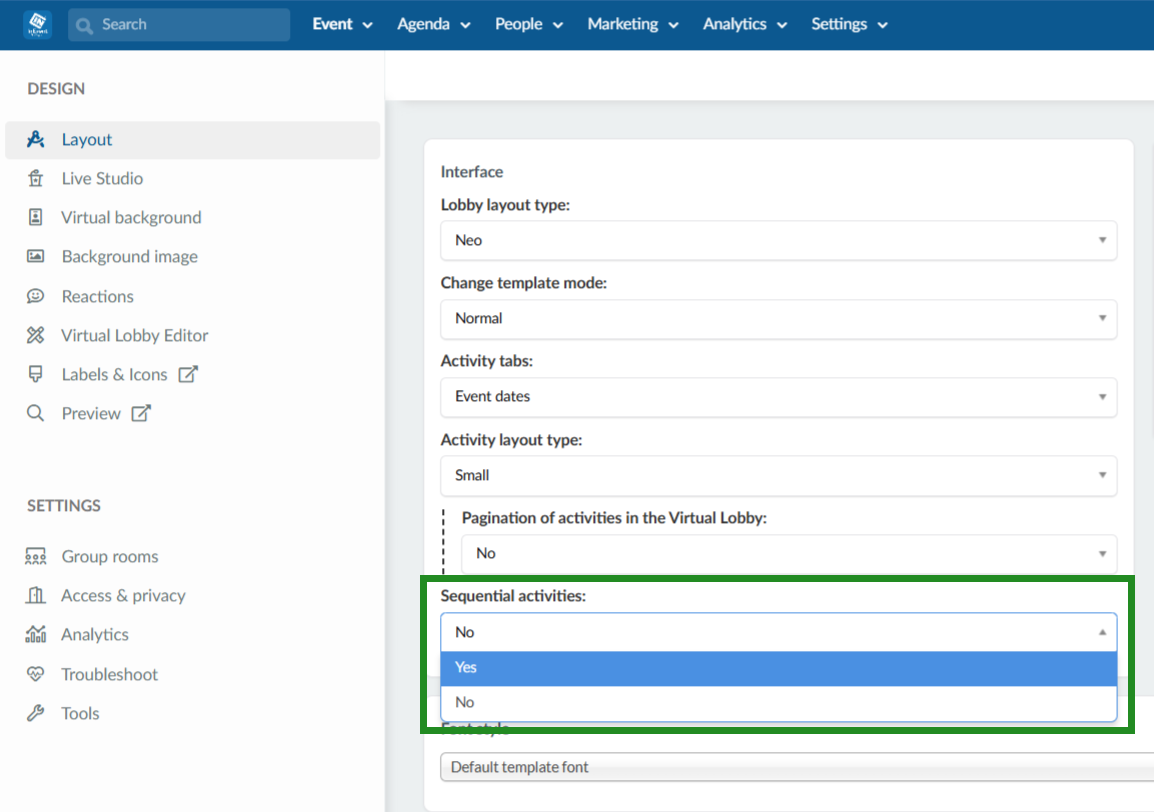
- Sequential Activities
Allows you to control the order in which attendees can access activities within the virtual lobby. When enabled, attendees must follow a predefined sequence, meaning an activity will only be available after the previous one has been completed or attended.
Welcome cover
Under Welcome cover, you'll have two cover types options: default event cover and video cover. To learn more about this, refer to our Welcome Card article.
Font style
You will be able to choose the font style of your preference under Font style.

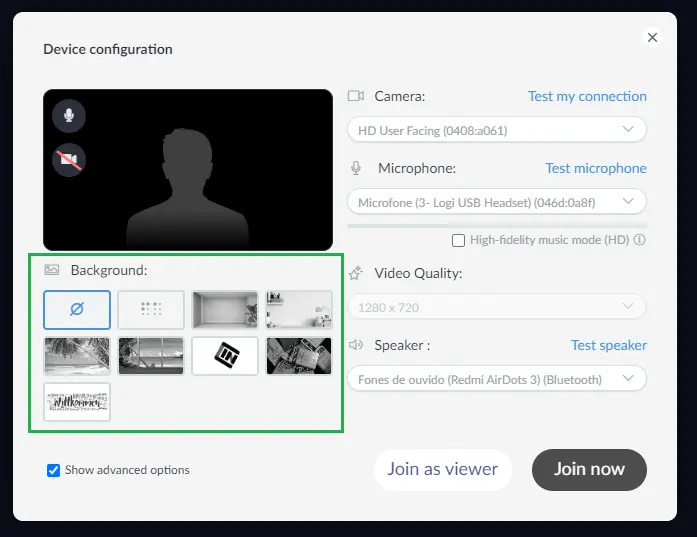
Live Studio
In the Live Studio tab, you can customize the company logo and change the colors of the background, add images, videos, as well as customize the lower third. To learn more about this, refer to our InEvent virtual backgrounds article.
The backgrounds updated on this section will be displayed as options in the Device configuration step right after presenters access a room.
Virtual background
You have some default virtual background available but you can also add some other options to be chosen from while configuring the device. For more information, refer to our InEvent virtual backgrounds article.
Background image
Under the Background image, you can upload both the Background image for the Lobby and the Player Idle image.
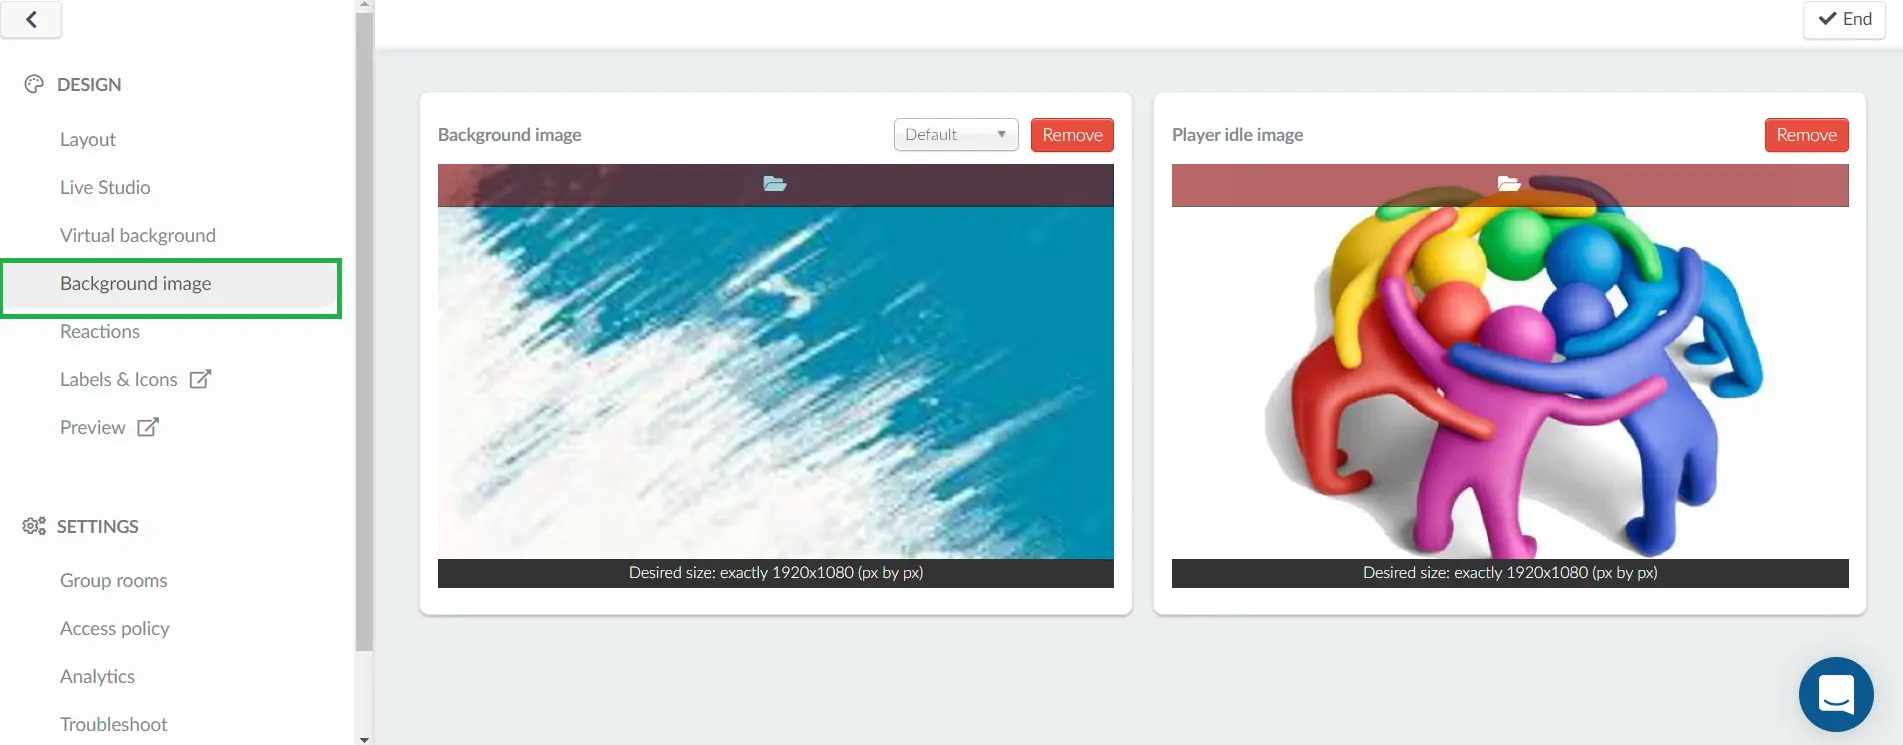
- Background image: If you wish to have an image as the background in the Virtual Lobby's main page instead of just a plain color, press Edit and click on the red bar to upload the image you wish. Press End to save the changes.
- Player idle image: By default, before the live content starts, the room will display a message that says Nothing's happening here. You will be notified about upcoming streams. If you wish to have an image or gif displayed inside the rooms before the live content starts, press Edit and click on the red bar to upload the image you wish. Press End to save the changes.
1920x1080px) or 16:9 aspect ratio.Reactions
This function is available for the Live Studio Stream, Pre-recorded (Simulated Live Streaming) and RTMP streaming. To illustrate how to use this feature, below you find a gif showing how to enable/disable the Reactions by clicking on Edit and using the toggle to the left/right.
You can select up to 7 emojis to be displayed on the Live Stream and the reactions show up in real-time to everyone.
To delete the emoji simply click on the trash icon underneath the reaction:
Labels & Icons
When clicking on this menu, a new tab will open for you to edit the virtual rooms' icons and labels. For more information about the virtual rooms, refer to the Live Studio article.
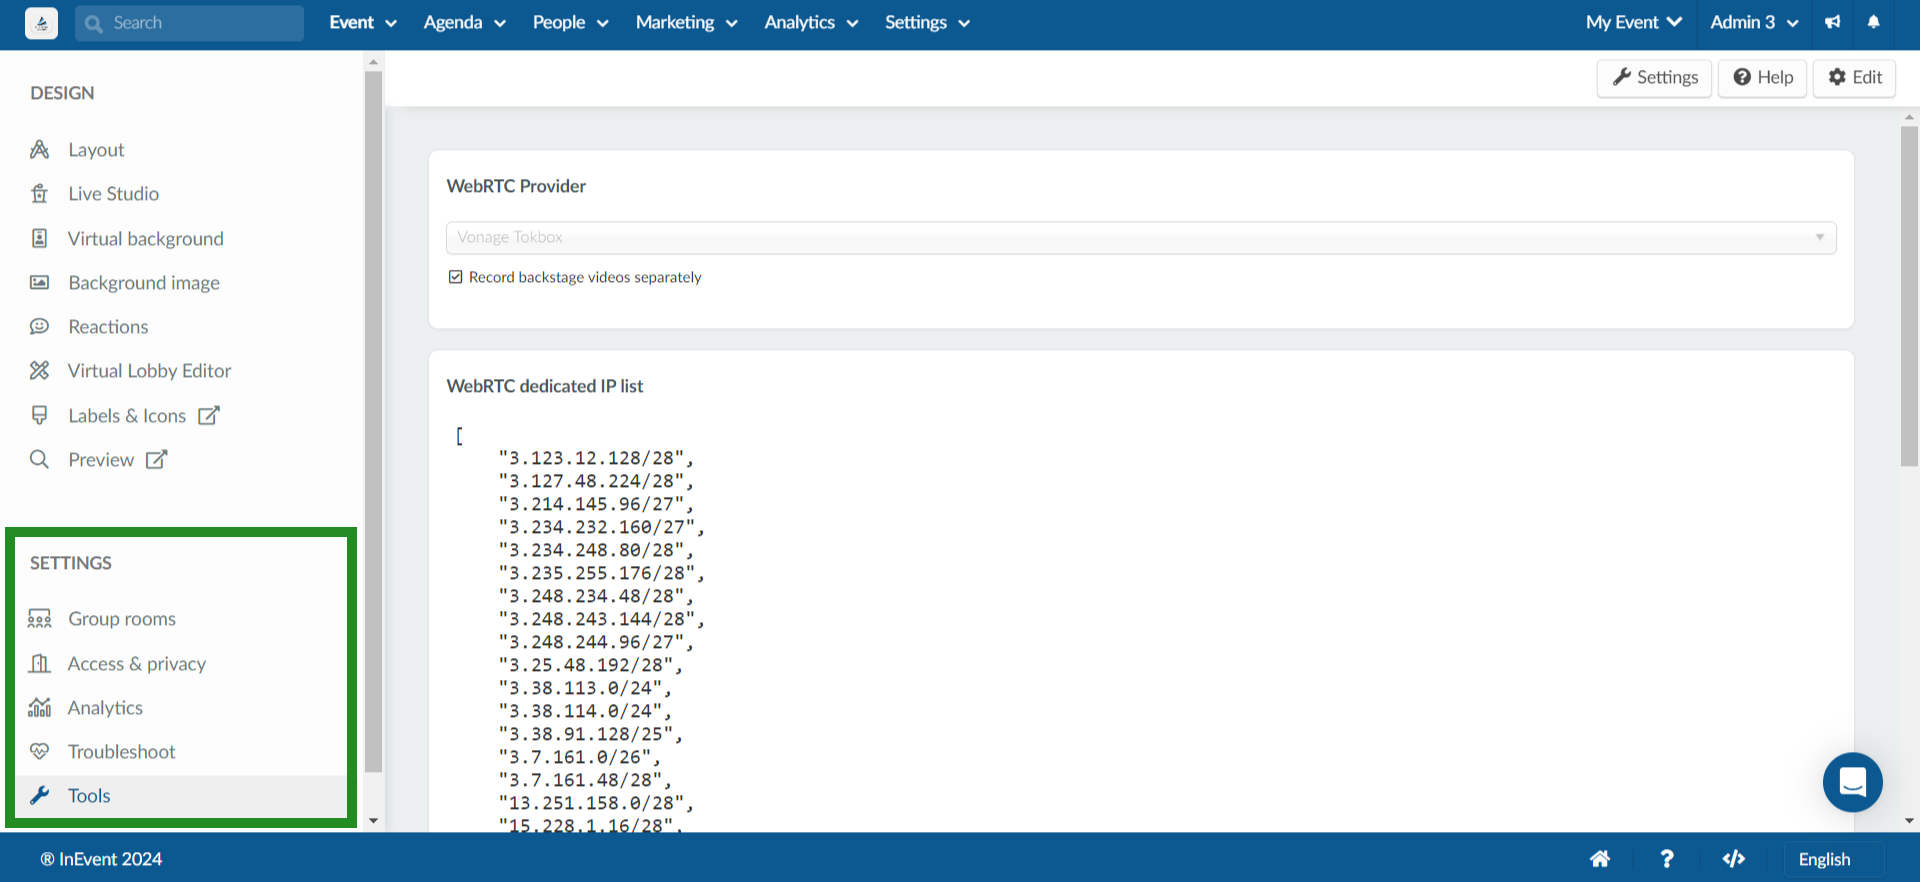
Settings
Under Settings, you will be able to set up Group rooms and the Access policy, check the Analytics, Troubleshoot and from the Tools section, you can view the WebRTC provider.
To learn more about Settings, check the article Virtual Lobby Settings.
To control the tools on the Virtual Lobby page, click on the Settings button on the top right corner. This will display a pop-up of all the tools.
You will see all the tools arranged into their various categories: Start, Registration, Live, Block, and Extra. Click on each category to view the tools and to enable or disable the tools by clicking on the toggle button next to each tool, as highlighted below:
To learn more about all the tools in the Settings button, refer to our Virtual Lobby Settings article.
To learn how to view all the tools and access them from the tools page (Settings > Tools), refer to our Set Event Tools article.
Changing the colors of the Virtual Lobby
You can customize the colors of your virtual environment according to your preference.
To do it, at the company level, press Company > Details.
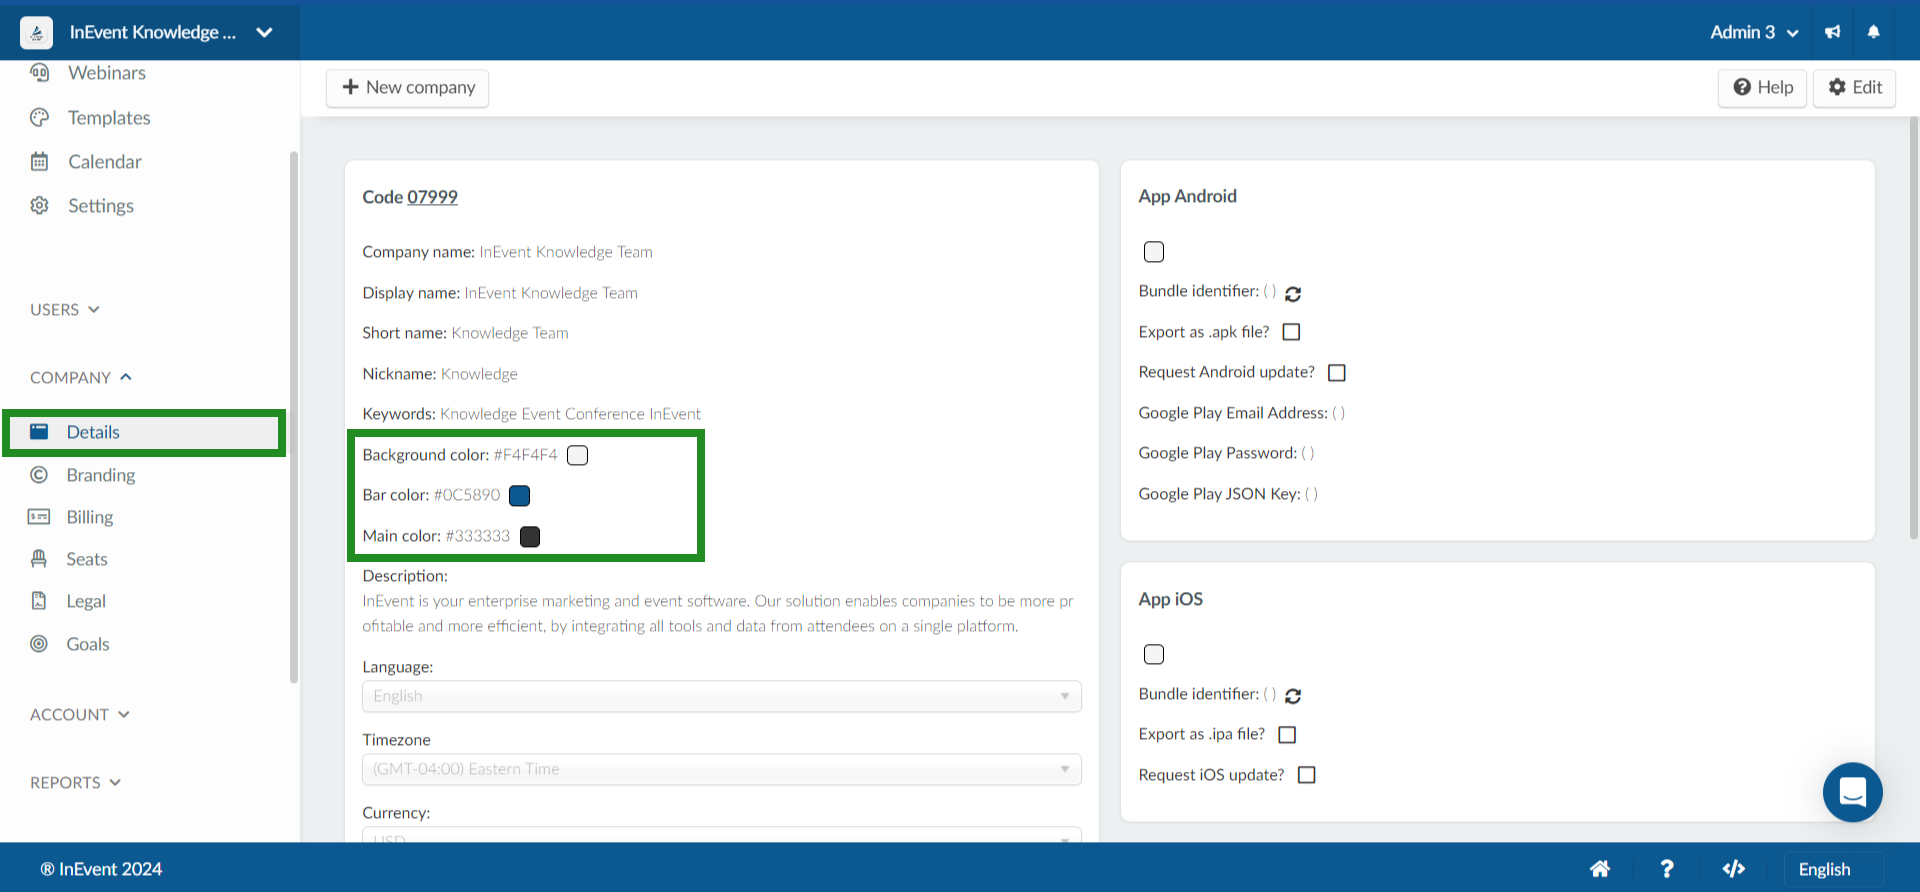
You can change the Background color, Bar color, and Main color using the hexadecimal code of the color you want.
Granting attendees access to the Virtual Lobby
By sharing this User guide with your attendees prior to the event date, they can get familiarized with the Virtual Lobby and ensure their computer meets all the requirements of the InEvent platform.
In fact, there are various ways for them to access the Virtual Lobby. To know more, refer to our How do I access the Virtual Lobby article.
However, if you looking to avoid access to the Virtual Lobby prior to the event date, refer to our How to avoid access to the Virtual Lobby prior to the event date article.
Finally, if you would like to understand how the Virtual Lobby works on the app and what features are available, refer to our Virtual Lobby on the app article.