E-mail creator: dynamic content and links
 Updated 4 days ago
by
Lorenzo
Updated 4 days ago
by
Lorenzo
With the Dynamic content, it’s possible to personalize your email, important data from your event and direct this information to all your attendees.
Before you go ahead, make sure to read the Email Creator article to learn how to create and edit emails.
Adding dynamic links and content to emails at the event level
To add dynamic content to the email, go to Marketing > Communication > Email creator page at the event level and select the email. You will need to either select a typograph box or edit the text displayed in the body of your email.
To customize the email, drag the chosen options from the left into the email on the right.
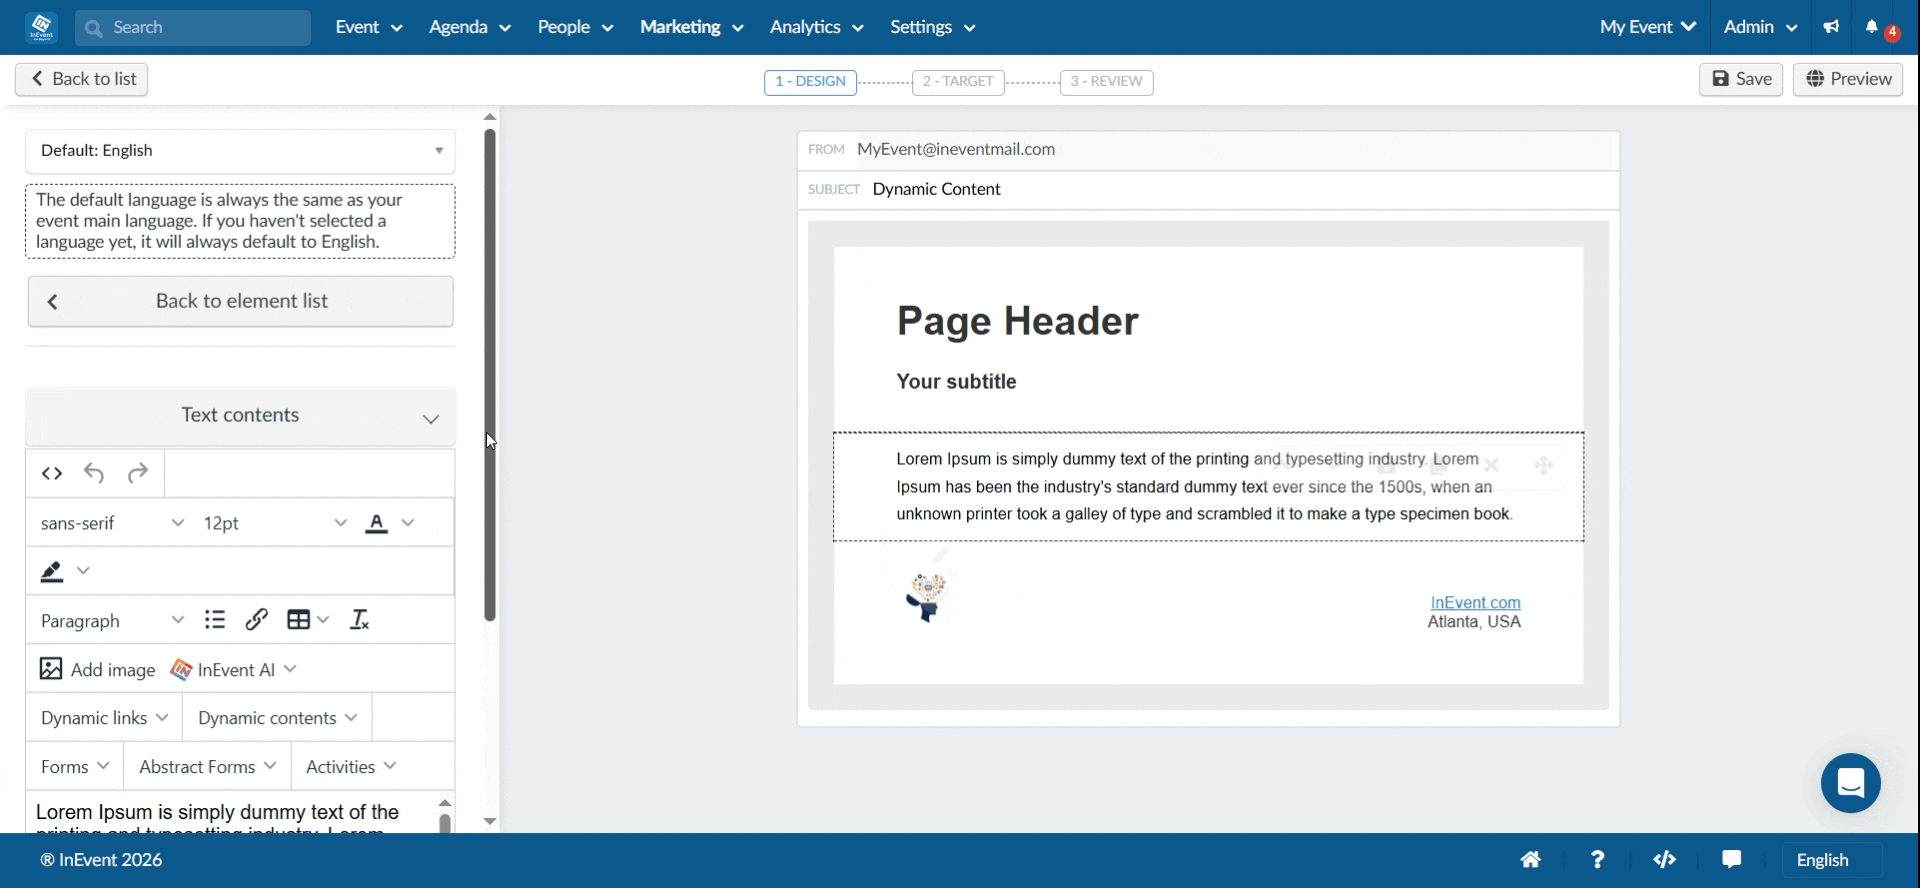
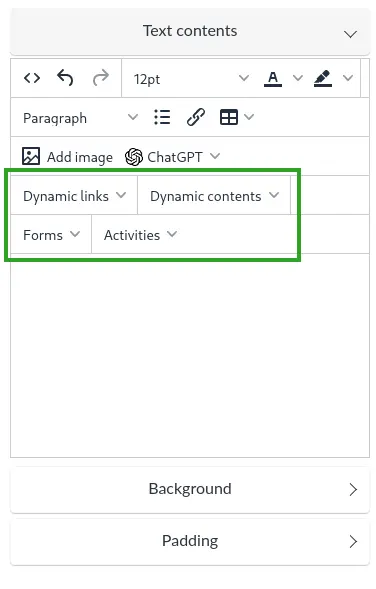
In the left-hand side menu, under Text contents, you will have a few options, including Dynamic links, Dynamic contents, Forms and Activities.
Below we will describe each one in detail.
Dynamic links
This section will include the following dynamic links that you can add to your email:
Data | Dynamic link URL | Description |
SSO Login | Redirect URI as configured within SSO settings | Inserts a link for SSO login gateway. For more information, refer to our Single Sign-On article. |
Website |
| This inserts the link for your event website which can be visited by the attendees. For more information, refer to our Website article. |
Registration form |
| If enabled, the link will lead attendees to the form needed to enroll for the event. For more information, refer to our Registration Form article. |
Purchase form |
| If Ticket requirement is enabled, the Purchase form dynamic link will appear. The link will lead attendees to the purchase form needed to enroll for the event. Refer to the Purchase form article for more information. |
Purchase form (with ticket) |
| If Ticket requirement is enabled, the Purchase form dynamic link will appear. The link will lead attendees to the purchase form needed to enroll for the event, with the ticket already selected for the attendee to purchase. Refer to the Purchase form article for more information. When a user registering clicks on a link for a subticket, the parent ticket is automatically selected for purchase as well. |
Registration form RSVP yes |
| The link directs guests who have been sent an invite to confirm their attendance with just a Yes click and they become automatically enrolled to the event. The Invite requirement and RSVP form have to be enabled for this option to work. |
Registration form RSVP no |
| The link directs guests who have been sent an invite to confirm their attendance. When they click on No, they are automatically disenrolled from the event. The Invite requirement and RSVP form have to be enabled for this option to work. |
Certificates |
| If you have created attendance certificates for your event, the link will direct attendees to their certificates which can be downloaded or printed. To ensure you have the correct |
Virtual Lobby activities |
| The link includes an individual token ID redirecting attendees to join the specific activity selected. To ensure you have the correct activity |
Virtual Lobby days |
| You can select specific days with activities to share with your attendees. When attendees click on the Virtual Lobby day, they will be taken directly to that date, where the activities will be displayed in the Virtual Lobby. Refer to the Agenda management article for more information. |
Virtual lobby tabs |
| You can select specific Virtual Lobby tabs to share with your attendees. When attendees click on the selected tab, they will be taken directly to the tab page, where the relevant information will be displayed. Refer to the Virtual Lobby tabs article for more details. |
Webinar link |
| This link leads attendees to the Webinar's live stream. Refer to the Webinar - Configuring your Live Stream for more details. Note that this dynamic link is only available on the Email creator for Webinar. For more information, refer to the Email creator - InEvent Webinar article. |
Download page |
| This link leads attendees to the download page where they can get the InEvent app on iOS or Android. |
App Link |
| This provides attendees with a quick and effortless way to access their InEvent account on the mobile app. By simply clicking the link, attendees will be automatically redirected to the InEvent mobile app, where they’ll be taken directly to their account. If users do not have the app downloaded, it will lead them to the play or app store to download the app. |
My events page |
| This link takes attendees directly to the My events tab in the Virtual Lobby, where they can see all the events they are registered in. |
My account page |
| This link takes attendees directly to the specific tab My account in the Virtual Lobby where they can see all about their profile. |
My abstracts page |
| This link takes attendees directly to the specific tab Abstracts in the Virtual Lobby where they can fill, review and approve the Abstract form, depending on their permissions. Refer to the Abstracts article for more information. |
My agenda page |
| This link leads attendees directly to the specific tab My Agenda in the Virtual Lobby where they can see all activities scheduled in the event. For more information, refer to our My Agenda article. |
My files |
| This link directs attendees to the specific tab My files where they can view all uploaded files and documents. For more information, refer to our Files and Documents article. |
My Photos |
| This link directs attendees to the specific tab My Photos where they can view all photos which the attendees feature in. For more information, refer to our Photo Match AI article. |
My voucher |
| This link directs attendees to their voucher, which contains information about QR codes, flights, shuttles, and many more. For more information, refer to our Digital Ticket Voucher article. |
Virtual Lobby |
| By default, this link will direct attendees to the Virtual Lobby tab. You can also change the entry page to another tab by clicking on the Insert/edit link button under text contents and editing the URL. |
Ticket manager |
| This link directs attendees to My tickets tab in the Virtual Lobby where they can review and manage their tickets. For more information, refer to our Attendee Center article. |
Ticket pending invite |
| This link directs users with pending ticket invitations to the registration form, where they will need to complete the form to be registered for the event. Refer to our Sending extra tickets to another person article. |
Event feedback form |
| The link directs guests who have been sent an invite to the event feedback form. The feedback tool has to be enabled for this to work. You can set up the feedback form at Event > Content > Feedback. |
Sponsor favorite |
| This link directs attendees to the Sponsor favorite tab in the web app where they can scan the QR codes of sponsors and add them as favorites. Refer to the Sponsor/Exhibitor article for more information. |
My Forms |
| This link directs attendees to the my forms tab |
My Photos |
| This link directs attendees to the Event Photos page, where they can view the images they add to the event. |
Event photos |
| This link directs attendees to the Event Photos page, where they can view all images in the Photo Gallery. For more details, refer to the Event photos article. |
Abstracts |
| This link directs attendees to the Abstracts page, where they can access the submission form, while reviewers can manage abstract submission controls. For more details, refer to the Abstract tab article. |
Sponsor account |
| This link directs sponsors to a dedicated space within the Virtual Lobby where companies can showcase their brand, update their profile, and engage with attendees. For more information refer to the Sponsor and Exhibitor profile article. |
Exhibitor account |
| This link directs exhibitors to a dedicated space within the Virtual Lobby where companies can showcase their brand, update their profile, and engage with attendees. For more information refer to the Sponsor and Exhibitor profile article. |
Speakers |
| This link directs attendees to a page where they can view all event speakers and access their profiles. |
Sponsors |
| This link directs attendees to a page where they can view all event sponsors and access their profiles. |
Exhibitors |
| This link directs attendees to a page where they can view all event exhibitors and access their profiles. |
Card Reader |
| This link directs attendees to the Card Reader page, where they can scan business cards to generate leads and automatically send participant information to the platform. For more details, refer to the Card Reader tab article. |
Gamification leaderboard |
| Gamification is a mobile only feature that enhances attendee engagement by allowing them to complete missions and earn points based on their interactions. For more information refer to the Gamification article |
My Files |
| This link directs attendees to a dedicated page where all event files are listed. Attendees can see the file location and choose to preview or download it. For mor information refer to the My files tab article. |
My App |
| This link directs attendees to a page with links to download the inevent app from the app stores. |
Event Map |
| This link directs attendees to a customizable map that provides a precise visual representation of the event’s location. It includes strategically placed icons to help attendees navigate and locate key areas within the event. For more information refer to the Event map article. |
Virtual Lobby - Activities |
| This link directs attendees to the Activities page, where they can browse and join event activities. For more information refer to the Virtual Lobby-Activities article. |
Virtual Lobby- Sponsors |
| The Virtual Lobby – Sponsors tab directs attendees to the Sponsors page, where they can view all event sponsors categorized accordingly. For more information refer to the Virtual Lobby-Sponsors tab article. |
Virtual Lobby - Exhibitors |
| This link directs attendees to the Exhibitors page, where they can view all event exhibitors categorized accordingly. For more information refer to the Virtual Lobby-Exhibitors article. |
Virtual Lobby-Meetings |
| This link directs attendees to the Meetings page, where all scheduled meetings are organized. For more information refer to the Virtual Lobby-Meetings article. |
Virtual Lobby-Group rooms |
| This link directs attendees to the Group Rooms page, where all available group rooms are displayed in a table layout. For more information refer to the Group rooms article. |
Virtual Lobby-Speed Networking |
| This link directs attendees to the Speed Networking page, where they can engage in randomly assigned 1x1 meetings in the Virtual Lobby. For more information refer to the Speed networking article. |
Networking |
| This link directs attendees to the Networking page, where they can view all visible attendee profiles and connect by sending a message or scheduling a meeting. For more information refer to the Networking article. |
Dynamic contents
The dynamic contents is broken into two parts: Event and Person which contains the event’s related data and also the attendee’s data which can be added to your email.
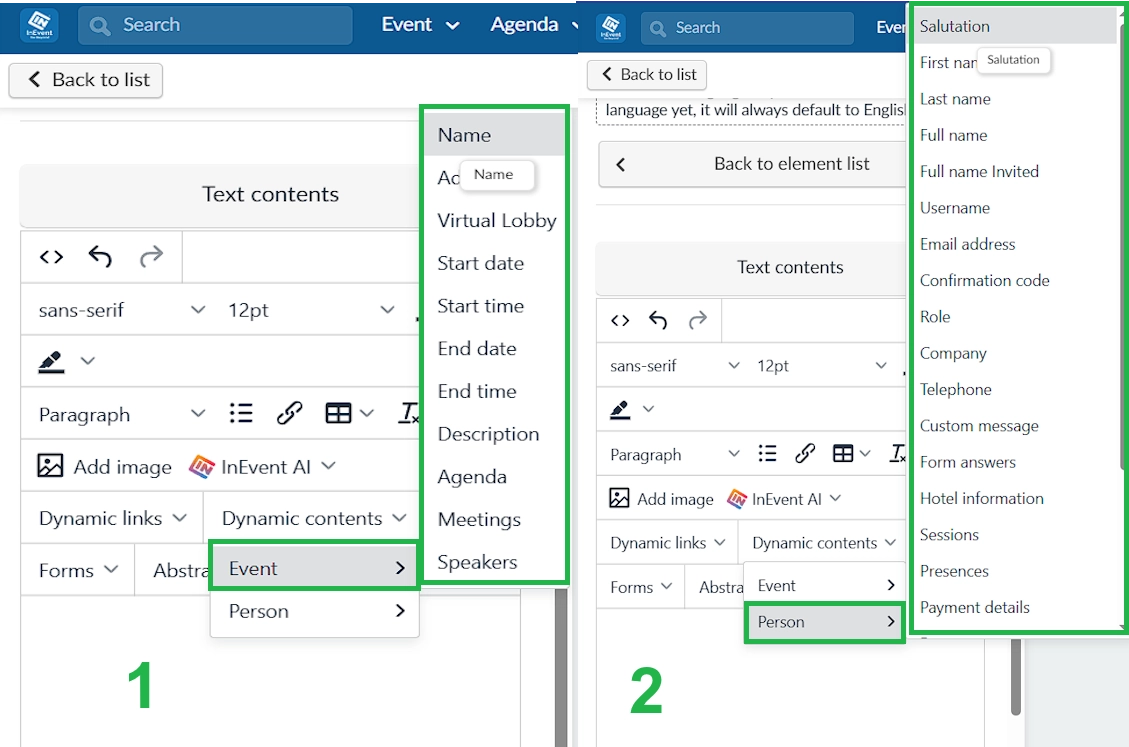
Event
A list of Event-related dynamic content can be found in the table below:
Data | Dynamic content tag | Description |
Name |
| This adds the name of your event which is what attendees will see in their emails. For more information on changing the name of your event, refer to our Event details article. |
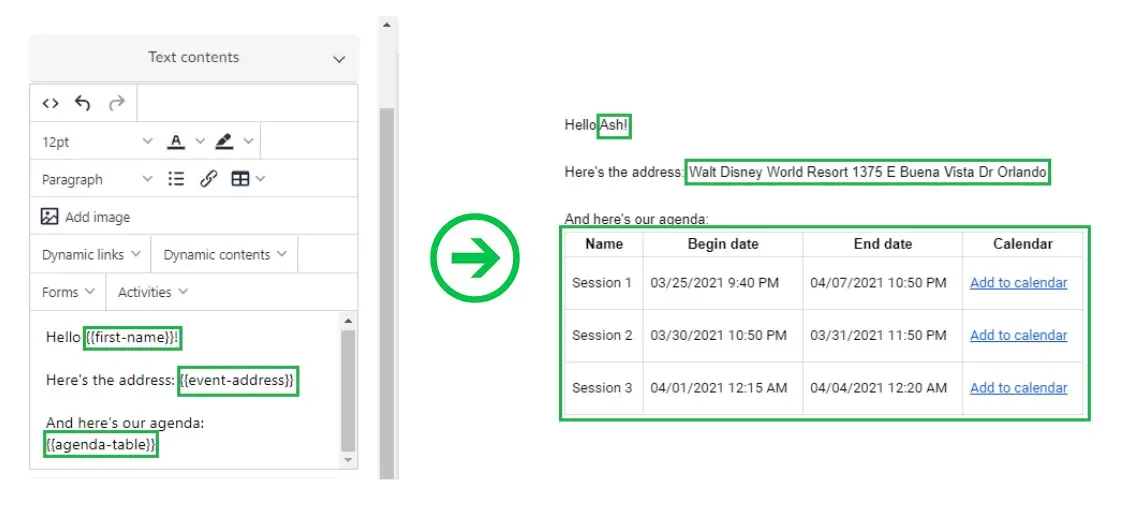
Address |
| If you are holding an In person or Hybrid event, the attendees will see the address of the event. |
Virtual Lobby |
| Attendees will receive a magic link which will direct them to the Virtual Lobby of the event. |
Start date |
| Attendees will see the start date of the event in their emails. For more information on setting your event start date, refer to our Event details article. |
Start time |
| Attendees will see the start time of the event in their emails. For more information on setting your event start time, refer to our Event details article. |
End date |
| Attendees will see the end date of the event in their emails. For more information on setting your event end date, refer to our Event details article. |
End time |
| Attendees will see the end time of the event in their emails. For more information on setting your event end time, refer to our Event details article. |
Description |
| Attendees will see the general description of the event. For more information on adding a description to your event, refer to our Event details article. |
Agenda |
| Attendees will see a table containing the names of activities scheduled for your event, their beginning and end date, as well as the option to add these activities to their calendar. For more information, refer to our Agenda management article. |
Meetings |
| Attendees will see their scheduled meetings with other participants, the beginning and end time of these meetings as well as its link and option to add to calendar. For more information, refer to our article on Meetings. |
Person
A list of Person-related dynamic content can be found in the table below:
Data | Dynamic content tag | Description |
Salutation |
| This will show the chosen salutation of the attendee. |
First name |
| The first name of the attendees will be used in the email being sent to them. |
Last name |
| This will input the last name of the attendees in the email. |
Full name |
| This will input the full name of the attendee in the email. |
Username |
| This will show the username of the attendee in the email. |
Email address |
| This will show the email address of the attendee in the email. |
Confirmation code |
| This will display the unique confirmation code for custom and registration forms submitted by the attendee. |
Role |
| The role of the attendee will be inputted in the email being sent. |
Company |
| The attendee's company name will be inputted in the email being sent. |
Telephone |
| The attendee's telephone number will be inputted in the email being sent. |
Custom message |
| This will show the custom message created in the Intro/Message/Itinerary section of an attendee column when they have been added to an event. For more information, refer to our article on how to add attendees to an event. |
Form answers |
| Attendees will see their answers to the Registration forms they have filled. For more information, refer to our Registration Form article. |
Hotel information |
| Attendees will see their Hotel information table, containing information such as hotel name, check-in and check-out dates, and hotel address. For more information, refer to our Hotel management article. |
Sessions |
| The attendees will see the agenda table which contains the list of activities they are enrolled in with their beginning and end date, as well as the option to add to their calendar. For more information, refer to our Agenda management article. |
Certificate |
| The attendees will see a table containing the list of the activities they have attended. The link to their certificate will be attached to the name of the activity. The activities must have the Attendance tracking feature enabled to confirm the attendance of participants. For more information, refer to our Attendance tracking article. |
Payment details |
| Attendees will see a table containing their payment details, containing information such as payment type, purchase identifier, and purchase date. This dynamic content is available for automatic emails related to payment actions and process. For more information, refer to our Confirmation email and other automatic emails article. |
Payment management |
| Attendees will see a button that leads to My tickets to review their ticket purchases. This dynamic content is available for automatic emails related to payment actions and process. For more information, refer to our Confirmation email and other automatic emails article. |
Meeting headline |
| Displays meeting headline for attendees. This dynamic content is available for automatic emails related to meetings. For more information, refer to our Scheduled Meetings: guide for event organizers article |
Meeting canceled headline |
| Displays meeting canceled headline for attendees. This dynamic content is available for automatic emails related to meetings. For more information, refer to our Scheduled Meetings: guide for event organizers article |
Meeting Information |
| Displays meeting information for attendees. This dynamic content is available for automatic emails related to meetings. For more information, refer to our Scheduled Meetings: guide for event organizers article |
Meeting buttons |
| Attendees will see the confirm meeting and cancel meeting buttons. This dynamic content is available for automatic emails related to meetings. For more information, refer to our Scheduled Meetings: guide for event organizers |
Meeting calender |
| Attendees will see a calender containg their scheduled meetings. This dynamic content is available for automatic emails related to meetings. For more information, refer to our Scheduled Meetings: guide for event organizers |
Here’s an example of how the dynamic contents looks on the email creator and how it will look on the email the attendees will receive:
Dynamic content for automatic emails
Some Dynamic links and Dynamic content are linked to automatic email triggers and therefore can only be used in certain automatic emails.
For more information on Dynamic content for automatic emails, refer to our Confirmation email and other automatic emails article.
Forms
This will enable you to add the Custom forms created as a link in your email.
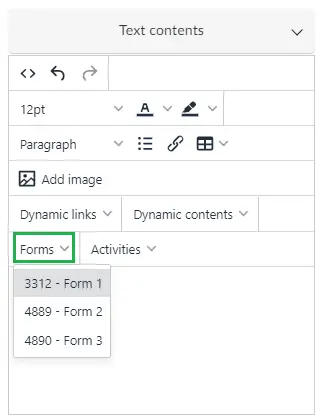
For more information, refer to our Custom Forms article.
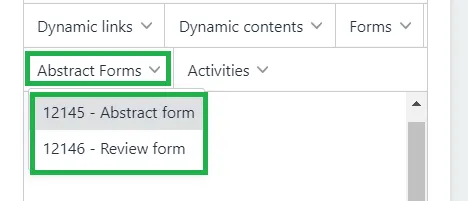
Abstract forms
This will enable you to add the Abstract form and Review form as a link in your email. By clicking on the Abstract form drop down, you can send the Abstract form via email to attendees by selecting Abstract form. To send the Review form to reviewers, select Review form
Refer to our Abstracts management article to learn more.
Adding calendar invite for specific activities
Check this article to learn how to add a calendar invite for specific activities to your emails.
Adding dynamic links and content to emails at the company level
To add dynamic contents or links to your email, go to Account > Email creator page at the company level and select the email. You'll need to either select a typograph box or edit the text displayed in the body of your email. Then, click on the Dynamic link or Dynamic content field to add a link or content.
Dynamic links at the company level
This section will include the following dynamic links that you can add to your email at the company level
Data | Dynamic link URL | Description |
SSO Login |
| This inserts the link for login via SSO |
Download |
| This link leads users to the download page where they can get the InEvent app on iOS or Android. Works only at event level. |
My events | {{eventPageUrl}}/event-list.php?tokenID={{tokenID}}&magicLink=1 | This link takes users directly to the My events tab in the Virtual Lobby, where they can see all the events they are registered in. Works only at event level. |
Dynamic contents
At the company level, dynamic contents are only available for a Person, which contains the user's related data which can be added to your email.
Data | Dynamic content tag | Description |
Full name | {{name}} | The first name of the user will be used in the email being sent to them. |
Username | {{username}} | This will show the username of the user in the email. |
Email address | {{email}} | This will show the email address of the attendee in the email. |
Confirmation code | {{confirmation-code}} | This will display the unique confirmation code for the user's form submissions. The confirmation code is very useful when users need to edit their membership forms submissions. Refer to the Lists article to learn more. |